Beautiful update for furniture with simple flower transfer
Furniture can be entirely transformed with something as easy as a simple flower transfer to give it a whole new lease of life.
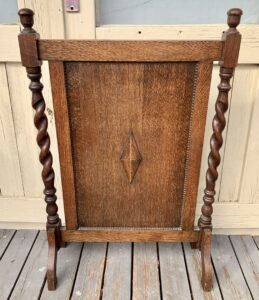
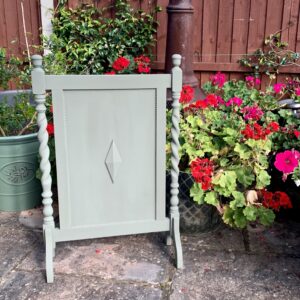
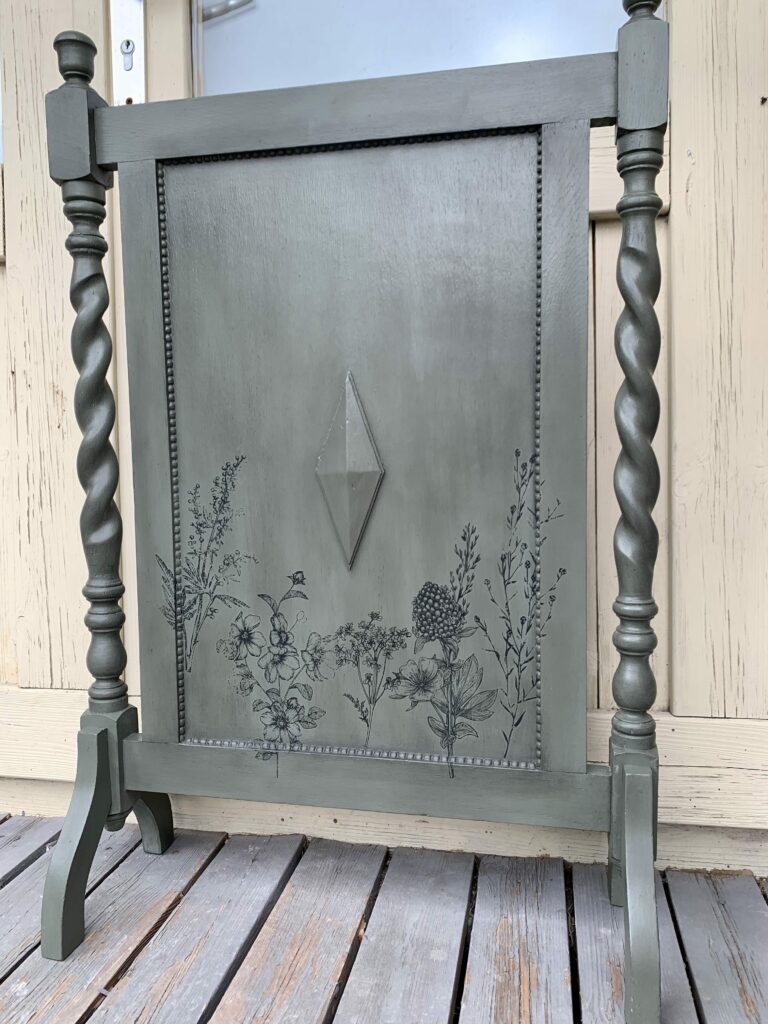
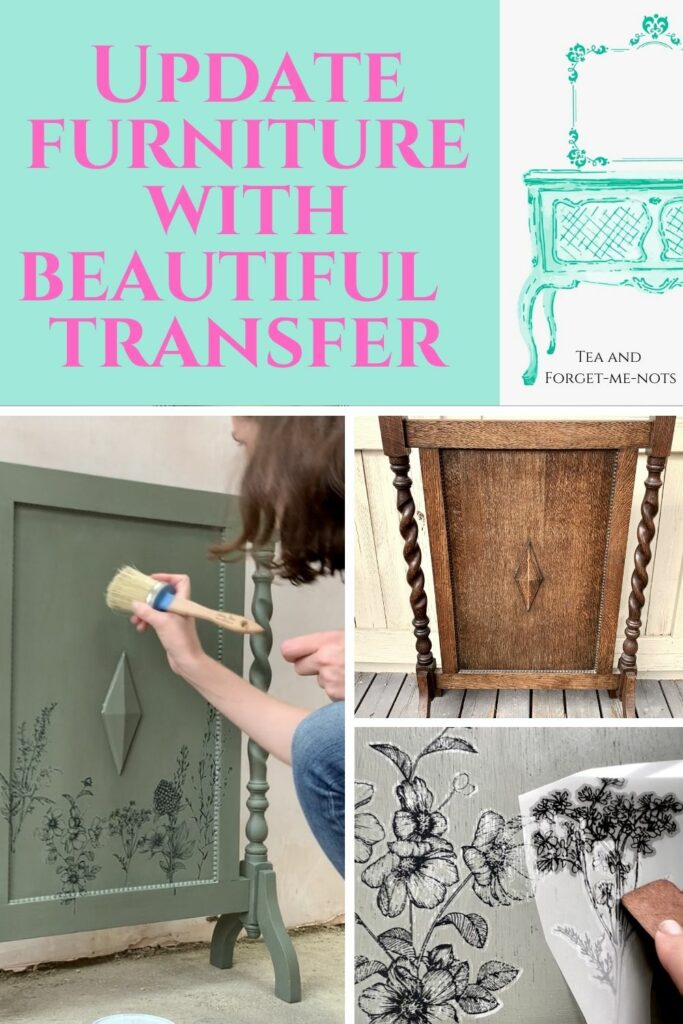
Between that and a coat of paint, this piece was entirely transformed. This fire screen cost £4.25* from a charity shop. I rarely say no to a piece like this.
Wood? Yes. Ornate details? Yes. Flat surface for adding extra character? Yes. Done!
It’s a fire screen but I don’t imagine many people have a use for these anymore. But it had the potential to be interesting, so I was sold.
*I actually paid £8.50 (the original price) and didn’t realise until I was 60 miles away.
Beautiful update for furniture with simple flower transfer
This post may include affiliate links so you can easily find the products I love and use myself. If you purchase these products, I may earn a small commission at no extra cost to you.
With old pieces, it’s especially important to give them a good clean first. This had plenty of nooks and crannies for dust and dirt to settle in.
I cleaned it with Sugar Soap and a microfibre cloth and then rinsed it to get rid of any leftover soap.
If you like floral projects, take a look at my most beautiful one yet!
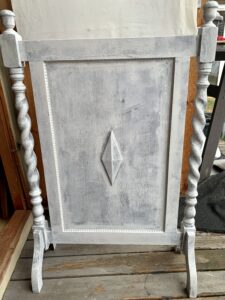
Prime time
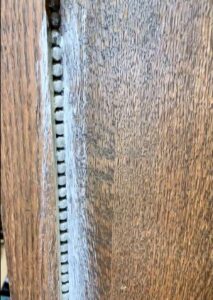
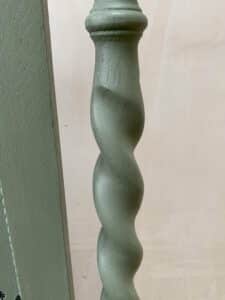
I knew that the bobble details around the edges would look great with some dark wax to make them stand out. But they did need a bit of elbow grease to clean and prime properly.
I primed the piece because it was dark wood and therefore had a good chance of the tannins in it bleeding back through the paint in the future.
I used the water-based Zinsser Bulls Eye primer as I was already using it priming some drawers. I’ve said it before but the water-based one is so easy to clean and there’s no odour to it, so it’s lovely and simple.
I hadn’t decided at this point what colour I was going to paint the piece. If I was going to go light then I would probably have primed again to even it out more.
Simply green
I chose the green paint, Alberta, simply because I liked the moody, earthy feel of it. I’ve had it in my paint stash for years as it was one of my first purchases when I was trying out chalk paint.
Other than the turquoise paint from Hobbycraft from my first ever project, this range was my first real collection of paint.
It’s the same brand that I used on my Star Wars drawers.
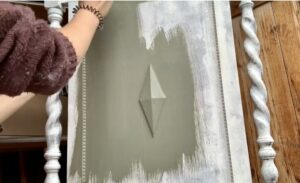
I did two coats of green and let it dry in the sunshine in my parents’ garden. A much prettier sight than my house is currently.
Wait for the less-than-stunning after photos in my building site!
Chalk paint doesn’t have a built-in top coat (at least, this one doesn’t) so I needed to seal the paint before adding a transfer. Otherwise, the paint beneath the transfer wouldn’t be protected.
Wax is a sealer in its own right but it should always be the final coat. So it wouldn’t work in this case as I was putting a transfer on top.
Hello, beautiful backdrop! This was after sealing with Polyvine’s Decorator’s Varnish.

ON SALE!
I’m not bad at avoiding sales on things I don’t need. However, when I saw that Sue Chic had a <40% sale on transfers, brushes, decoupage paper… well, the rest is history.
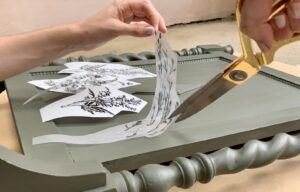
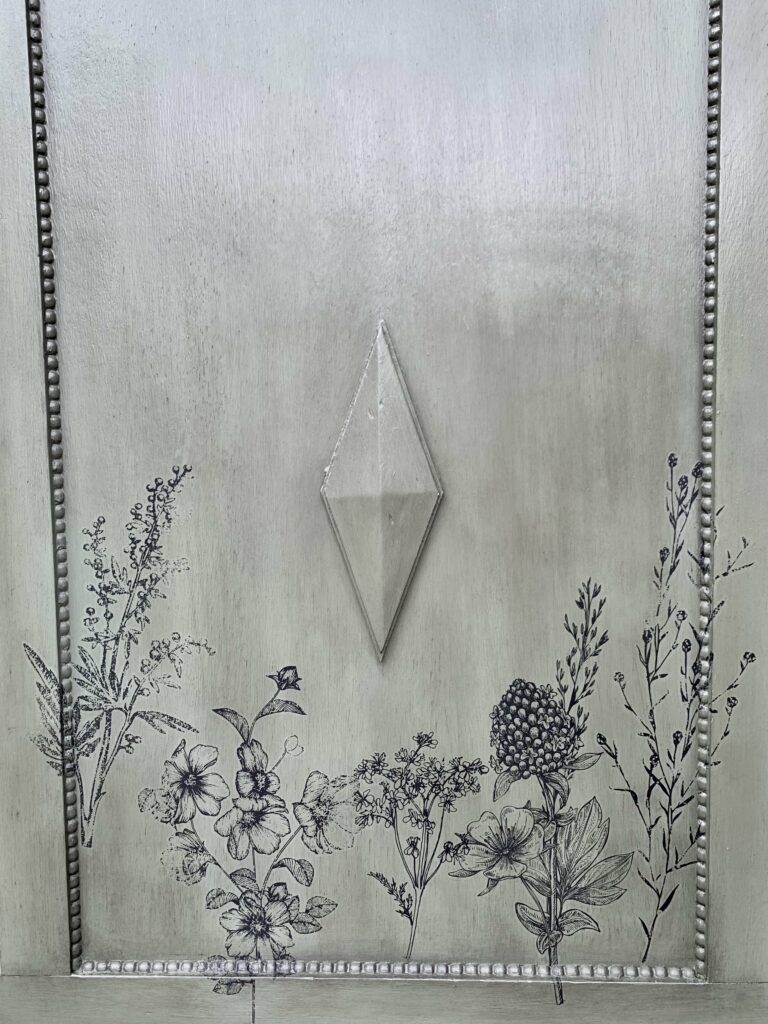
The box of goodies arrived on Saturday. And this transfer was added on Sunday. I chose the simple flower transfer, Spring Meadow Life, by Redesign With Prima.
I used pieces of this transfer again on my fabulous upcycled globe!
Simple flower transfer
I cut out a selection of flowers from the simple black options and tried out the placement with the backing still attached. It’s only after removing the backing that the transfer will stick to anything it touches and you have to be careful.
I ended up changing a couple of the flowers after starting because I wanted them to be more symmetrical.
I started by placing the two outer flowers and worked inwards to make sure that they were positioned evenly.

I cut into the transfer where the edges rose onto the frame. This gave them more flexibility to attach to the indentations.
Without this, if you looked at the piece from the sides, there would be a gap in the transfer between the layers of the frame.
After removing the protective backing, I attached the transfer by using a ruler to scratch it off. It takes a bit of time as you have to rub over every section but is otherwise as simple as it sounds.
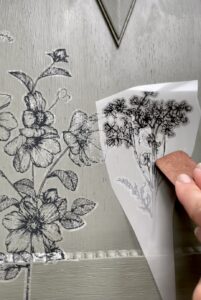
To secure it in place well, I gently went over it with a microfibre cloth to press down any loose edges.
Want to know 23 great DIY tools? Get the list!
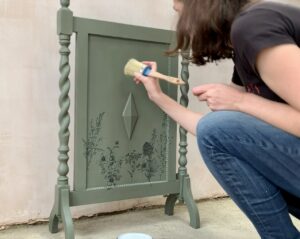
Wax on
Despite the piece already being sealed, I added wax to give it more depth.
I started with a coat of clear wax and let it sit for about half an hour.
With wax, it’s best to go back and buff it with a cloth (something that doesn’t leave fibres like a microfibre cloth) to take off any excess.
This is before buffing…
This is after buffing. What a difference!
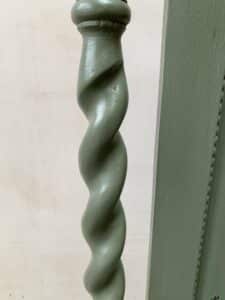
I then added black wax, primarily to enhance the details of the bobbles. I also think it gives it a smoky look which works well as it is a fire screen.
I explained the process of using black wax on my bumblebee footstool.
I’m glad I changed one of the flowers as it made the pattern flow nicely with the varying heights.
From brown and classic to earthy, grungy and textured. I love it. It has character.
Not many people use fire screens these days but this could be a room divider or just a talking point in the right kind of space.
This would have been beautiful in white, similar to my chest of drawers transformation, but I wanted something a bit different.

What do you think, do you prefer the classic look or the addition of the simple flower transfer?
Want to see the 30 second makeover? Here it is!
If you liked this post, you might also enjoy this one…
Pin it for later – update furniture with beautiful flower transfer

Hi there! I'm Rachel Bowyer, a passionate DIY enthusiast with a knack for transforming the old into something beautifully new. With a deep love for furniture painting, refinishing, and the art of crafting. I've been documenting my DIY projects and restoration journey since 2018. I specialise in techniques like decoupage, stencilling, and decor transfers. Join me as we explore the world of creativity and home improvement, one project at a time.
Wow!! This is gorgeous!! Great job!!
Thanks Christin <3
What an absolutely beautiful piece you “fifth sparrowed no more”! I have been looking for something like this for my fireplace but in Texas they are few and far between! I love the paint and transfers you used too!
I don’t know that they’re common here either but I couldn’t resist. Thanks for taking the time to comment, Kristin.
Love this piece and how you transformed it! Too funny about the distance realization.
Thanks! And I know, even so I’m not sure I could have gone back to a charity shop!
This is a gorgeous transformation. I love the one of the black wax!
Thank you for taking the time to say so!
You did a wonderful job with this piece. The end result is gorgeous!
Thank you, Paula.
Truly beautiful transformation. I love fireplace screens, even if just for decor. This is so clever … and lovely! xo
Thank you, that’s very kind of you, I’m so glad you took the time to comment.
Love this piece!! The transfers add such dimension and the color you chose is perfect!
Thank you. I was really excited to use these transfers on the piece!
Stunning! Looks like leather!
Wow, what a compliment! Thank you.