Handmade Christmas Sign – Festive DIY Porch Decor
Do you love making handmade Christmas signs for your home? Here’s how to create a personal wooden sign for either your front door or for wall decor.
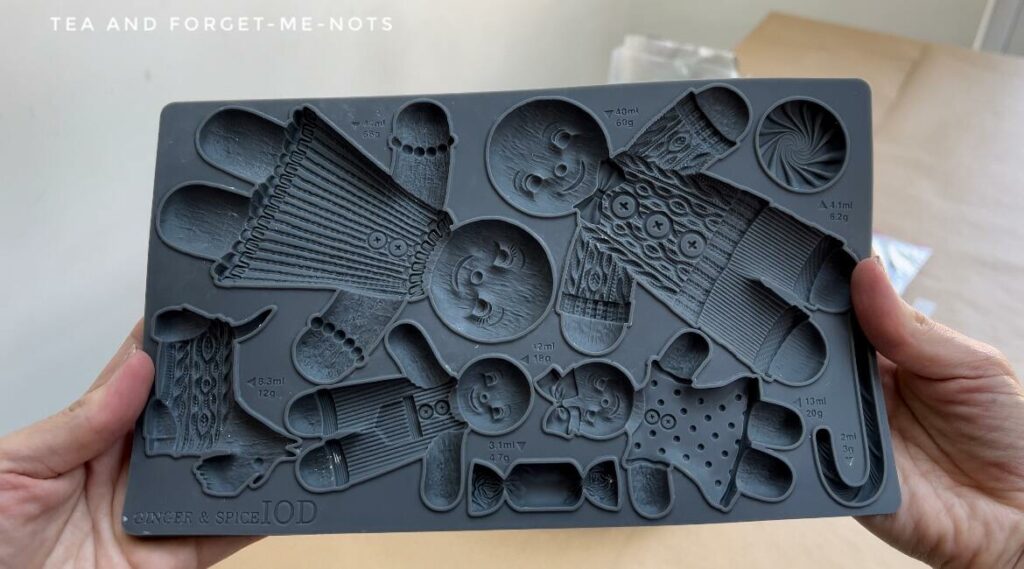
When I received this gingerbread people mould, I immediately saw a family. There are characters of different sizes. Two adults, two children, a dog, candy canes…
Of course, that family can take any form you like. 1 person and three dogs, 2 people and lots of chocolate, whatever combination works for you.
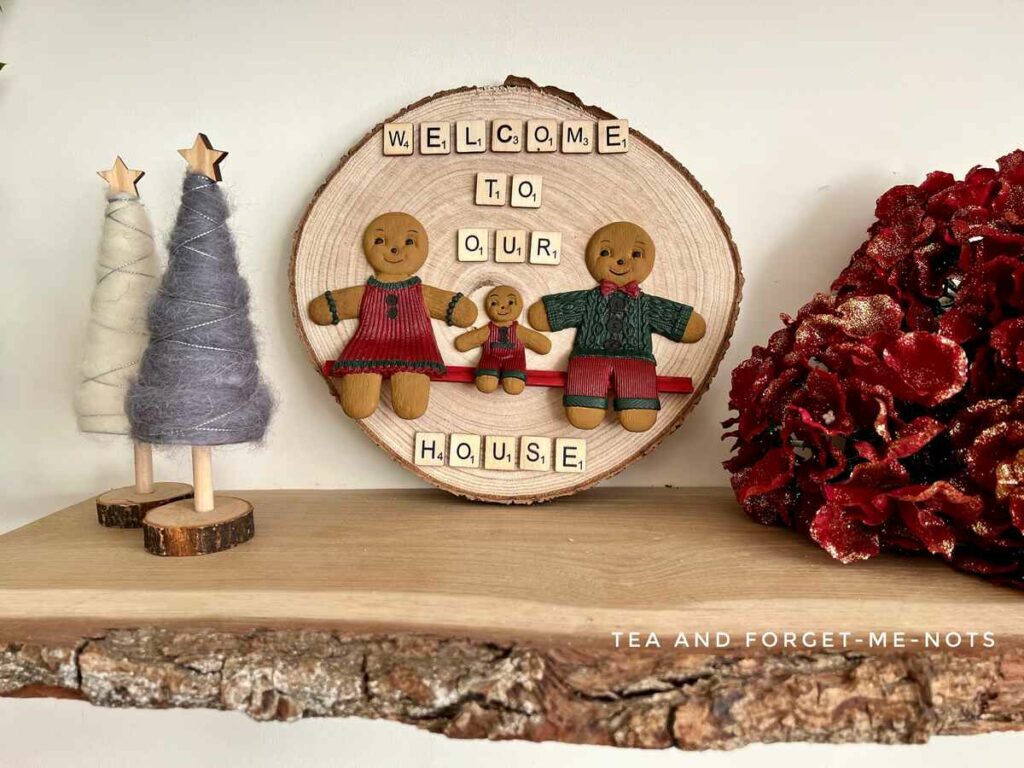
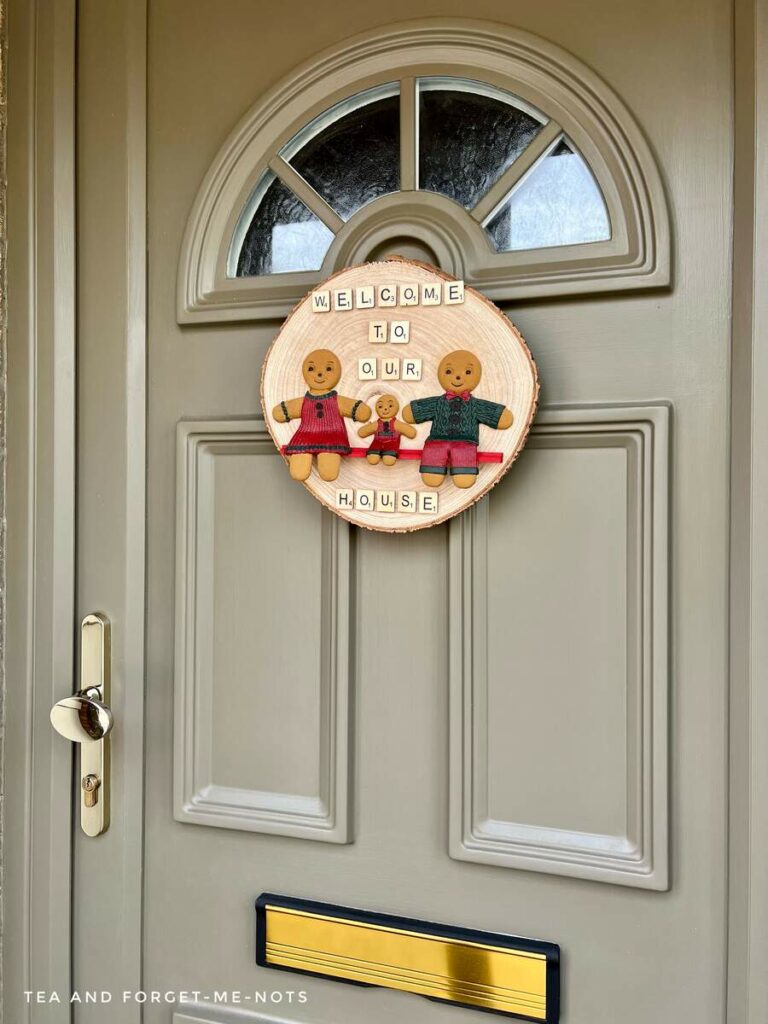
For me, I saw a welcome sign to use as front porch decor.
I created a slightly rustic wood sign by using a wood slice. But you can easily use scrap wood pieces to make your porch sign.
Prefer a video tutorial instead of step-by-step instructions? Here’s a video tutorial that guides you through the process of creating a handmade Christmas sign.
How to Make a Handmade Christmas Sign DIY Project Step by Step
Materials Needed
This post includes gifted products and affiliate links so you can easily find the products I use myself and recommend to friends. If you purchase these products, I may earn a small commission at no extra cost to you.
Step by Step Instructions
Step 1: Ginger and Spice Silicone Mould
This was my first time using a mould. So, I’ll share the step-by-step guide on how to use the mould and work with the IOD clay.
It’s always a good idea to do a little research when trying something new. Here’s what I learned to share with you.
Thanks to Iron Orchid Designs for gifting me this Ginger and Spice mould.
For a beginner like me, playing with these moulds was both fun and easy. I’m a fan!
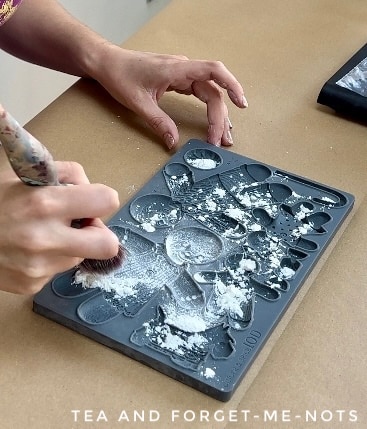
Step 2: Add Cornstarch to the Mould First
The first thing you need to do when you get the mould is to add cornflour (also called cornstarch). Cornflour is the UK name for cornstarch. To avoid using the wrong ingredient, make sure it looks like white powder.
This barrier allows the mould to detach easily. I added the cornflour and used a dry paintbrush to spread it out into all the details evenly. You can remove excess cornflour simply by tapping the back of the mould upside down.
Iron Orchid Designs moulds have a liquid and solid measurement guide next to each object which is really helpful. So for each object, you choose either the gram or MLs needed.
This is helpful as you know how much clay, or other material, you need to buy before you make them.
The moulds also have a micro rim. Which is a raised edge around the object. That allows you to get a crisp edge.
Step 3: Using Air Dry Clay in Moulds
This air dry clay is really soft to use. Which makes it easy to mould into the shapes and gentle on your hands.
I applied the clay to the mould, filling it up and making sure it was even. If you don’t fill the mould so that it has a flat back, it will have less surface area to attach to the object you apply it to.
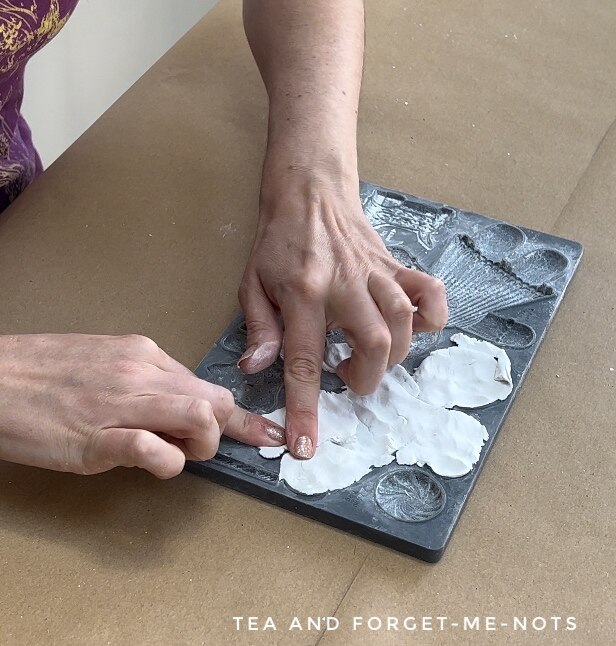
I used a rolling pin to flatten out the back.
You don’t need to wait to remove the mould. You can take it out straight away and let it dry.
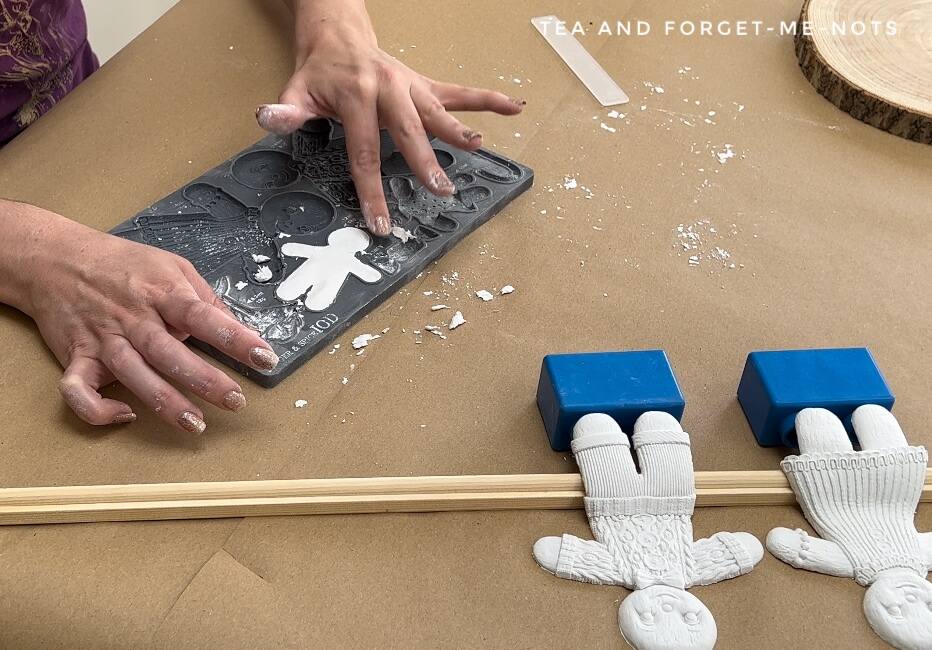
To remove the mould, you want to let gravity do the job for you. Turn the mould over so that the mould gently falls out. You may need to peel the mould edges carefully but this should be fairly easy. Especially if you used cornflour first.
Step 4: Position the clay in the shape you want it to dry
As soon as the characters came out, I bent the legs and raised them up while they dried. I used a Lego block for this. This was so they would dry in the shape I needed to sit on the shelf on the wooden sign.
If you want to bend the moulds into any shape then you need to do it before it has dried.
Step 5: Paint the Clay Moulds
For the colour of the gingerbread people’s skin, I used a mixture of Mojave and Coffee Bean. Mojave is a mustardy, yellowy brown. Coffee Bean is a dark brown.
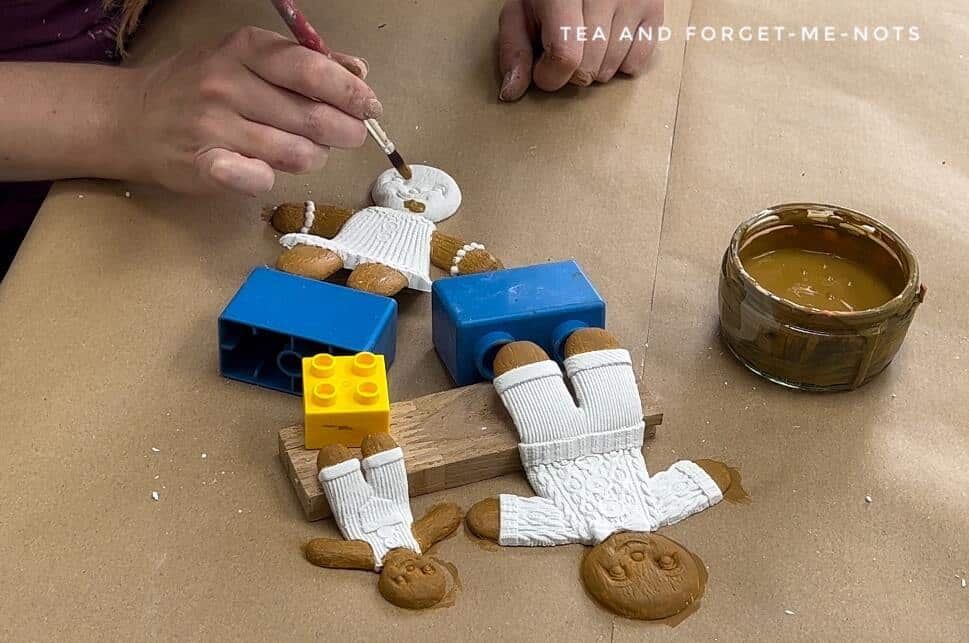
There isn’t a standard way to paint gingerbread people’s features. You can use either black or white paint for the facial features. Choose what feels right for your sign look.
I actually didn’t use black paint at all. I used the dark brown of Coffee Bean for the eyes as it was a little softer.
The great thing about using the clay for the gingerbread people is that it naturally left a textured look for the gingerbread.
It’s important not to use a thick layer of paint that takes away some of the detail of the mould. It’s best to do a couple of thin coats to keep the details.
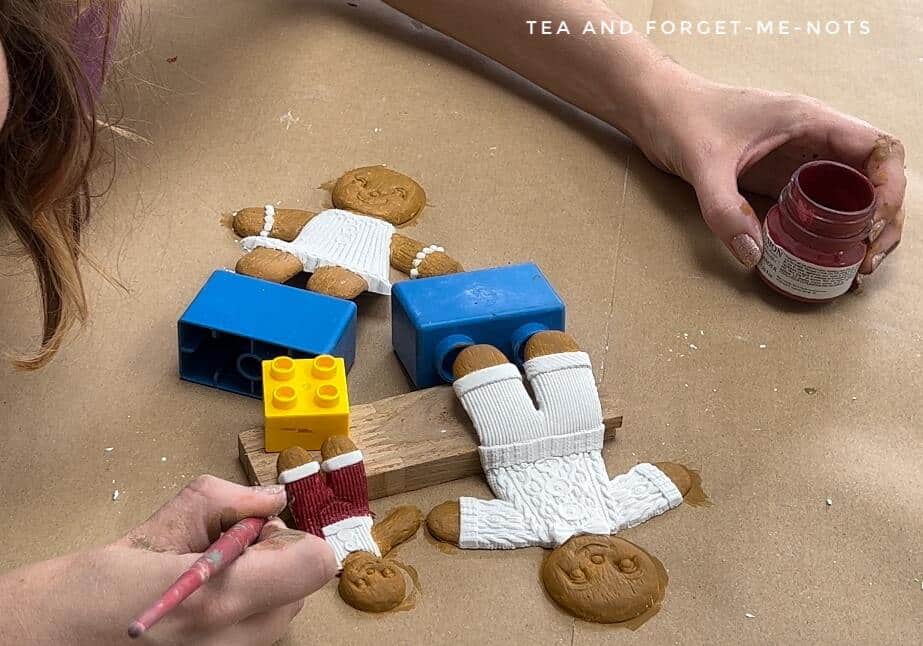
Step 6: Paint the Gingerbread Characters
I chose to paint the characters before they were stuck to the wood slice. So that I could get a clean edge on the outside of the character without accidentally getting paint on the wood slice too, which would be hard to remove once the characters were stuck down.
I stuck to traditional Christmas colours for the clothes for the gingerbread people. I had a bit of paint in sample pots of Fusion Mineral Paint. A green and red paint that was perfect for a look for this time of year.
You can also use chalk paint for painting moulds. You can choose whether you seal the paint depending on whether you think it might get damaged. I didn’t as my DIY wood signs tend to stay safely on the wall or door.
I needed a second coat of paint for full coverage once they were attached. So I didn’t paint all the way to the edges so there was no risk of getting paint on the wood.
If you’re making Christmas gifts then you might want to stick to traditional colours of the Christmas season.
Or if you’re making a personal gift for someone? A perfect way to make it more special is to use their favourite colours of clothes they love. Making something that shows you’ve put thought into it is always a cute idea.
Step 7: Fill in the Cracks in the Clay
All clay naturally cracks. So on DIY projects, you’re likely to see some cracks once it has dried. This is because clay shrinks which is what creates the cracks.
So it was no surprise that after 24 hours, some areas had cracked. It’s not a big problem. You can either touch them up with more clay or embrace the rustic look.
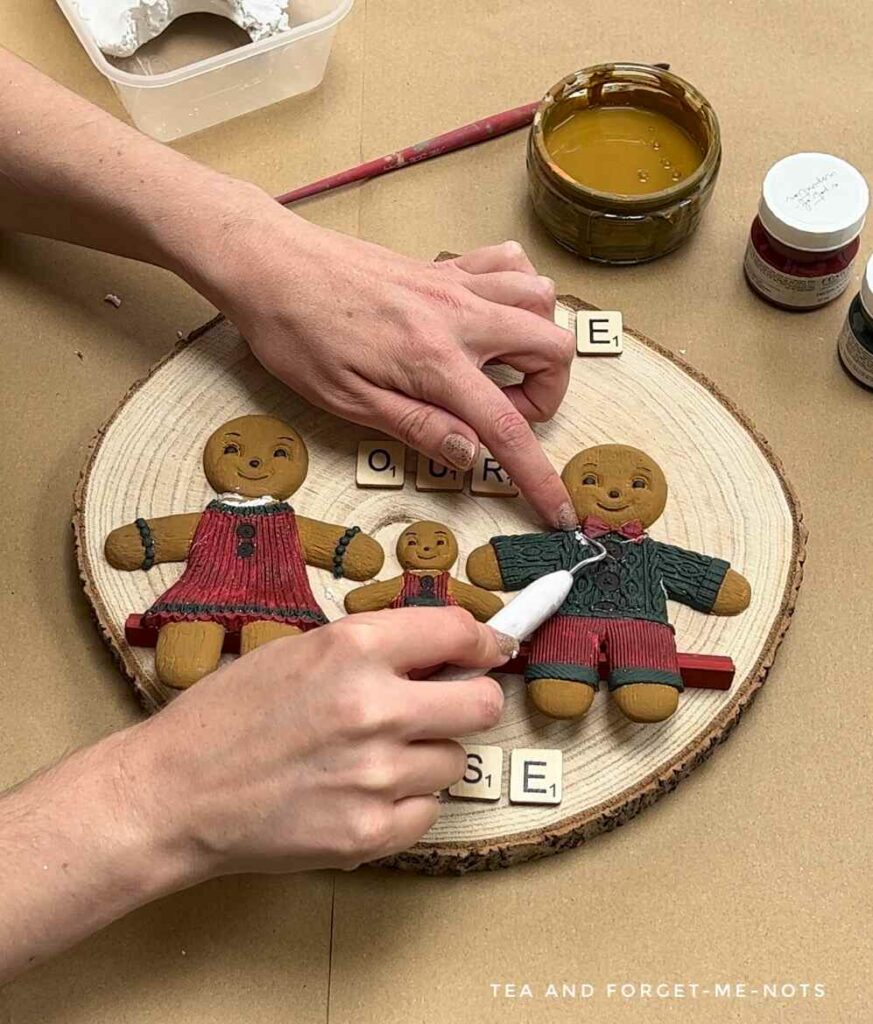
I used a Cricut tool to push the clay into the largest gaps. Then smoothed it out with my finger. For the smaller cracks, I simply painted over them which disguised them nicely.
The cracks may not have been very visible if I hadn’t already painted. It’s up to you whether you paint before or after the clay has dried as you may not need to do touchups if you wait for those cracks to appear first.
Step 8: Secure the Sign With Brackets
When the clay was still pliable, I stuck the characters down to the wood slice. I did this before the clay was fully dry. So that there would be some wiggle room getting the characters to lay flat with their legs over the shelf, as though they are sitting on it
You can use wood glue to attach the clay. I used a good amount and smoothed it out with a lolly stick. And avoided going too close to the edges so it wouldn’t spill out onto the wood.
I did two things to prepare the wood board for the characters to sit on the sign.
Firstly, I attached two sawtooth hangers to the back. Then threaded the rope through it for this to hang on the wall. I did it first because I wanted to minimise touching it once the gingerbread people were attached.
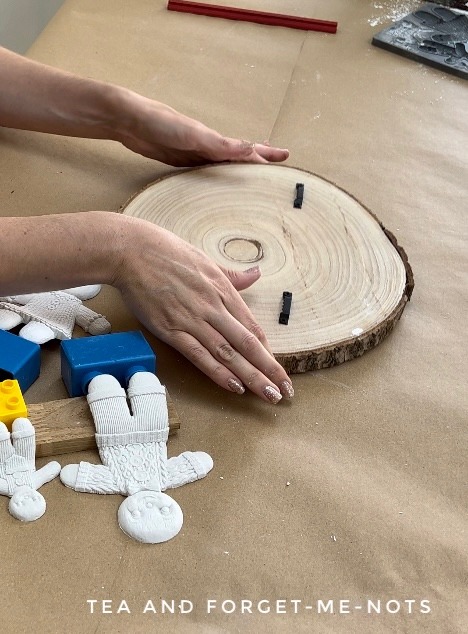
I did two hooks rather than one to give flexibility if one side of the wood ended up slightly heavier.
The next step was to make a small shelf for the gingerbread people to sit on. I measured the size of each of the characters. Then cut a piece of scrap wood to size to fit them all.
Finally, I painted it in the same word in the same red that I used for the outfits.
Step 9: Add Your Christmas Message
The final step was to add a message with faux Scrabble tiles. I chose the words ‘Welcome to our House’. I deliberately chose house rather than home, as of course gingerbread people are known for their houses.
The little tiles had sticky pads on the back so were easy to attach to the wood slice.
Alternatively, you could use a Cricut cutting machine to create your own message for holiday decor. Such as “Merry Christmas” or “You Bake My Day”.
Display Your Adorable Handmade Christmas Sign
DIY wooden Christmas signs are the perfect addition to a front porch. An easy way to welcome people to your home. And so much fun to make!
Equally, they can sit on your fireplace mantel or take pride of place in your living room.
I hope this gave you some Christmas inspiration if you’re looking to make your own DIY Christmas signs.
They’re a great way to create special home decor for yourself and make wonderful gifts for Christmas Day.
These gingerbread moulds don’t have to just be for DIY Christmas decorations. They could equally be used to create DIY signs for baking fans all year round.
How to Make a Christmas Welcome Sign Instruction Video
You can find more video tutorials on our Youtube Channel
If you loved this project, you’ll love these projects too:


will you make a handmade christmas sign?
I love seeing what you do. Please mention @teaandforgetmenots and share your creations with me!
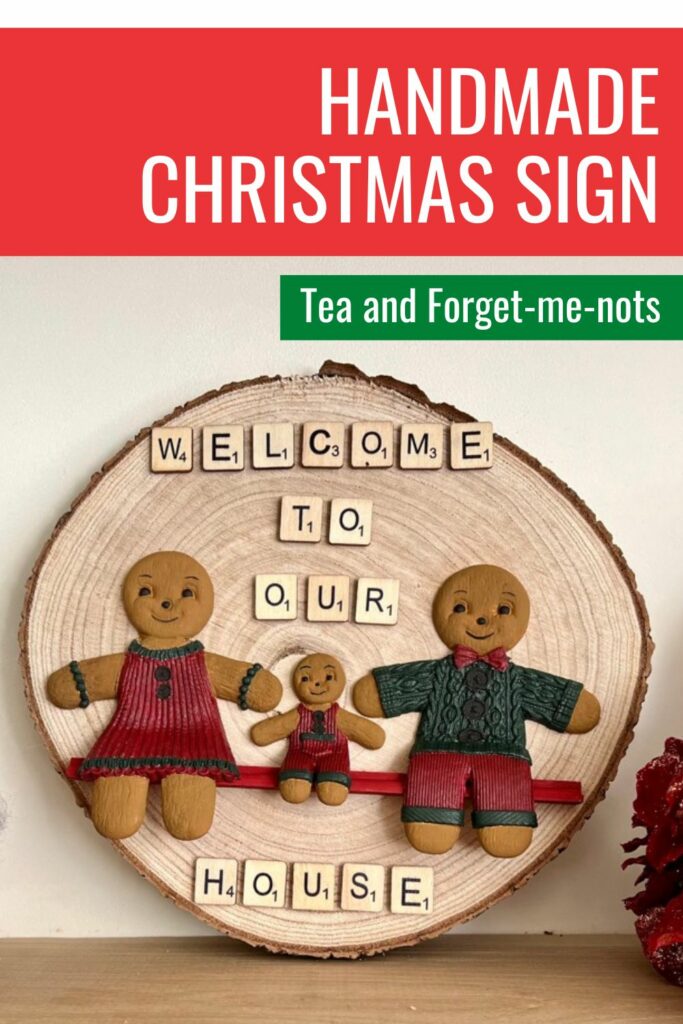
Pin it for later – Handmade Christmas Sign

Hi there! I'm Rachel Bowyer, a passionate DIY enthusiast with a knack for transforming the old into something beautifully new. With a deep love for furniture painting, refinishing, and the art of crafting. I've been documenting my DIY projects and restoration journey since 2018. I specialise in techniques like decoupage, stencilling, and decor transfers. Join me as we explore the world of creativity and home improvement, one project at a time.