How To Paint a Ceramic Christmas Tree With Vintage Feel
Looking to transform a ceramic Christmas tree into timeless decor with a vintage look? Here’s how to paint a ceramic Christmas tree.
Just picture a painted ceramic Christmas tree, adding nostalgia to your holiday decor. Whether you’re working on a charming tree-shaped dish or a 3D ceramic tree, the process remains the same. And it’s surprisingly simple.
If you’re looking to add some vibrant colours into your Christmas decorations just for your own joy, or to create a festive atmosphere for little ones, bold colours make it more fun.
However, there’s a key supply that will determine your success when painting ceramics. The rest is all about adding that enchanting vintage look, suited to your unique style.
International Bloggers Club
This month’s International Bloggers Club (IBC) challenge is Ceramic Crafts.
The IBC is a group of creators from all over the world. We challenge each other to make something using a common theme.
You’ll find my blogger friends and their ceramic projects at the end of this post.
How to Paint a Ceramic Christmas Tree Step by Step
Materials Needed
Step-By-Step Instructions to Make a Vintage Ceramic Christmas Tree
Step 1: Clean the Ceramic Tree
I stumbled upon two plain, yet promising, Christmas-tree-shaped dishes at a charity shop. A bargain for just £5.
They had a classic look, with white paint and a red trim. A neutral canvas that could fit into anyone’s festive home decor.
But here’s where the magic begins. With a splash of colour to create that hint of vintage charm.
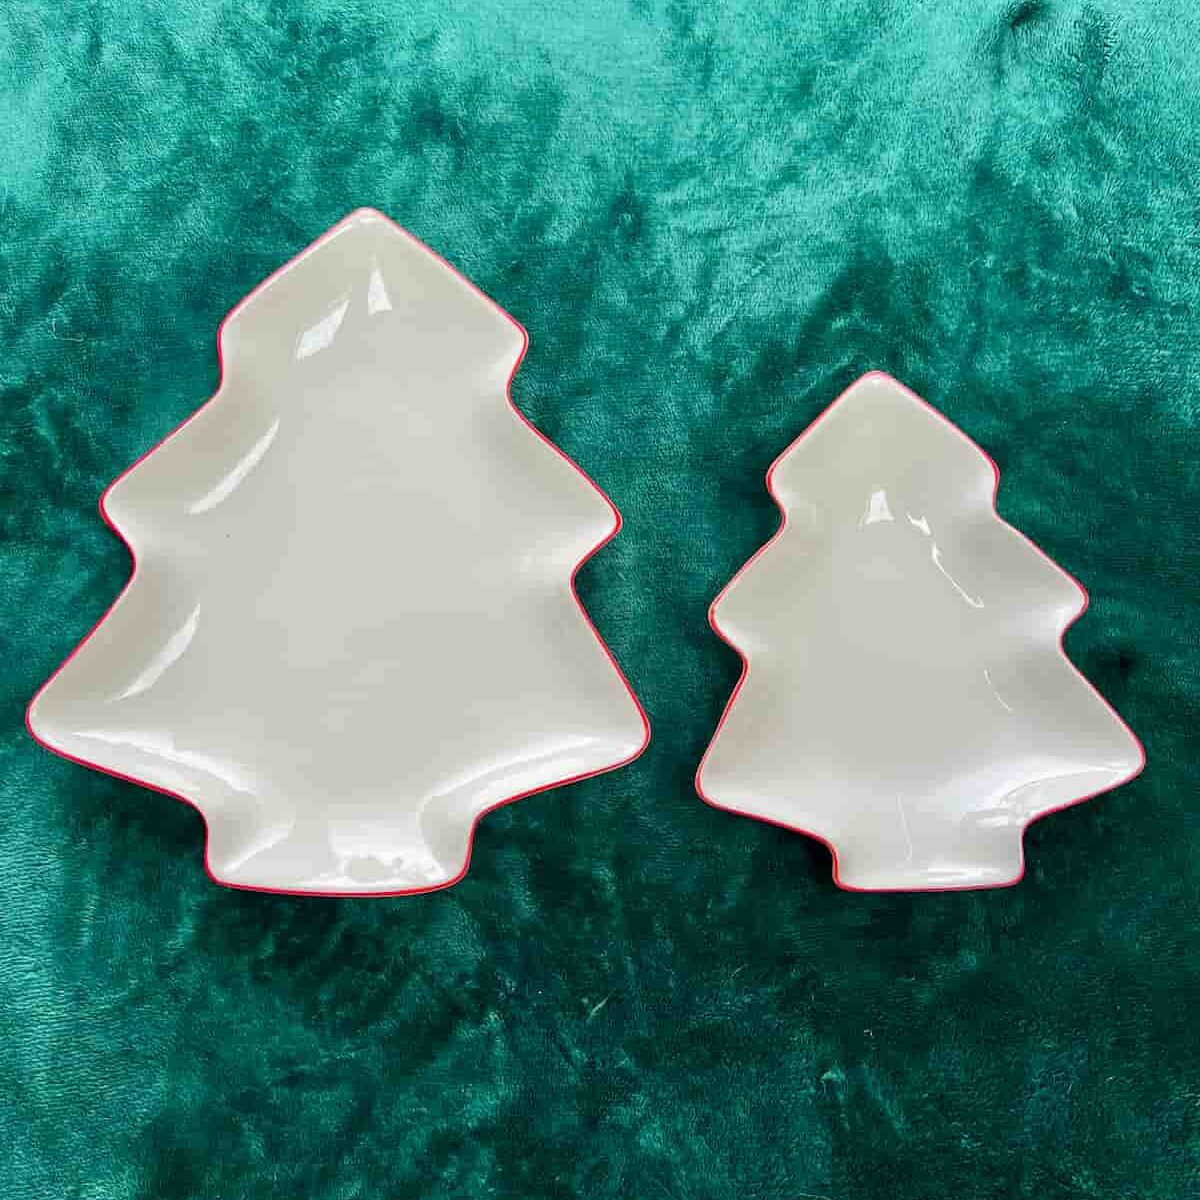
The first step is to prepare the canvas by cleaning the surface. This ensures that it’s free from any dust and dirt. This gives you the base for your paint to adhere well to.
You can use either White Lightning or dish soap for this step.
Step 2: Add Slick Stick to Ceramic Base
The secret sauce to painting ceramic successfully is the painting cupboard staple, Slick Stick. I’ve used this on various surfaces, from a plastic front door to a laminate IKEA dresser. It’s what allows the paint to adhere and last over ceramic glazes.
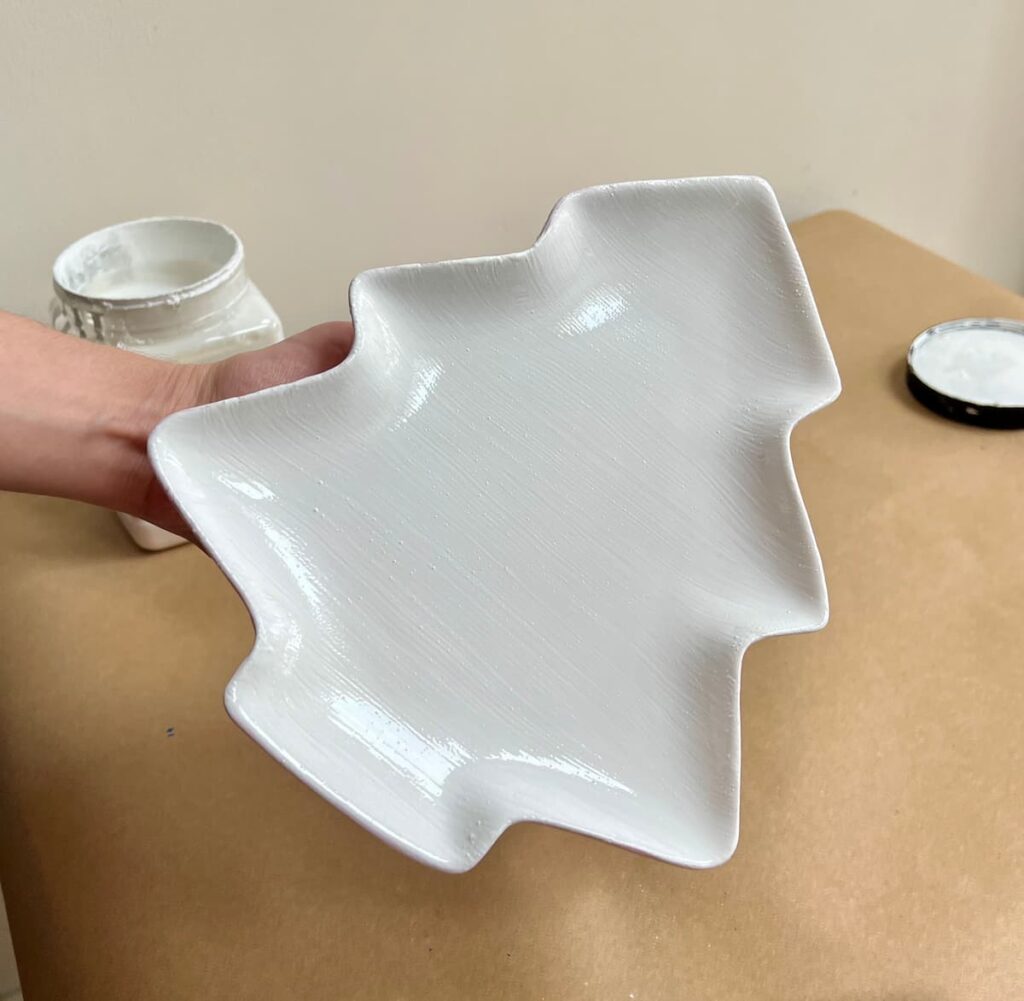
Apply Slick Stick as you would paint. You need two coats to ensure the base is ready to paint over. Allow a few hours in between for each coat.
While it looks like paint and leaves an appealing matte finish, you’ll still need to apply your chosen paint colour on top.
Wait for 24 hours after your last coat of Slick Stick before moving on to the next step.
If you’re after that classic decor aesthetic, a coat of white or cream chalk paint will do the trick.
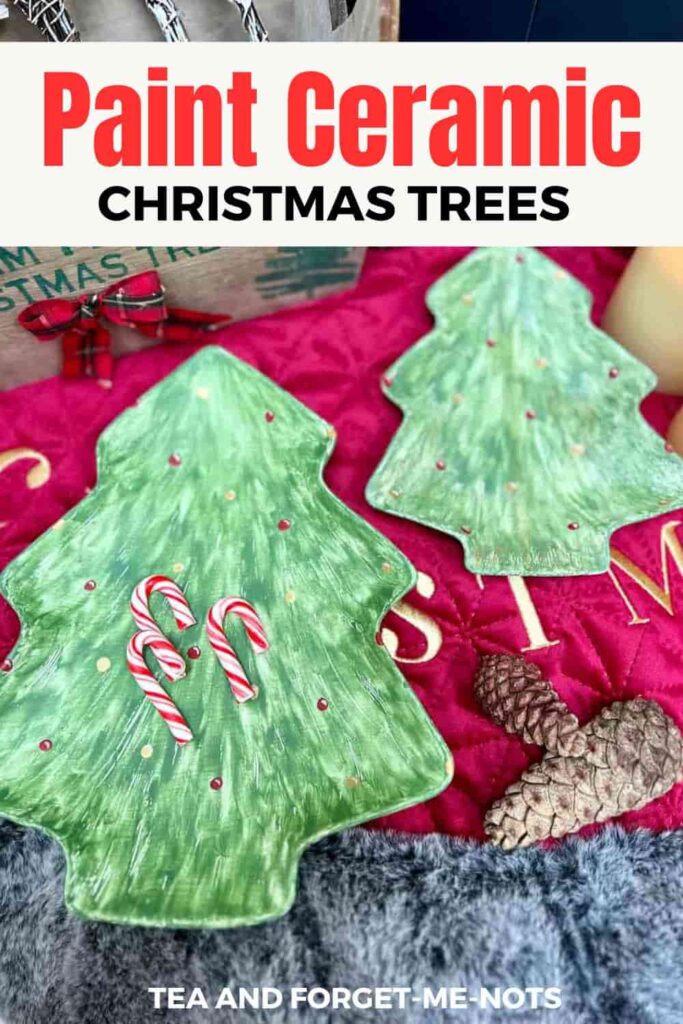
Step 3: Paint the Perfect Vintage Green Tree
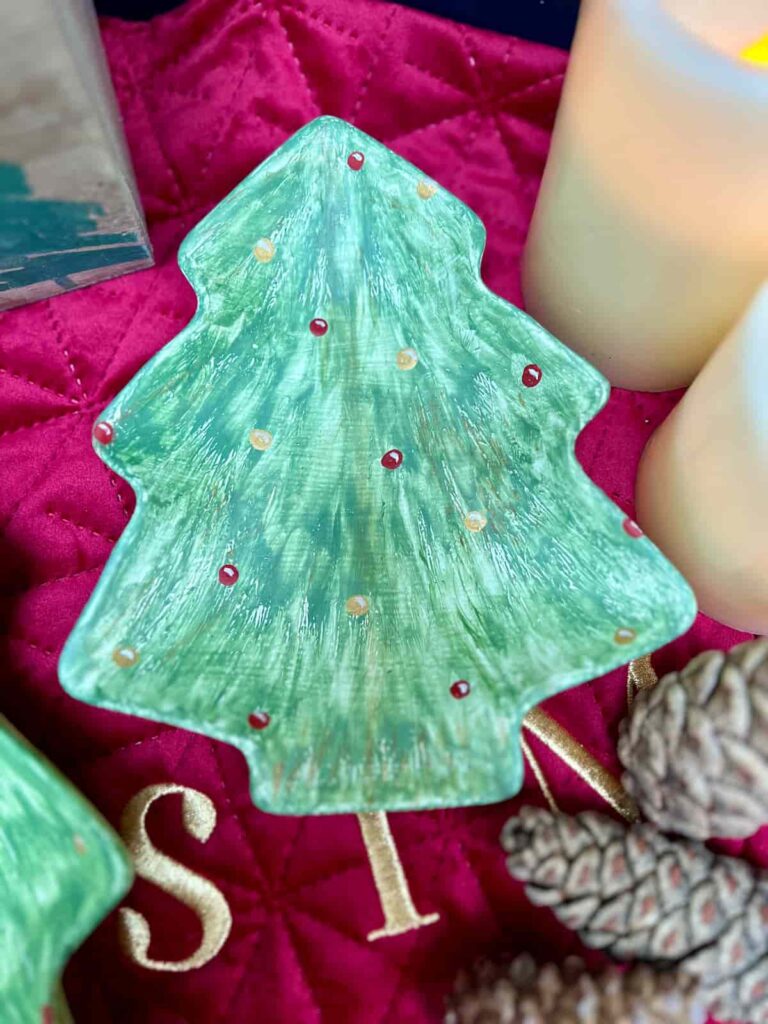
The best way to create the perfect tree vintage a feel, is with a festive green paint named English Ivy.
Then, put a unique twist on it!
By slightly diluting the paint, it takes on a more translucent appearance. Which helps give depth and character to your tree.
After applying a coat, a simple toothpick can add texture to the branches and needles, ensuring they stand out later.
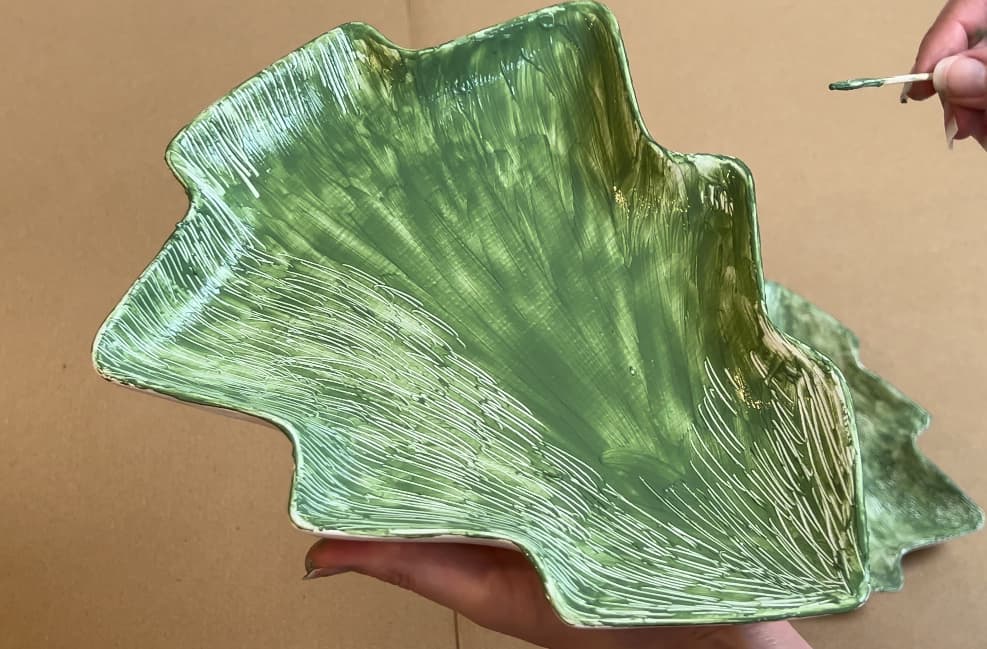
As the paint begins to dry, it’s time for some artistic magic. With the paint not too wet, not too dry, you want it just right.
With the partially dried coat of paint, use your finger to create the illusion of tree needles by dragging them down from the top of the tree. The unevenness in the paint application adds a lovely dimension.
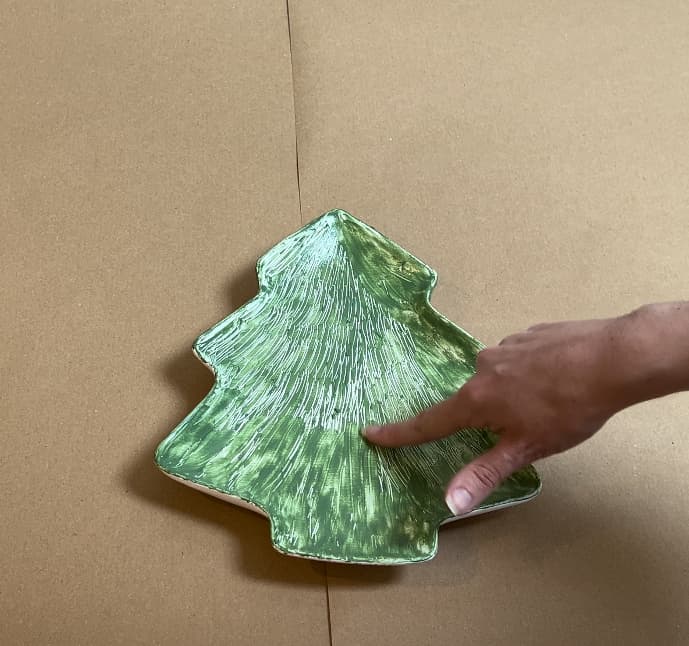
Then go back and add a few extra lines with a toothpick.
Finally, add a few fine painted brown lines to the tree base to hint at the trunk and branches.
Step 4: Add Decorative Baubles to Tree
With the foundation in place, it’s time to introduce the decorative elements.
A timeless combination is red and gold baubles. To maintain bauble shape and size consistency, a paintbrush end or a sponge dabber can help. Or play around and free-hand the baubles for a handmade touch.
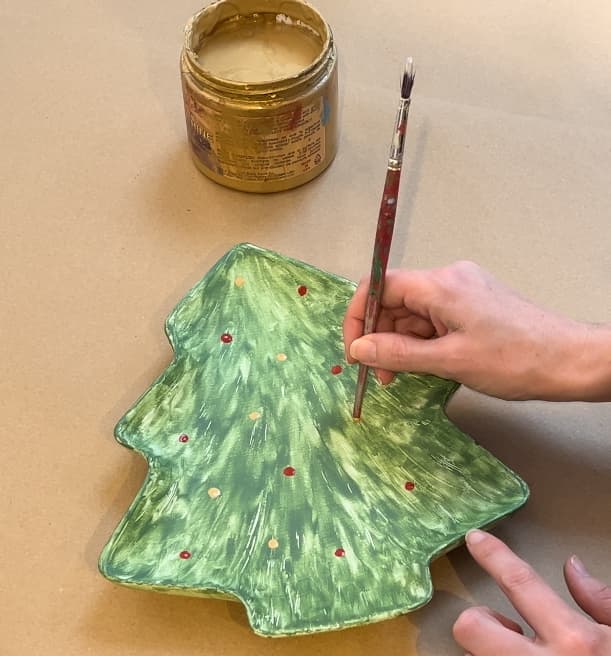
The red baubles were painted with Barn Red, while the gold ones shimmered with a metallic gold paint named Gold Digger.
Once dry, a fine artist’s brush allows you to add the small details of the highlights where the light would catch the baubles. This was created with white paint, called Fluff.
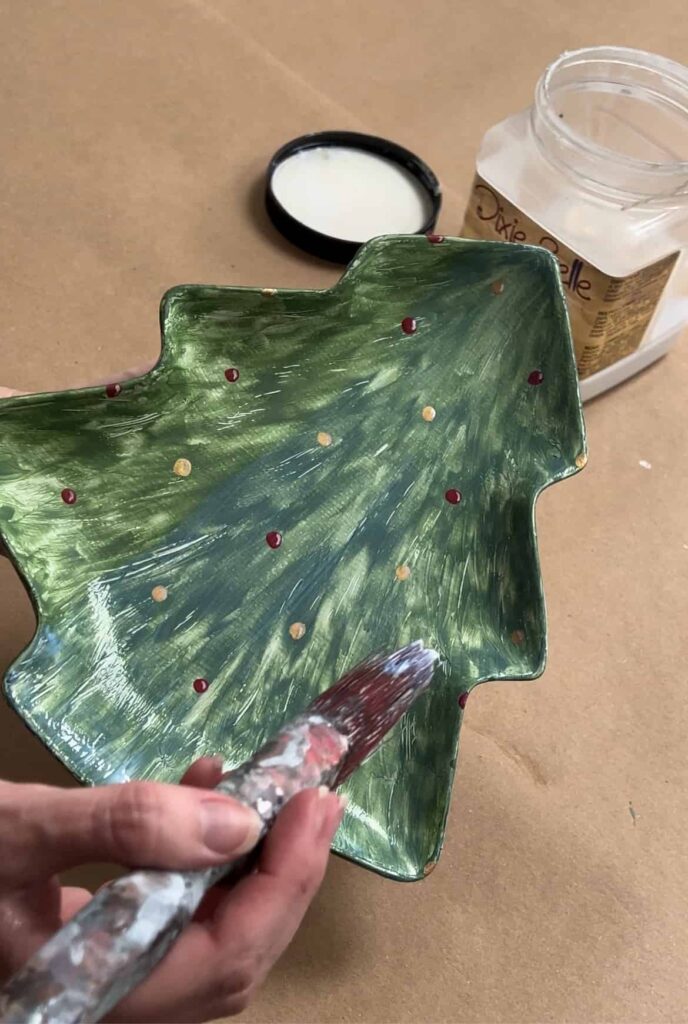
Step 7: Seal Painted Ceramic Tree
Finally, seal your masterpiece with two coats of sealer.
Two coats of satin will create a subtle sheen. Or for the durability of satin, combined with the elegance of matte, one coat of each. The last coat should have the sheen you want for the final look.
This sealer is not food-safe, so don’t put food on the dishes.
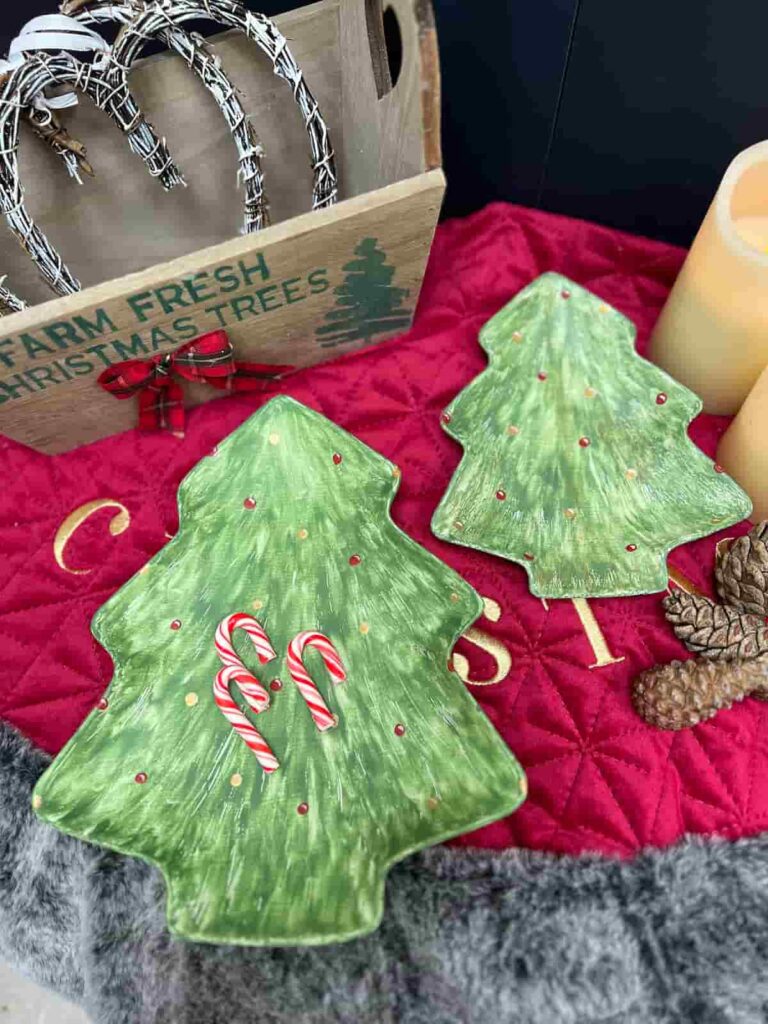
Painted Vintage Ceramic Tree
With these steps, you can transform your own ceramic Christmas tree into a cherished vintage Christmas treasure. Or paint your own pottery as the perfect gift for a vintage lover.
Both the large tree and small tree are done in the same method. However, you can mix the colour scheme for a varied vintage look for the holiday season.
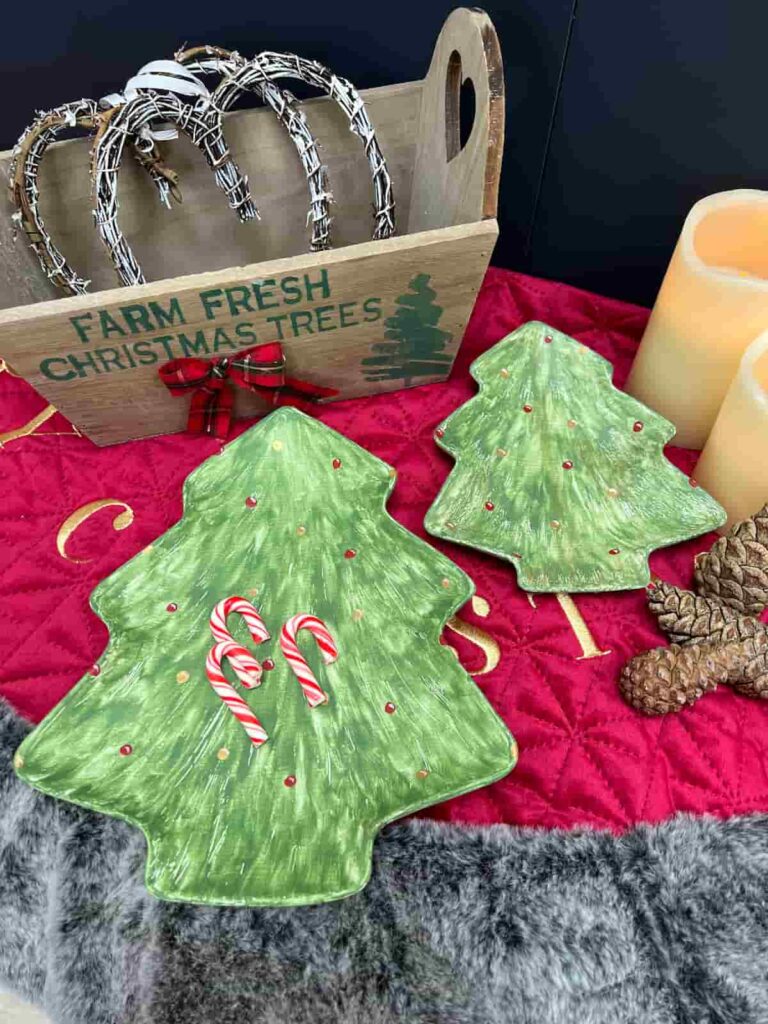
These candy canes are decorative only. Don’t place food on these dishes, unless sealed with a food-safe sealer.
Aren’t these so much more charming than the classic white?
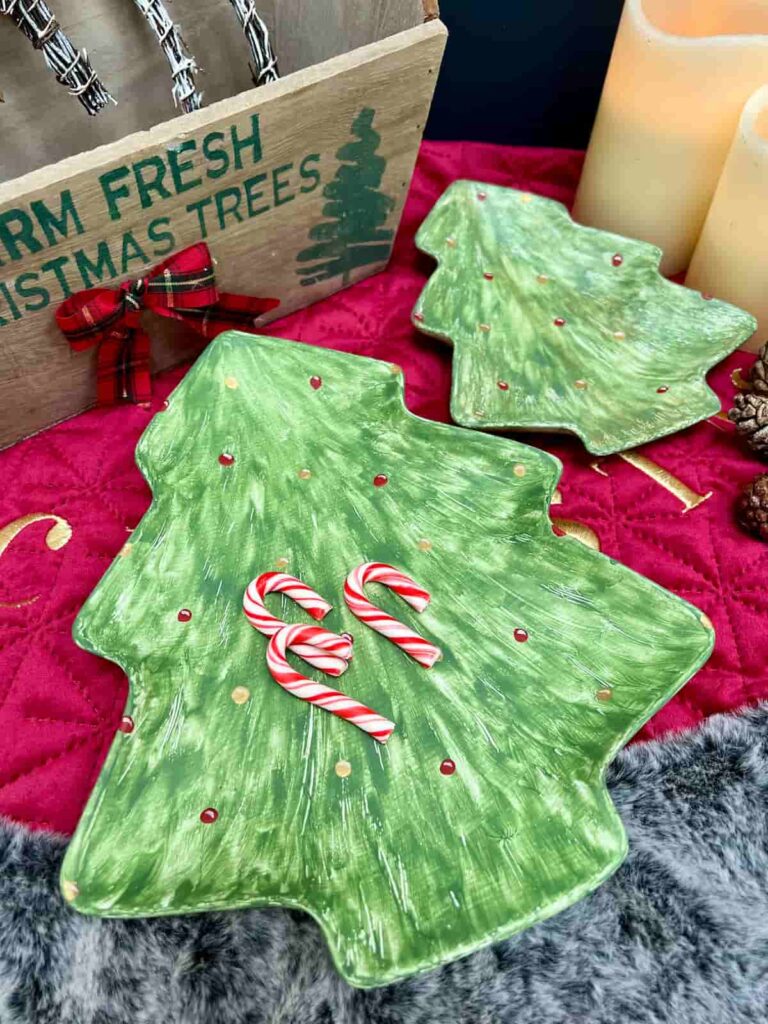
How adorable is the smaller Christmas dish? Perfect for fir cones, wrapped candy canes or a candle.
The splash of colour looks adorable in a festive kitchen or for a table decoration.
How can this help you in your home improvements? Did you know that you can also paint ceramic bathroom or kitchen tiles? Today’s Homeowner gives advice on how to do this.
My Favourite Supplies
Here are some of the supplies that I used when making this project!
Slick Stick
A fabulous product to use instead of sanding on shiny and laminate surfaces.
english ivy chalk paint
A muted green chalk paint with elegant grey undertones.
satin clear coat
A water-based polyacrylic to protect your DIY projects.
If you loved this project, you’ll love these projects too:

Did you make this project?
I love seeing what you do. Please mention @teaandforgetmenots and share your creations with me!
Pin It For Later – How to Paint a Ceramic Christmas Tree
International Bloggers Club
For more ceramics from my blogging friends, check out their DIY projects below.


Hi there! I'm Rachel Bowyer, a passionate DIY enthusiast with a knack for transforming the old into something beautifully new. With a deep love for furniture painting, refinishing, and the art of crafting. I've been documenting my DIY projects and restoration journey since 2018. I specialise in techniques like decoupage, stencilling, and decor transfers. Join me as we explore the world of creativity and home improvement, one project at a time.
That is so cool Rachel; love it! On first glance, I thought for sure you used a special glass paint because it does take on that look when you thin the paint!
Thanks, Sara. No, just chalk paint and a touch of water. Easy and fun to do.
That’s such a great idea. Our thrift stores are full of blegh ceramics that could do with a makeover like this. Ooooo the possibilities 🙂 I love finding out about new products and I’ve never tried Slick Stick before (what a cool name BTW). I inherited a whole bunch of old CorningWare from my gran and they’re my go-to for serving food but I’m not a big fan of the little brown and yellow flowers on the side. Do you know if Slick Stick is heat resistant?
Thanks, Michelle. No, I don’t believe it is heat resistant. That would be a great project though.
Very pretty makeover, you did an awesome job.
Thanks Anita.