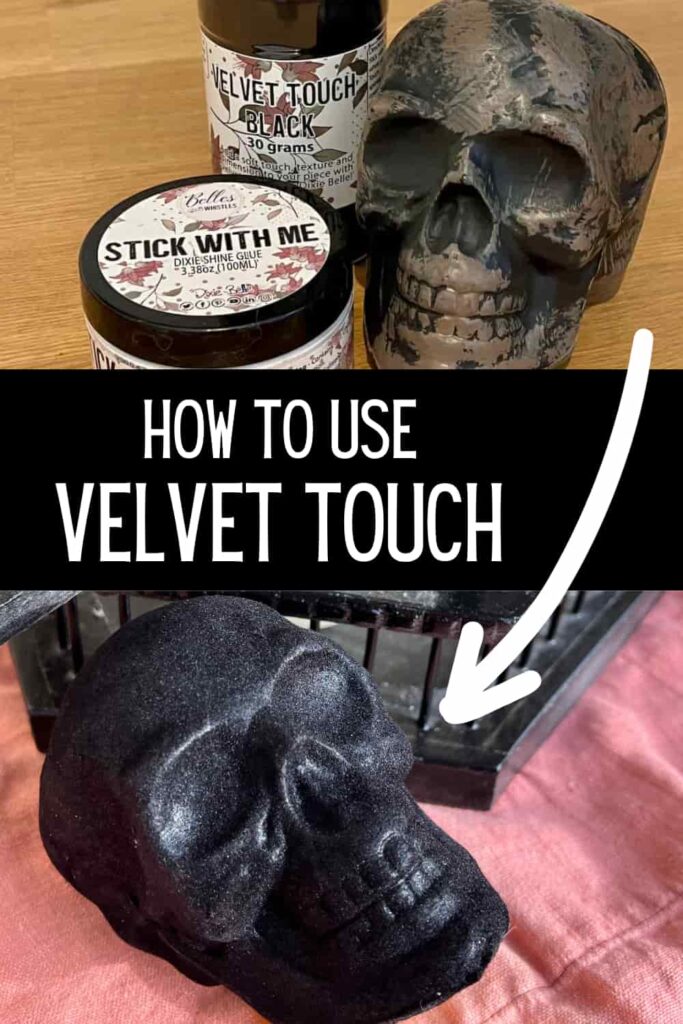
How To Use Velvet Touch By Dixie Belle Paint
Creating a plush, velvety texture with Velvet Touch by Dixie Belle Paint Company is a fantastic way to infuse your DIY projects with a touch of luxury and elegance. Whether you’re looking to completely transform an object or simply add a textural highlight, Velvet Touch has you covered.
You can use it for various projects and surfaces. Such as to add extra dimension to a flat piece like a sign. Or re-coat the inside of a jewellery box.
Thank you to Dixie Belle Paint for sponsoring this post.
Adding a velvety surface to an object is a simple way to create a luxurious or sleek look. It can be used to cover an object completely or to highlight shapes just like a raised stencil.
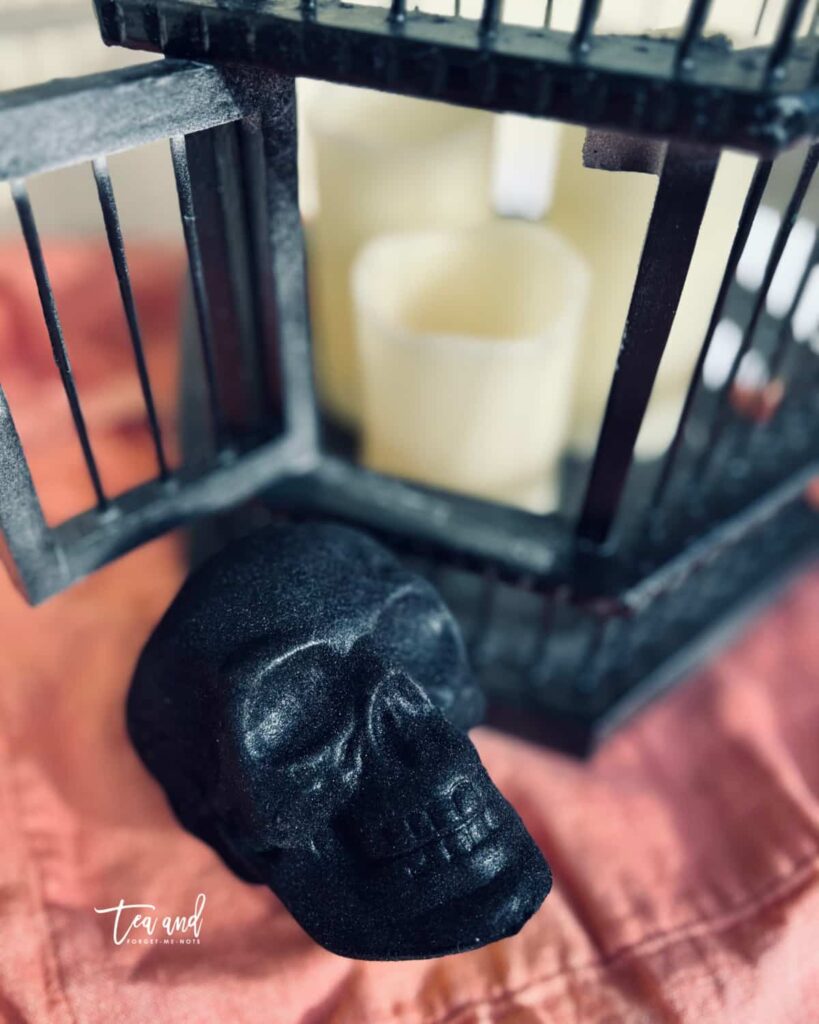
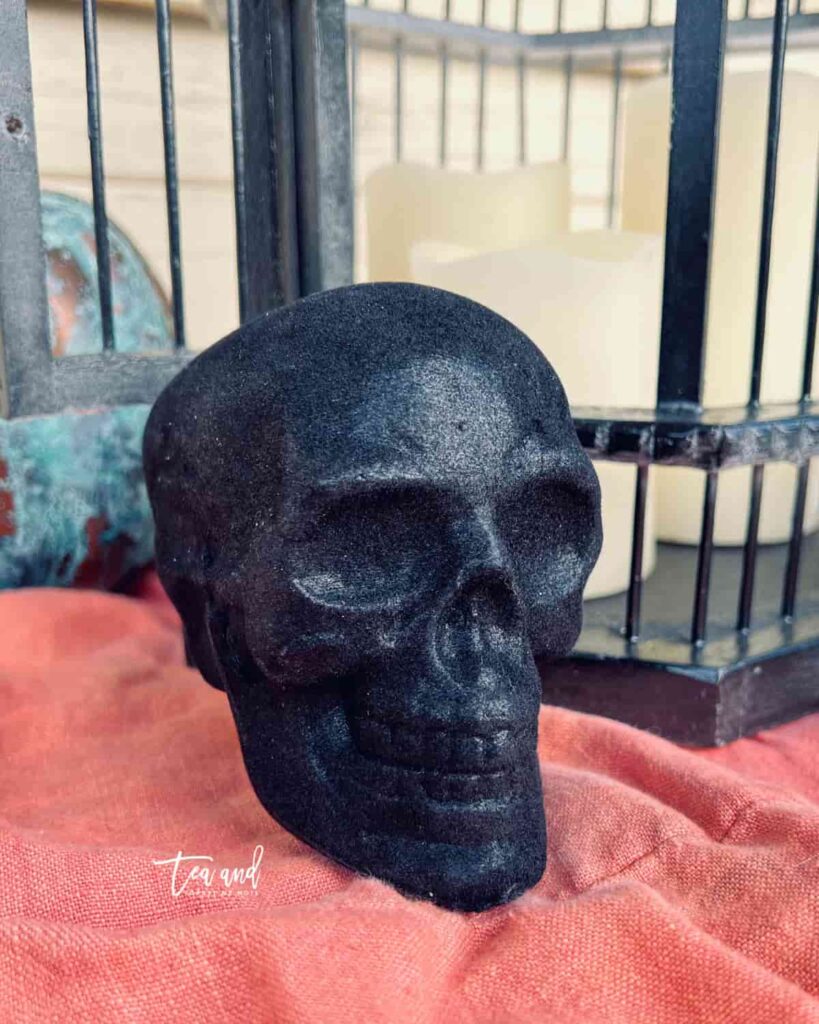
Just like with witches’ capes, velvet conjures up ideas of Halloween and moody, dark vibes. So, to demonstrate this new product, we’re going to follow the steps on a plastic skull.
You only need two products for Velvet Touch to work. The velvet powder and an adhesive to attach it. Simply shake it onto the sticky surface and let dry to easily create the look.
Here’s how to use new Velvet Touch by Dixie Belle Paint Company.
How To Use Velvet Touch Step by Step
This post includes gifted products and affiliate links so you can easily find the products I use myself and recommend to friends. If you purchase these products, I may earn a small commission at no extra cost to you.
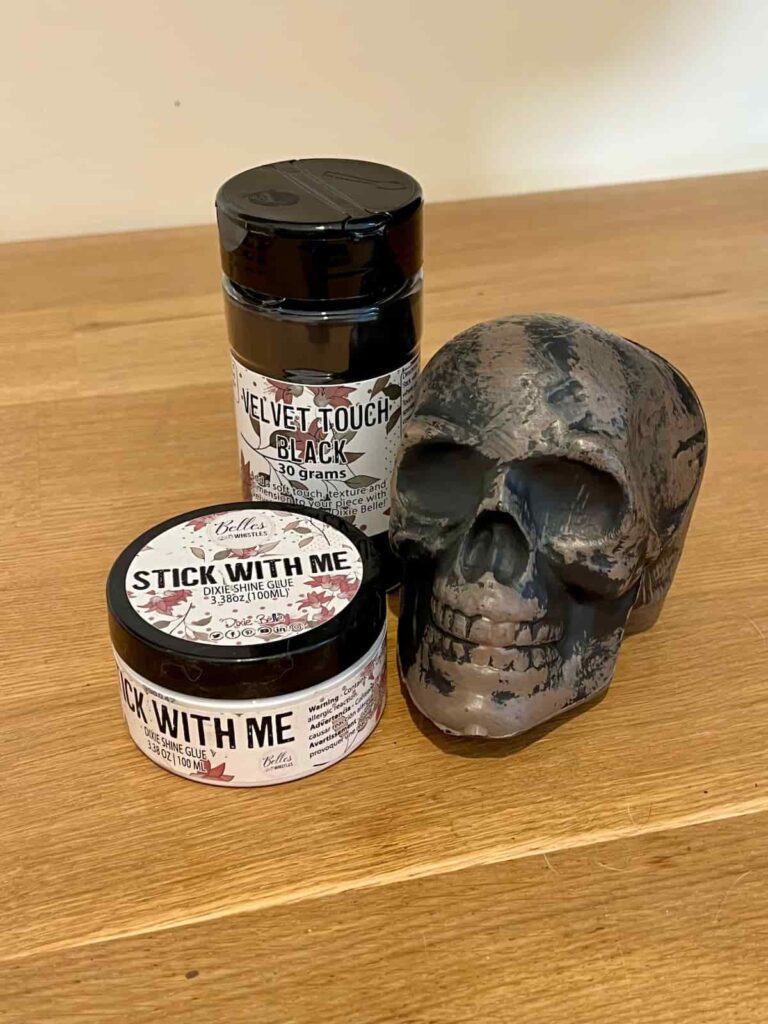
Materials Needed
Step by Step Instructions
Step 1: Safety Precautions and Workspace Preparation
Prioritise your safety when working with Velvet Touch. You should work in a well-ventilated area to prevent inhaling the fine powder. It’s a good idea to wear gloves and a mask to protect yourself from breathing anything in.
Additionally, place a sheet of paper under your project to catch any excess powder. This is also an easy way to return any extra to the container for future use.
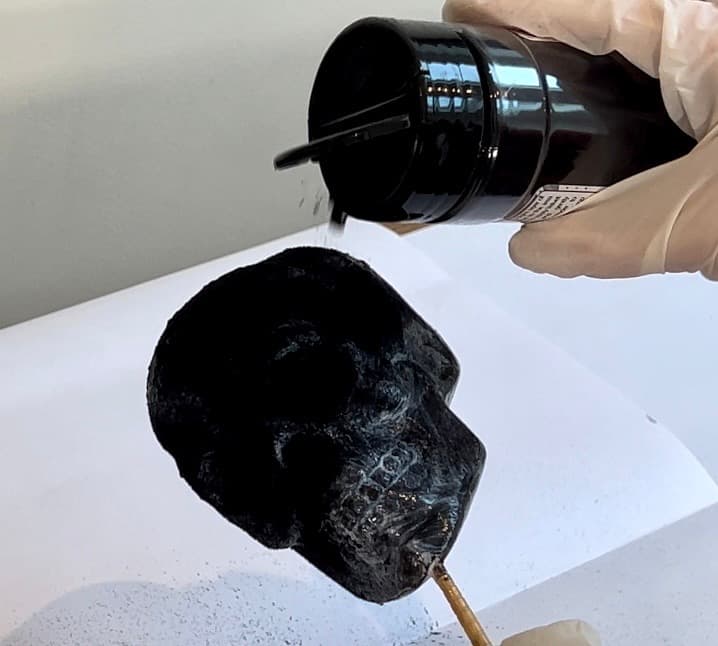
Or if you have a 3D object like this skull, you can apply it over a plastic pot like a Tupperware. This will easily catch and contain the powder that falls off of the object as you coat it.
Step 2: Paint Black Base Coat (if needed)
To make the black velvet appear the densest, start by applying a black base coat. For example the black paint, Caviar, from the Dixie Belle Chalk Mineral Paint range.
This can help you achieve a solid dark foundation for your velvet texture.
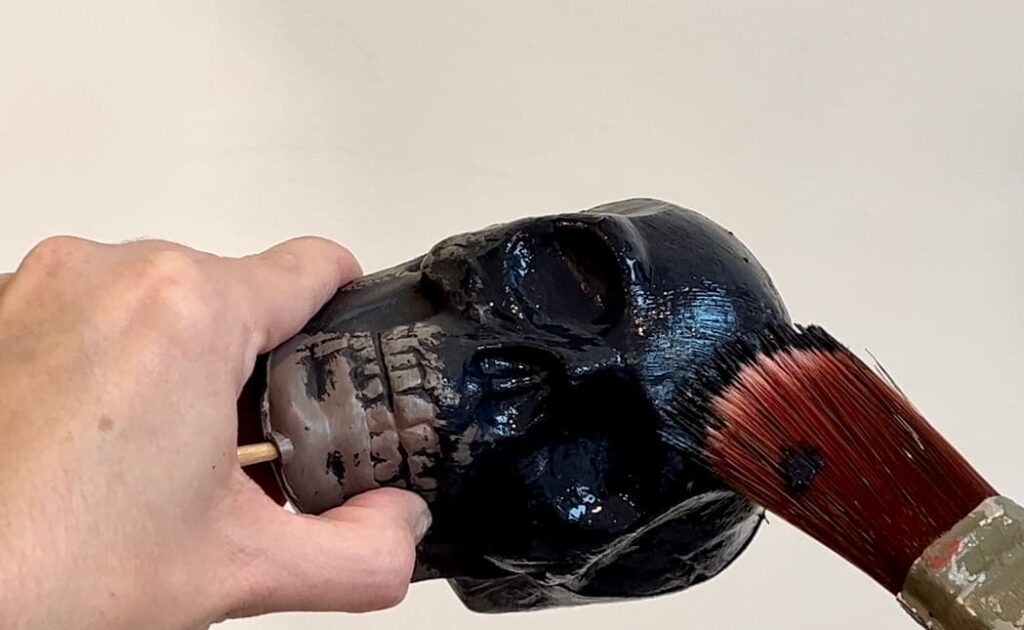
A Terra Clay Paint like Onyx or the Dixie Belle Silk Paint of Anchor would also work well.
A first coat of paint is enough coverage as long as you use high quality, pigmented black paint.
Step 3: Apply the Adhesive (Stick With Me)
Stick With Me is the recommended adhesive for working with Velvet Touch. This is the glue that you use with the gold-leaf-like product, Dixie Shine.
Apply an even, thin coat over the entire area you wish to cover. It’s best to apply Velvet Touch while Stick With Me is still wet. This gives you the best adhesion to get a rich black colour.
This also prevents the velvet from rubbing off once it’s dry.
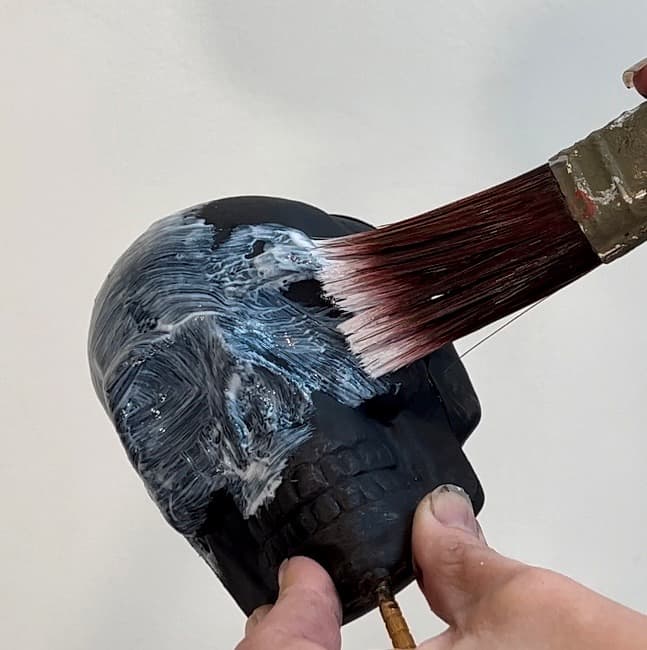
If you wait until the adhesive is tacky rather than wet, the results will be less dense, with some velvet coming off after drying.
An alternative to Stick With Me is the Dixie Belle’s Satin Clear Coat. Apply a thin layer of clear coat in the same way and the sealer will act like glue on the velvet.
Step 4: Sprinkle on Velvet Touch
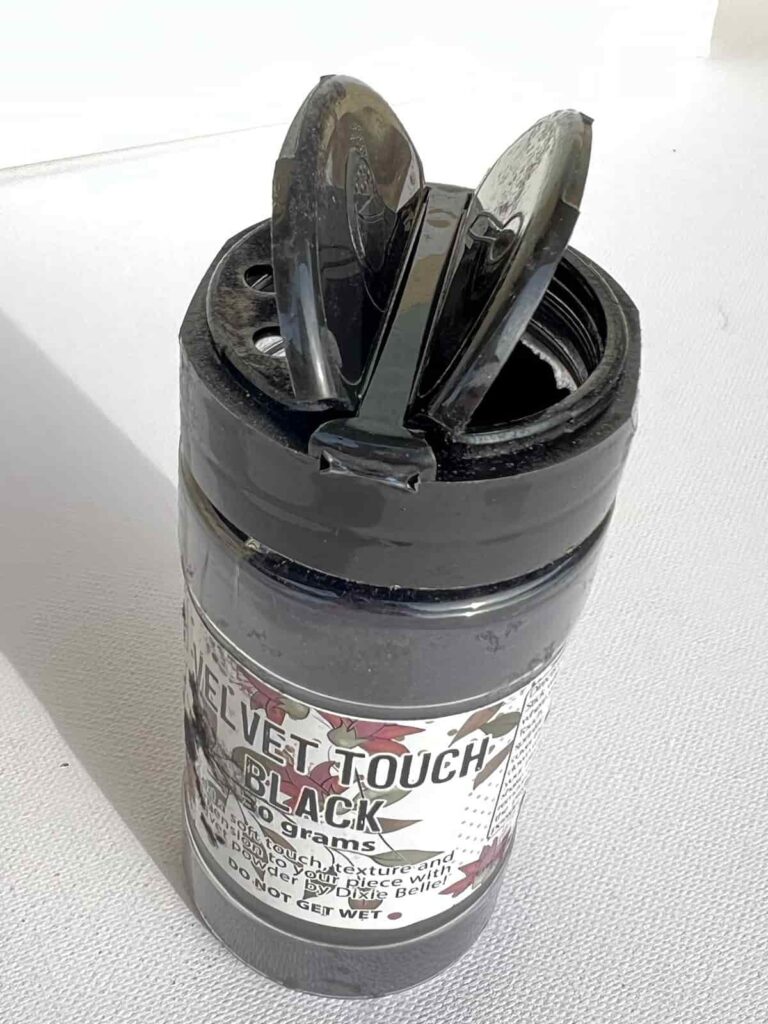
Velvet Touch has a dual-lid system. One half is fully open and the other side has three holes. The side with holes lets the powder come out more slowly for a more controlled application.
Choose which side to use based on the size of the project you’re covering.
Sprinkle the Velvet Touch powder over the wet or tacky adhesive. Gently shake the project to allow the powder to settle evenly.
Tap down the powder to create a velvety, smooth texture.
Step 5: Clean Up
Just as preparing your surface carefully before starting is important, cleaning up is essential too. This makes sure that your work surface is clear and safe after completing your project.
If you used spare paper to catch the velvet as you applied it, pour it back into the container. Be careful to avoid it flying about in the air.
If you’re working on a flat surface like a sign, you can use baby wipes to collect any loose powder. For larger areas, a vacuum can help with cleanup.
If you’ve worked on a project inside something like a Tupperware pot, you can simply put the lid on to keep any excess powder secure. Or return it to the Velvet Touch container.
Step 6: Allow Your Project to Dry
Depending on the size and complexity of your project, it may take a few hours to overnight to dry completely.
Dixie Belle’s Velvet Touch
Before decorating your home with your velvet-textured masterpiece, give it a gentle tap to ensure that any loosely attached powder falls off.
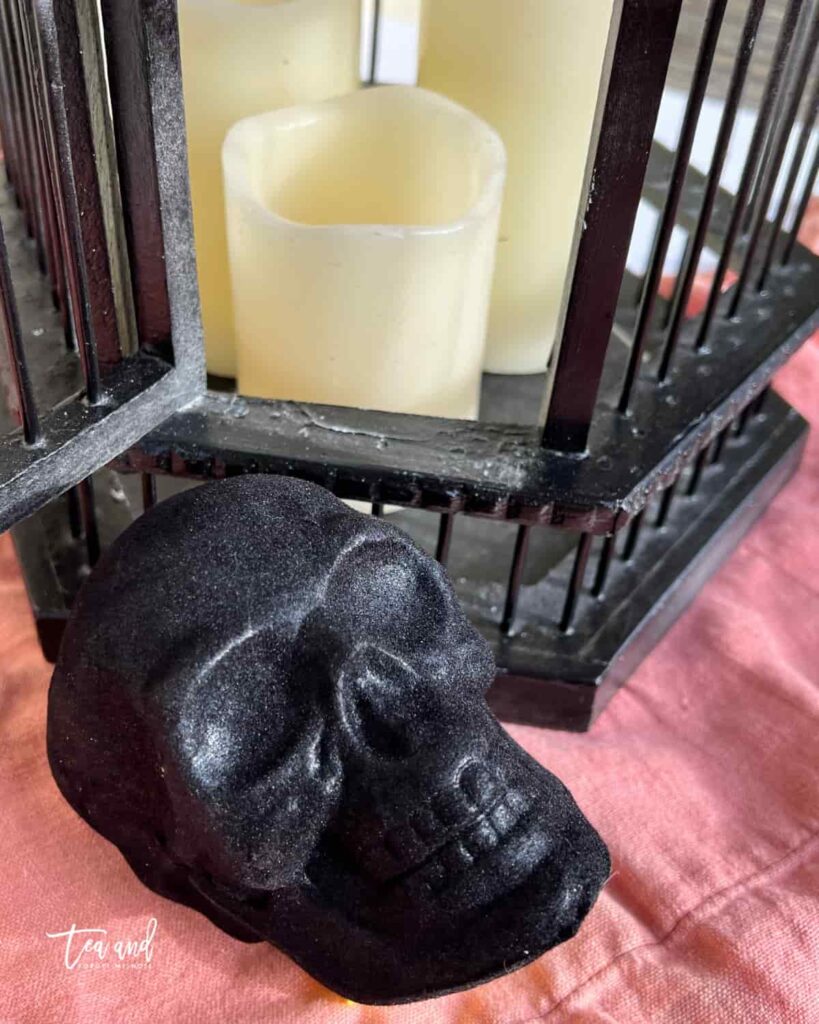
With these steps, you can master the art of using Velvet Touch to create a stunning, velvety texture on various surfaces.
It’s a quirky way to add a touch of sophistication to your DIY projects.
Enjoy the luxurious results!
My Favourite Supplies
Here are some of the supplies that I used when making this project!
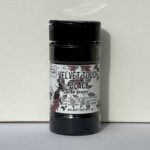
velvet touch
A great way to create a velvety finish on all kinds of projects and surfaces.
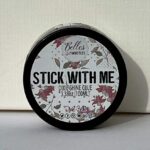
stick with me
Adhesive for both Velvet Touch and Dixie Shine.
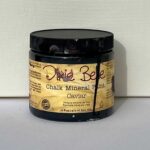
caviar paint
An elegant, true black, matte chalk paint.
If you loved this project, you’ll love these projects too:
have you used velvet touch?
I love seeing what you do. Please mention @teaandforgetmenots and share your creations with me!
Pin It For Later – How To Use Velvet Touch By Dixie Belle Paint

Hi there! I'm Rachel Bowyer, a passionate DIY enthusiast with a knack for transforming the old into something beautifully new. With a deep love for furniture painting, refinishing, and the art of crafting. I've been documenting my DIY projects and restoration journey since 2018. I specialise in techniques like decoupage, stencilling, and decor transfers. Join me as we explore the world of creativity and home improvement, one project at a time.
I’ve heard so much about this paint so would love to try it. I’m itching to do some DIY or crafty projects.
I’d love to know what you think when you do.