How to Make an Easy DIY Pumpkin Wreath (2 Ideas)
A DIY pumpkin wreath is a beautiful way to dress up your front door for autumn. You can either add faux pumpkins or create one with a mould.
It’s important to decide what you want the focal point of the wreath to be. Is it a simple wreath focusing on the pumpkins? Or a full wreath filled with foliage, pumpkins, ribbons and berries.
Either can be a gorgeous wreath. It depends on your style of home decor and what’s available to you.
I’m going to share two ways to create DIY wreaths with pumpkins. If you’re looking to recreate your own wreath, choose your favourite and have fun crafting!
How To Make a DIY Pumpkin Wreath Step by Step
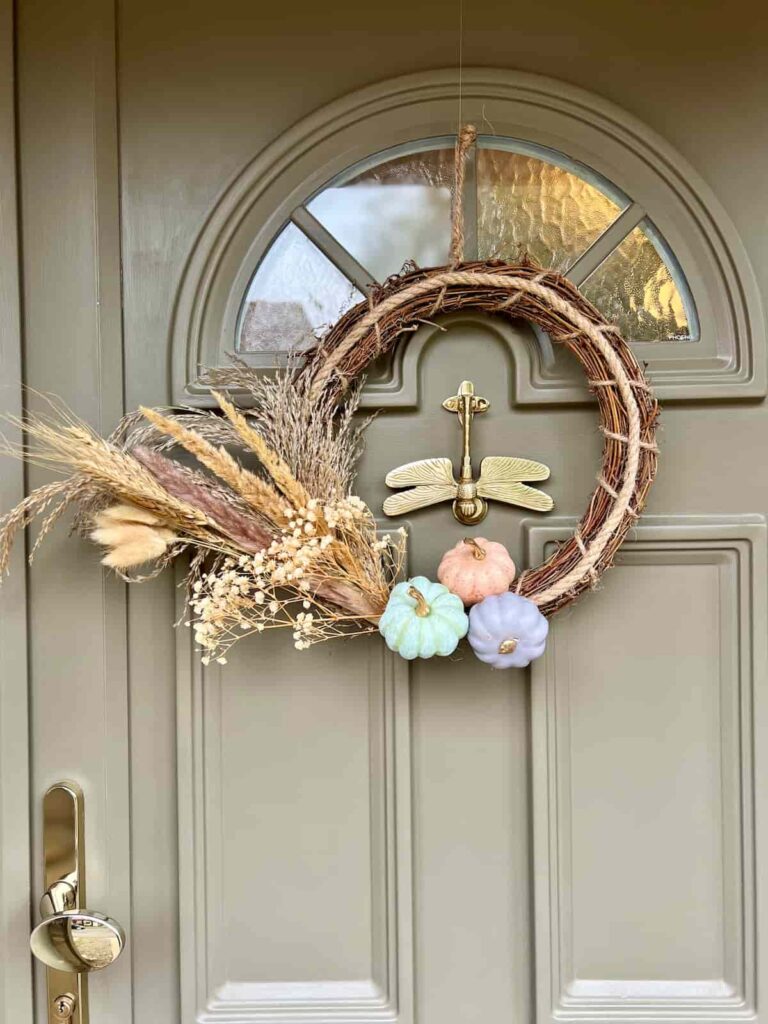
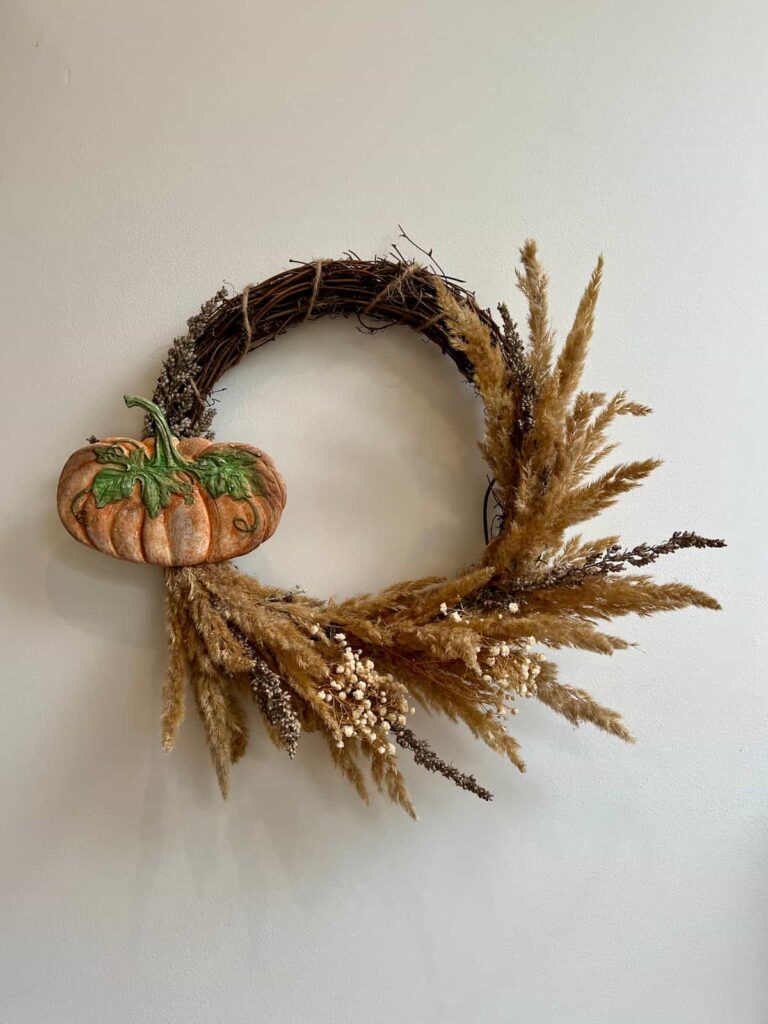
DIY Pumpkin Wreath 1
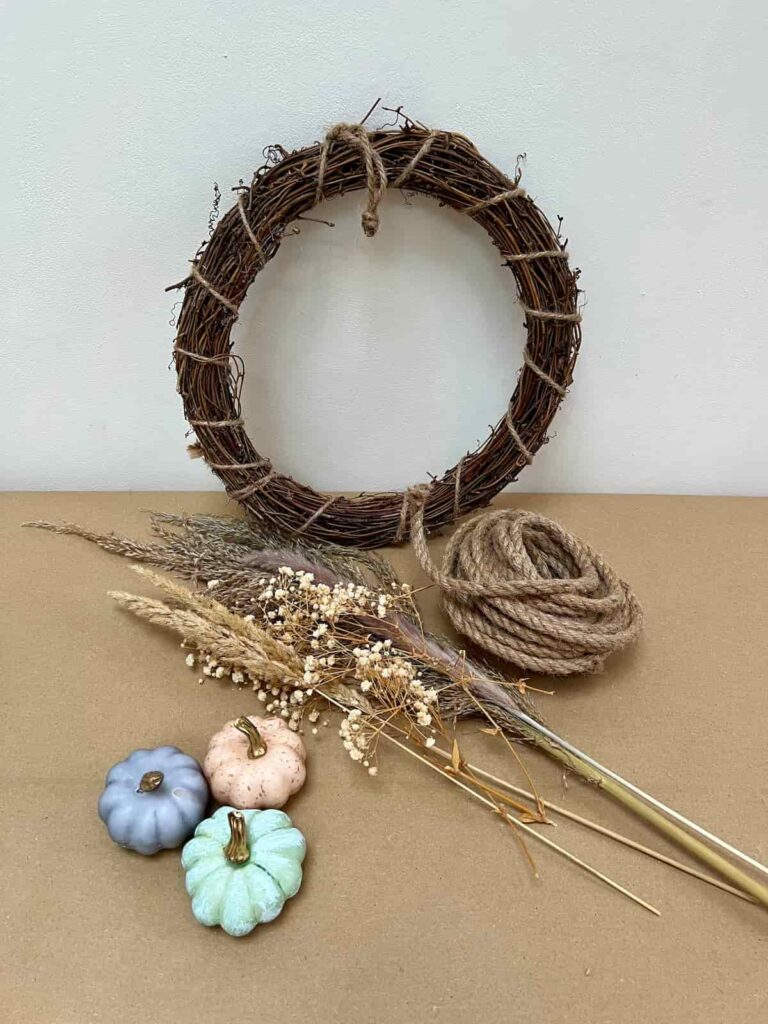
Materials Needed
Supplies for a Pumpkin Wreath
To start with you need a wreath base. This could be a grapevine wreath like mine or a styrofoam wreath. The important part is what you add on top!
With a grapevine wreath, you start with a pretty base. So you don’t need to cover it.
With other kinds of bases, you might want to hide the whole wreath form.
A great way to do this is to wrap something neutral around it, like a burlap ribbon. Burlap works well for a DIY pumpkin wreath as the brown suits the autumnal colour scheme.
Add Rope To Wreath Base
Layers are one of the best ways to make any project look more impactful. It adds dimension and interest.
To start, I added a circle of nautical rope around the middle of the wreath circle.
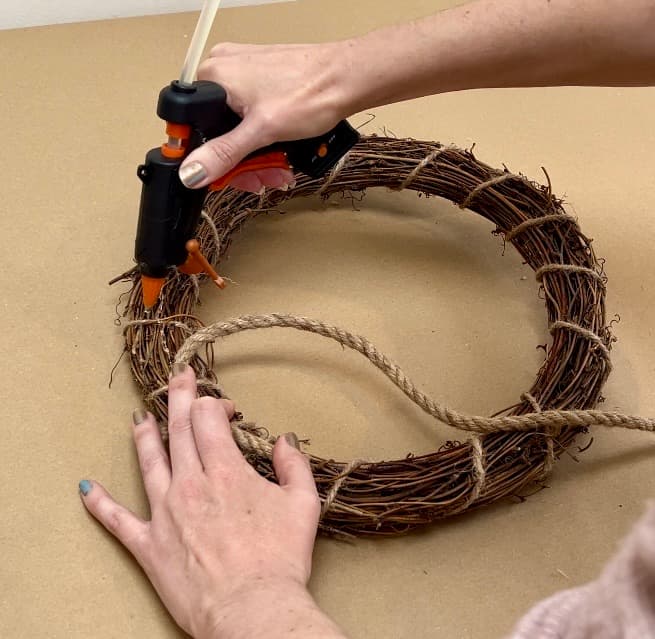
Hot glue kept it in place securely.
Faux or Dried Florals for a Pumpkin Wreath
Faux pumpkins and flowers are the perfect way to decorate a wreath so that it lasts. If you made a wreath last year, you save the extra cost and by reusing faux foliage.
And if the colours are fairly neutral then they can be worked into a different seasonal wreath. Neutral colours also allows the pumpkins to take centre stage.
For this autumn pumpkin wreath, I chose a selection of dried and faux flowers from a craft store.
The first step is to lay out your faux florals in your desired look. You can fill the base of the wreath with the plainer flowers and foliage. You don’t want to hide any pieces that will get covered later on.
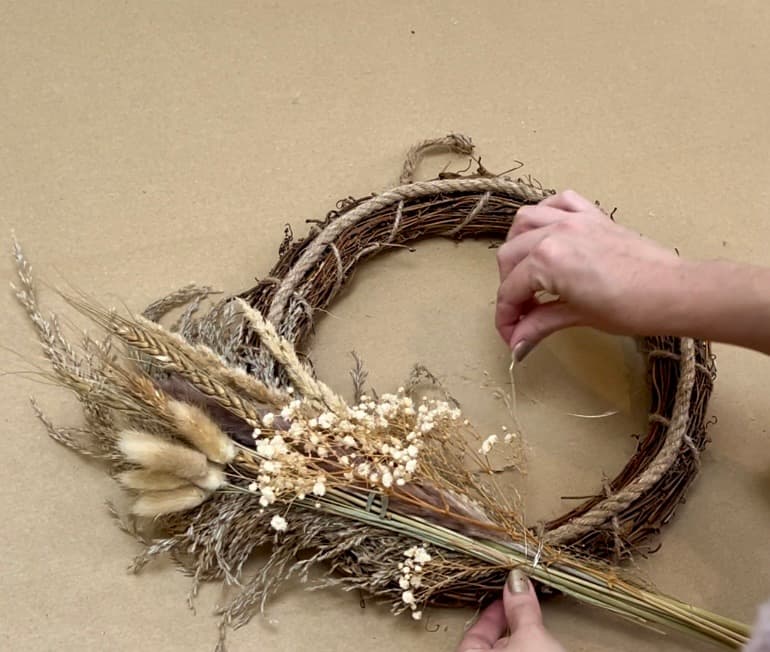
A different way is to mix and match real grasses with faux grasses. This helps to blend the faux elements in so that they look more natural. As not all faux florals look high quality.
After making a bundle of flowers, attach them together with floral wire. This stops them from slipping apart. Then attach the bundle to the wreath base.
Once you have the flowers attached. You can add the main features of the autumn wreath.
Attach Faux Plastic Pumpkins
The focus of this wreath is the faux mini pumpkins. I chose neutral, pastel colours in orange, green and purple. But faux pumpkins are easy to paint if you want something more vibrant.
These bags of pumpkins are from Amazon and also come with chenille fabric smaller pumpkins. Which would give a different look and feel.
Three is an aesthetically pleasing number for grouping objects.
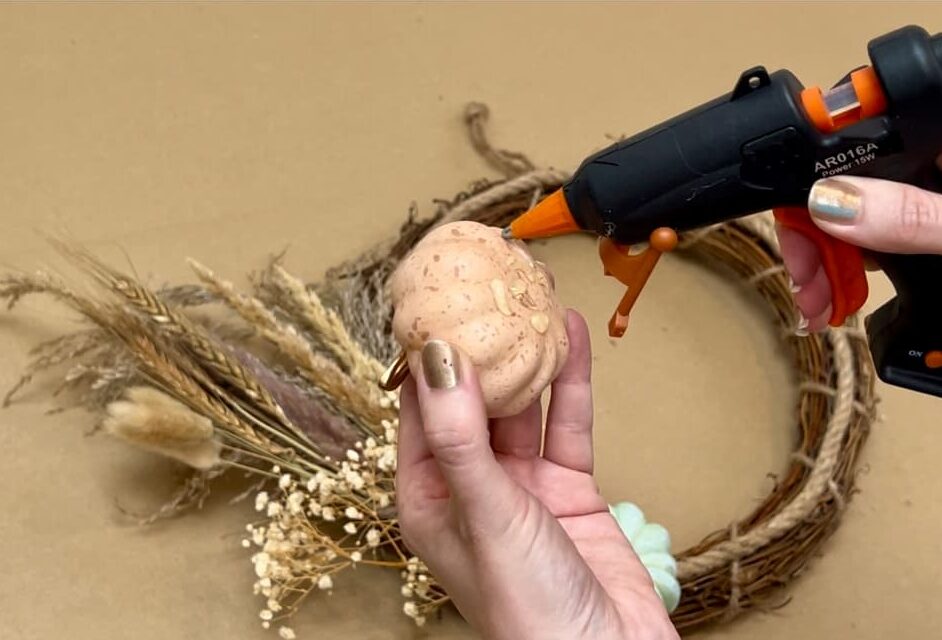
For the first pumpkin, I put a dab of hot glue on the bottom of the pumpkin. Then placed it on top of the wire that attached the flowers. The second and third pumpkin was placed at different angles to add more dimension to the overlook look.
I ran out of hot glue after the second pumpkin and tried E6000 instead. Which did not work.
So, returned to the best way and used more hot glue for the final pumpkin.
DIY Pumpkin Wreath For Your Door
You can attach the top of the wreath with a wide ribbon or fishing wire over the top of your front door.
Then your beautiful wreath is ready to place on your front porch to welcome guests to your home.
There are so many ways that you can design your own pumpkin wreath like this. Covering the entire base with flowers or putting pumpkins throughout.
Festive Pumpkin Wreath 2 Instructions
Materials Needed
Hello Pumpkin Mould
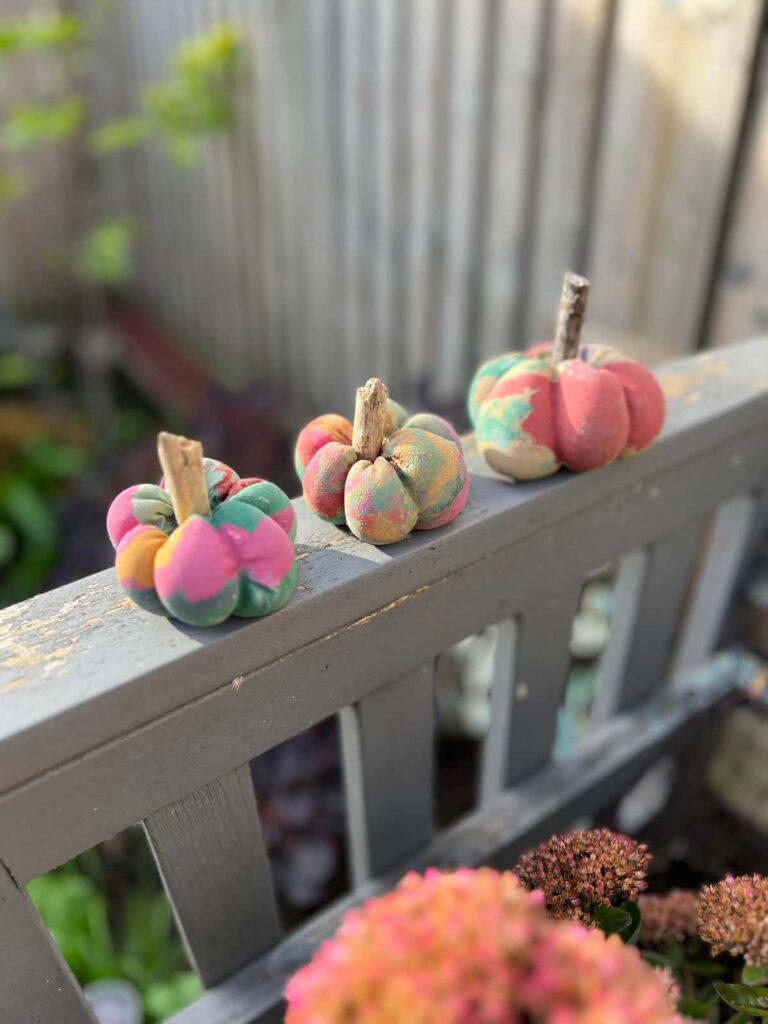
For the second wreath, I used a pumpkin-shaped mould.
I reused dried flowers from a previous autumn wreath for the base. Here’s how I assembled it (plus more YouTube video tutorials).
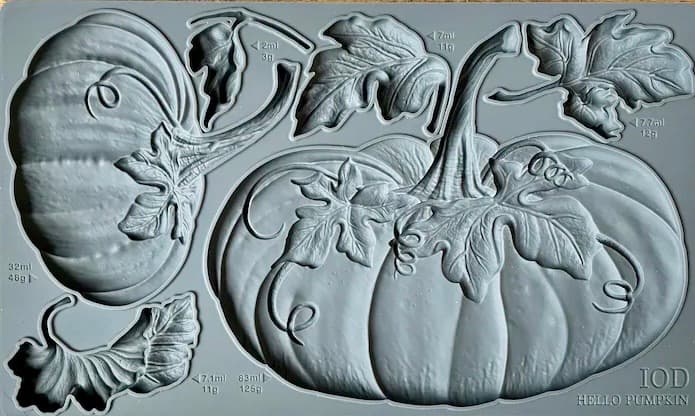
The ‘Hello Pumpkin‘ mould is from Iron Orchid Designs and has beautiful details in it.
Make an IOD Pumpkin Mould
I filled it with cornflour, or cornstarch which helps it release easily. Then made the mould using air dry clay.
I used this mould previously on a Halloween project. It was so easy to use, even for a beginner like I was.
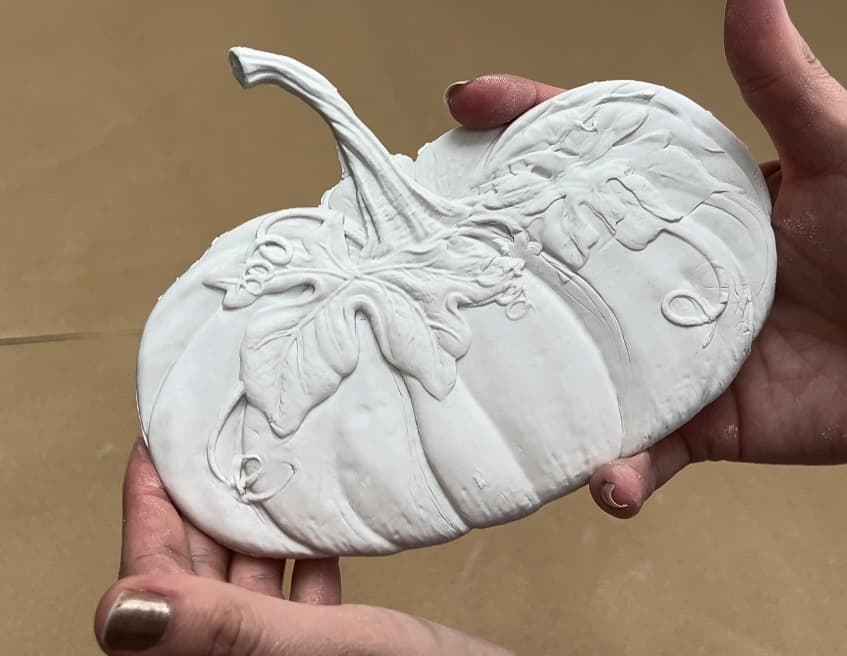
One tip I was given was to put the mould in the freezer for 30 minutes before taking it out. This hardens the mould so it releases more cleanly.
And the trick worked!
Don’t you just love our community for sharing new things with each other so generously?
Paint Air Dry Clay
For autumn and pumpkin wreaths, you have two classic colour schemes to choose between. Oranges and reds, and whites and neutrals.
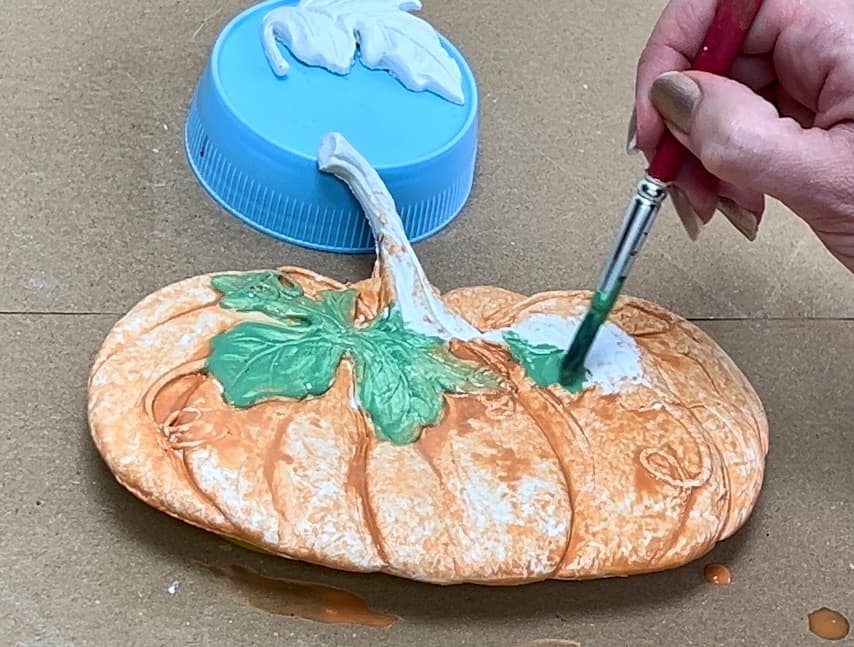
For this white pumpkins mould, I did a wash with orange and green paint. A wash is where the paint is diluted with water. This lessens the vibrancy and makes it more subtle.
More farmhouse style.
How to Attach a Mould to a Wreath
As the back of the pumpkin is flat, to attach the mould simply use a hot glue gun.
They’re really fun DIY projects to get creative. And the best thing is that you can either keep them as is or reuse things for a different look next year.
How would you decorate your own adorable DIY pumpkin wreath?
For more unique ideas for seasonal decor, check out the bottom of the post. Or feeling even more creative, here’s how to make a real grapevine wreath base.
Pin it for later – DIY Pumpkin Wreath

If you loved this project, you’ll love these projects too:
Did you make this pumpkin wreath?
I love seeing what you do. Please mention @teaandforgetmenots and share your creations with me!

Hi there! I'm Rachel Bowyer, a passionate DIY enthusiast with a knack for transforming the old into something beautifully new. With a deep love for furniture painting, refinishing, and the art of crafting. I've been documenting my DIY projects and restoration journey since 2018. I specialise in techniques like decoupage, stencilling, and decor transfers. Join me as we explore the world of creativity and home improvement, one project at a time.
Both are gorgeous…and can I say I love your dragonfly door knocker!
Thank you, Ann! The dragonfly makes me happy every time I see it.