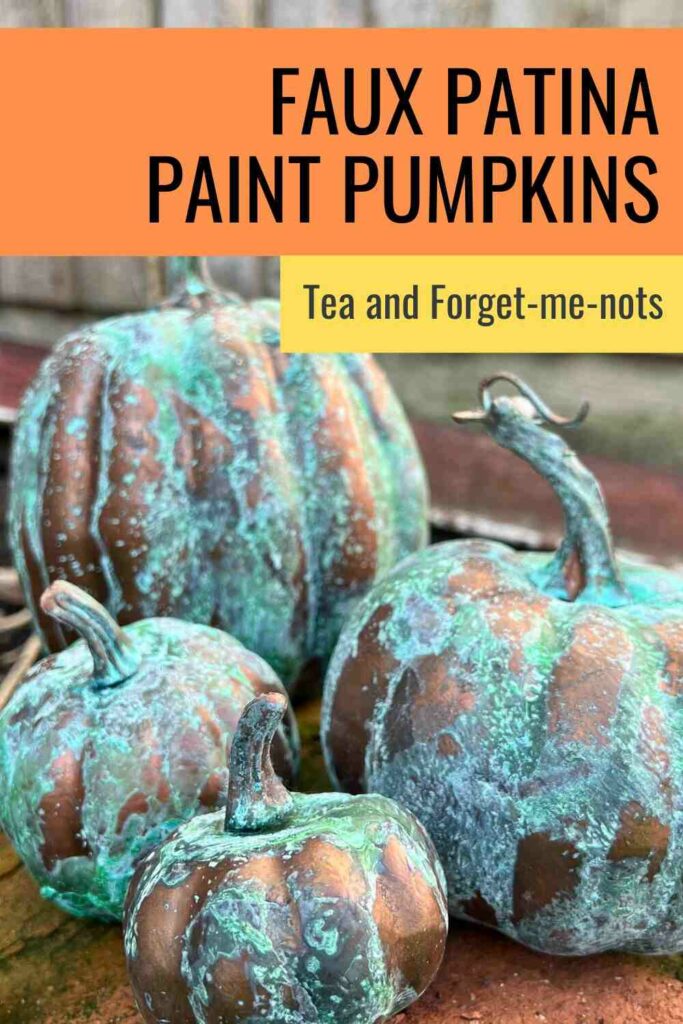
Best Paint to Paint Pumpkins for Faux Patina Look
Want to create cool pumpkins? Here’s the best paint to paint pumpkins for a faux patina look, like it has been weathered outdoors.
But instead of waiting months for nature to do its thing, this is something you can create in a couple of days.
And most of that is drying time.
This post includes gifted products and affiliate links so you can easily find the products I use myself and recommend to friends. If you purchase these products, I may earn a small commission at no extra cost to you.
Thank you to Dixie Belle Paint for sponsoring this post.
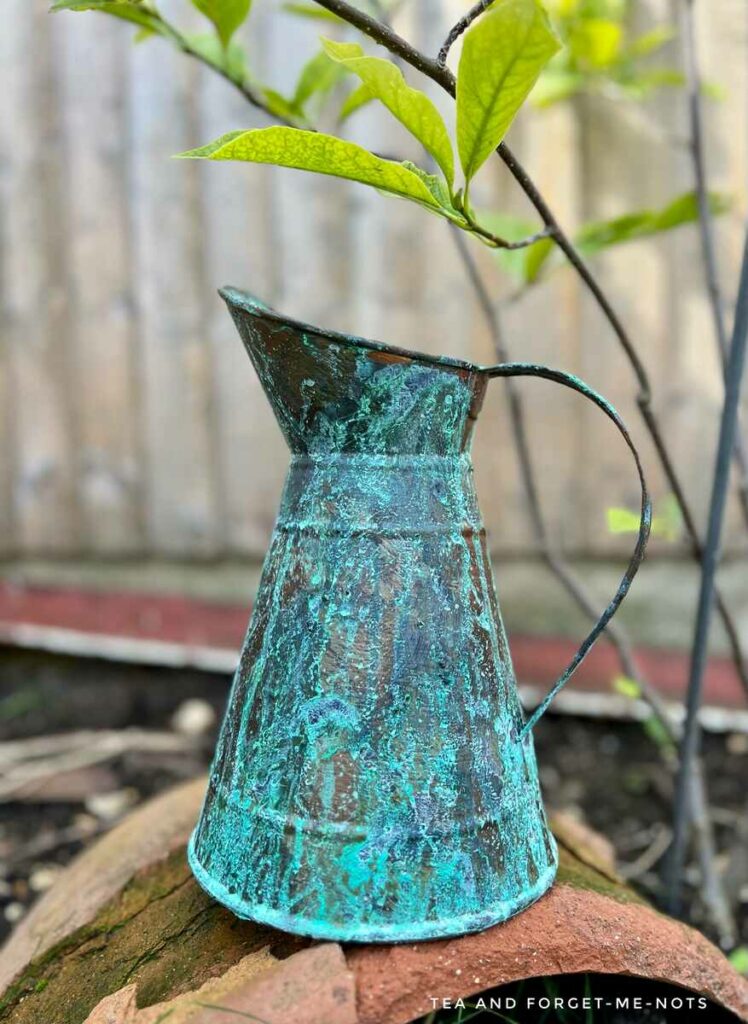
And it doesn’t just work on metal., You can use it on plastic, wood, or resin too.
For an in-depth guide on the patina paint process and tools, check out this post.
Here’s the best paint to paint pumpkins for a faux patina look…
How to Make a Painted Pumpkin With a Faux Patina Finish Step by Step
Materials Needed
Step by Step Instructions
Step 1: Clean Faux Pumpkins
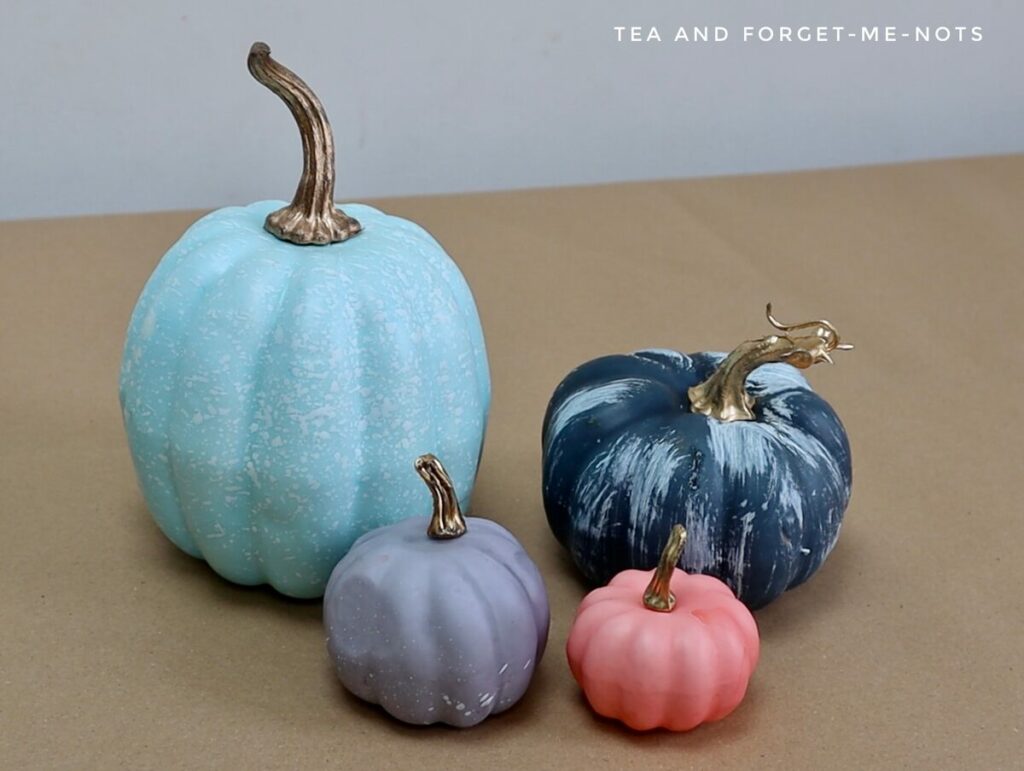
For this project, I used a selection of faux pumpkins in different sizes and different shades from Amazon.
They are bright, fun colours. But plasticky and some had a bit of a bad dry brush paint job. I even needed to hot glue the stem back on as it was a little flimsy.
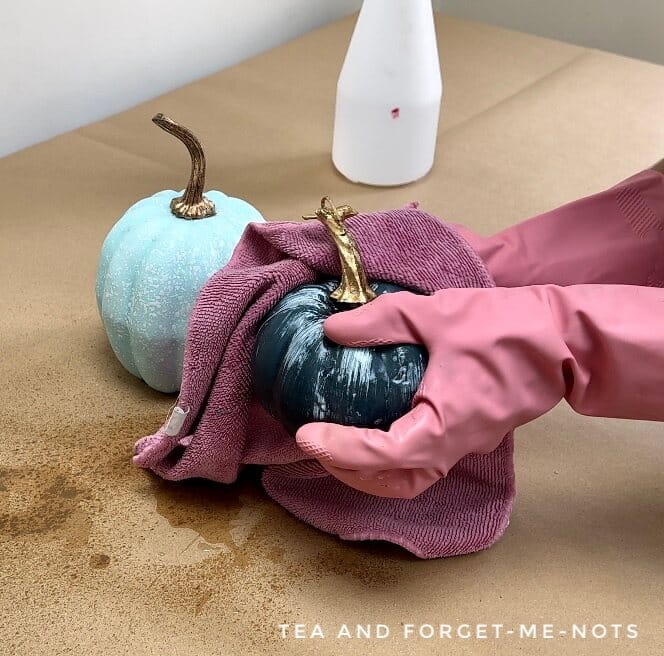
Before applying the faux patina paint, the first thing to do is clean the surface well. For this, you can use White Lightning. Make sure to get into the crevices and the plastic stems.
Then remove the White Lightning with some clean water.
Step 2: Prime for a Patina Paint Technique
Whether or not you need to apply a primer depends on the material of the object.
The primer you need for metal objects is called Prime Start. This stops the metal from rusting underneath the paint.
For non-metal objects, the first step is to just apply a coat of paint.
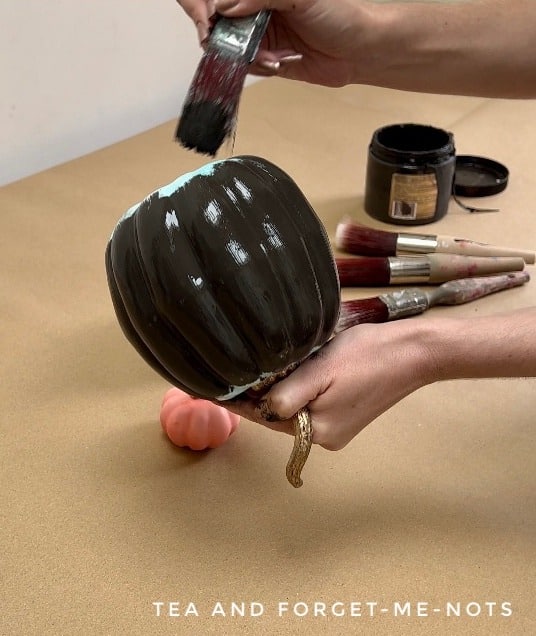
I chose chalk paint in the colour, Coffee Bean. Dark brown is a good choice as it would be a similar colour to the end result.
It doesn’t matter if you start with light, white pumpkins. The base coat of paint should give you good coverage.
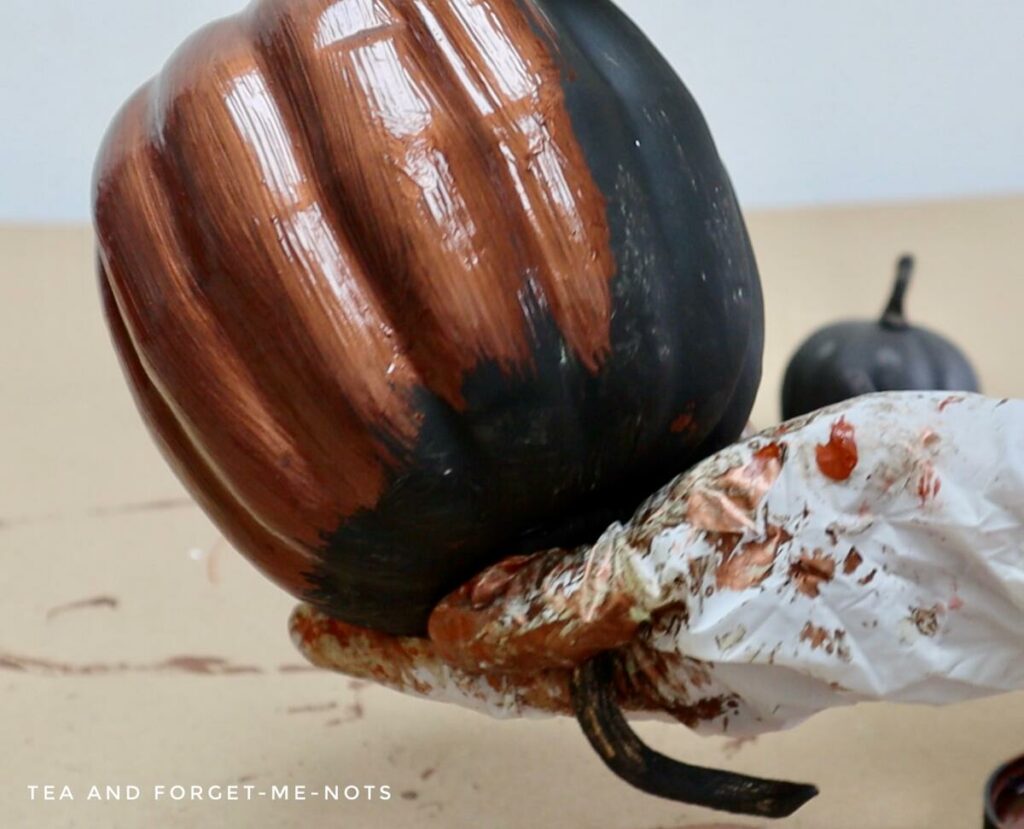
Step 3: Apply First Coat of Patina Paint
The next step is once the chalk paint is dry. And you do a first coat of faux patina paint. Which is as easy to apply as normal paint.
But you need to give the pot a good shake and stir to mix up the metal flakes within it.
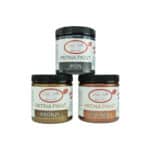
Choose the patina paint based on the colours that you like. Then choose the patina spray depending on the different shades of rust you want to create.
There are bronze, copper and iron patina paints. And green, blue and yellow patina sprays. So a lot of options depending on the rusted look you like.
As pumpkins are round, it’s easy to get paint on yourself as you hold it in different places. It’s important to wear gloves and other protection with patina paint.
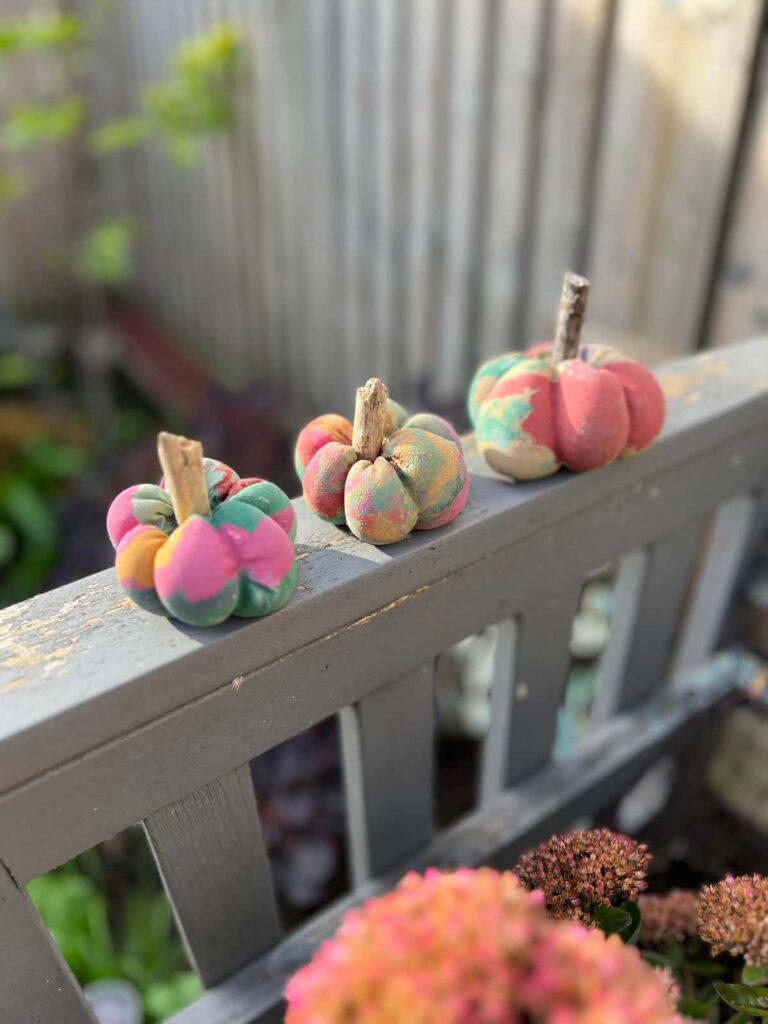
For these pumpkins, I used two patinas, bronze and copper. One pumpkin I did with just the bronze paint finish. For another, I used only copper paint. For the other two pumpkins, I did a combination of both colours.
You can use a synthetic brush to do this. Although it’s a good idea to use a cheap chip brush if you don’t plan to wash it soon after using it.
The more texture you create, the more rustic the finish will be. Using a rough, textured brush or applying the paint with a pouncing, stippling motion will add to the effect.
Step 4: Leave to Dry
I really liked the colour of the pumpkins with just the coat of faux patina paint on them. I’m tempted to create some more bronze and copper patina pumpkins just like this.
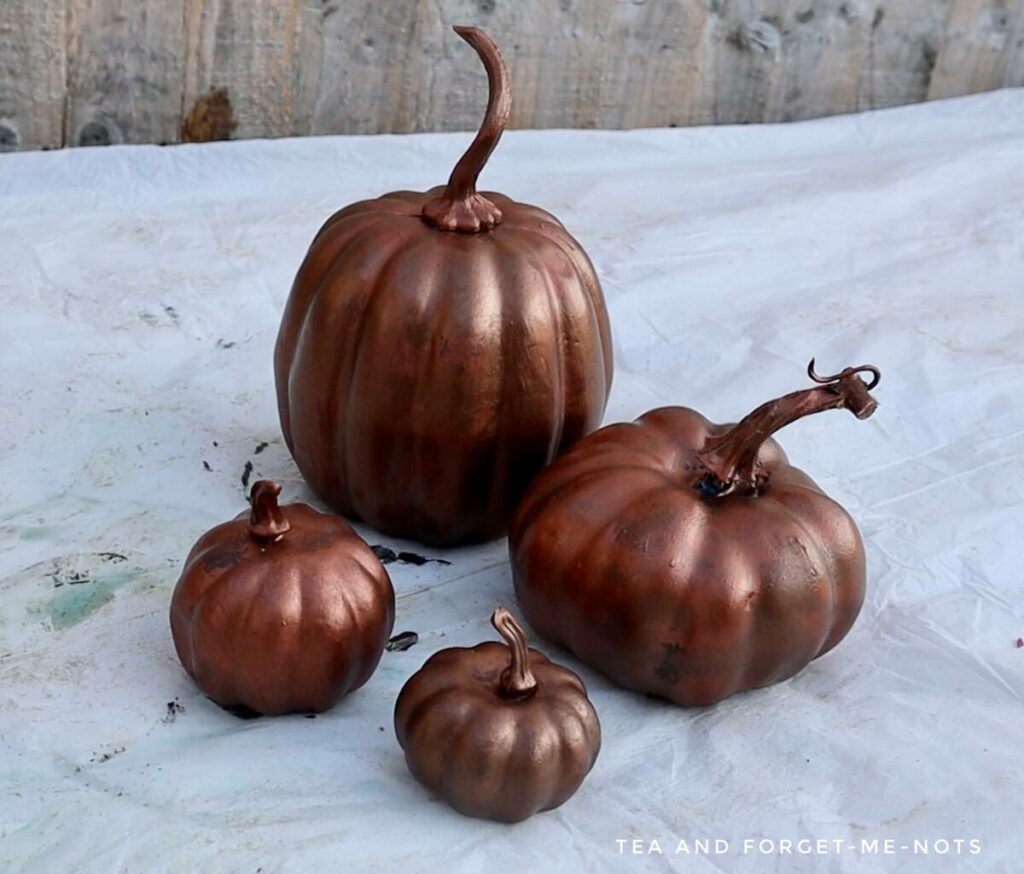
That metallic paint already made the plastic pumpkins look so much more solid.
It’s important to protect your body when using these products. I wore gloves and worked outdoors. You can work indoors in a well-ventilated area. But this isn’t necessarily a project I would do with young kids.
You should wait at least one hour before progressing to your second coat of paint. However, for the best results, it’s recommended to wait up to 24 hours.
That’s if you have the patience!
I waited about 12 hours to apply my second coat of paint. That worked perfectly fine.
Step 5: Apply Second Coat of Patina Paint
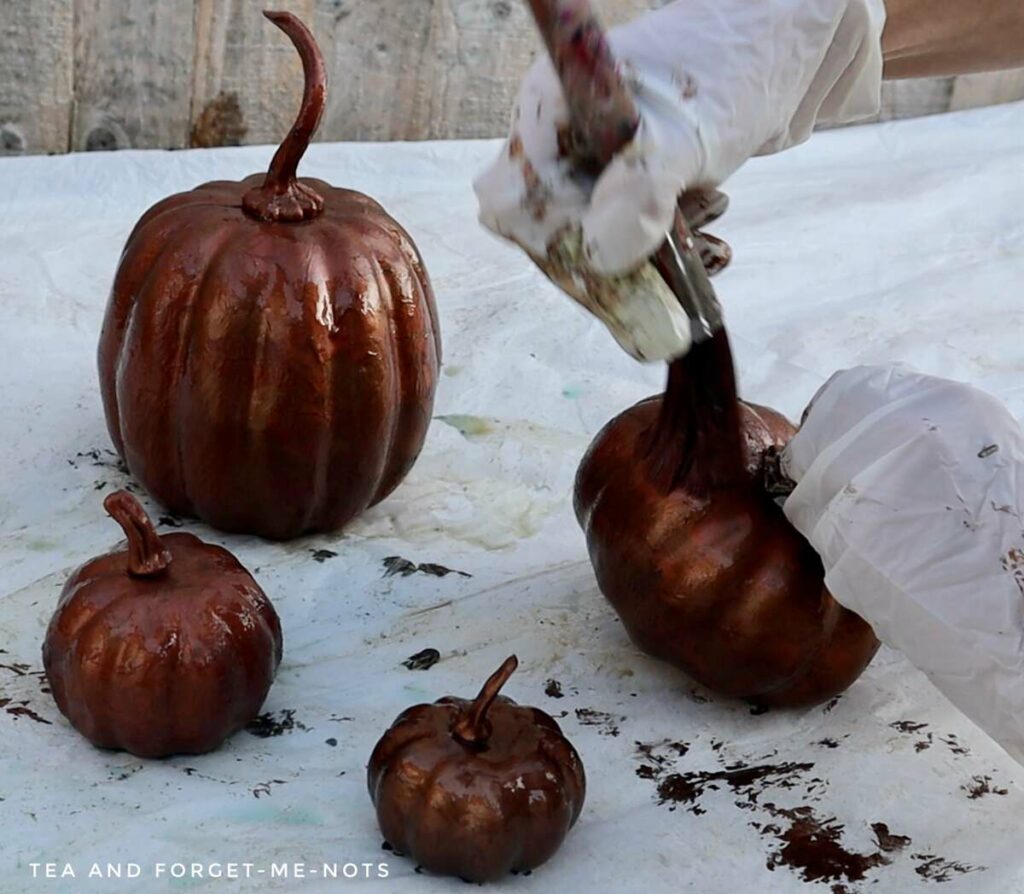
The really fun part begins with applying the second coat. As you use the patina spray while the second coat of paint is still wet.
Your second coat will repeat the colour underneath. For the pumpkins with both copper and bronze paint, I tried to match the colour pattern.
Step 6: Add Patina Spray
Patina spray is an easy way to create a faux, tarnished finish. You need to give the patina spray a good shake before using it.
Then you spray the wet paint and watch the transformation take place.
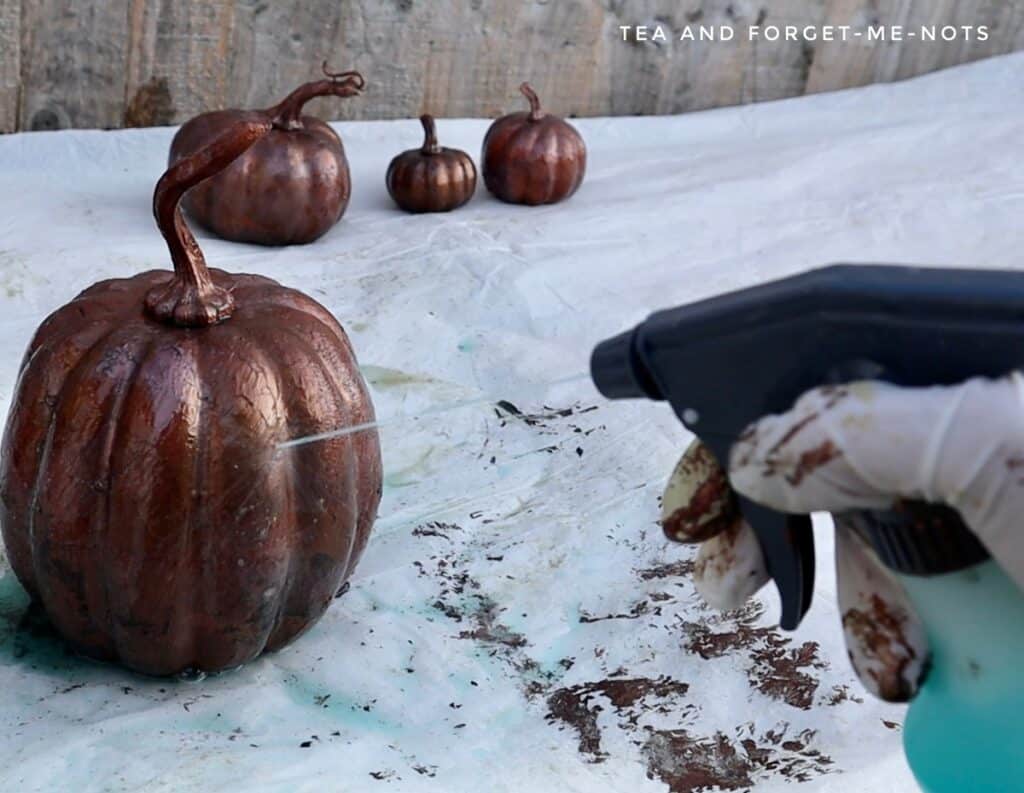
The impact on these pumpkins was almost instant. The colour began to change straight away.
However, the tarnishing continues to develop for up to 6 hours. If you leave them for a long time overnight then you can wake up to some surprise results!
If you don’t like the drips that result from the spray, you can use a paper towel to wipe them away. Or spray with a fine mister spray bottle to create a more even and gentle spray pattern.
I used a lot of patina spray to create a really dramatic transformation.
However, if you only use a few squirts of the patina spray. Or dab the spray on with a sponge, you could create a very subtle effect. It’s a personal preference.
I found that a little paint spray goes a long way in this little makeover.
Once you finish using your patina spray, you need to remove the spray nozzle. The patina spray comes with a screw cap. So, remove the nozzle and place the cap on top when storing the spray bottle.
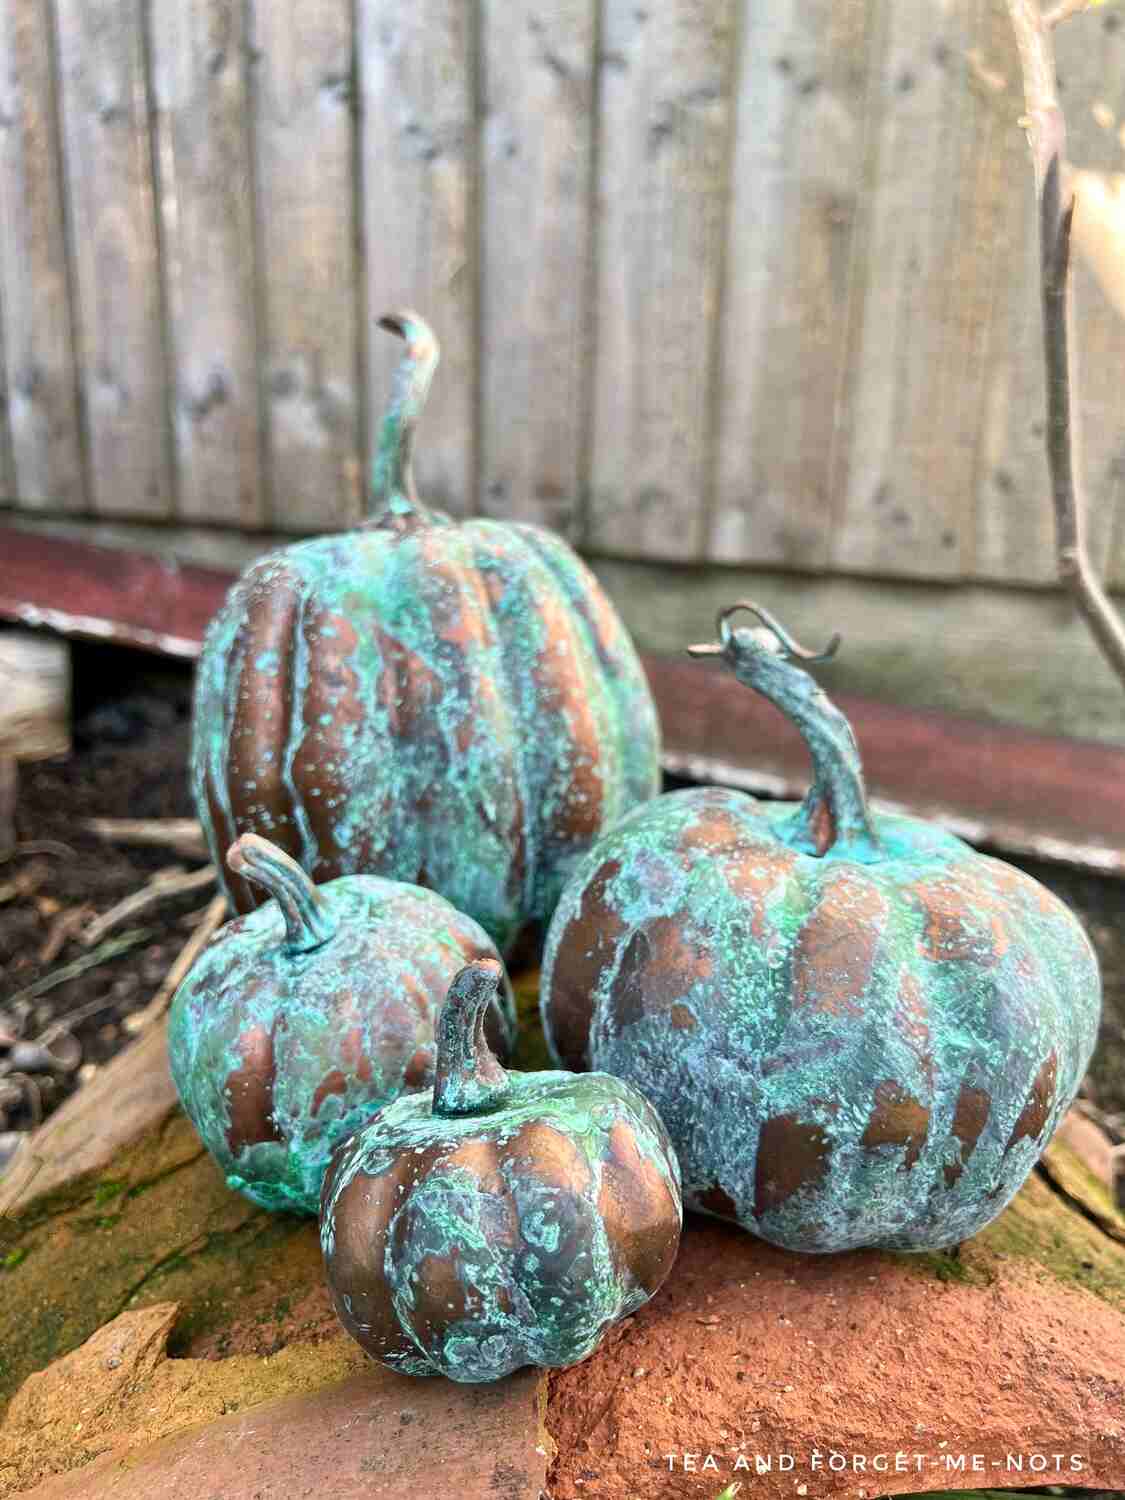
Step 7: Seal Patina Paint
You can seal your hard work with Patina Guard. Patina Guard stops the ‘rusting’ process. So pauses the look at the stage when you apply it.
However, Patina Guard can’t currently be shipped abroad, so isn’t available to me in the UK. But you can use both Gator Hide or Clear Coat as other options.
Gator Hide is great protection for making outdoor fall decor. But you could also use these pumpkins for autumn home decor too.
The difference between bronze and copper is a white or green patina. But there are so many different colours and highlights. It’s a completely unique look.
For additional decoration, you could add gilding wax to highlight areas. Any bright, metallic paint would create more impact across the piece.

It’s an easy project and painting process. And a lot of fun to play around with to get the look that you like.
Aged patina faux finishes are not just for metallic objects. You could use it on different surfaces such as ceramic, wood, resin or foam pumpkins.
The different ways to make a quirky craft project with this type of paint are endless. And the best part is that the finished product will always look different.
Dixie Belle also has an Iron patina paint. And blue and yellow patina sprays. Which adds even more options to creating a faux patina look. You can mix and match the paint colours and patina sprays for a one-of-a-kind result and original fall décor.
One of the best ways to give your autumn decor new life is with an old rustic finish!
My Favourite Supplies
Here are some of the supplies that I used when making this project!

faux plastic pumpkins
Either for a pop of colour as they are or to add some fun paint to.
patina paint
Metallic paint for a bronze, copper or iron finish.
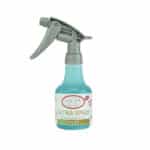
Patina spray
Easily create a weathered, rusted look on any material.
If you loved this project, you’ll love these projects too:
Did you make patina paint pumpkins?
I love seeing what you do. Please mention @teaandforgetmenots and share your creations with me!
How to Make Faux Patina Pumpkins Instruction Video
You can find more video tutorials on my Youtube Channel
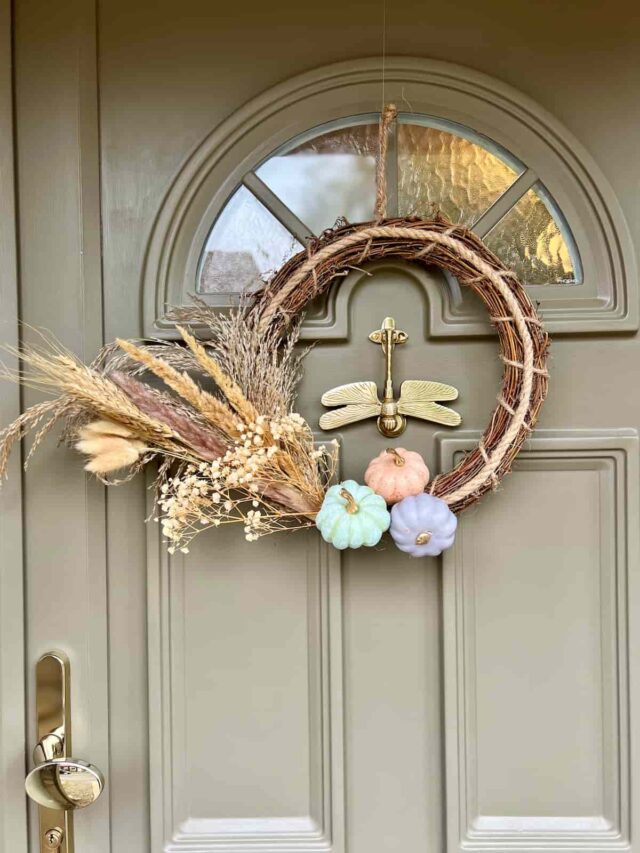
Pin it for later – Best Paint to Paint Pumpkins for Faux Patina Look

Hi there! I'm Rachel Bowyer, a passionate DIY enthusiast with a knack for transforming the old into something beautifully new. With a deep love for furniture painting, refinishing, and the art of crafting. I've been documenting my DIY projects and restoration journey since 2018. I specialise in techniques like decoupage, stencilling, and decor transfers. Join me as we explore the world of creativity and home improvement, one project at a time.