How to Make a Flower Wreath DIY For Less Than £5
A flower wreath DIY is a pretty way to decorate your front door. This simple-to-make wreath will welcome both autumn and guests to your home.
The first step to making perfect flower wreaths is by looking around you at nature. Whether that’s for design inspiration when using faux flowers or to decide which fresh flowers and filler flowers to use.
Here’s how to make a DIY flower wreath for less than £5/$5.
One of the best ways to save money, when making a DIY wreath is to use flowers and foliage that you find outside. These naturally won’t last as long as artificial flowers, however, they will look beautiful, fresh and vibrant.
Rather watch the video tutorial instead for step-by-step instructions? Here’s a video tutorial that guides you through the process of creating a flower wreath DIY project.
How to Make a Flower Wreath DIY Step by Step
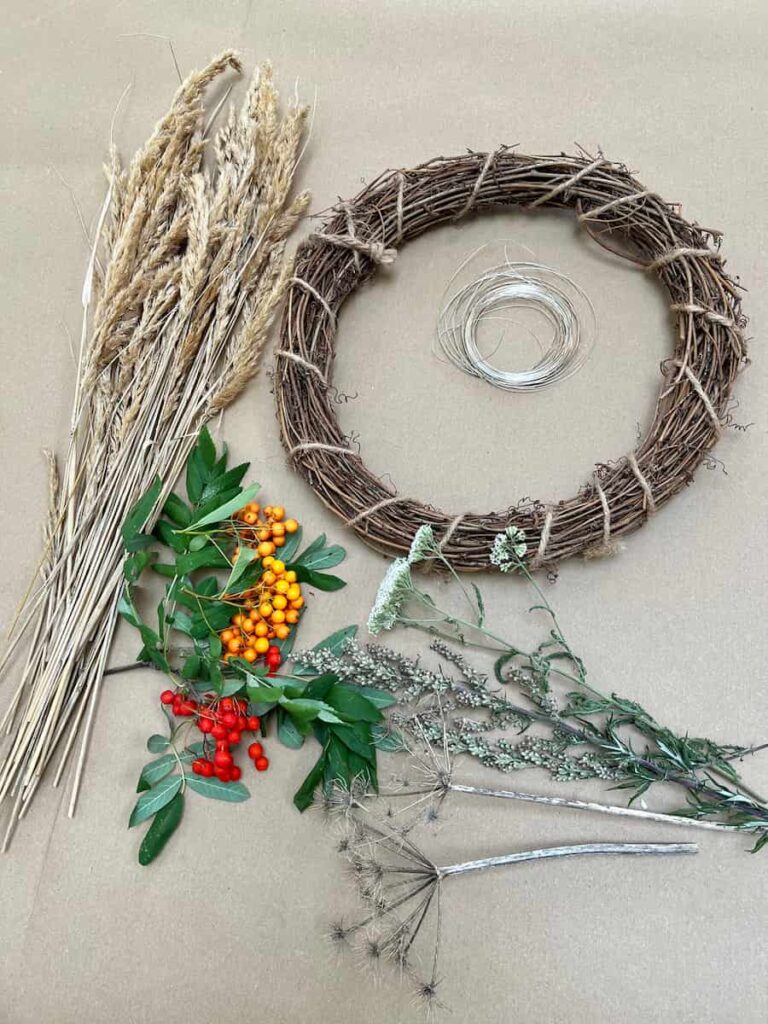
Materials Needed
Step by Step Instructions
Gather Your Materials for Floral Wreath DIY
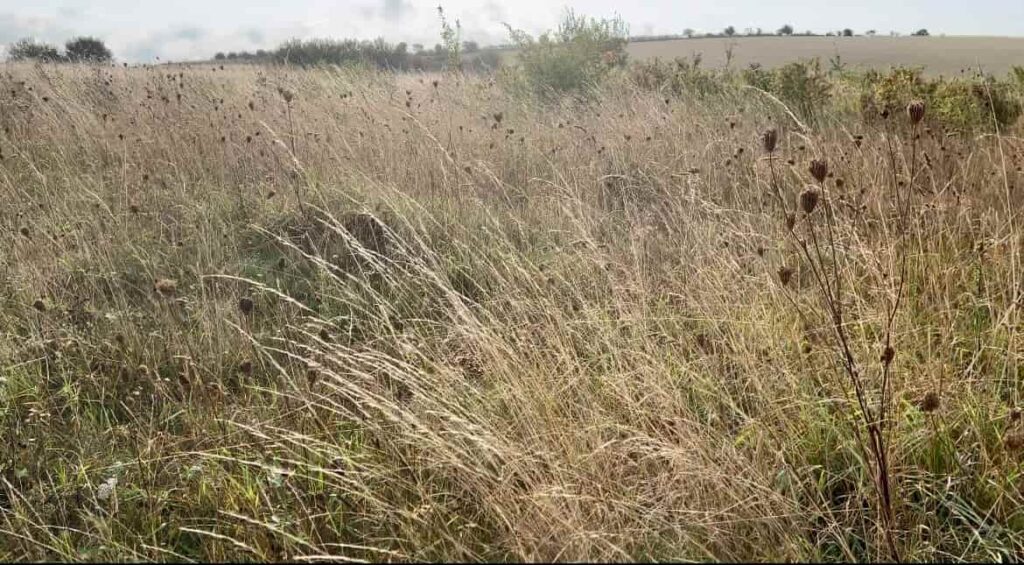
The first thing to do is find your flowers and natural items. For the foliage, I walked in my local countryside and chose a selection of grasses, flowering plants and berries. It’s a good idea to pick a little bit more than you think you will need, as you can always display any extras separately in a vase.
Of course, it’s important to check any flowers, berries or grasses that you use are safe. And especially be careful when pets or children may come into contact with them.
What Supplies Do You Need to Make a Flower Wreath?
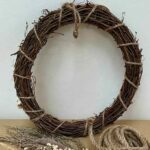
For the starting point, you need a wreath base on which to attach your flowers or foliage. I found this wicker wreath on sale in a shop for just £1.60/$2. It looks similar to grape vines, which is something you could make for yourself with wild grapevines.
The next thing you need is to attach your greenery and foliage to the base of the wreath. Putting the greenery on first covers the bulk of the wreath form without hiding any of the focal flowers that go on top.
A vine or wicker wreath ring creates a more natural look, if you don’t plan to have cover all of the wreath.
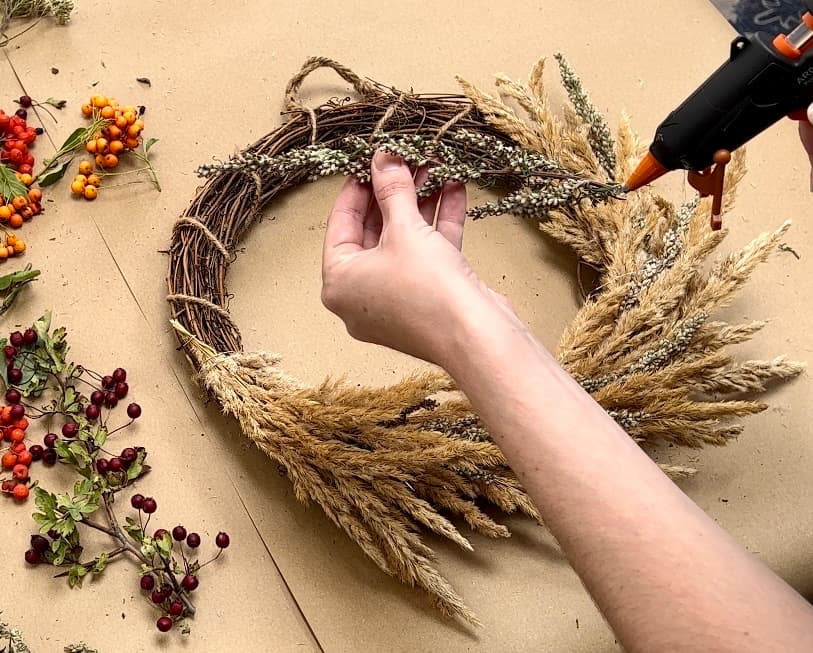
Attaching Grass to Wreath Base
As this is an autumn wreath, I used grass as the base. It has the same shape and colouring as wheat. Which feels particularly autumnal to me at the end of harvest time.
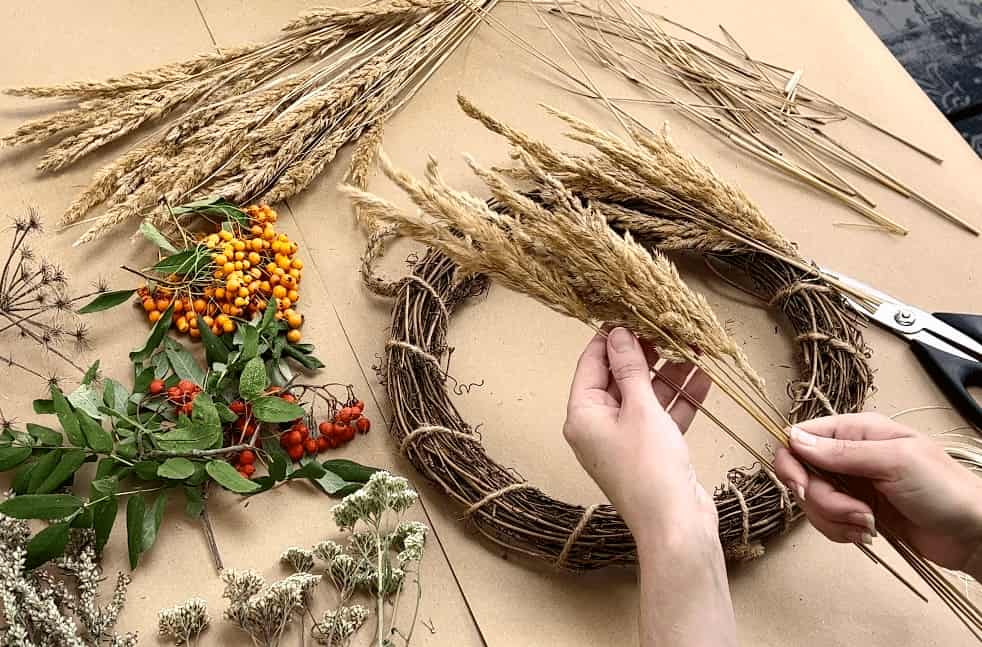
The first thing to do is make a bundle so that you don’t attach each flower or greenery individually. Each bundle will depend on the size of the clippings you have. But you might use about 10-15 pieces of grass for each of the small bundles.
It’s helpful to stagger the stems so that the tips lay slightly below each other.
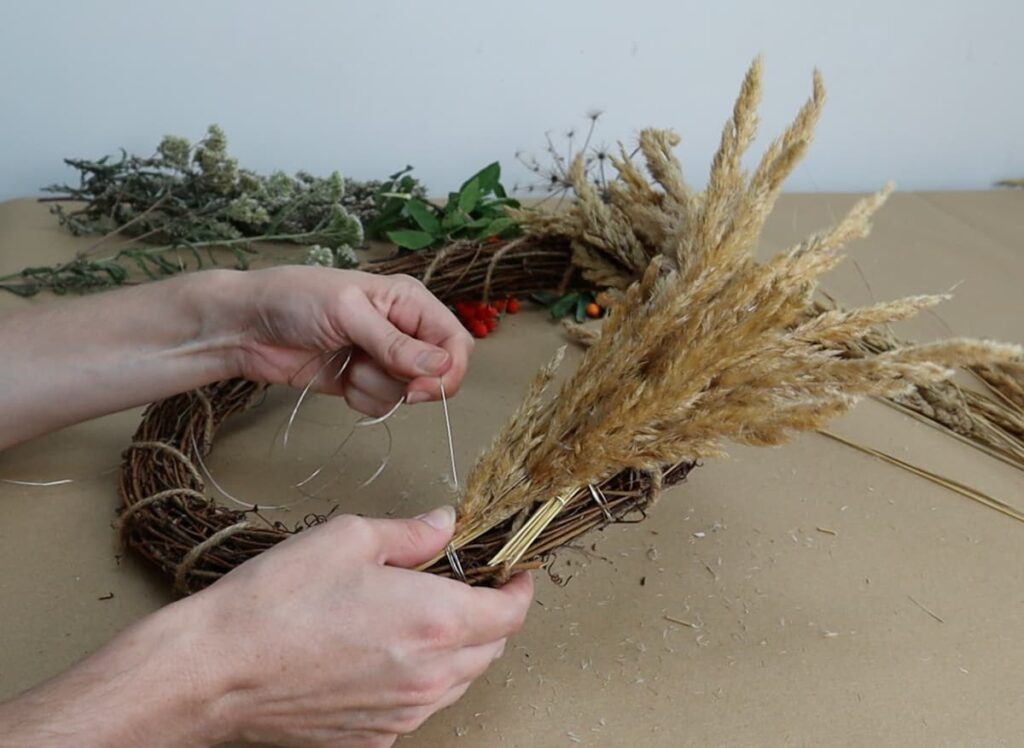
Best Way to Secure Grass to Wreath
Firstly, you can use craft wire to secure the grass stem bundle. Floral wire is designed for this but I had craft wire in my jewellery-making supplies. Securing the stems together keeps them from moving or slipping when attached to the wreath form.
Finally, you secure the first bundle to the wreath.
I was able to cut the wire with scissors. However, you might need wire cutters if your piece of floral wire is thicker. It’s a good idea to use thicker wire for larger wreaths where you may need a bigger bundle for each section.
The next step is to position the bundles to flow around the shape of the wreath. They should overlap each other slightly. You should be able to hide the wire of the previous bundle and maintain the gentle curve around the basic wreath shape.
This might mean having more bundles than you expect. But there shouldn’t be any gaps between each section. Which will leave a full overall design.
You can play around with different looks for the floral arrangement before attaching anything. That’s one of the best things about making homemade wreaths. It’s a wonderful way to play with how it looks until you reach your desired size and design.
What Do You Use to Attach Flowers to a Wreath?
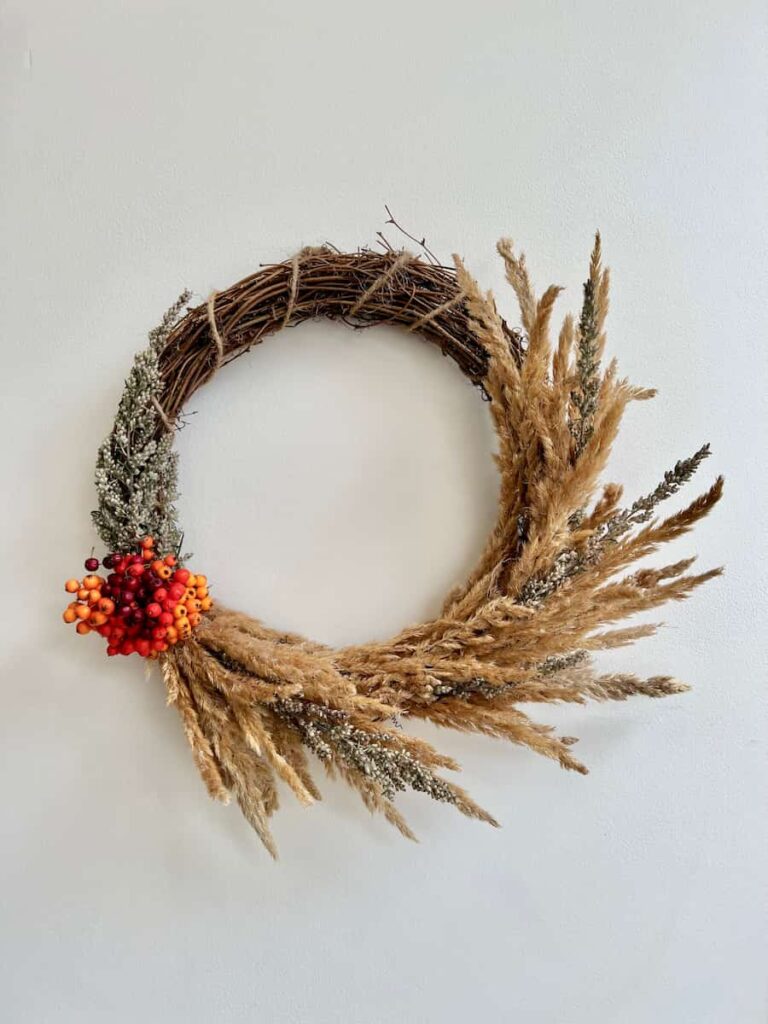
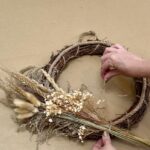
For the greenery placement on this wreath design, I only added grass to 2/3 of the wreath form. This left some of the natural wicker wreath exposed. Brown is an autumnal colour so fits nicely in the colour scheme for a floral autumnal wreath.
The next stage was to bulk out the base of the grass wreath. For this I used Mugwort. Mugwort is a flowering plant with a white and purple tinge to it.
It’s a good idea to test the placement of the biggest flower before securing it in place. Initially, I tested where to place each section, hidden within the grasses, to evenly place them around the wreath. The best way is to place the accent flowers first. Then add any smaller flowers around them to show them off the best.
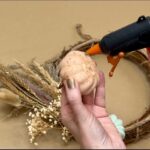
Once I was happy with the placement, I used a cordless glue gun to secure each piece of Mugwort. Layers are one of the best ways to create a full and impressive wreath display.
Side note, a cordless glue gun is one of my favourite budget tools for crafting. I didn’t realise how inconvenient having a short wire was until I got a cordless one. It’s such an easy way to craft without needing to be near a plug socket.
How to Cover the Wire on a Wreath
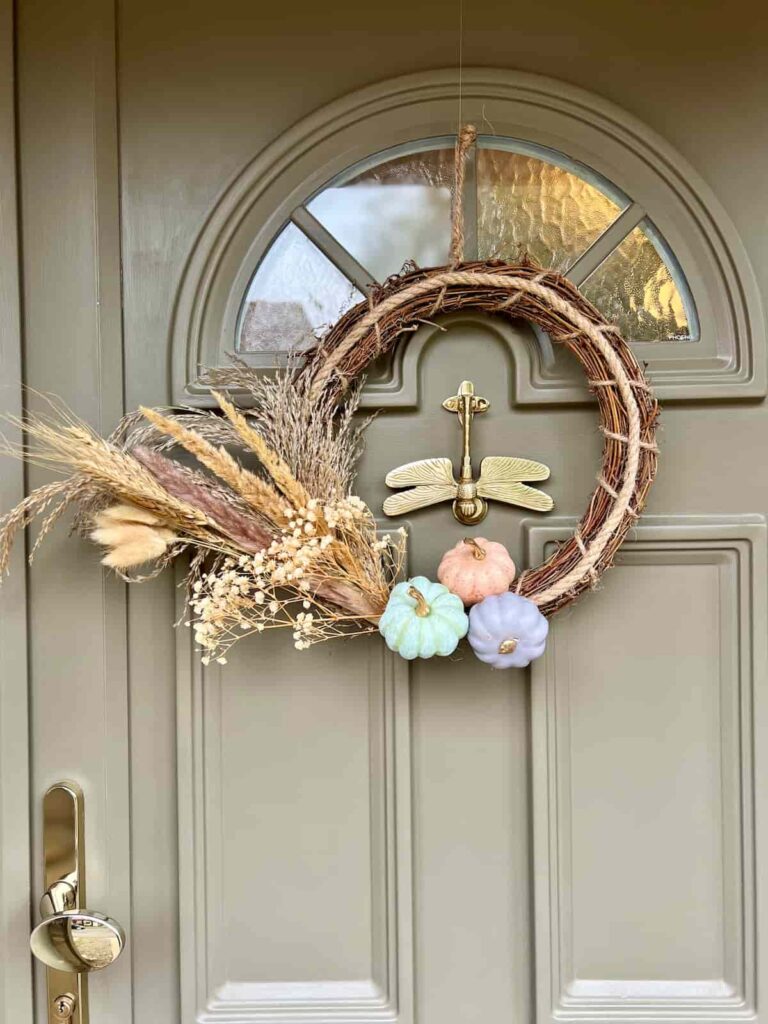
When not covering the entire base with greenery or grass you will be left with one section of exposed wire at the end. For this DIY project, I used berries as the focal point. Both to cover the wire and add a seasonal pop of colour.
But berries won’t stay fresh throughout the autumn months. So, it’s important to be able to easily remove them so that the beautiful wreath stays looking healthy.
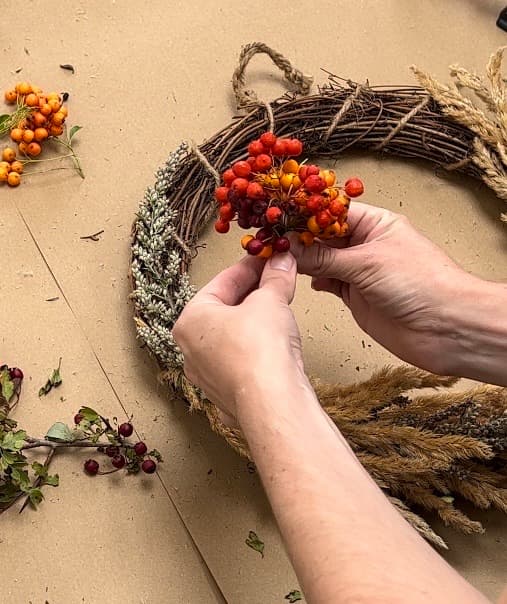
I chose a selection of orange and red berries. Then made a bundle of them and secured it with wire. And finally, attached this wire to the wreath base.
This is the easiest way to be able to detach them so that you can replace them with fresh berries later on. The next time you swap them, it could be with more berries or with something more permanent like a ribbon or pine cones.
Once the simple DIY wreath was the right size and design, I added additional grass to areas where wires were still visible. This is easiest with a hot glue gun.
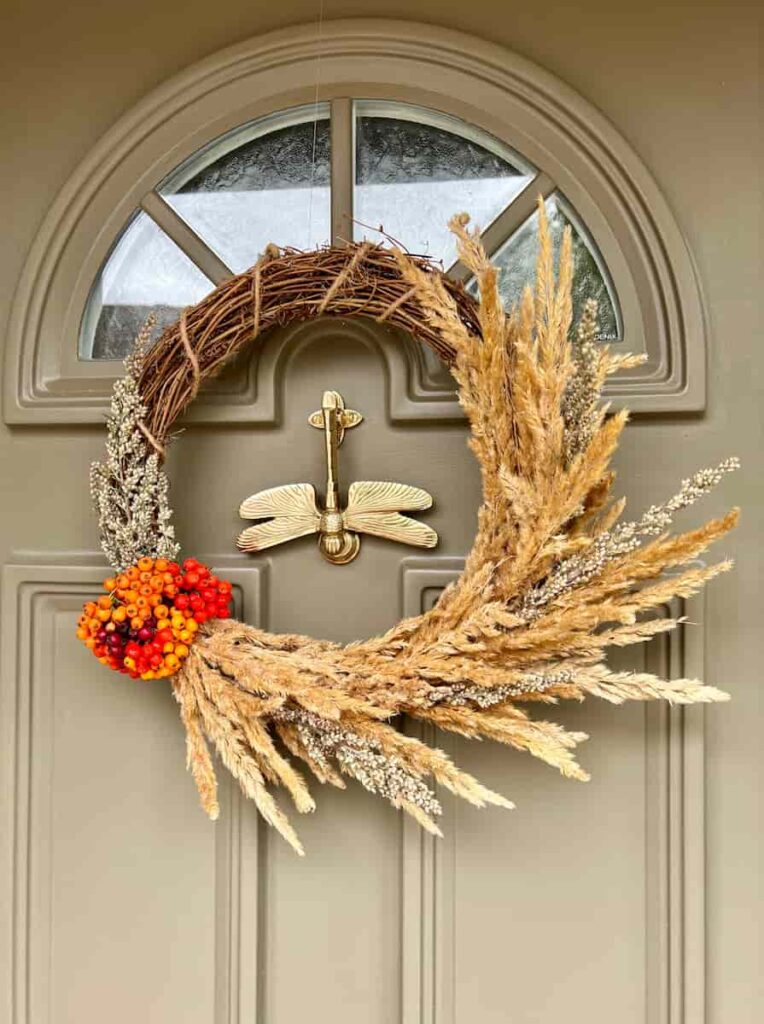
How to Attach a Wreath to a Front Door
The final thing is to attach the entire wreath to the front door. You can use the same craft wire for this. Firstly wrap it around the top of the wreath and knot it. Then take it up and over the front door. Finally, secure it on the back of the door.
For larger wreaths, you could also use a command hook or suction cups.
Alternative Ways to Make Floral Wreaths
- If you want the different flowers to last for a long time, you can add floral tubes with water for each of the flower stems to sit in. Or a better way is to use a floral foam wreath and keep it wet with water. Both are wonderful ways to keep a fresh floral wreath looking healthy for longer.
- Alternatively, another option is to make a dried flower wreath. Dried flowers are a good compromise between using real flowers and having the floral wreath last longer.
- If you only want to make your wreath once, you can use faux florals or even paper flowers for a different look. This means you can reuse your front door wreath next year.
It only takes a couple of hours to make a fresh flower wreath.
It’s such a lovely way to add natural elements to your home decor. And the best part is that the majority of the flowers and grass were attached with wire. So, the base is easy to reuse for another fall wreath or DIY spring wreath.
It’s so much fun and an affordable way to create seasonal decor for your home.
How to Make an Autumn Flower Wreath DIY Instruction Video
You can find more video tutorials on our Youtube Channel
My Favourite Supplies
Here are some of the supplies that I used when making this project!
Wreath Form
A great rustic wreath form to build on.
Wreath wire
A multi-purpose wire for crafting.
cordless glue gun
A cordless glue gun is such a convenient tool to craft with
If you loved this project, you’ll love these projects too:
have you made a wreath?
I love seeing what you do. Please mention @teaandforgetmenots and share your creations with me!
Pin it for later – Autumn Flower Wreath DIY


Hi there! I'm Rachel Bowyer, a passionate DIY enthusiast with a knack for transforming the old into something beautifully new. With a deep love for furniture painting, refinishing, and the art of crafting. I've been documenting my DIY projects and restoration journey since 2018. I specialise in techniques like decoupage, stencilling, and decor transfers. Join me as we explore the world of creativity and home improvement, one project at a time.