Adorable DIY Nursery Bookshelf With Woodland Design
Want to makeover a DIY nursery bookshelf suitable for a children’s room? Here’s how to upgrade an old bookshelf into an adorable woodland-themed piece of furniture.
These shelves were free from Freecycle. But you can get similar basic shelves for a great price. Then for a little extra cost turn them into something magical to hold baby books for your kid’s room.
Thank you to Dixie Belle for sponsoring this post.
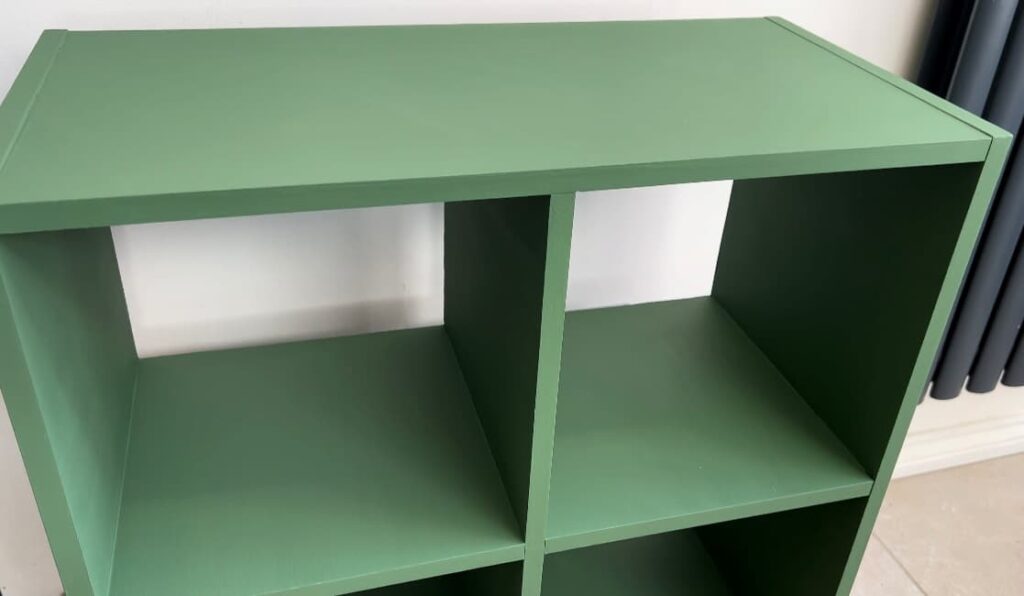
This is a good bookshelf and the perfect size for a small space. They don’t take up much space and are a simple design to decorate.
How to Make a DIY Nursery Bookshelf Step by Step
Materials Needed
Step by Step Instructions
How to Prep Before Painting a Wooden Bookshelf
For even the best bookshelves, the first thing to do is a little bit of cleaning before starting any painting project. It’s the difference between the paint lasting well and it not.
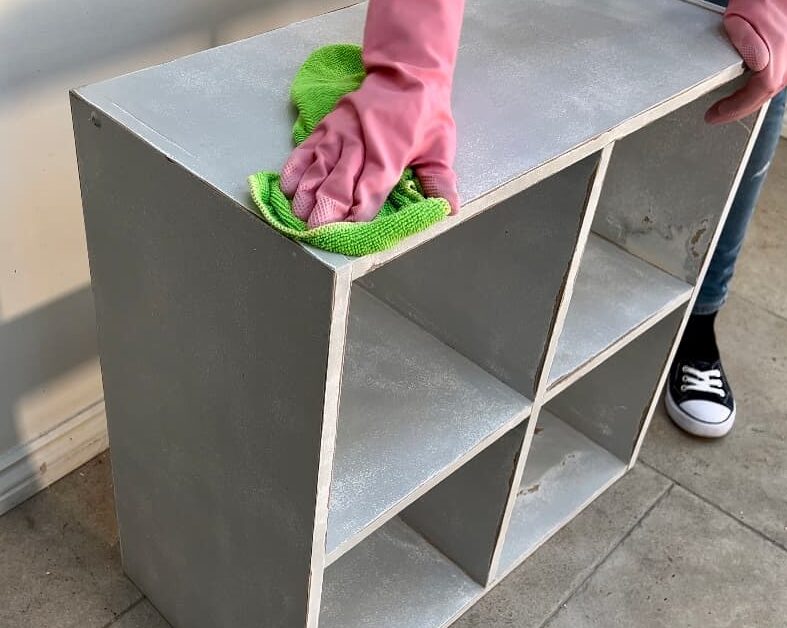
I typically clean with a TSP-based cleaner called White Lightning. Then remove the cleaner with fresh water.
Choosing Child-Friendly Paint
When choosing paint for a set of nursery bookshelves, the paint must be child-friendly. This means having low or no VOCs (Volatile Organic Compounds) in the paint.
A lot of modern paint is low-VOC. Which makes it a safer and more environmentally-friendly choice for indoor painting projects. But you should check the packaging first to be sure.
Chalk paint is a good choice for a baby’s nursery as it is durable and easy to clean. One thing’s for sure, if it’s somewhere where children will play, the paint needs to be hardwearing.
Some brands state that you don’t need to sand or prime before painting. Or seal the paint once it’s dry. Chalk paint is pretty handy for taking some tasks off the to-do list.
However, I do those steps anyway to guarantee the best results.
But if you want a paint with less work then chalk paint is a good choice. Then the only reason to repaint your little reading nook a second time is because you want to, not because you have to.
Selecting the Perfect Paint Colour
The first thing to think about is what paint goes with the nursery already. That’s taking into account wall colours, your children’s preferences, and any extra decorative elements you want to add.
Choosing the right paint colour for a nursery theme doesn’t have to be complicated. And if it’s only one colour, then it makes for an easy DIY project.
Here’s a guide on how to choose paint colours.
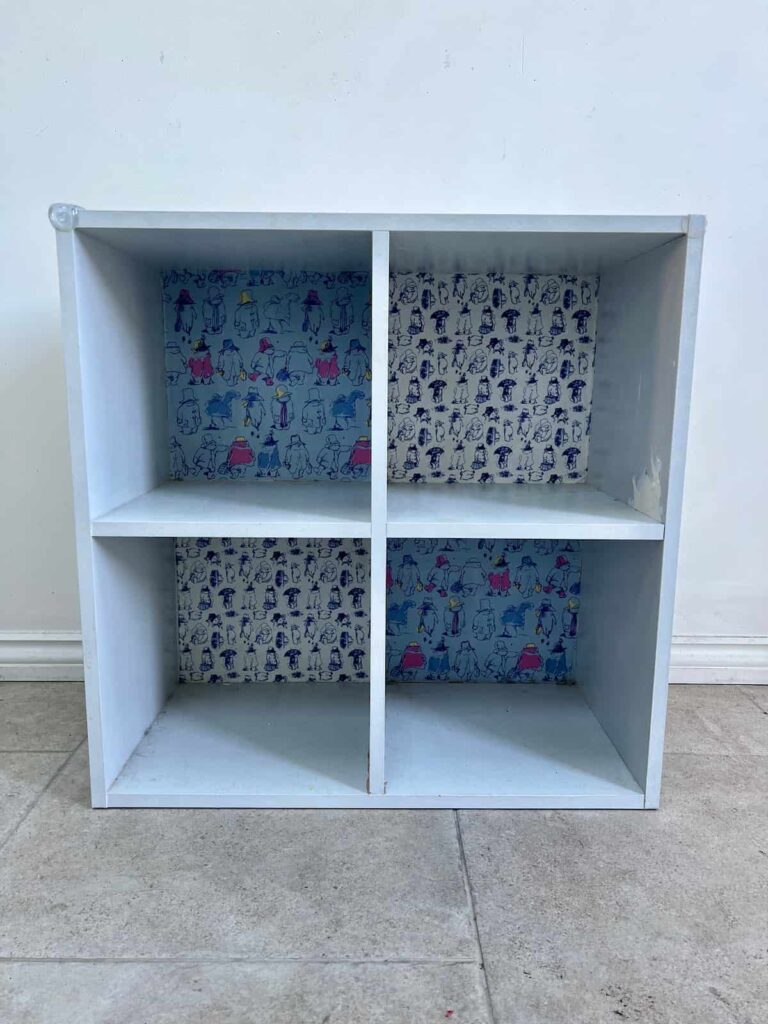
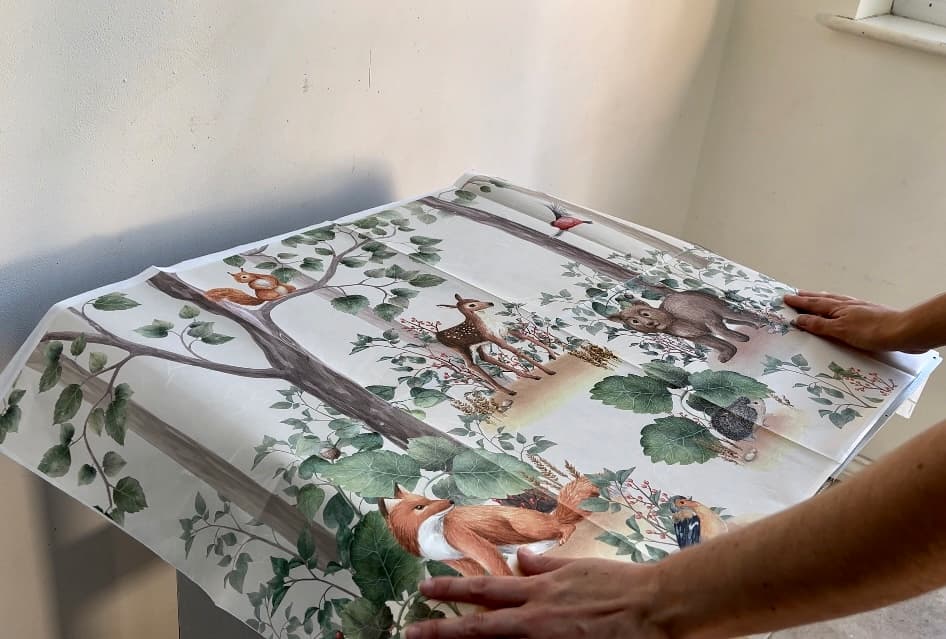
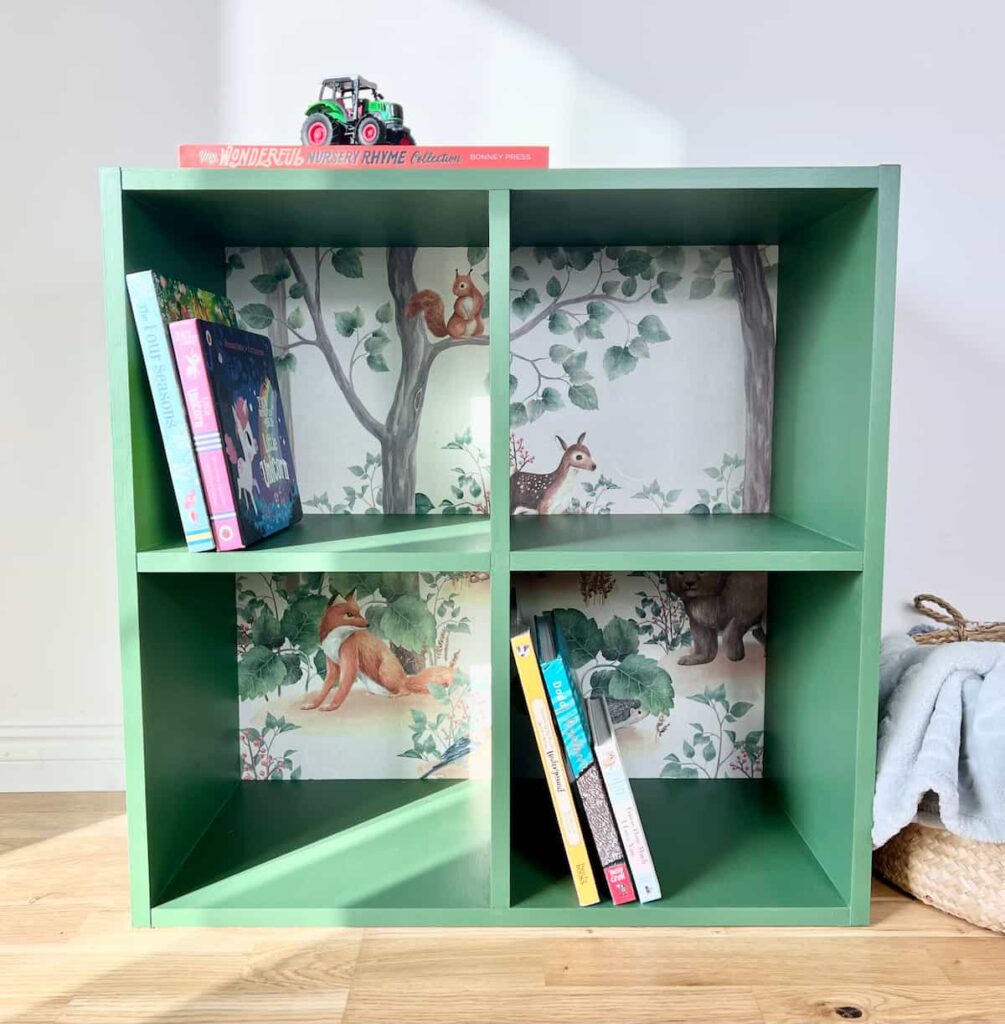
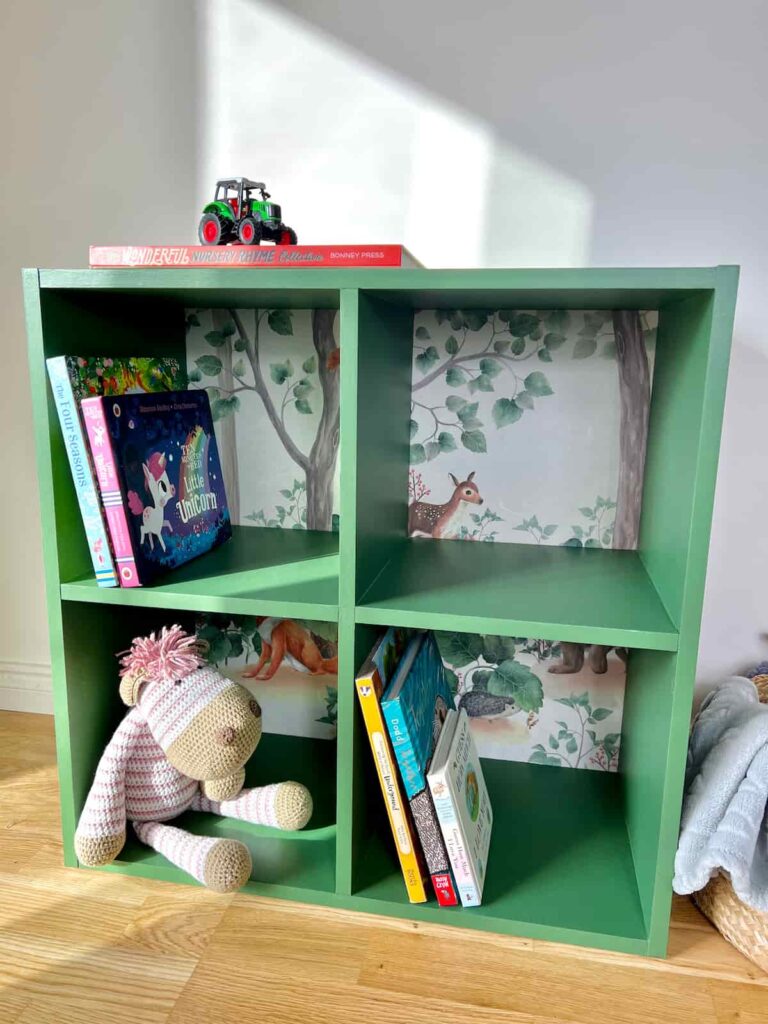
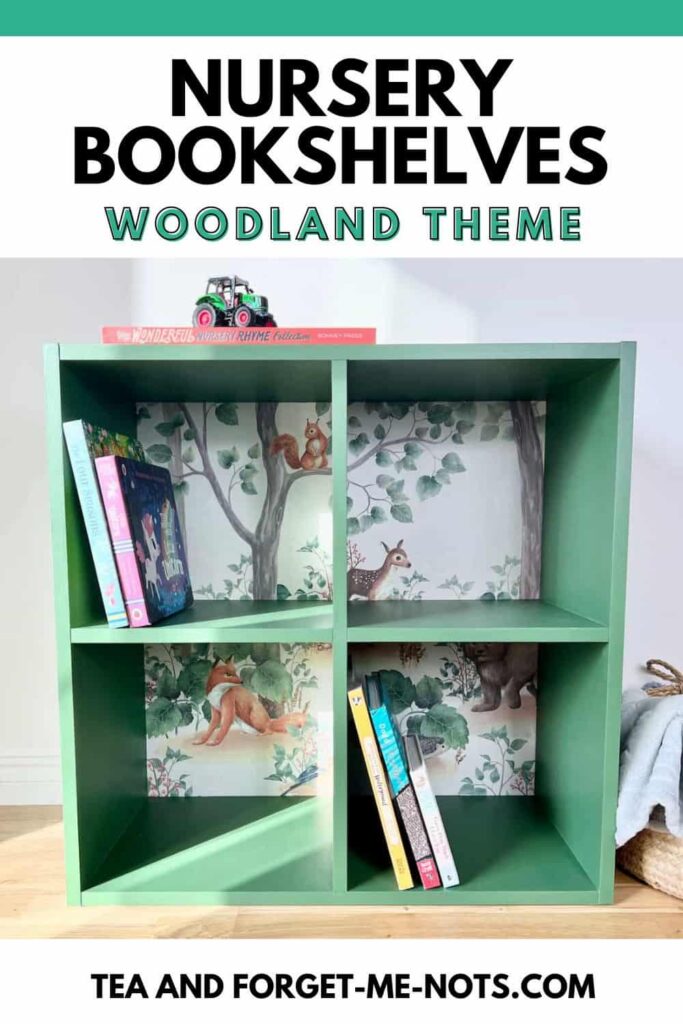
Choosing the paint colour for these small nursery shelves was easy. I had a muse piece of woodland animal decoupage paper. So, you look for what colours are within the images and find a matching or complementary paint.
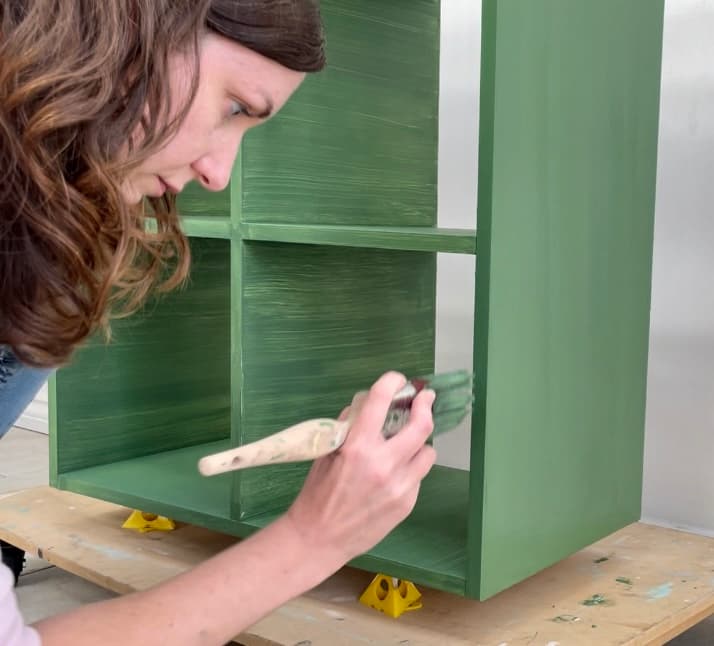
I chose a colour released in 2023 called English Ivy. Which is a muted green paint with grey undertones. It pairs well with the leaves of the woodland nursery paper and gives a lovely, nature-inspired feel.
It’s also a neutral choice. It isn’t geared towards any gender and isn’t childish, so can grow with the child.
Tips to Get a Smooth Finish on Painted Nursery DIY Bookshelves
Chalk paint can be thick so a little goes a long way. You can thin it out with water to make it easier to work with.
If you decant some of the paint into another pot, you can stir a little bit of water into it.
It’s also helps to mist the brush with water when painting with chalk paint. This moves the thicker paint around the surface for a smooth application.
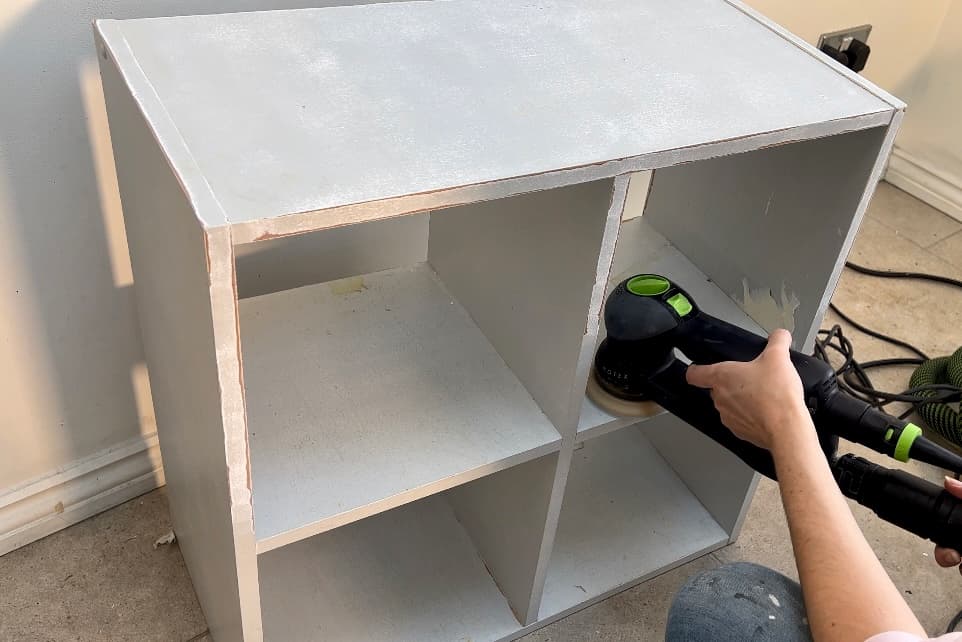
Before the second layer of paint, you can do a light sand over the first coat. Gently rub 180 grit (or higher) sandpaper over the paint to remove brush strokes or paint nibs.
Then clean off the sanding dust with a damp cloth. The next coat of paint will be applied on top of a nice smooth surface for the best finish.
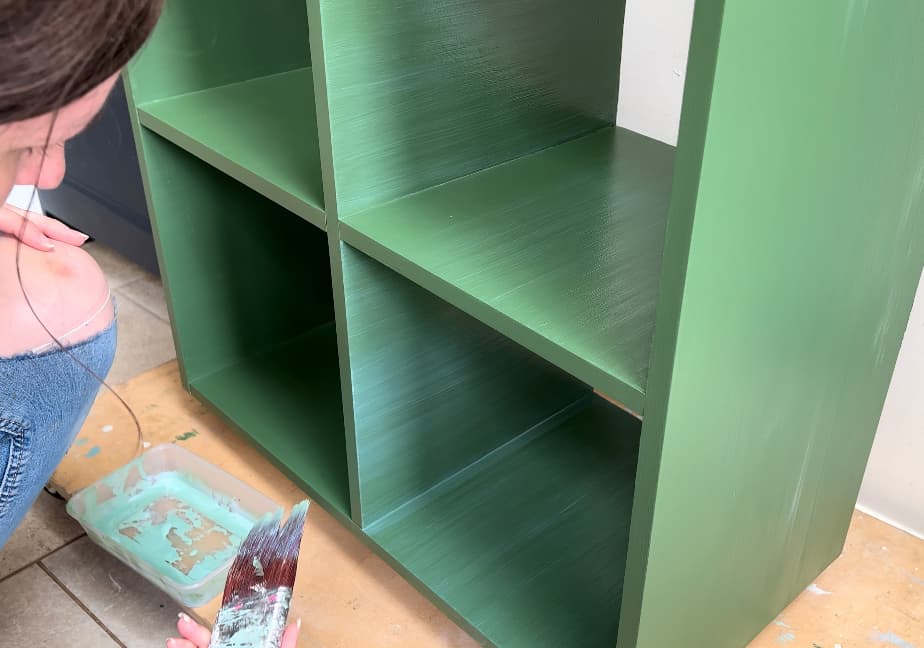
With small shelves, it can be difficult to see the top of the bottom shelf as it’s so close to the floor. A better way to get a well-painted top of each cube is to turn the entire bookshelf upside down.
Then you can easily see where you’re painting to make sure you get a smooth finish. If you place a towel on the floor, then the newly painted (but dry) top shelf shouldn’t get scratched.
Maintaining the Fresh Look Over Time
Sealing chalk paint is a great way to ensure that the bookshelf paint will last for a good amount of time. As with the chalk paint, you also want a low-VOC sealer for children’s furniture.
Doing two or three thin coats of sealer will give you the best chance of having a durable finish.
For most projects, I use a low-VOC clear coat with a satin finish. Satin is the middle ground for both sheen and durability. Gloss is the hardest-wearing and the most shiny. Matte is the least durable and will leave no shine.
Want the durability of a gloss sealer but without the finish? You can do 1-2 coats of a gloss sealer and a final coat of matte sealer. That will give you the durability of the gloss but with the look of the matte.
Designing a Whimsical Theme
This woodland nursery decoupage paper is the perfect way to add a whimsical design to nursery furniture or a kid’s room. The cute animals and natural elements feel cosy and comforting.
The green paint, English Ivy, really shows off the beautiful features of the paper. You could also pair this paper with a creamy white for a more understated look. Thinking of creative ways to make this bookshelf come together is half the fun of designing it.
The theme and colours are also gender-neutral. This is a great idea as the bookshelf can be used for multiple children or passed on to other families.
How To Add Decoupage to a DIY Nursery Bookshelf
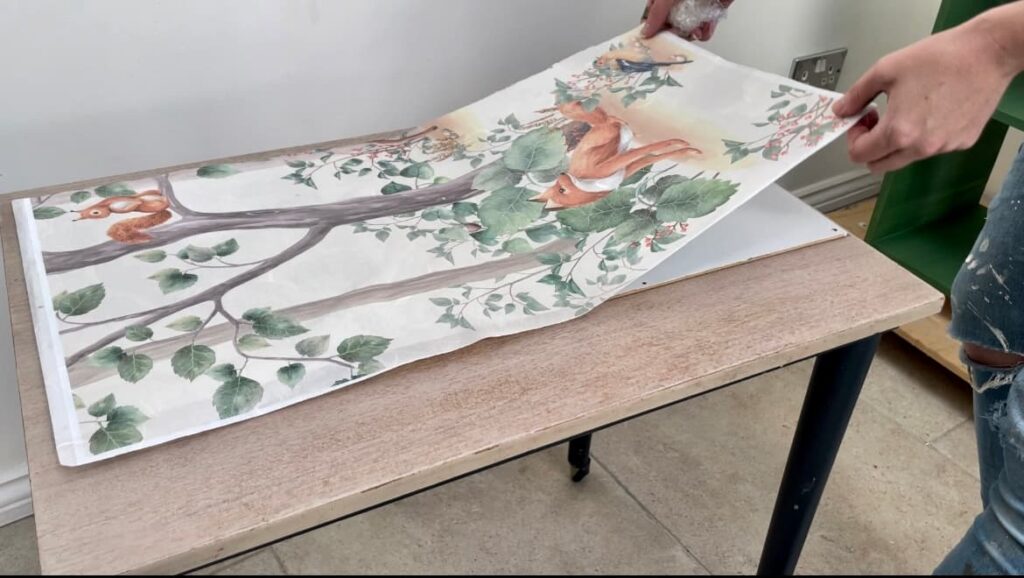
It’s easy to add decoupage paper to the backing of a bookshelf. If your bookshelf has a backboard, it’s helpful to remove it first before applying the paper. This gives easy access to apply the decoupage paper to a flat surface.
This set of shelves came with a backboard in two pieces. To remove the backboard, just prise up the nails with a hammer.
Have the popular IKEA Kallax unit with open shelves? You can do a simple IKEA hack and add some backboard to create the same look.
As this unit had glued fabric from a previous makeover, I turned the backboard over to use the flat side. This avoids having to sand the board perfectly flat before applying the decoupage paper. You don’t want to apply paper over an uneven surface as the lumps will show.
These are the following steps for applying rice decoupage paper for a great result:
- Check you have a flat and clean surface
- Lightly spritz the paper with water to get it damp, not fully wet
- Apply a layer of clear coat to the surface
- Lay the paper in place, you have time to readjust it if it’s not straight
- Take balled-up plastic wrap to push wrinkles to the sides of the paper
- Use 180 grit sandpaper to trim the paper at the edges
- Leave to dry
- Add a clear coat to seal the paper for extra protection
You can reattach the backboard once it dries, either with a nail gun or staples.
Safety Measures for DIY Kids Bookshelf
It’s a good idea to leave this type of bookshelf without legs for a nursery or children’s bedroom. A wide base that sits on the floor, with no legs, is less likely to fall over.
Additionally, you can secure the back of the bookshelf to the wall for extra confidence that it won’t tip.
You can always add legs to the bookshelf for a different look when the children are old enough to not climb it.
DIY Nursery Bookshelves
These nursery shelves are the cutest thing for a collection of books in a baby’s room. The whimsical paper adds so much character to the original classic look bookshelf. If your child is still little, you can use the space for plush toys and toy storage.
Matching the colour of the paper and the paint is the best way to create a cohesive look.
It’s the perfect addition for different uses such as storing children’s books in a child’s room or nursery.
For more DIY bookshelf ideas, check out these 5 unique ways to paint a bookshelf.
Or for different types of shelves, check out this book storage made from wooden crates.
How to Make a DIY Nursery Bookshelf Instruction Video
You can find more video tutorials on my Youtube Channel
If you loved this project, you’ll love these projects too:
have you painted your own diy nursery bookshelf?
I love seeing what you do. Please mention @teaandforgetmenots and share your creations with me!
Pin It For Later – DIY Nursery Bookshelf

Hi there! I'm Rachel Bowyer, a passionate DIY enthusiast with a knack for transforming the old into something beautifully new. With a deep love for furniture painting, refinishing, and the art of crafting. I've been documenting my DIY projects and restoration journey since 2018. I specialise in techniques like decoupage, stencilling, and decor transfers. Join me as we explore the world of creativity and home improvement, one project at a time.