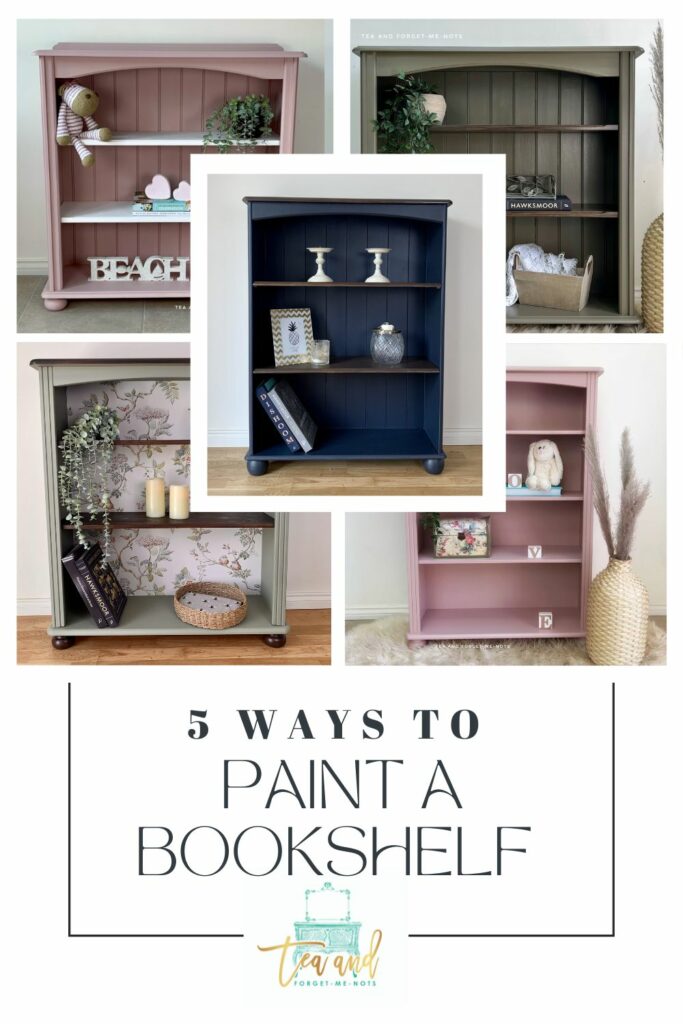
5 Unique Ways to Paint a Bookshelf
Have a bookshelf and want to see how it will look in different styles? Here’s some inspiration for 5 unique ways to paint a bookshelf.
I love a good upcycled bookcase makeover. They’re often affordable to pick up, a simple shape to paint, and a useful piece of furniture.
All good reasons to give painting one a go.
So, here I have the same simple bookcase* with 5 unique ways to paint a bookshelf.
*Ok, almost the same. One of them has three shelves, but otherwise, they’re basically identical. Which is great for a style comparison.
5 Painted Bookcase Ideas
Number 1 – Decoupaged Bookshelves
Number 1 because this is one of my most-viewed blog posts ever. Something about this nature-inspired makeover of an outdated bookcase caught people’s eye.
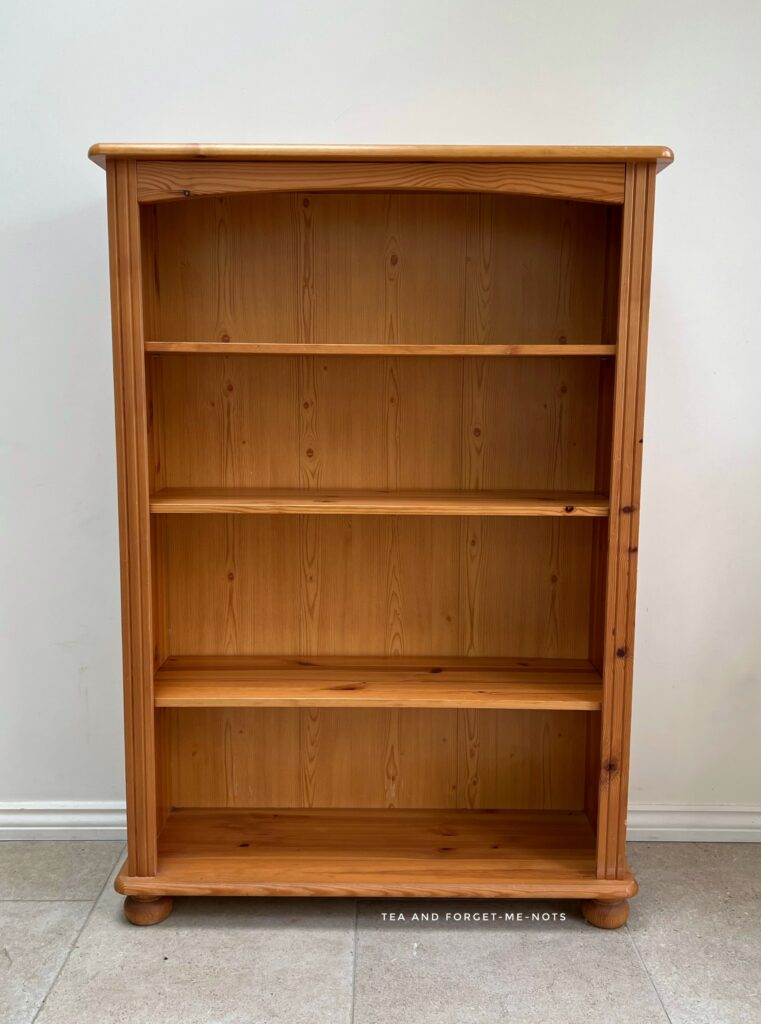
This piece was free and in reasonable condition.
As usual with real wood pine, it’s common to get dings and dents as it’s a soft wood. They sand out easily enough with a bit of time though.
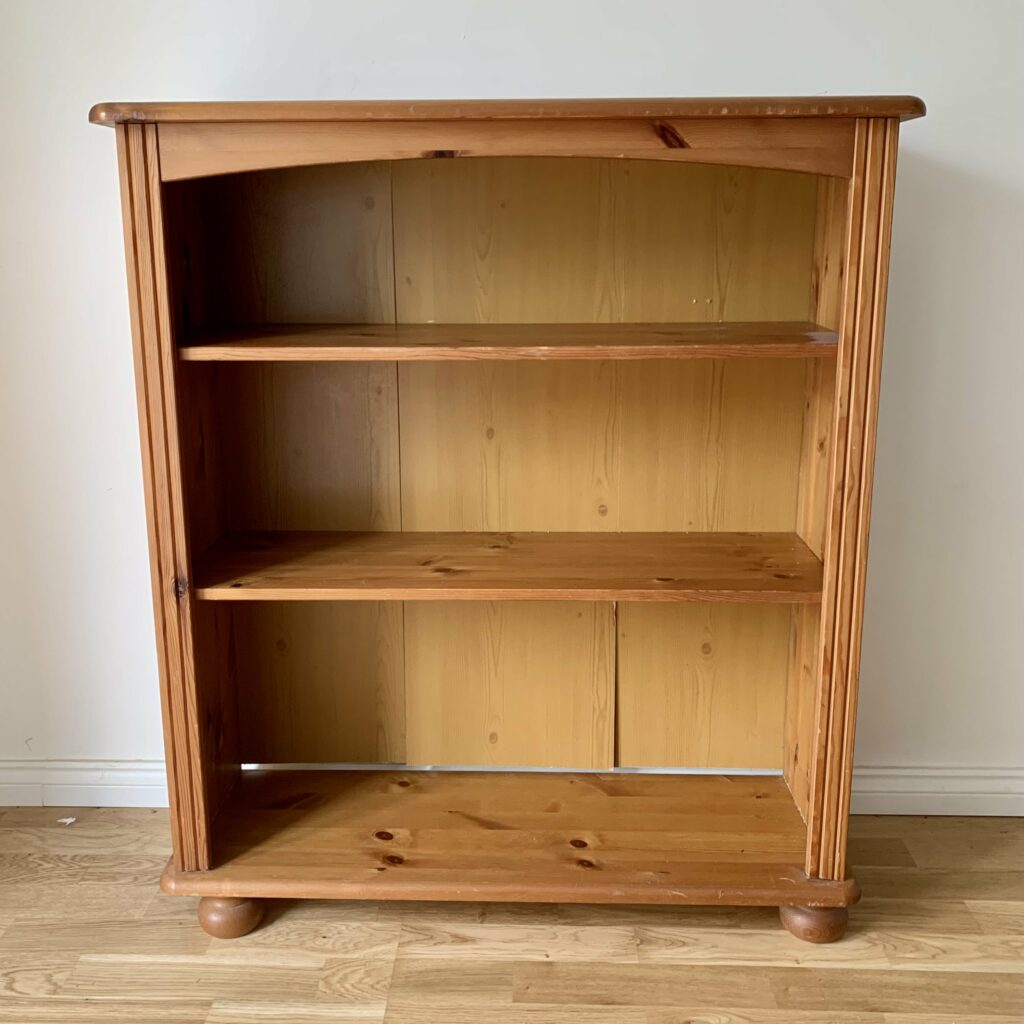
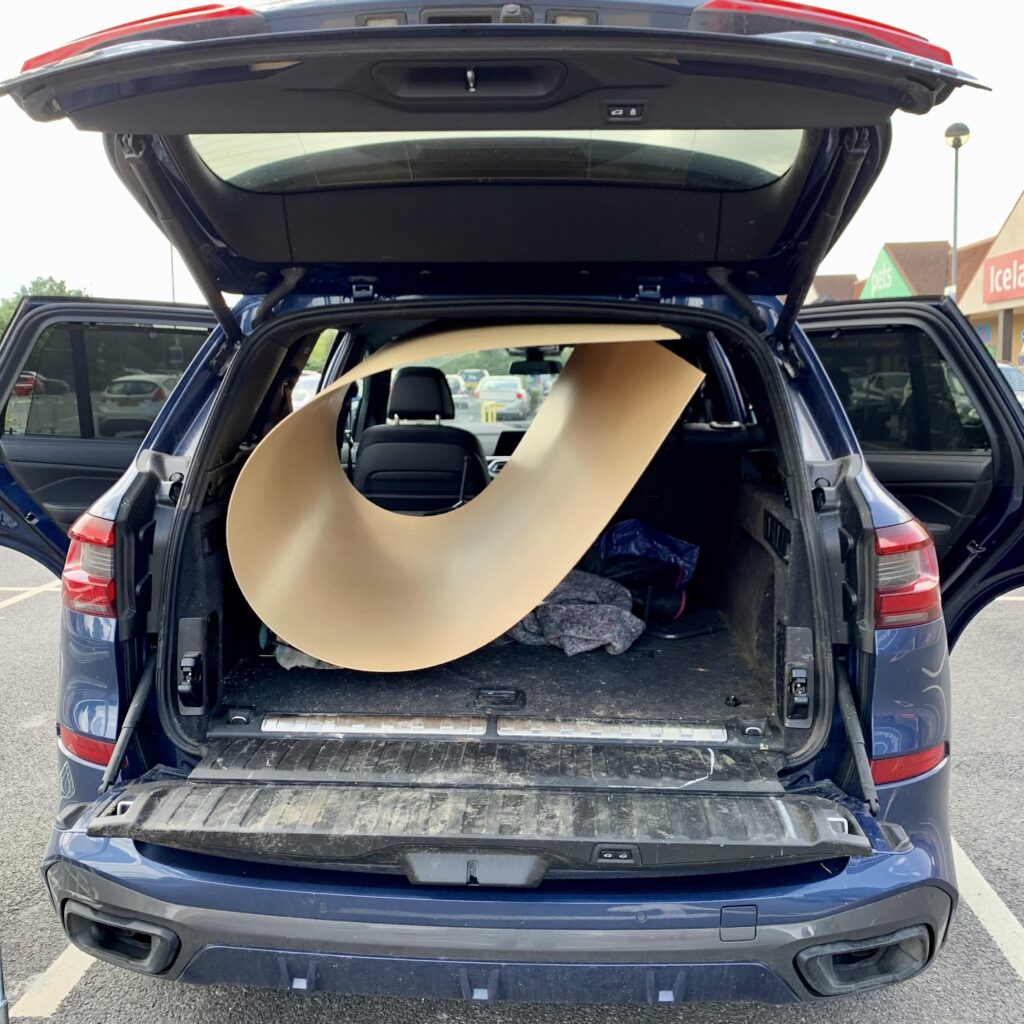
Strangely, the backboard didn’t fit. I guess it was replaced at some stage and they used what they had to hand. But it left a gap at the bottom.
Hence some yoga-like flexibility of the new back panel I picked up to replace it. It almost didn’t get in the car at all. I wasn’t expecting that!
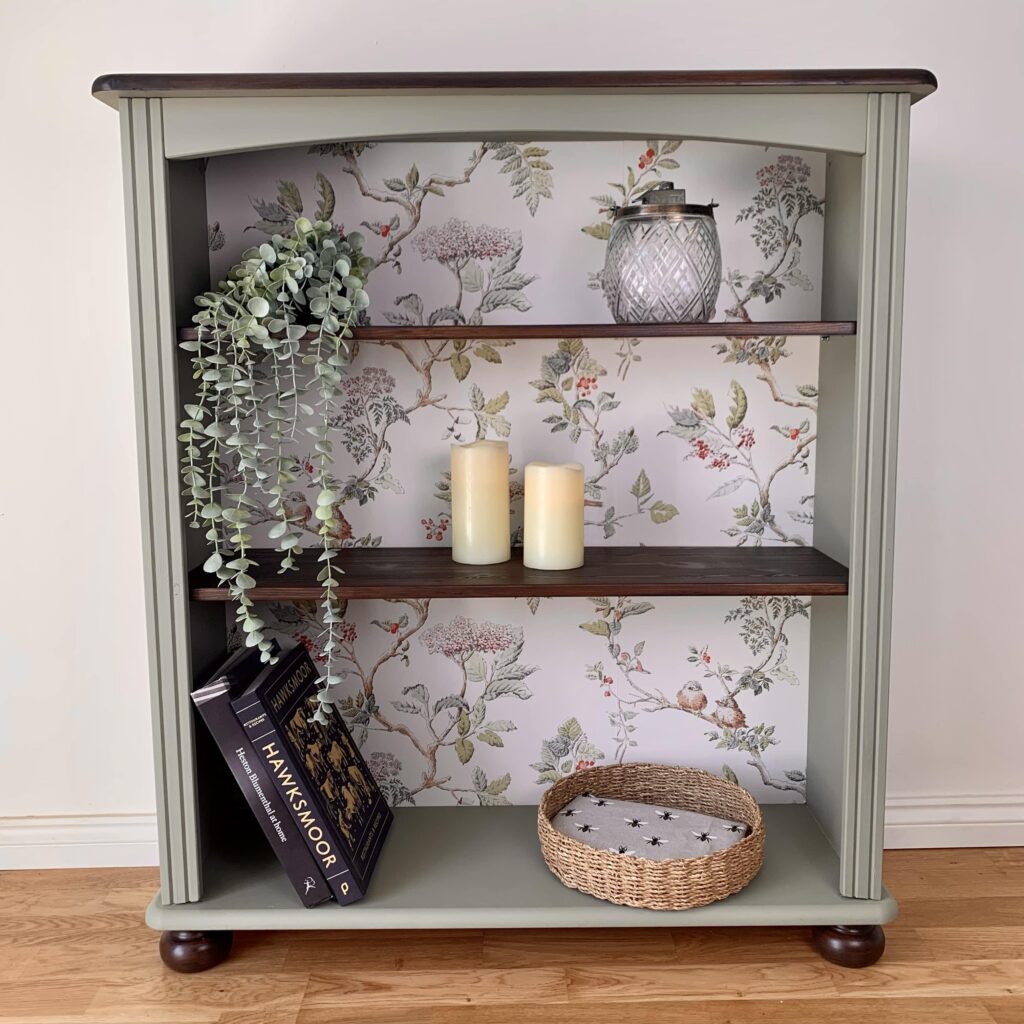
I gave the outer bookcase a fresh coat of paint in a lovely green called Lichen, by Fusion Mineral Paint.
For the next step, I decoupaged the new hardboard with wallpaper from Laura Ashley. The greens and browns in the design match so well with the colours of the bookshelf.
If you don’t have wallpaper, you can also decoupage with wrapping paper or contact paper.
For the shelves, I stained them in Cappuccino. Which really set off the wallpaper behind it.
This is also one of my fastest-ever selling pieces. That tends to happen when you love a piece, others who like your style, do too.
If you try this, be prepared for your new pretty wallpaper to get hidden by books and decorative pieces!
Here are the steps to creating this new bookshelf
Number 2 – Paint and Stain Bookshelf
This was another free piece. And probably the price of this cheap bookcase was deserved.
You can see in the post a close-up of the paint job. I suspect they were aiming for a distressed, rustic look. As long as they were happy with it, that’s the main thing.
It took a lot of time to get the thick paint on the entire piece sanded nice and smooth. But it made a huge difference once I got there.
This is when free isn’t always better. When the time you spend getting the piece ready might be more than the cost of buying an unpainted one.
It’s always a balance.
If you don’t want to spend the time and effort of sanding off old paint, applying wallpaper is a great solution.
My original plan was to decorate the back of the DIY bookshelf. Possibly with a gold or white mandala stencil.
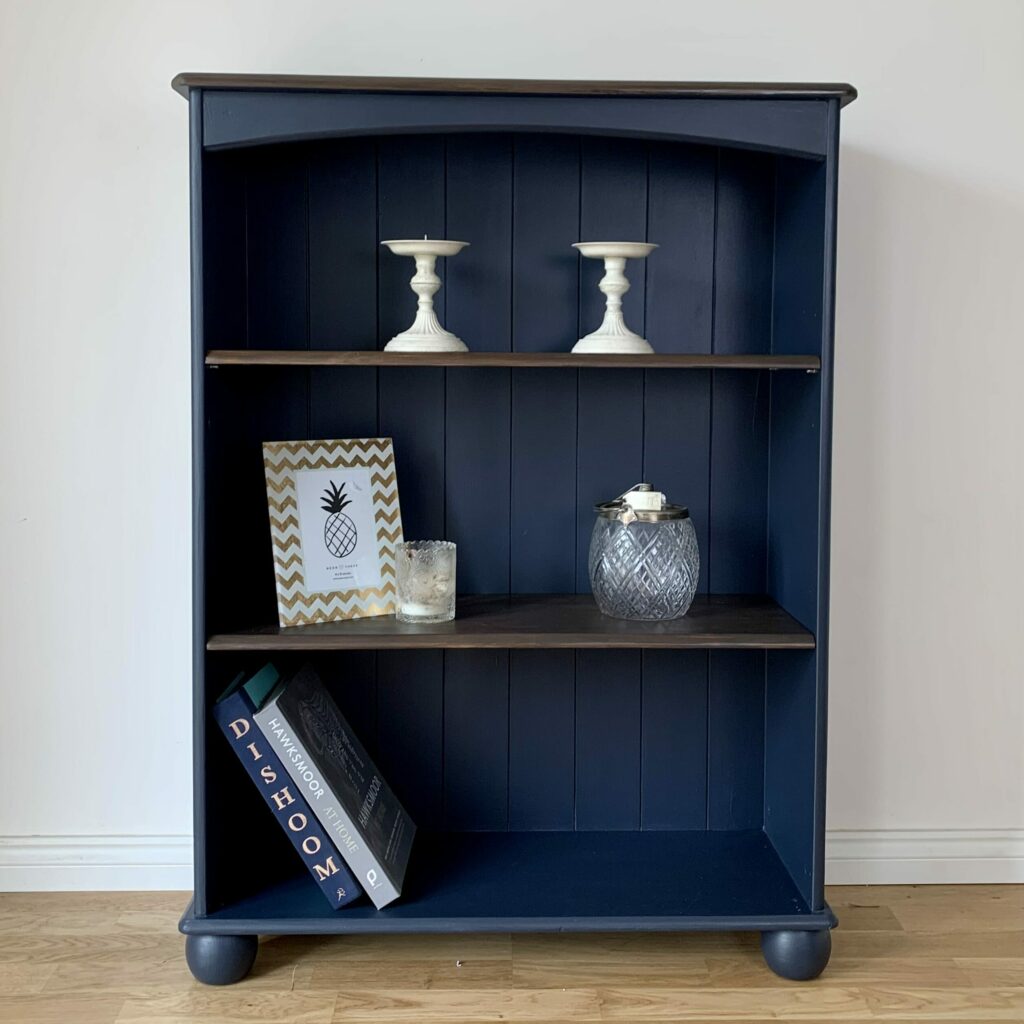
But my plan changed and I love the result.
This colour is Fusion Mineral Paint’s Midnight Blue. It’s such a popular colour at the moment.
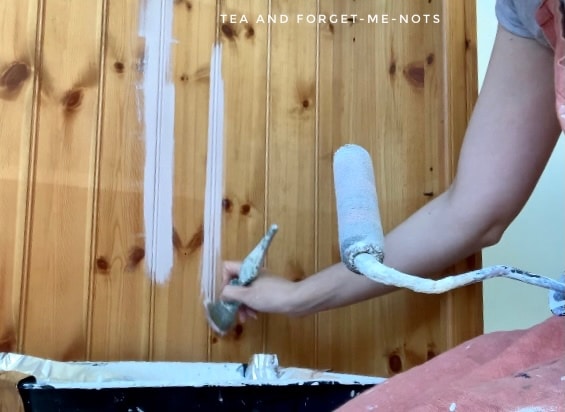
An easy way to get paint into the joins at the back of the shelves is to use a brush. Then use a roller to spread the paint further across the boards.
As it’s such a warm brown, I used Cappuccino Stain and Finishing Oil, for the top and shelves. It gives it a lovely, cohesive look.
These types of old bookshelves have lots of holes on the sides so you can adjust the height of the shelves.
If you know that you want them in a set place, you can use wood filler to hide them. This gives it a cleaner look but is less convenient as a storage space in the long run.
This also sold fast, which is a great bonus.
Find out about the finished product here.
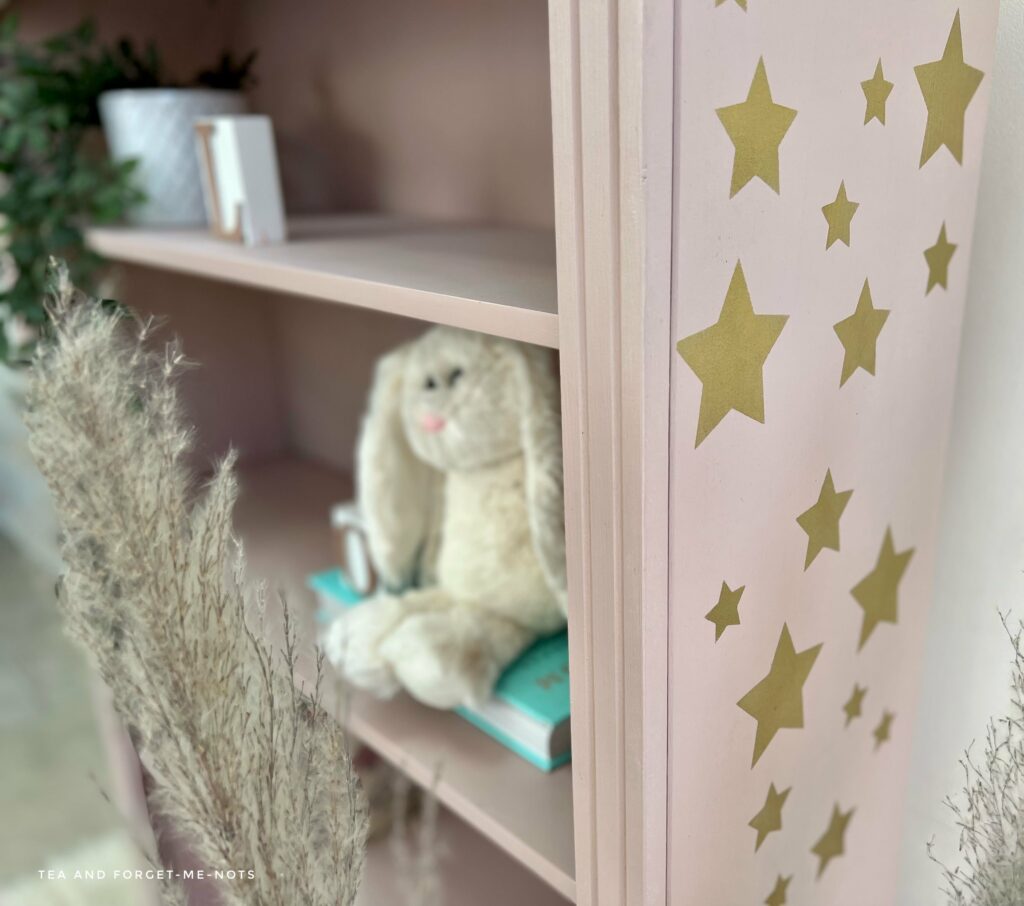
Number 3 – Stencilled Bookcase
This was a commission piece, so I can’t claim the credit for the design. This was the brainchild of my tween (10-year-old) customer.
The bookcase cost about £30 and was in great condition. Always a good start.
First things first, I had one requirement given to me by the tween’s parents, not to use any of my ”luminous pinks”. Funnily enough, my bright pinks usually sell quickly, but I accepted the restriction.
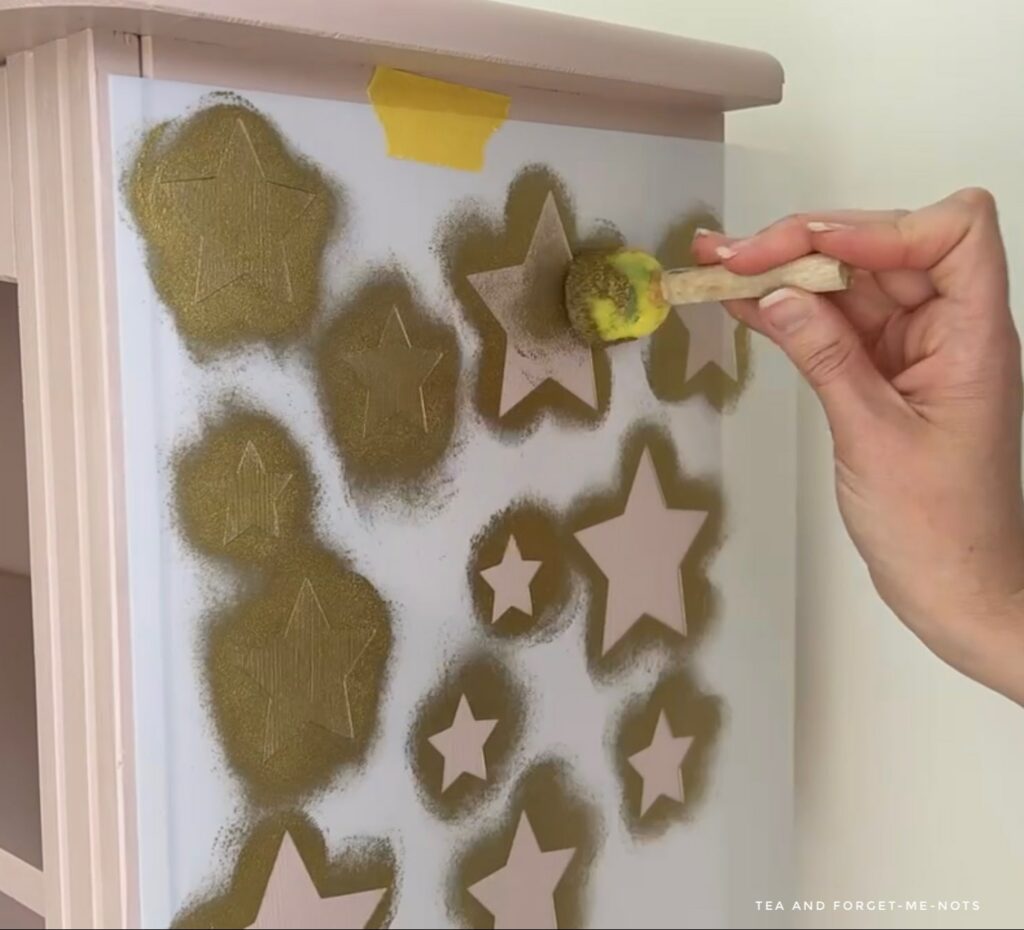
My customer chose the lovely, muted pink chalk paint, Tea Rose.
Then for the glam part, they asked for 50 stars across the top and cascading down the sides of the bookcase.
It ended up being closer to 20 or 30 gold stars. Often a bit of empty space enhances a stencil rather than looking too fussy.
A great way to make DIY stencils is to use a Cricut machine. Stars are such a simple shape to cut out too.
Fortunately, just a first coat of gold mousse was enough for good coverage. Once you remove the stencil, it can be tricky to line it up again perfectly.
I love gold and a stencil, so they spoke to my heart! They were thrilled with how it turned out.
A cool idea coupled with a great display space for into their early teenage years.
Here’s how I made the perfect storage for a tween.
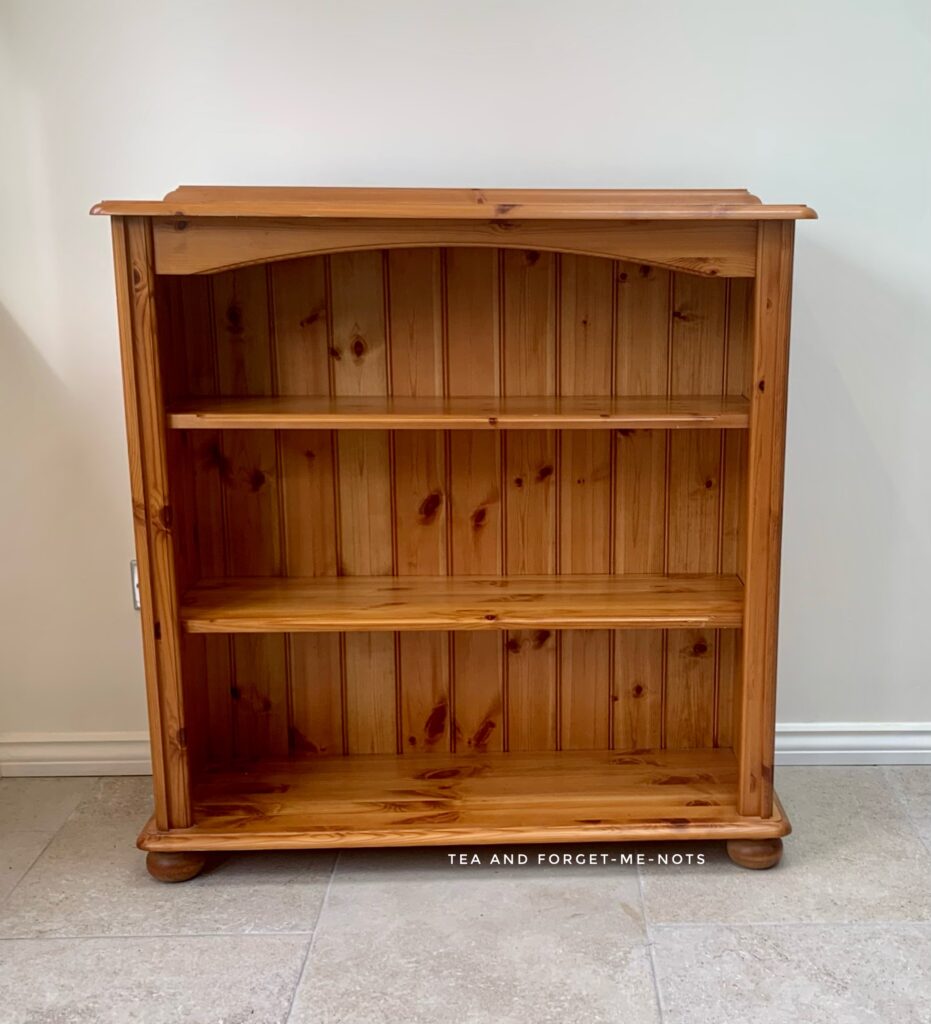
Number 4 – Classic Painted Bookshelf Makeover
No fancy embellishments, stencils, decoupage or stain on this one. Sometimes the simple way is the best way to paint a bookcase.
This bookcase cost £15 and was in good condition.
Once you’ve done a few of these, it’s usually a quick process to refinish them.
You get into a rhythm.
Alas, this one didn’t want to play ball.
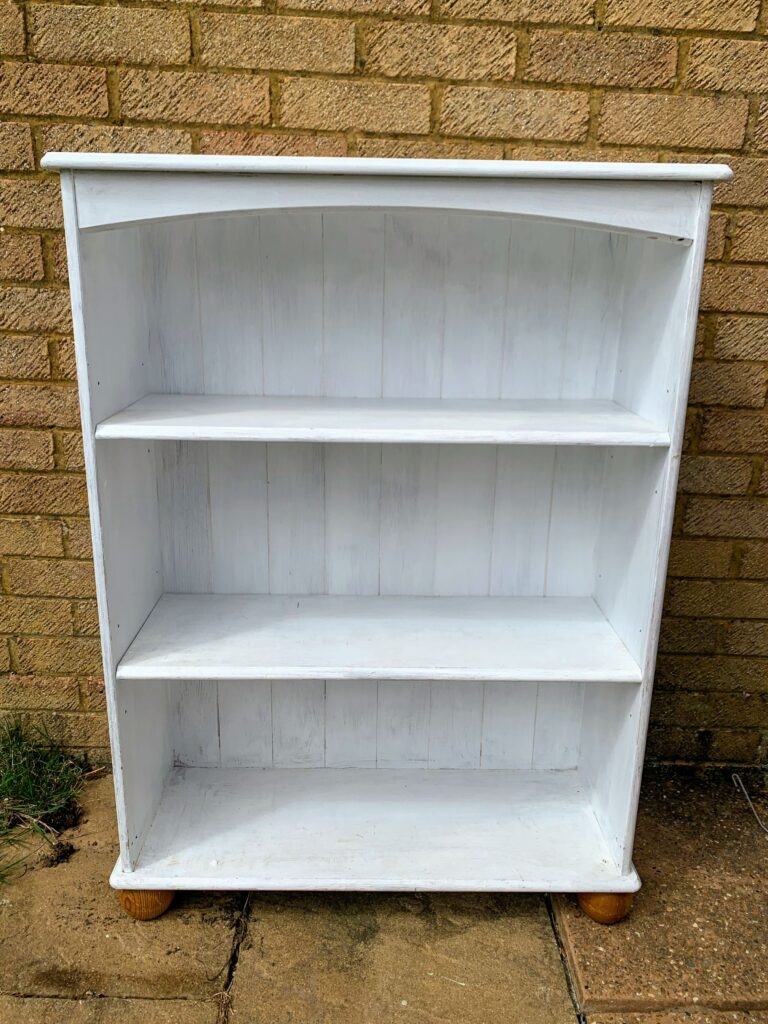
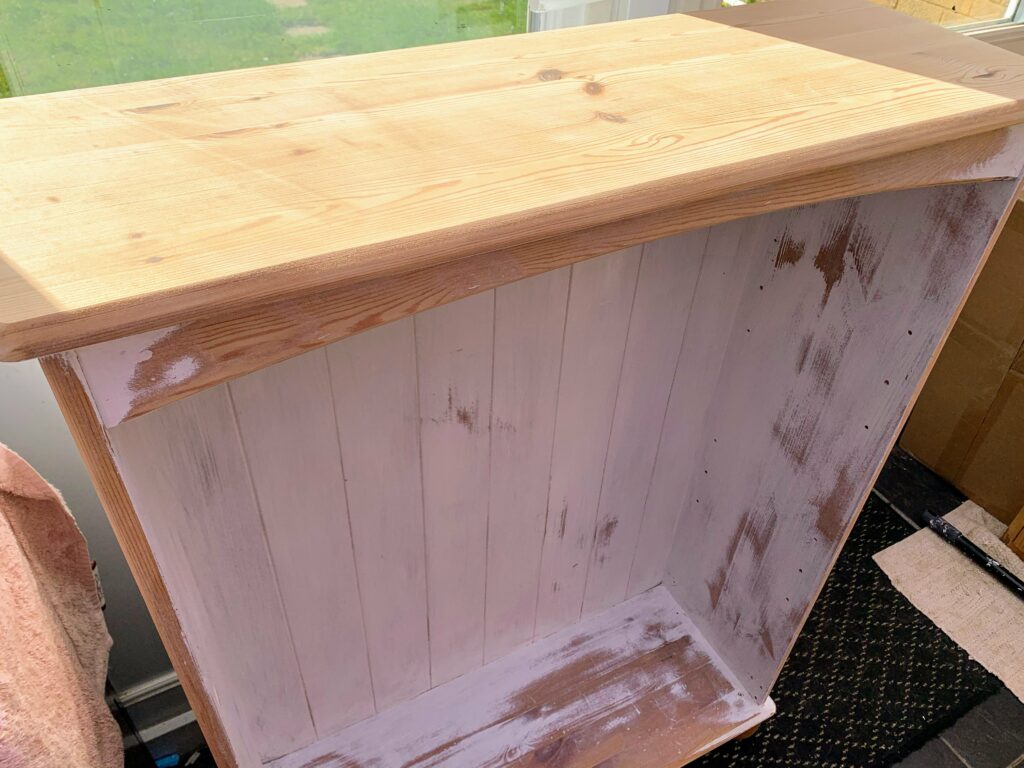
I had dreams of whitewashed pine. But after several attempts, I had to admit defeat. Sometimes, the universe tells you it’s not meant to be.
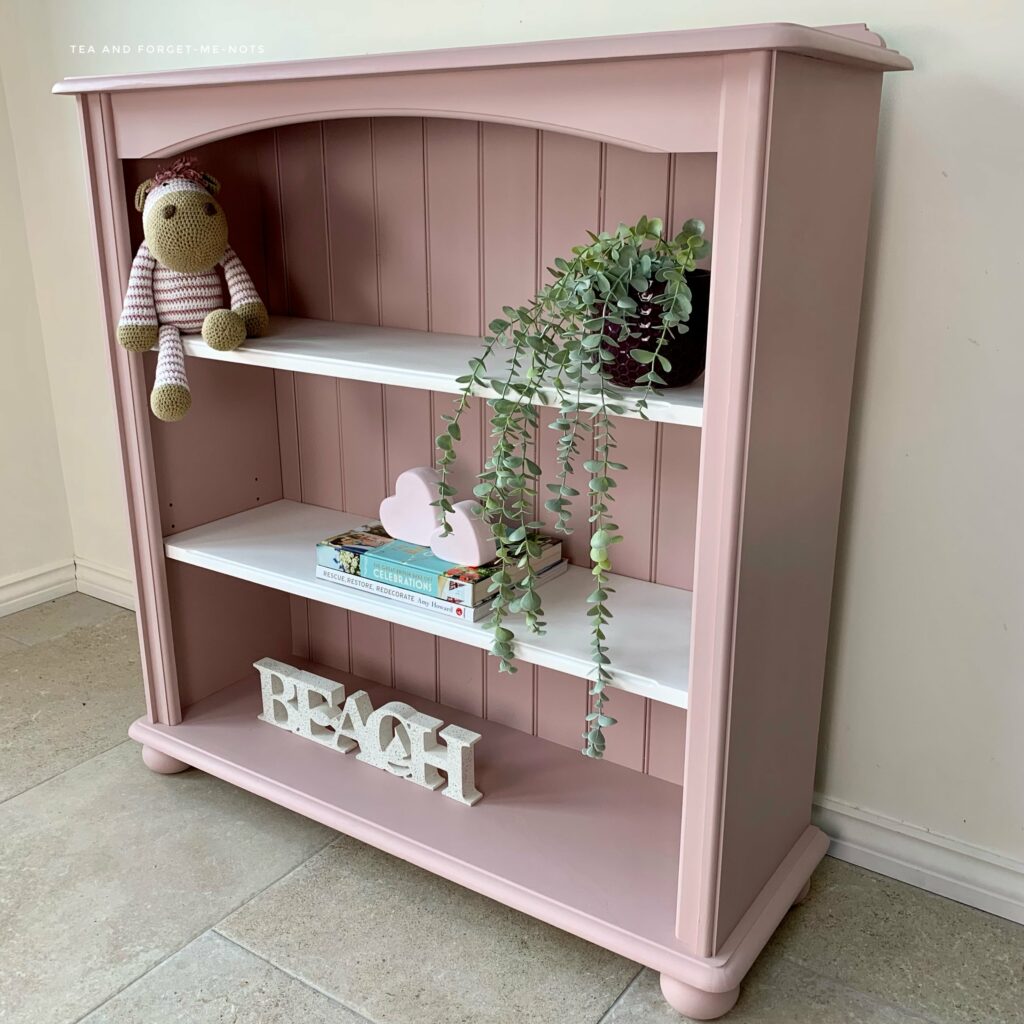
So, I painted the bookshelf with a light pink, Conch. And the shelves in Salt Water.
It needed two light coats of paint for good coverage. It’s usually on the second coat of paint where the true colour shows up.
Both of these colours are from the Silk paint range by Dixie Belle. This means that they also have a built-in primer and top coat.
So, I saved some time there at least!
If you don’t like seeing some of the knots in the pine boards, then its best to prime the wood first. I recommend a shellac-based primer like BIN Zinnser.
Fortunately, I liked the finished look. To be fair, I don’t tend to stop unless I like it. Otherwise, it niggles at me.
I pictured this in a child’s bedroom. Someone even told me that it would suit their kitchen or dining room.
But, it didn’t ever sell! Pink can take a while to sell, but I had to give up on this one.
This leads up to number 5 – the repaint!
If you like the look and want to see how it came together. Here it is, plus the YouTube tutorial.
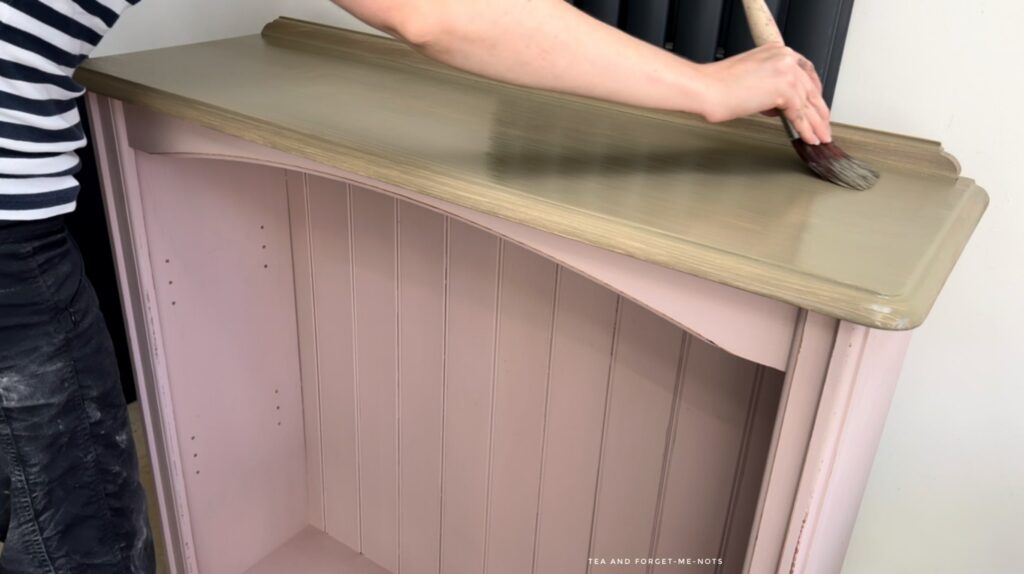
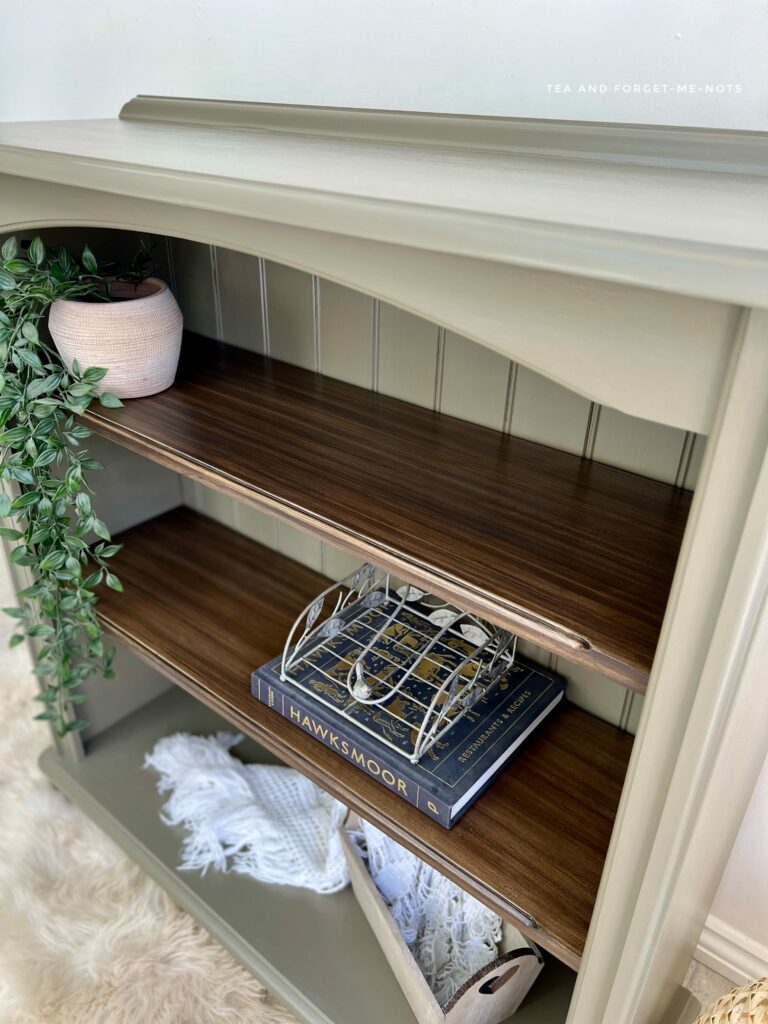
Number 5 – Repainted DIY Bookcase
So, how to repaint an old bookcase? Fortunately, not one that was badly painted this time.
The advantage of painting over my own work is that I know what materials I used.
Also, my blogs are a great reminder when I forget!
You’ll see that it looks quite a lot like the decoupage bookcase from project one.
I used different products but the feel is the same. I just love this colour combination for Autumn. It feels so natural and warm.
This green paint is the super popular, Hampton Olive. It’s a lovely, earthy, muted green.
The shelves were stained with No Pain Gel Stain, in Walnut. This gel stain is oil-based. Which usually takes longer to dry than a water-based stain.
With doing two coats of stain, on both sides of the shelves, including drying time, it took a few days to get the colour and coverage right.
It’s easiest to turn it upside down and put the top of your bookcase on the floor when painting the legs. This gives you easy access to the base so that you don’t miss any spots.
For these DIY bookshelves, I firstly put a towel on a furniture dolly. Then placed the bookshelf upside down with the lip of the top over the edge of the dolly.
This meant that:
- It lay flat, so didn’t wobble.
- The fresh paint was protected by the towel.
- I could easily rotate the bookshelf to paint the different sides of the legs.
Here’s how it came together, for the second time! Plus the detailed tutorials.
I hope you enjoyed this whizz through 5 unique ways to paint a bookshelf. From light pink to navy, stencils and decoupage, I love the inspirational ideas and the variety of DIY projects.
The good news is that it’s what keeps the creativity flowing.
Do you want DIY bookshelf ideas because you’re upcycling something for the first time?
It helps if you take on just a small bookcase for a first project. You can get to grips with it without overstretching yourself. Larger surfaces, extra storage areas or working at height, all add to the difficulty.
Less stress = more fun. So, you’ll keep coming back for more!
More about upcycling and refinishing furniture.
Find this post helpful?
Pin it on Pinterest for later
Pin it for later – 5 Unique Ways to Paint a Bookshelf

Hi there! I'm Rachel Bowyer, a passionate DIY enthusiast with a knack for transforming the old into something beautifully new. With a deep love for furniture painting, refinishing, and the art of crafting. I've been documenting my DIY projects and restoration journey since 2018. I specialise in techniques like decoupage, stencilling, and decor transfers. Join me as we explore the world of creativity and home improvement, one project at a time.
All great ideas to transform a blah book shelf into something special. I’d like to try the decoupage!
Thanks Maria! The decoupage is very easy with wallpaper. I’d love to see if you do it.
Another beautiful makeover!
Aw thanks, Cindy.
Racheal, I can see why the decoupaged shelf sold so fast it’s lovely. What a great way to add texture to a piece of furniture.
Thanks, it was lovely, I really should do it again.
They are all beautiful! I love the decoupage and the stencil! I have a dresser I want to paint and stencil in the weeks ahead! I am pinning it so I can refer to your tutorial! Thanks!
Thanks, Donna. I can’t wait to see it!
They all look beautiful Rachel!
Aw, thank you, that’s kind.