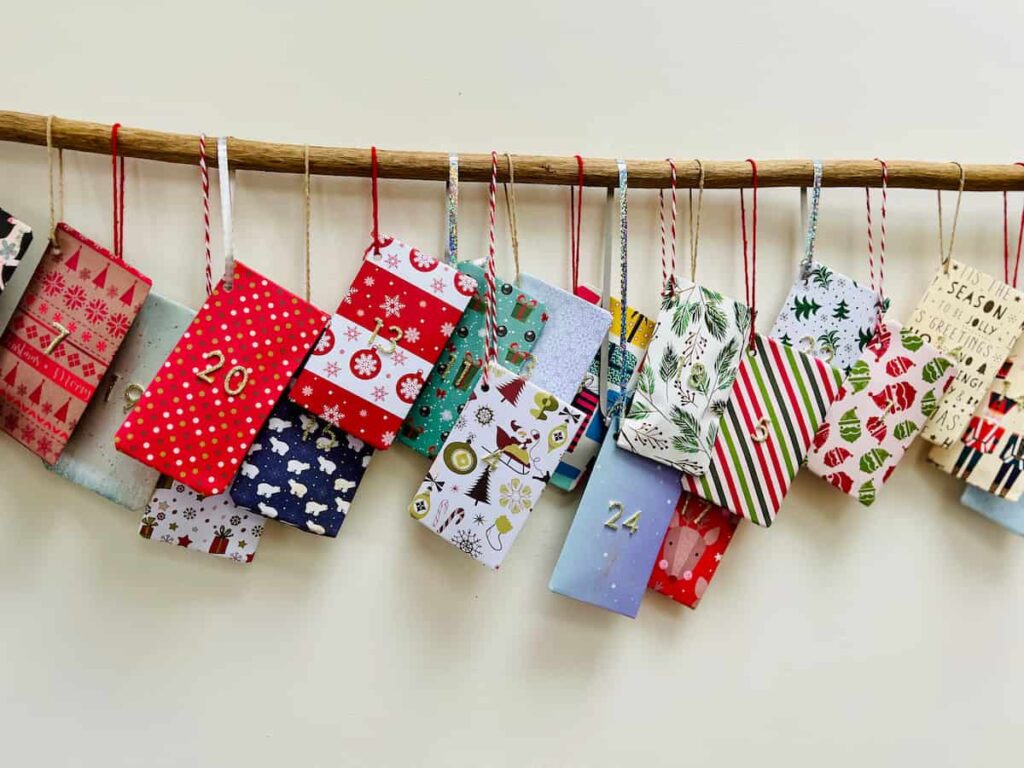
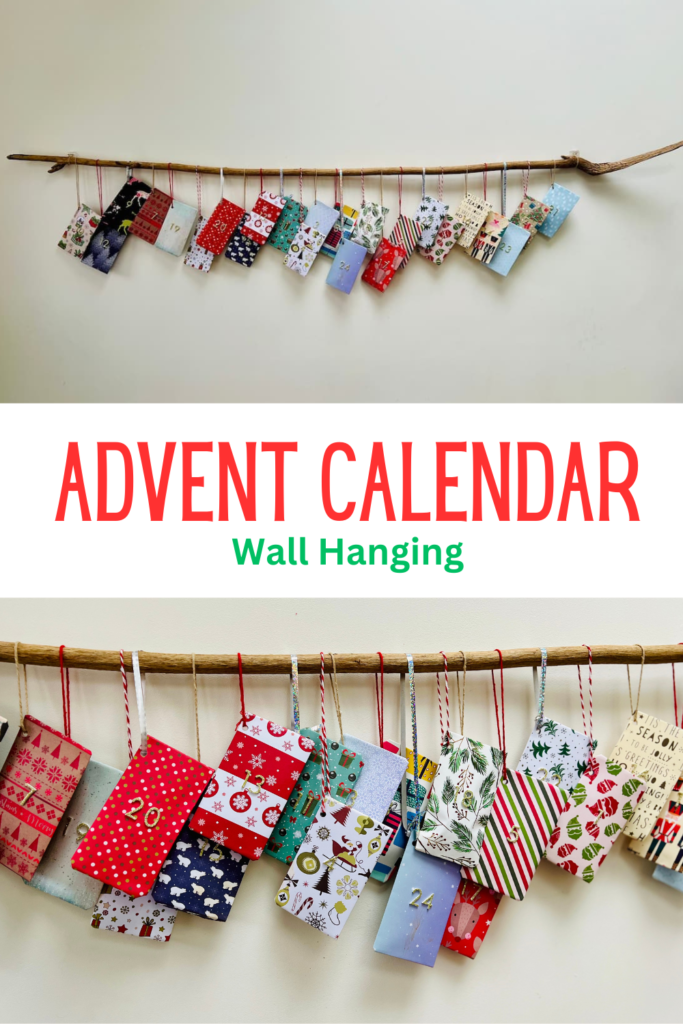
Easy (and Gorgeous) DIY Advent Calendar For Wall Hanging
Want to make a last minute advent calendar that will look great? Here’s how to make a DIY advent calendar for wall hanging. You can add personal little gifts to each day.
You’ll see how to fold little card pouches that you can add small gifts to. And even better, I’ll share an idea for how to fill the days with just one gift.
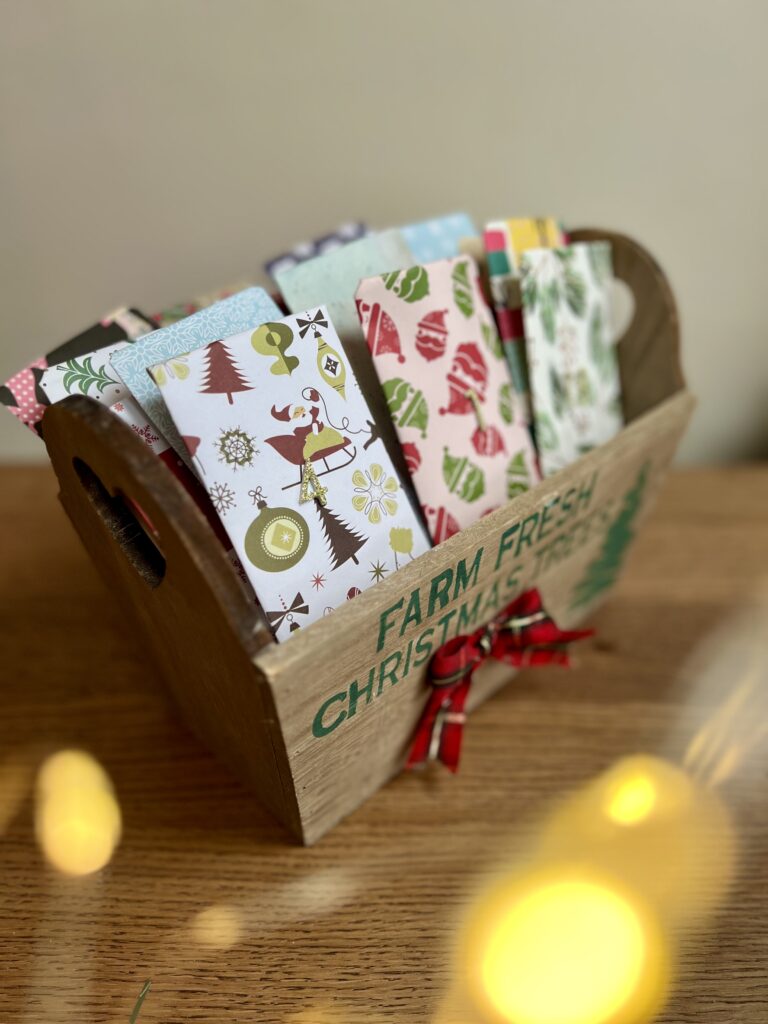
The main material you’ll need is a festive card or paper. If you stop there then you can store the pouches in a tray and you’re done.
Or add a couple of extra steps for an impressive-looking advent calendar for wall hanging. Which doubles as beautiful holiday decor.
How to Make a DIY Advent Calendar For Wall Step by Step
Materials Needed
Step by Step Instructions
Step 1: Choose Christmas Paper or Card
This pack of 24 Christmas papers came with 8 different designs. This would do the job perfectly. Or as I had a few more packs of holiday season designs, I used a different pattern for each day.
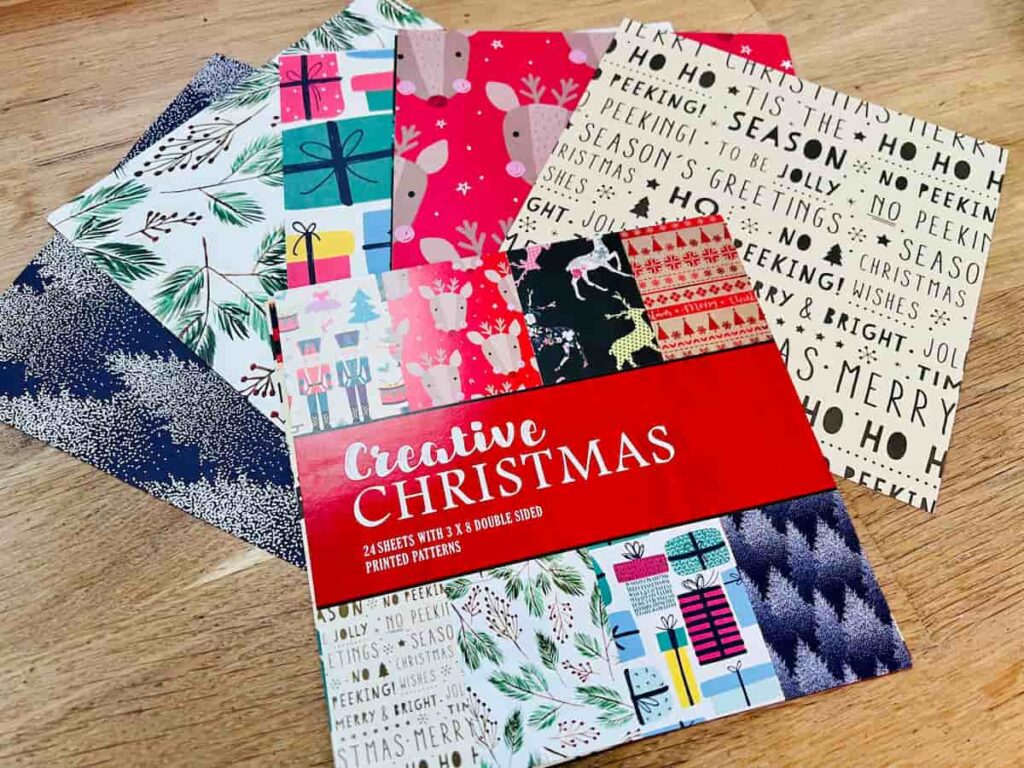
Either way, you can create unique advent calendars.
If you have multiple children that you’re making a decorative wall advent calendar for, then using the same design for each day may be helpful.
The packet states how thick the paper is, I wouldn’t recommend using higher than 200 GSM as it gets harder to fold.
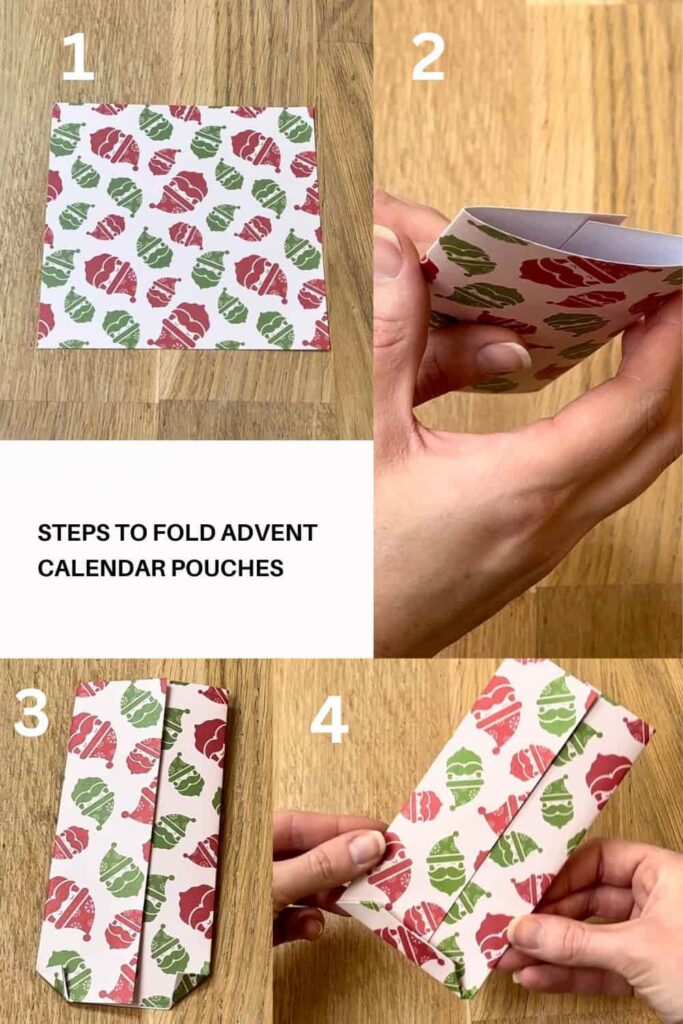
Step 2: How to fold paper into advent calendar pouches
Firstly, start with the paper image side down.
You’re going to fold the edges into the middle, with a slight overlap. The overlap is how you will secure the back together.
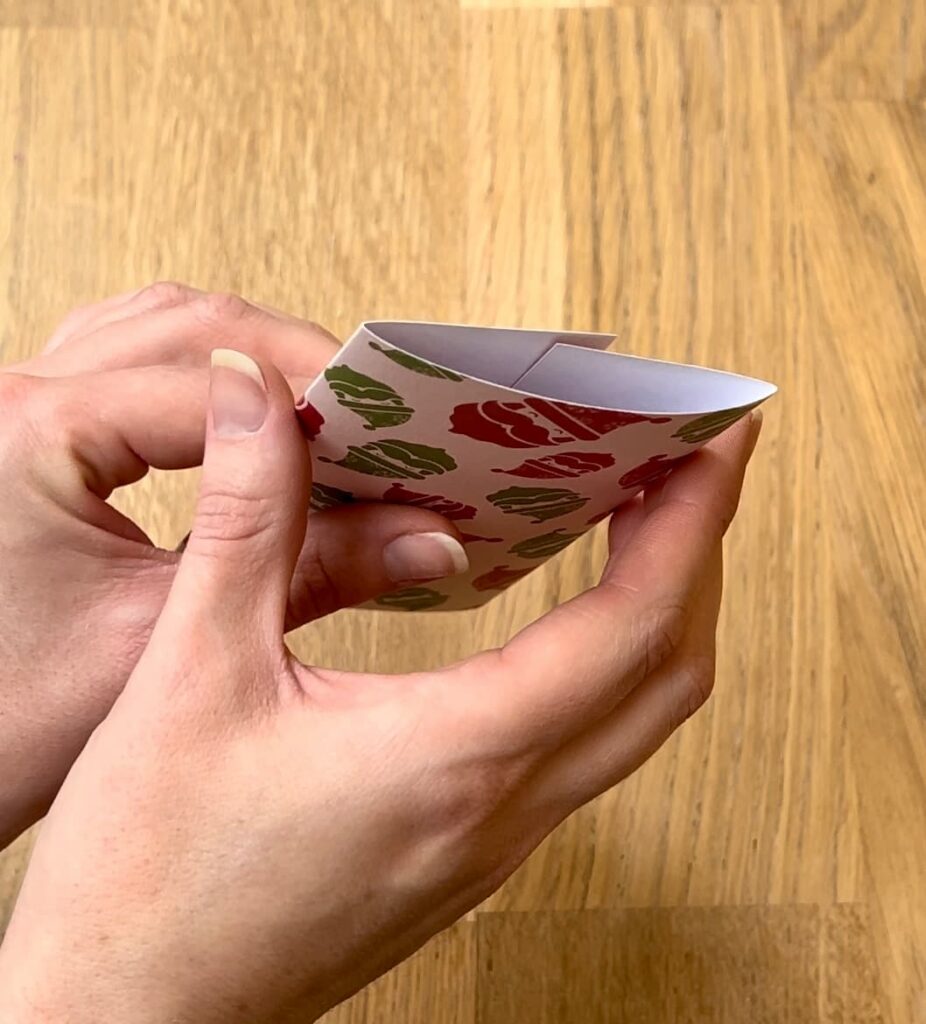
You can use double-sided tape to keep the back together. But if you put light gifts in the pouch, such as stickers, then you might not even need the tape.
Secondly, fold up the two bottom corners of the rectangle. Fold them about 1cm /half an inch. These are just small folds to create the bottom seal.
Then fold the bottom up. Use double-sided tape to secure this fold.
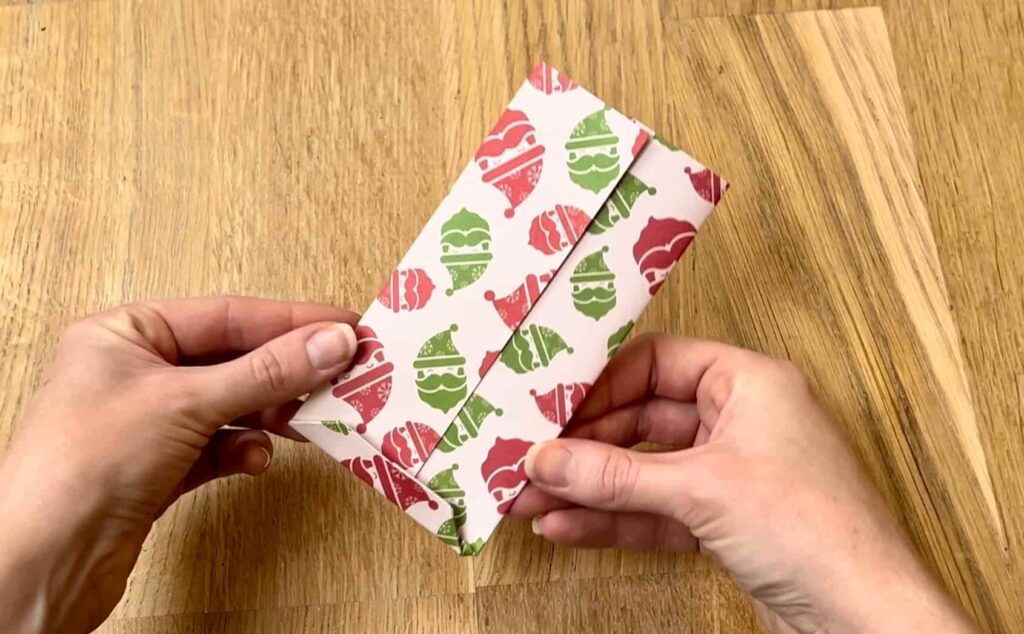
Ensure each fold is well pressed down to create a crisp edge. It might be helpful to use a ruler to neaten the line.
Then turn the paper around and repeat the bottom folds on the top. But don’t seal the top with tape. This is where you will fill the pouch.
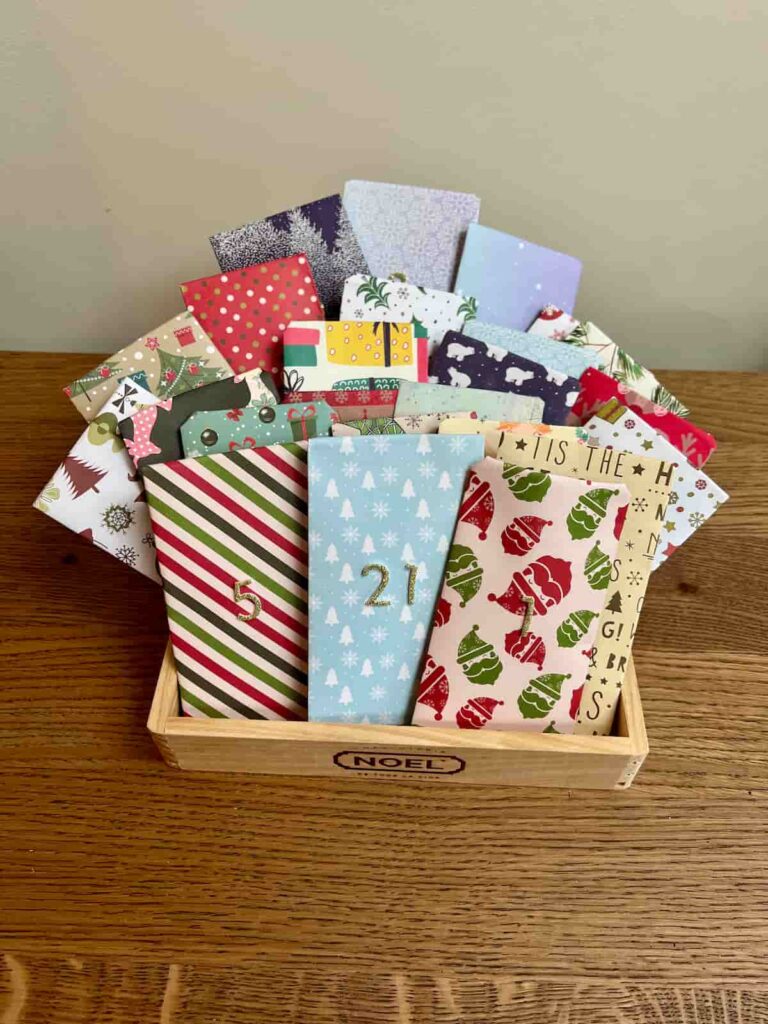
Step 3: Add numbers to the advent calendar pouches
Next, add some numbers to each pouch so they’re labelled for each day of advent. Typically up to number 24.
For this, I used gold, glittery numbers that stick on. But if you’re short on time, you can neatly write the numbers.

If you don’t want to create an advent calendar for wall hanging, your pouches are complete and ready to go. You can present them nicely by adding them to a pretty tray.
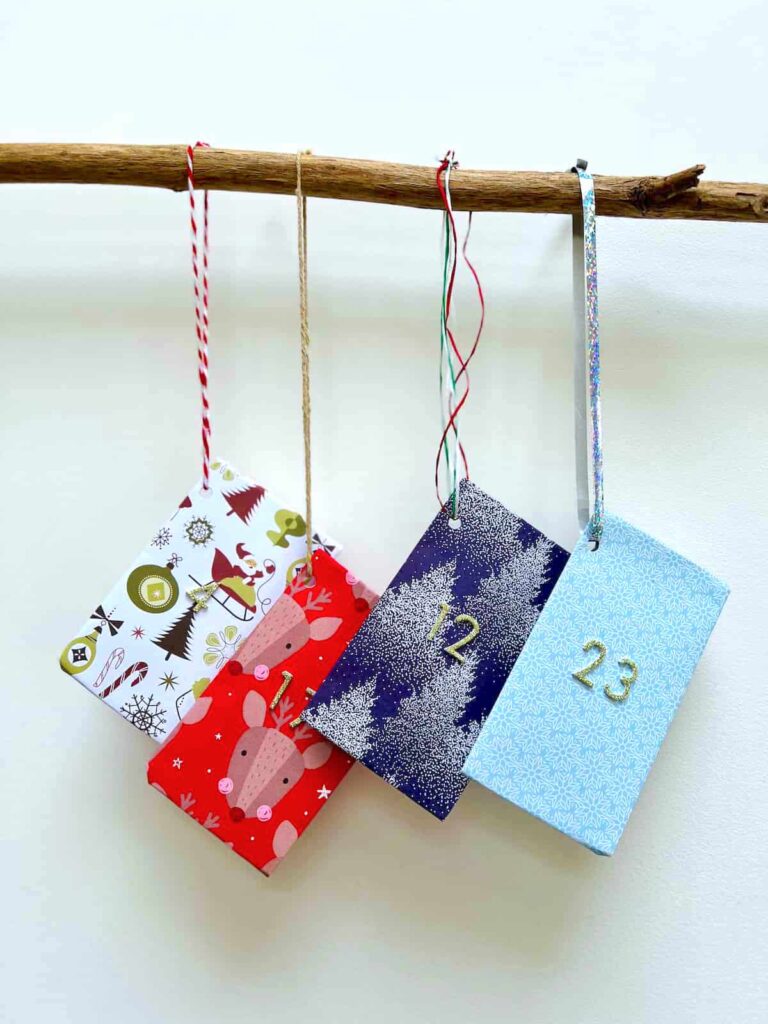
Step 4: How to hang advent calendar pouches
Just a couple more steps to make them ready for an advent calendar wall hanging.
Firstly, use a hole punch to make a hole in the top corner. If you make the hole on the same side for all of the pouches then they will dangle to the same side.
For a more varied look, add the hole on the other side too for half of the pouches. Make sure the hole isn’t in the middle though as this is where the ribbon goes.
Lastly, add the ribbon or string to each pouch. You can either use the same ribbon for each pouch for a consistent look. Or mix it up for a more interesting and fun way to present the Christmas advent calendar.
The length of the string depends on how far you want the pouches to hang down.
You can either measure the string out so that they’re consistent. Or do a variety of lengths to let the pouches dangle more naturally.
Step 5: How to fill the advent calendar pouches.
Gift a jigsaw. This is a great idea if you want an interactive way to keep someone entertained. This works for children of all ages and adults.
A jigsaw also doubles as a Christmas gift.
You can use any jigsaw design. A Christmas design may be extra special. This could become a charming family tradition.
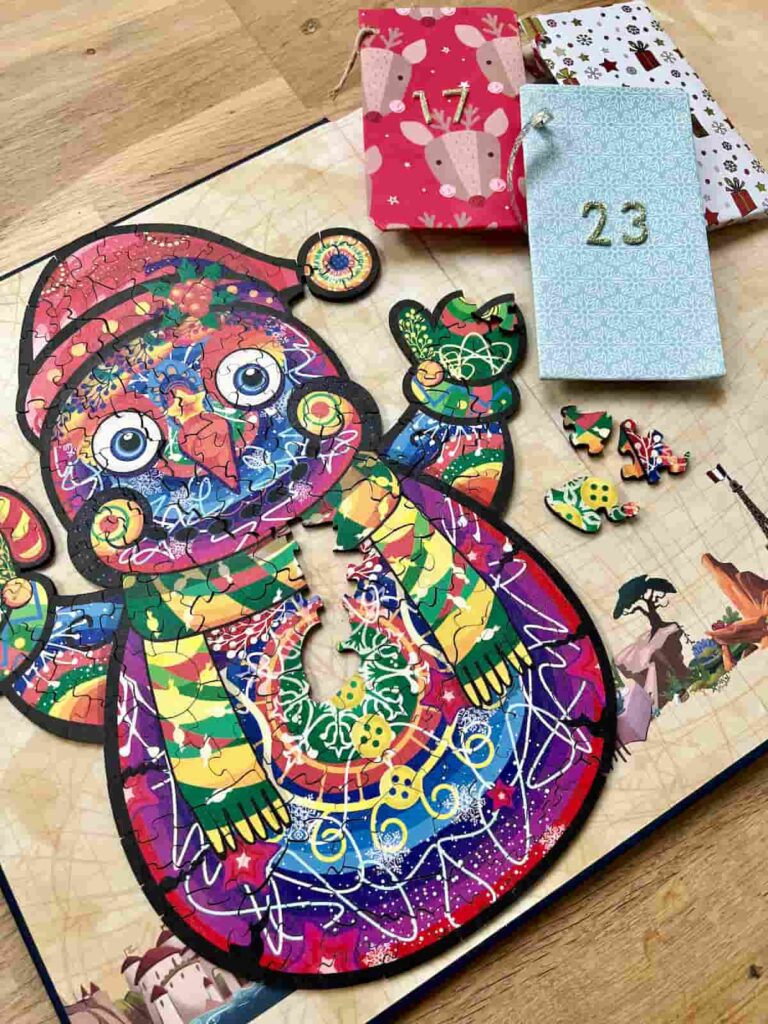
When choosing the jigsaw, think about the number of pieces in the puzzle. This might depend on the age of the person opening it.
A 100-piece jigsaw puzzle gives you about 4 pieces a day.
You can add a few pieces of the jigsaw to each pouch. Then by day 24, the puzzle is complete.
The downside of giving random jigsaw pieces is that it might be several days until they can fit anything together. So, I like to prepare it a bit more.
Here’s how to make opening the advent calendar pouches a little more structured:
- Firstly, make the jigsaw puzzle.
- Then choose 4 pieces of the puzzle that fit together. Put those in the pouch for Day 1.
- Then choose 4 more pieces that attach to the first day’s. Add to Day 2.
- Continue until all the pieces are in the pouches. By Day 24, they should be able to complete the jigsaw.
Step 6: DIY Advent Calendar For Wall Hanging
To create the wall hanging, slide the pouches onto whatever object you want to hang them from.
For this, I had saved a pretty tree branch during the year. But you can use anything long and thin enough to tie the pouches to.
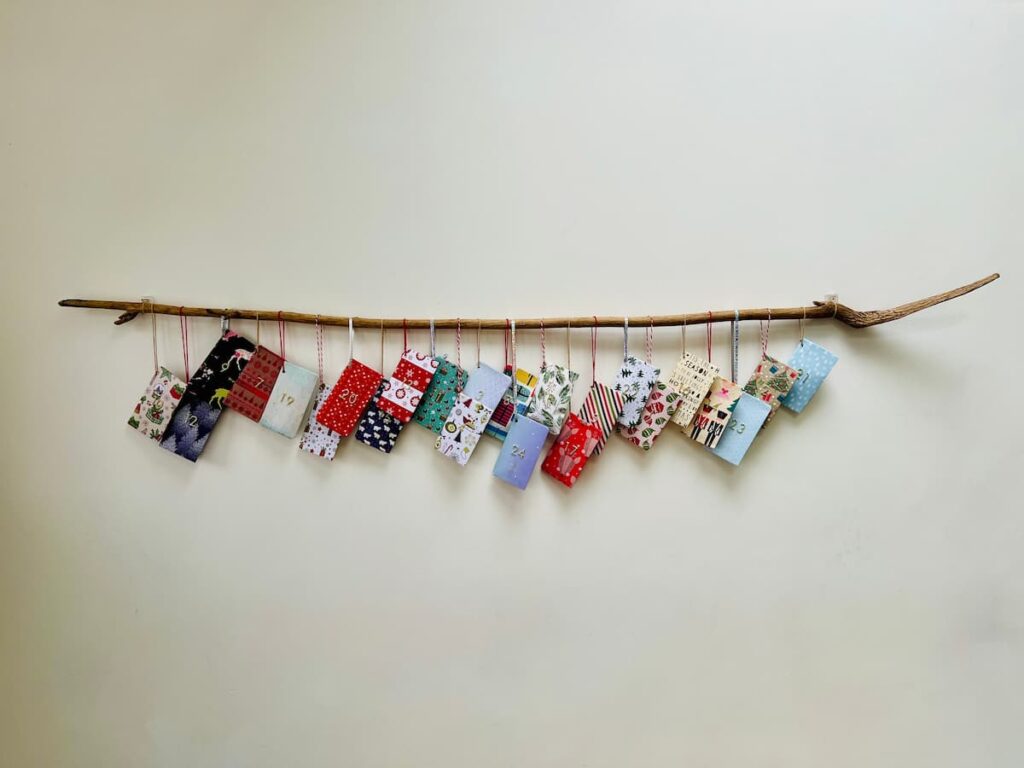
To attach the branch to the wall, I added command hooks to each end. Then tied a string around both the branch and the command hooks.
Alternatively, you could hang them from your Christmas tree. This would add a little treasure hunt to find the pouch each day.

It’s a simple and interesting way to gift a jigsaw and give a little activity to do for each day of Advent.
Other things you could add to these light pouches are sweet treats, stickers, nail polish, stationery, a nano block set, crystals, jokes, or compliments.
Whatever you choose, I hope you have a very Merry Christmas!
Want more great Christmas ideas? Check out my YouTube channel.
Answers to Your Questions About Making a DIY Advent Calendar
Do you need to add tape to the paper pouches?
Tape will allow you to add heavier gifts to each pouch. But it isn’t necessary for light gifts such as stickers.
Does the paper need to be square?
Choosing rectangular paper will change the shape of the pouches you can make. As long as the pouches are consistent, they will look good.
If you loved this project, you’ll love these projects too:
Did you make this advent calendar?
I love seeing what you do. Please mention @teaandforgetmenots and share your creations with me!
Pin It For Later – DIY Advent Calendar For Wall

Hi there! I'm Rachel Bowyer, a passionate DIY enthusiast with a knack for transforming the old into something beautifully new. With a deep love for furniture painting, refinishing, and the art of crafting. I've been documenting my DIY projects and restoration journey since 2018. I specialise in techniques like decoupage, stencilling, and decor transfers. Join me as we explore the world of creativity and home improvement, one project at a time.