Wait until you see this upcycled pink chest of drawers
Looking to transform your chest of drawers? This pink chest of drawers started out as plain Mexican Pine but wait until you see the result…
Free is the best price although that often comes at the cost of repairs. The drawers were missing their handles, a base to the bottom drawer and the backing was warped.
Otherwise, it was in good condition although I did come across one thing which left me very puzzled. I’m still not sure if it was a poor design choice or shoddy manufacturing…

Wait until you see this upcycled pink chest of drawers
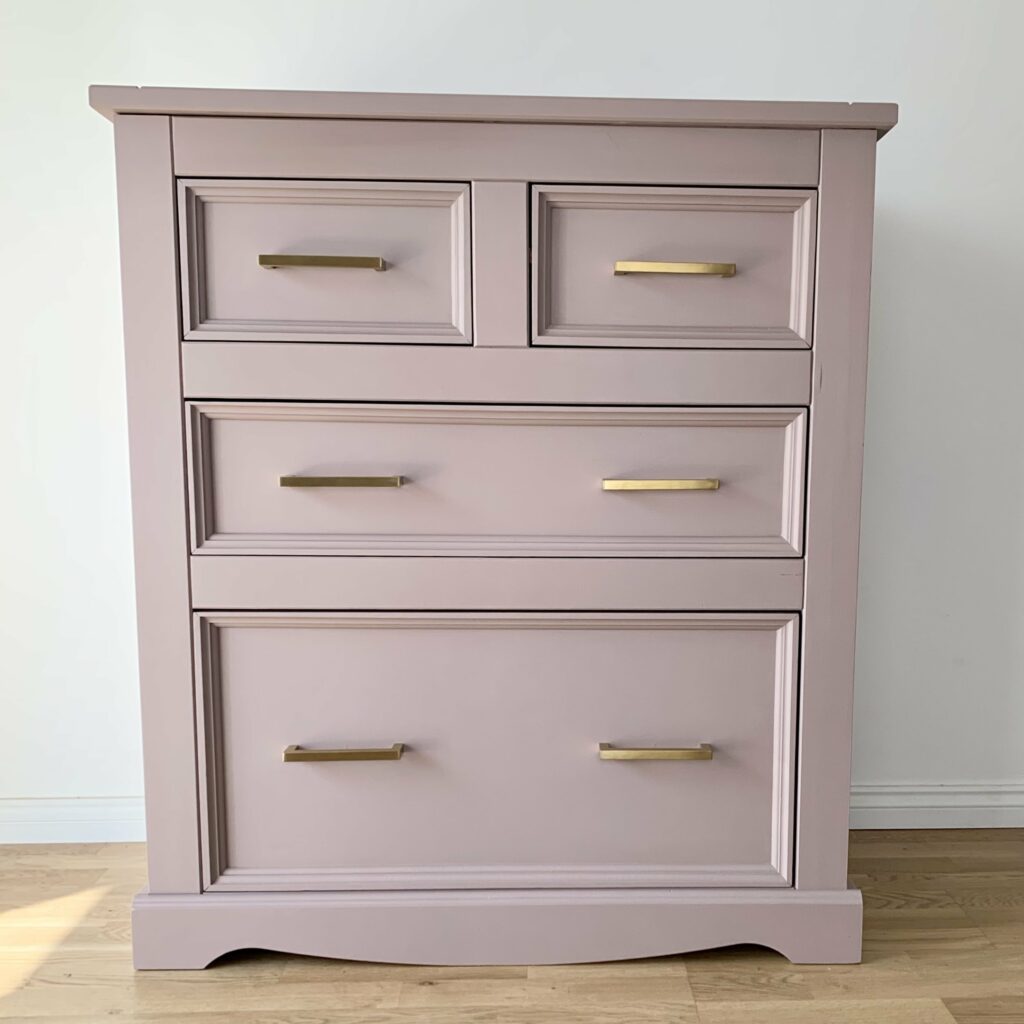
I’ve been waiting for a piece to use the beautiful dusky pink colour, Damask, on. The paint coupled with the gold handles I chose is such a pretty look.
This post may include affiliate links so you can easily find the products I love and use myself. If you purchase these products, I may earn a small commission at no extra cost to you.
Upcycled Chest of Drawers Video
The prep
I began by washing the whole piece down with White Lightning cleaner by Dixie Belle. I mixed it with warm water in a spray bottle which is less messy than a tub of water.
After a good once over, I washed it again with plain water to get rid of any leftover cleaner which the paint wouldn’t stick to.
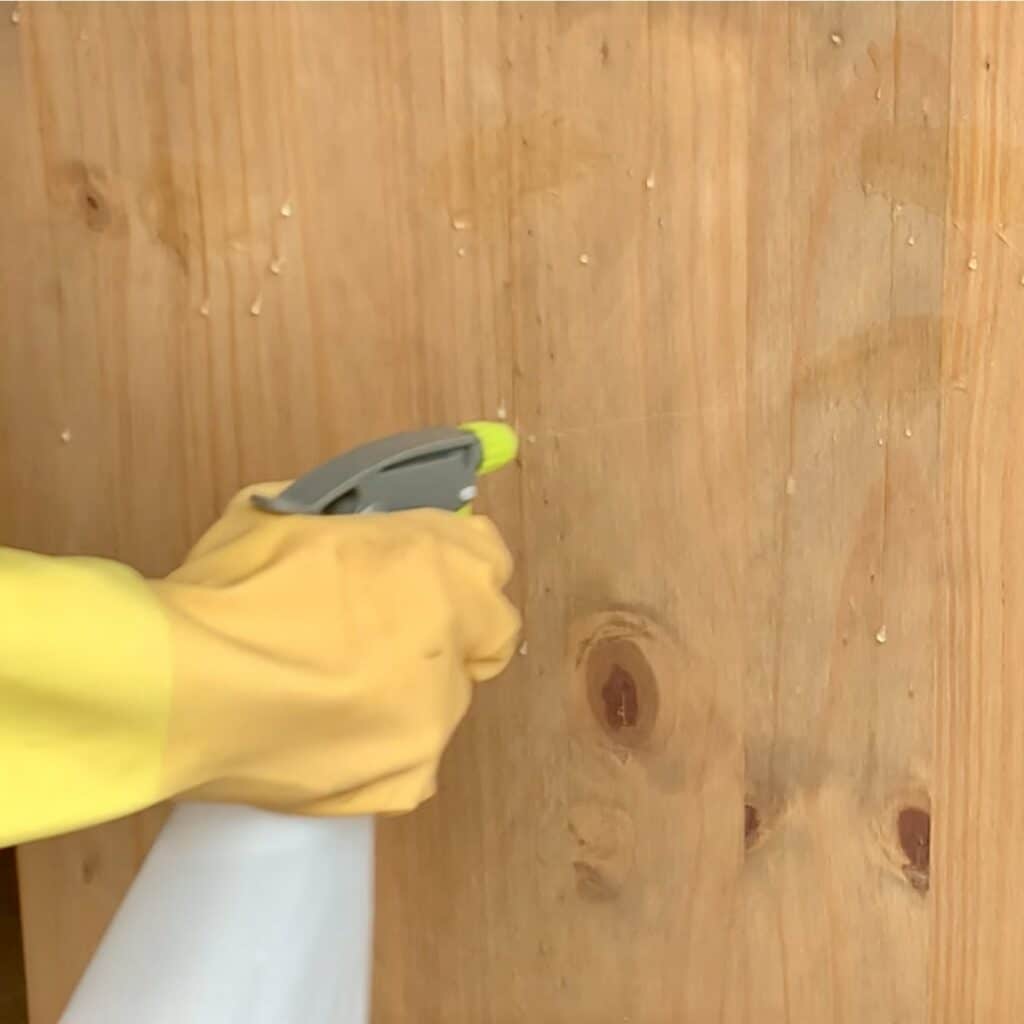
I hand sanded it to give the paint some extra texture to hold on to and improve the chances of it staying put. For the same reason, I removed the sanding dust and used a sticky tack cloth to do that.
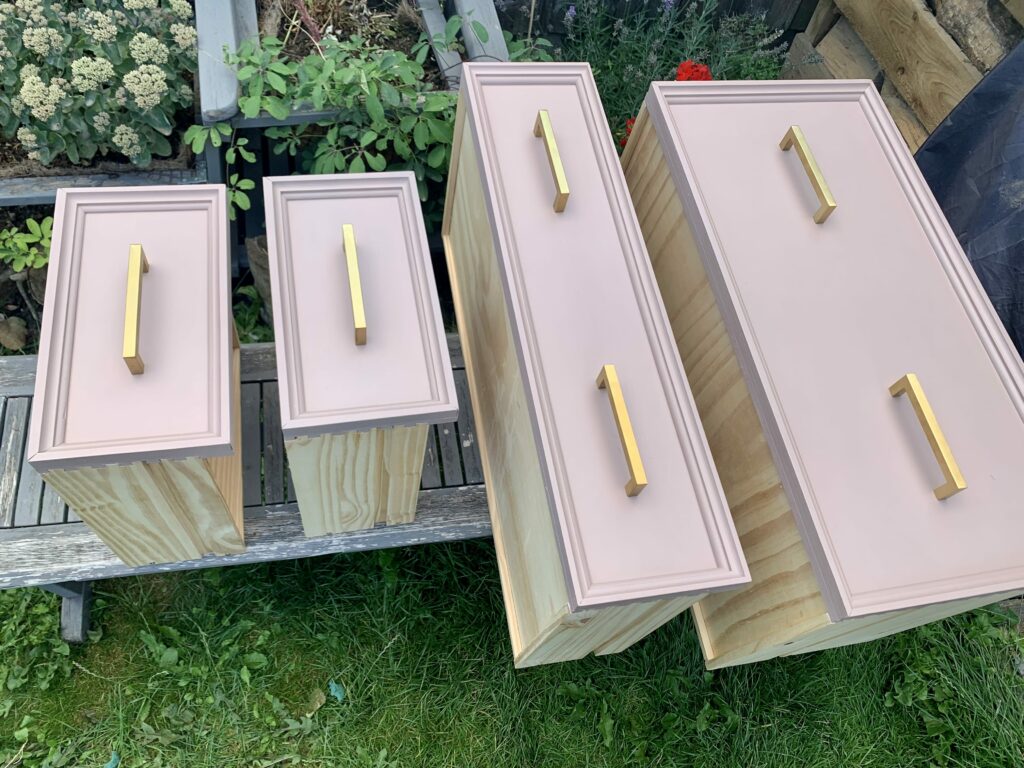
It wasn’t a problem that the drawers came without handles as I had gold ones that I wanted to use. I filled in the existing hole with Dixie Belle’s Mud filler, which needed three layers to get a smooth finish.
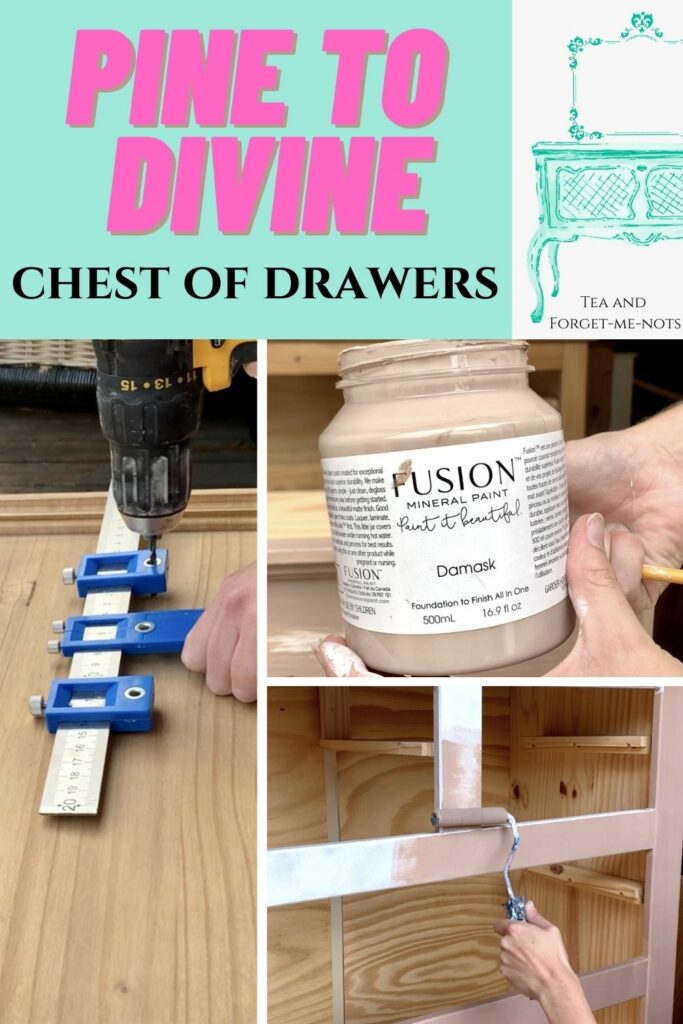
I used my punch hole locator to work out where the holes would go for the new handles. This is a great tool. You line up the middle with the holes to make a mark and can drill straight through the guide.
The tool even made my list of best buys under £15 to make your life easier!
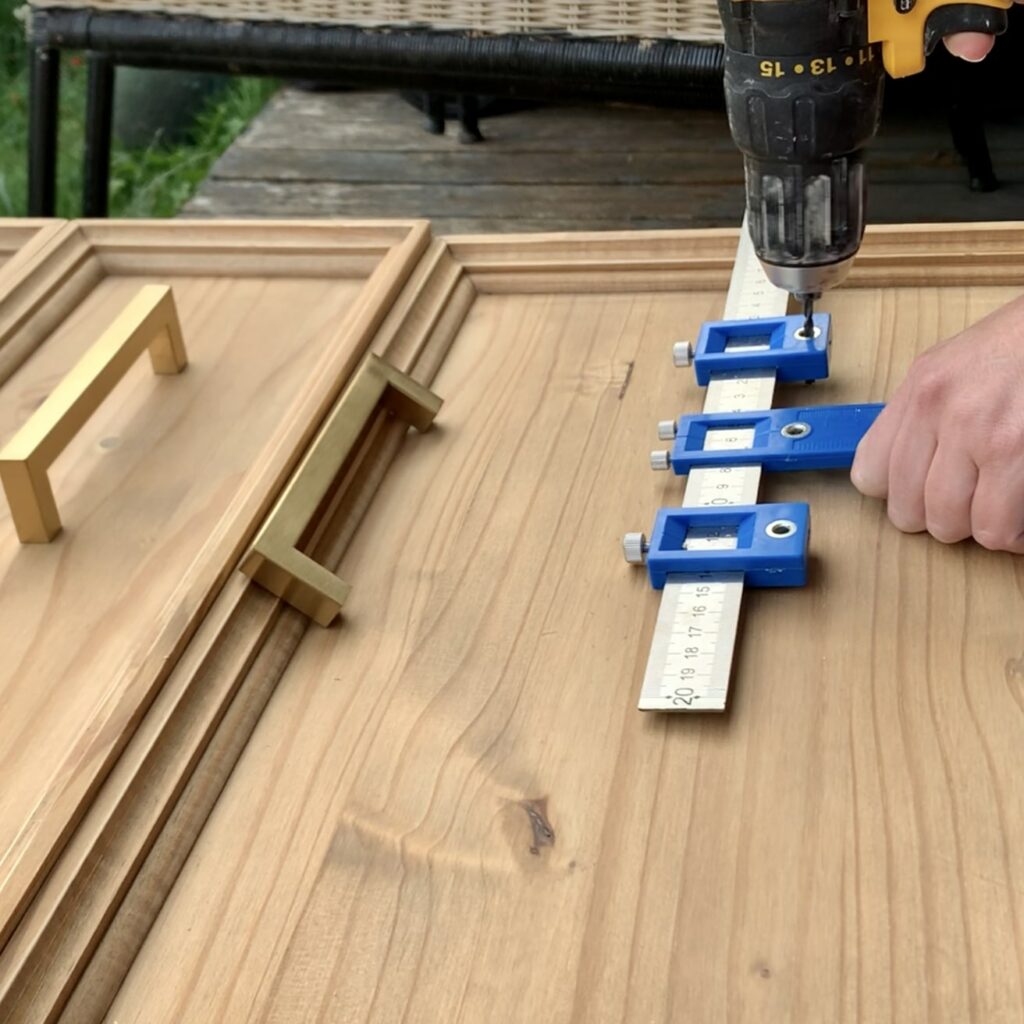
I did this before painting so I didn’t risk scratching the paintwork before it was fully cured, which takes 30 days.
Also, if I made a mistake on the hole location, it would be better to fix it before priming, painting and sealing.
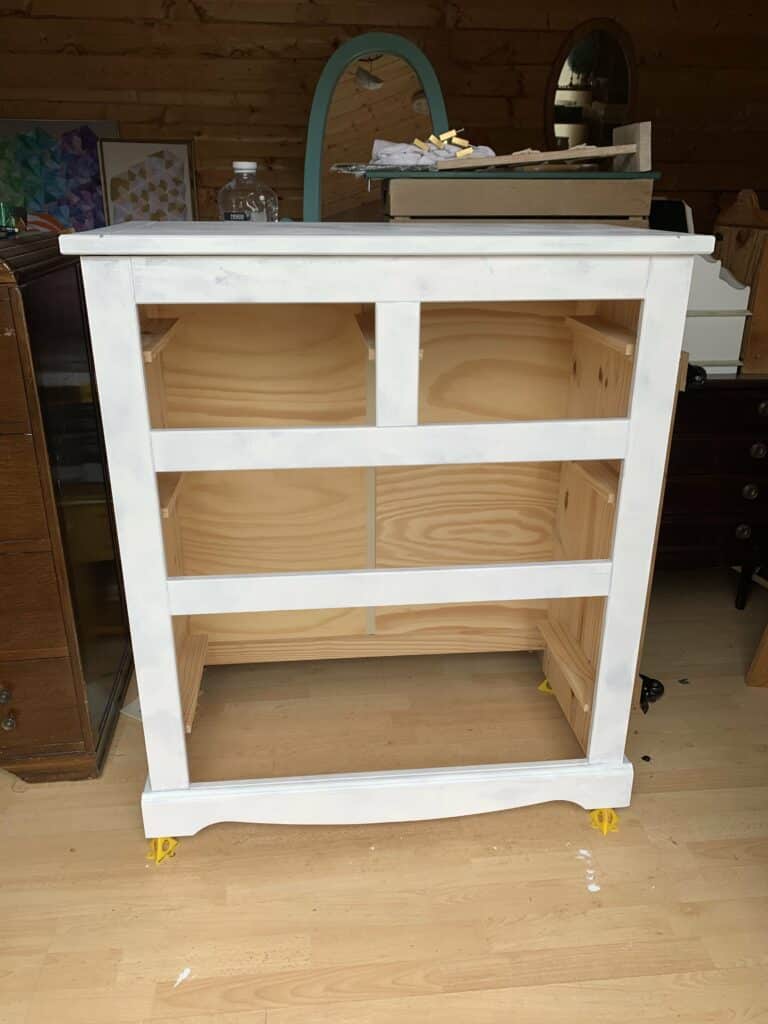
Prime time
BIN Zinsser is my favourite primer. I usually use the shellac-based one which is great for blocking out the wood grain or tannin bleed-through.
This was my first time using the water-based version as it was recommended as being far easier to clean up after.
I did two coats. It worked nicely and was very easy to clean up after too.
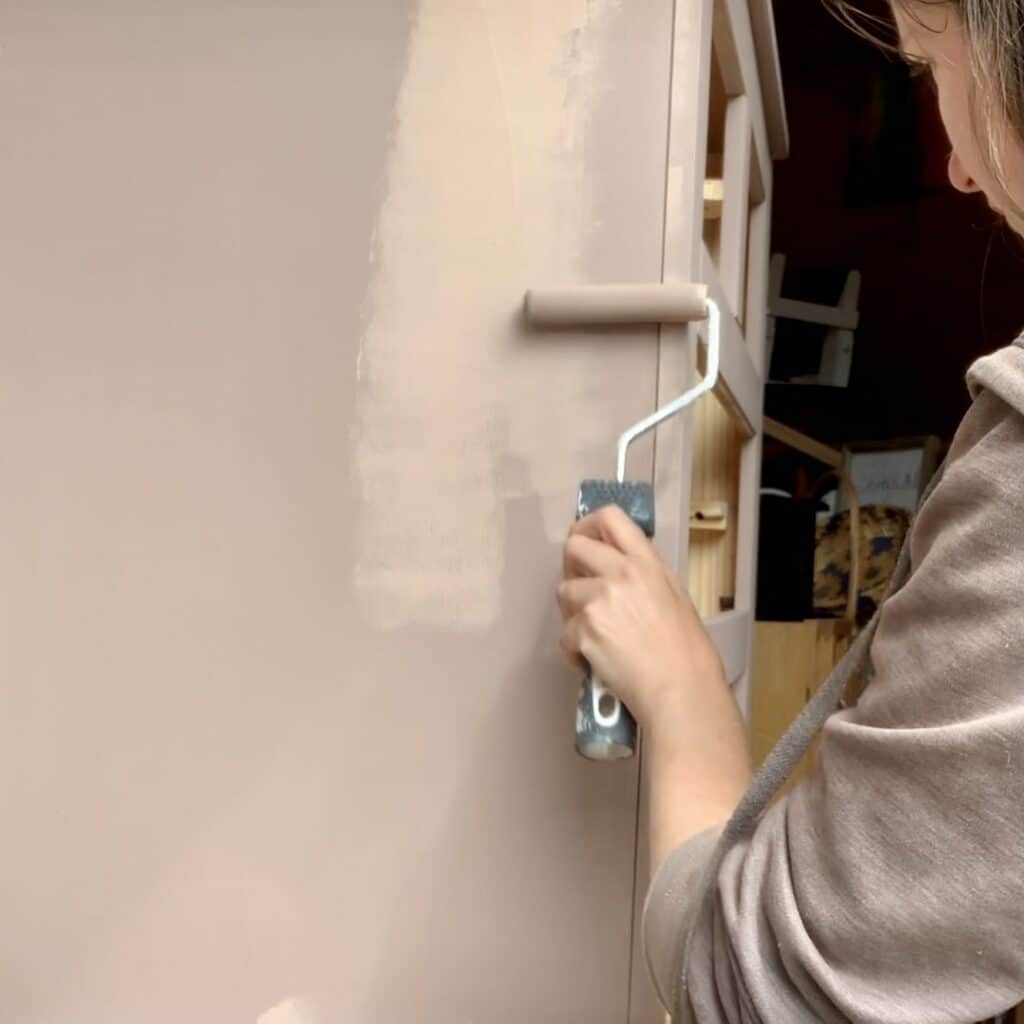
Pretty in pink
One of my go-to paint brands is Fusion Mineral Paint. I used three coats of their lovely, dusky Damask to create this pink chest of drawers.

I also painted the dovetail joints to highlight them, as they’re a nice bit of character for an otherwise quite plain set of drawers.
A fan of pink? Here’s a beautiful pink bookshelf makeover.
Fusion doesn’t need a sealer but when I sell a piece I want the reassurance that it will be as durable as possible. I sealed this with Polyvine’s Wax Finish Varnish and did two coats on the top for extra protection.
I recently tried Hemp Seed Oil as a top coat for the first time, see how that went.
Want to know 23 great DIY tools? Get the list!
A puzzle
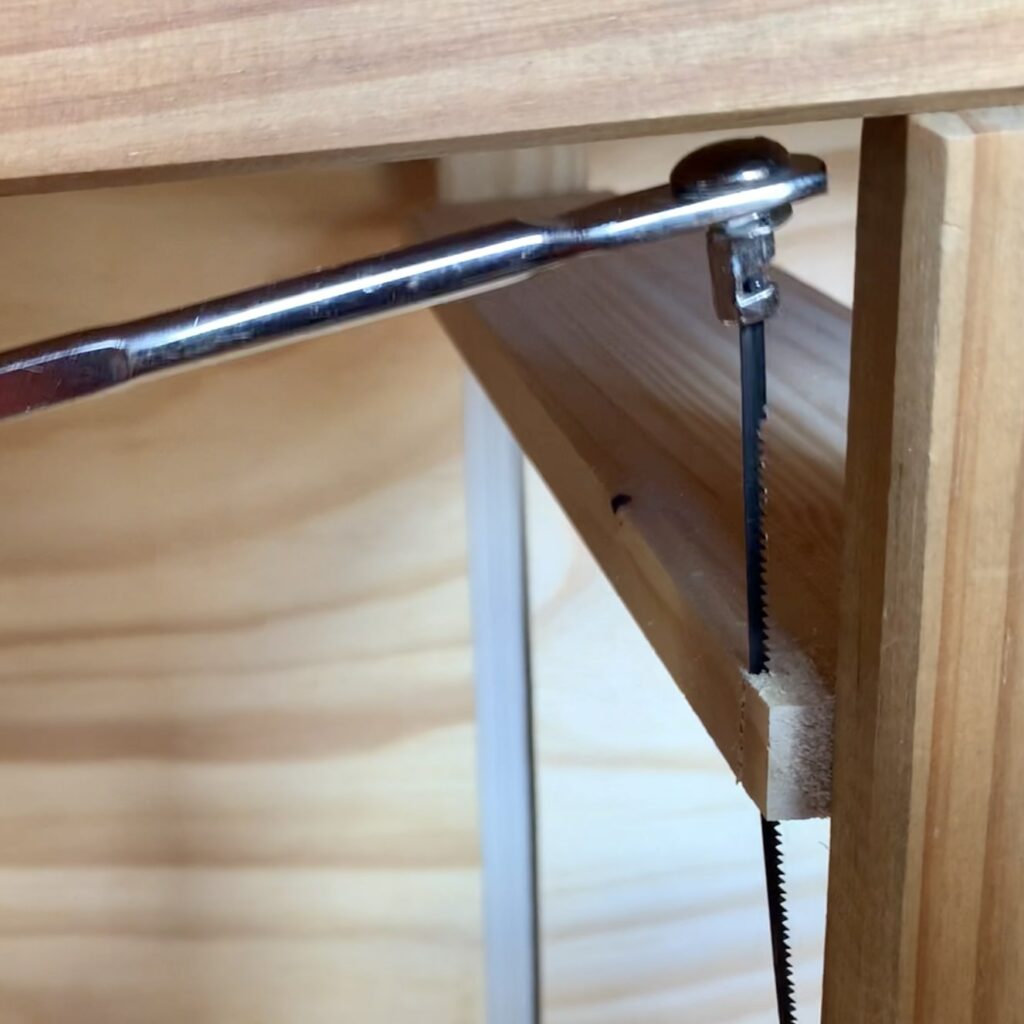
After painting, I noticed that the two small top drawers didn’t sit flush with the frame. They stuck out by about an inch. I assumed something was caught or broken. But after an investigation, it was where the wooden runners stopped which meant that they just did stick out.
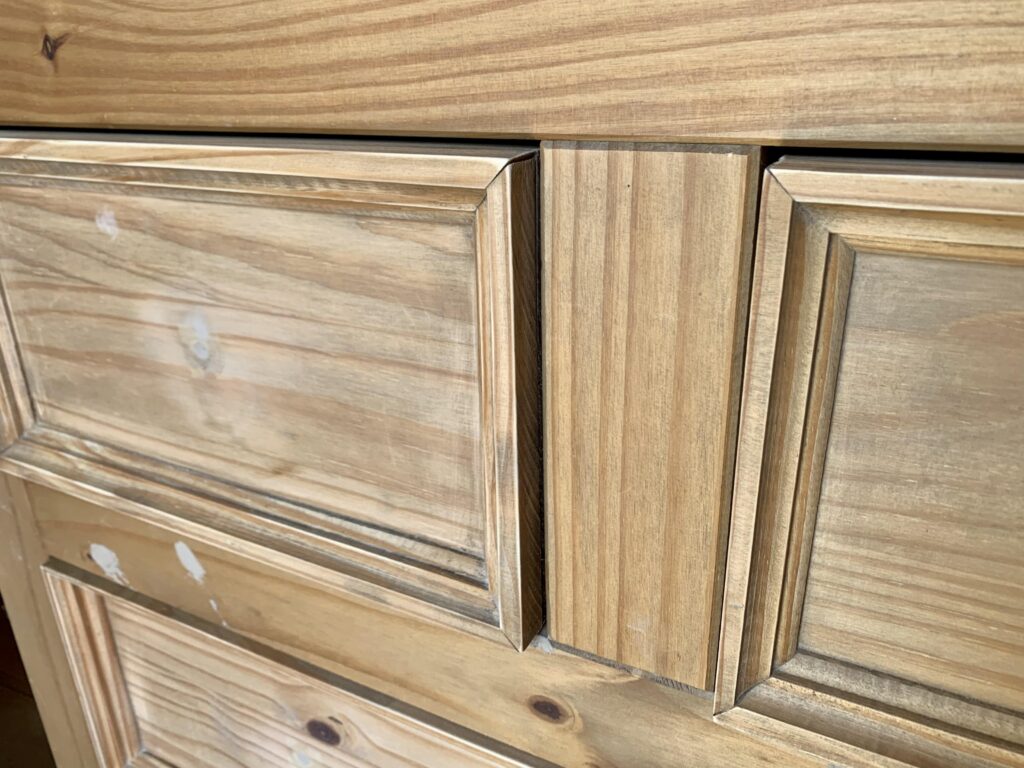
I used a coping saw to cut about an inch off of the runner so the drawers lined up properly. I still don’t know whether this was a manufacturing mistake or the work of a design genius who I don’t understand. Either way, I think I improved it.
Fixing it up
I also had two repairs to fix.
The original backing was two pieces that had popped out of alignment. It would have been easy enough to fix them back into place. However, I also needed a replacement drawer base and fortunately, they were the same material.
So, I repurposed the original backing for the drawer and cut it to size with a mitre saw.
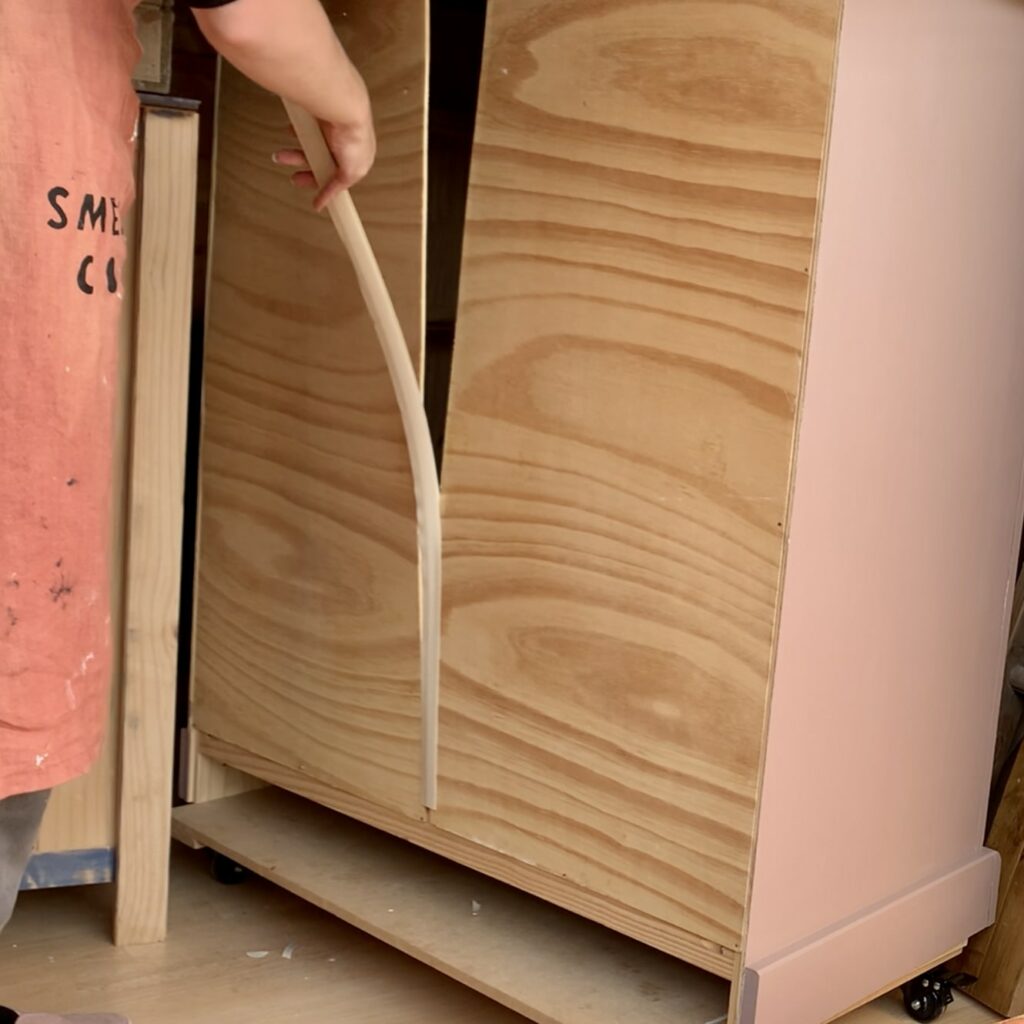
Then I replaced the backing with a single piece of hardboard and stapled it into place.
Finally, I added some lovely gold handles. I like how simple they are but think they really show off the rectangular frames of the drawers.
For drawers where I turned the original handles gold, check out this transformation.
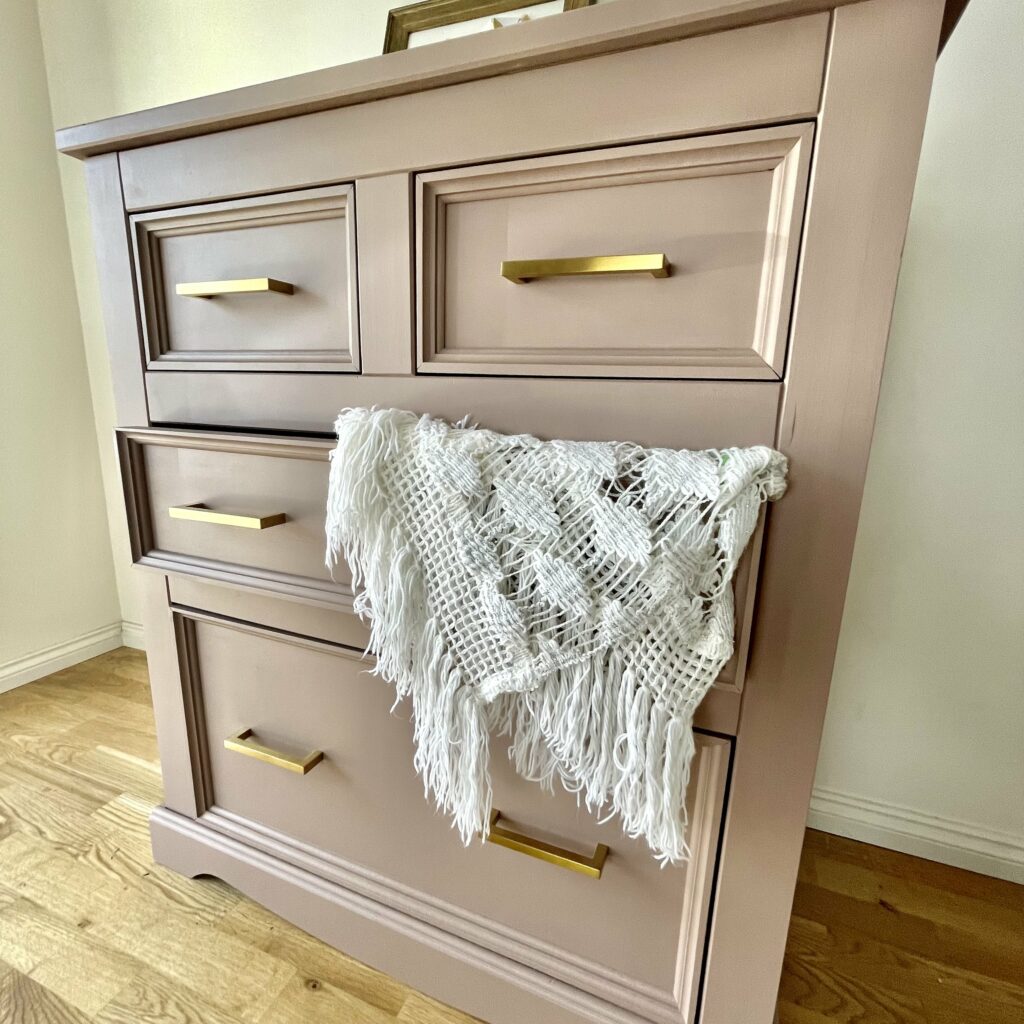
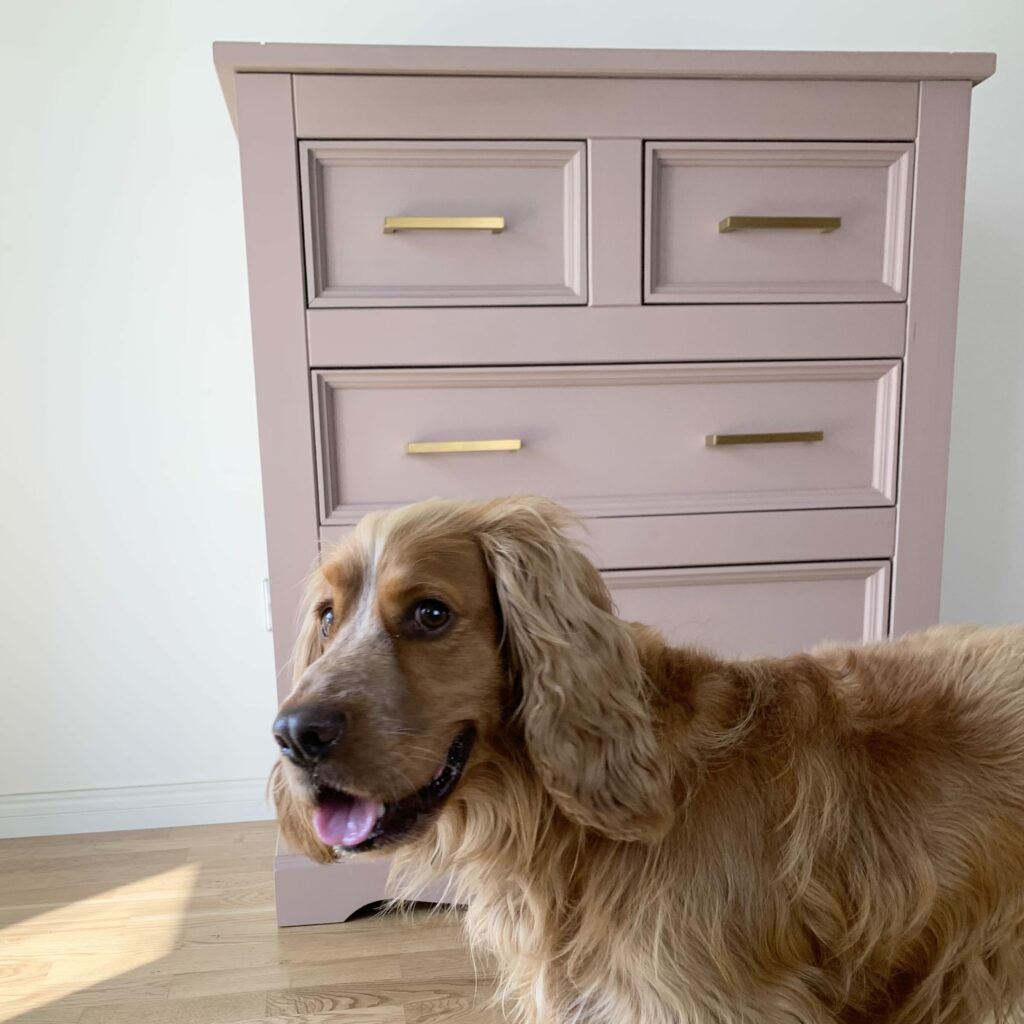
And here she is, a pretty, pink chest of drawers.
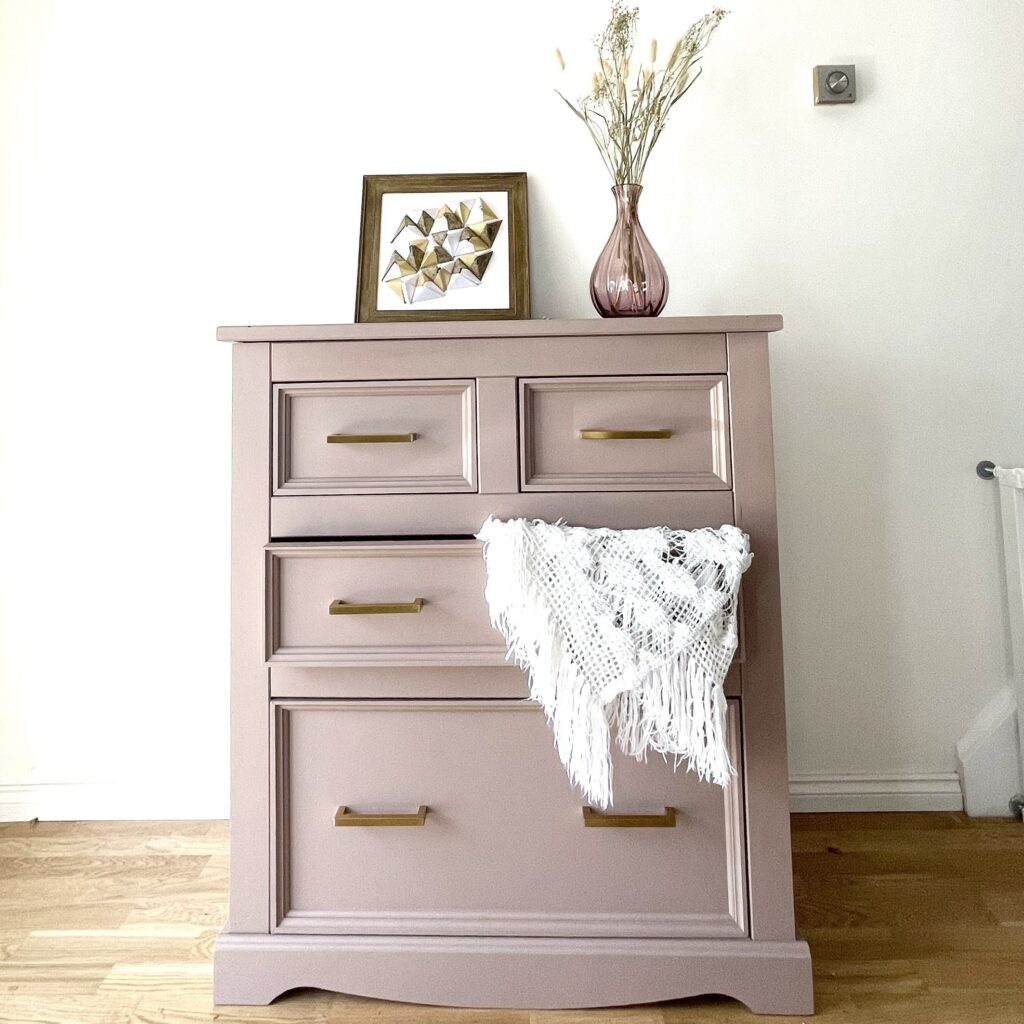
With my bonus photobombing model, Puzzle. He would make anything lovelier!
What do you think? Do you know why the drawers didn’t fit properly? If so, please tell me!
Prefer short videos capturing the transformation? Check out my Instagram.
If you liked this post, you might also enjoy this updated floral chest of drawers…
Pin it for later – wait until you see this upcycled pink chest of drawers

Hi there! I'm Rachel Bowyer, a passionate DIY enthusiast with a knack for transforming the old into something beautifully new. With a deep love for furniture painting, refinishing, and the art of crafting. I've been documenting my DIY projects and restoration journey since 2018. I specialise in techniques like decoupage, stencilling, and decor transfers. Join me as we explore the world of creativity and home improvement, one project at a time.
The color you chose is beautiful! Can’t beat free & some elbow grease!
Thank you, I love the colour too <3
Wow! What a difference!! Great job!!