How to paint wood furniture black successfully
To successfully paint wood furniture black is difficult. Top coats often turn out streaky. Fortunately, I found a way to get a great result.
Black and white are some of the hardest paint colours to finish well.
Many thanks to Dixie Belle for sponsoring this post.
This post includes gifted products and affiliate links so you can easily find the products I use myself and recommend to friends. If you purchase these products, I may earn a small commission at no extra cost to you.
How to paint wood furniture black successfully
Furniture painting a wooden cabinet
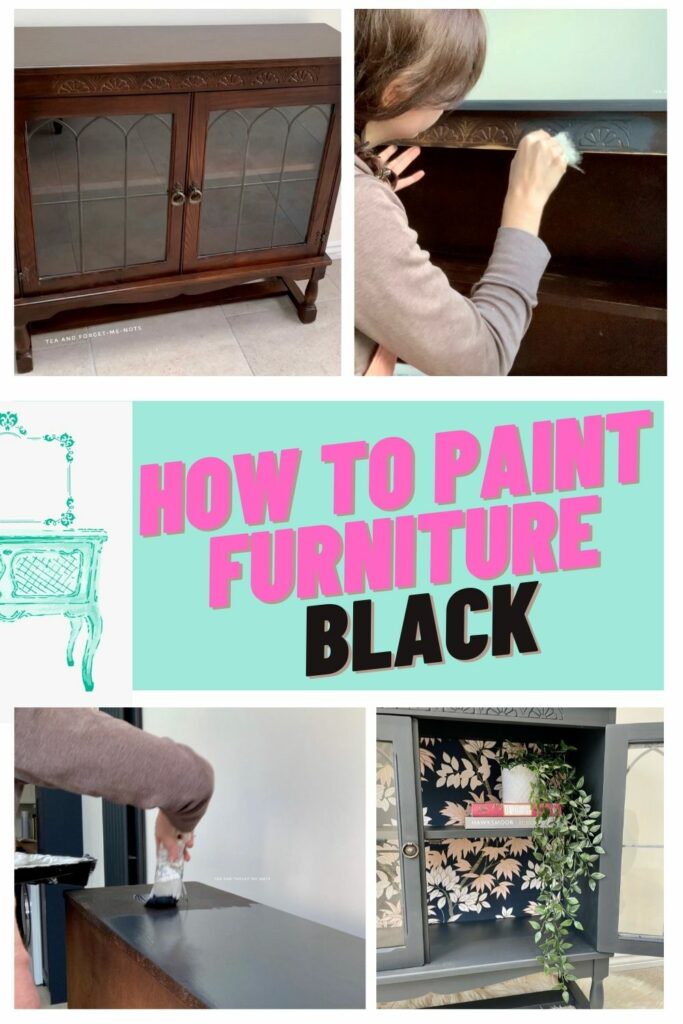
My friend saw this cabinet on Facebook Marketplace. The owner had been trying to sell it unsuccessfully and eventually listed it for free, saying it would go to the dump the next day.
It would have been such a shame if this had been thrown away.
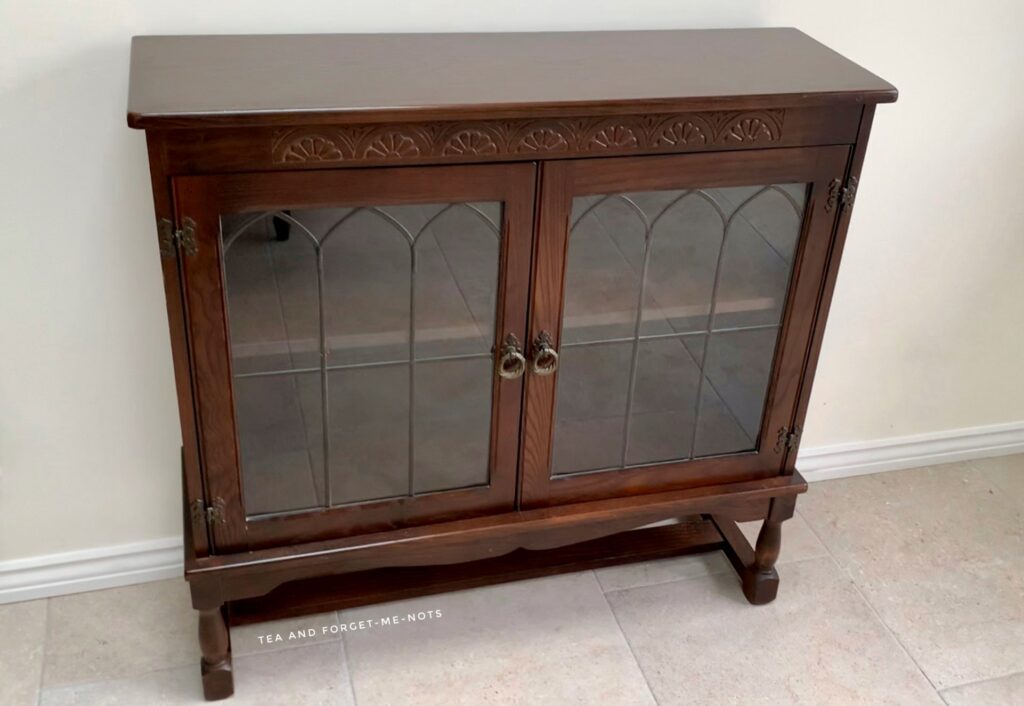
It was in great condition, although, it did have some rather adorable artwork on it, which you can see in the Youtube video.
If I kept the cabinet, I would have left the drawings, as they were sweet and added to its story. But I don’t expect a buyer to want to see a child’s drawing on their new furniture.
If you’re looking for a gift for an upcycler or DIYer, take a look at my 21 suggestions. Some of them are digital so you don’t have to worry about delivery.
How to Paint Black Successfully Video
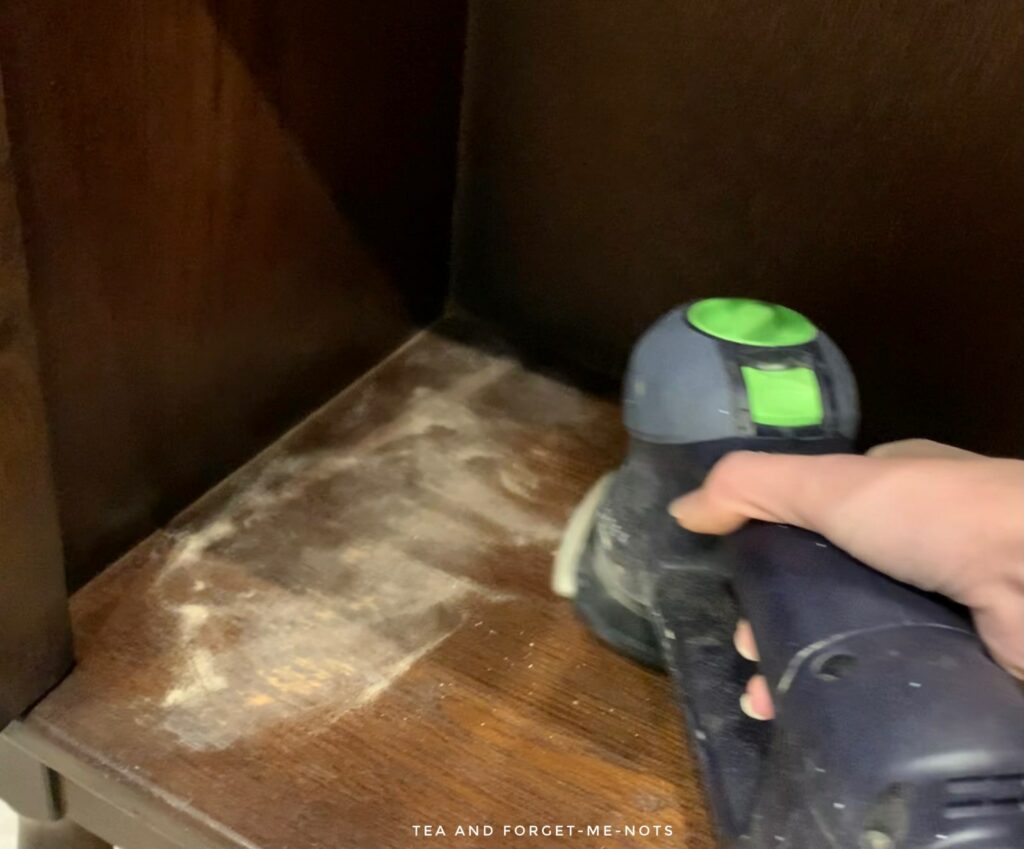
Prepping to paint for the best results
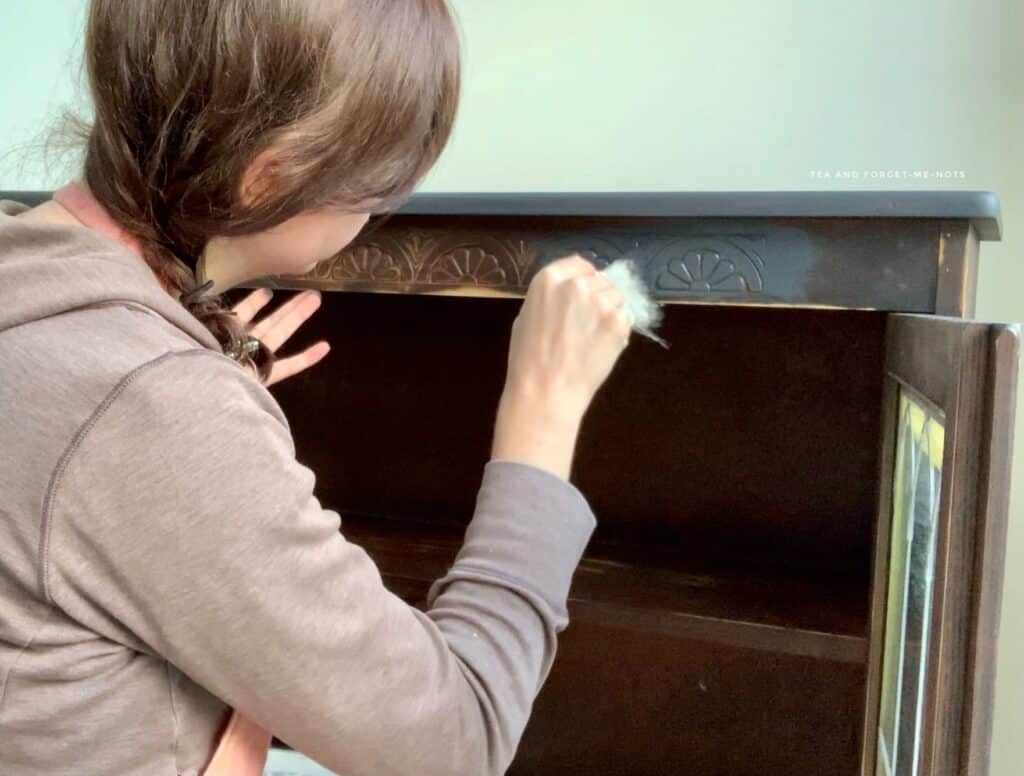
I cleaned the whole piece twice with White Lightning, and it needed it. The water was black after the first clean. That’s the downside of ornate pieces, dust settles in them so easily.
As I planned to paint the wood cabinet black, I used my sander to take the shine off the previous finish. The triangular sanding head is great for getting into corners.
The dust extractor attachment also means that I can sand in the house without making a mess.
Much better than working in a cold shed at the moment!
For the first time, this piece came to me with a slightly musty smell. It’s a common issue so I knew some ways to help remove it.
It’s always interesting to have something new to tackle. Well, when there’s an easy solution, at least!
To help the musty smell, I used BOSS primer in clear over the bare wood. BOSS is designed to block the smell and it worked perfectly.
Primers often come in white or grey but I wanted clear in this case as I was painting a dark colour. Brown to black is a much easier transition than white to black.
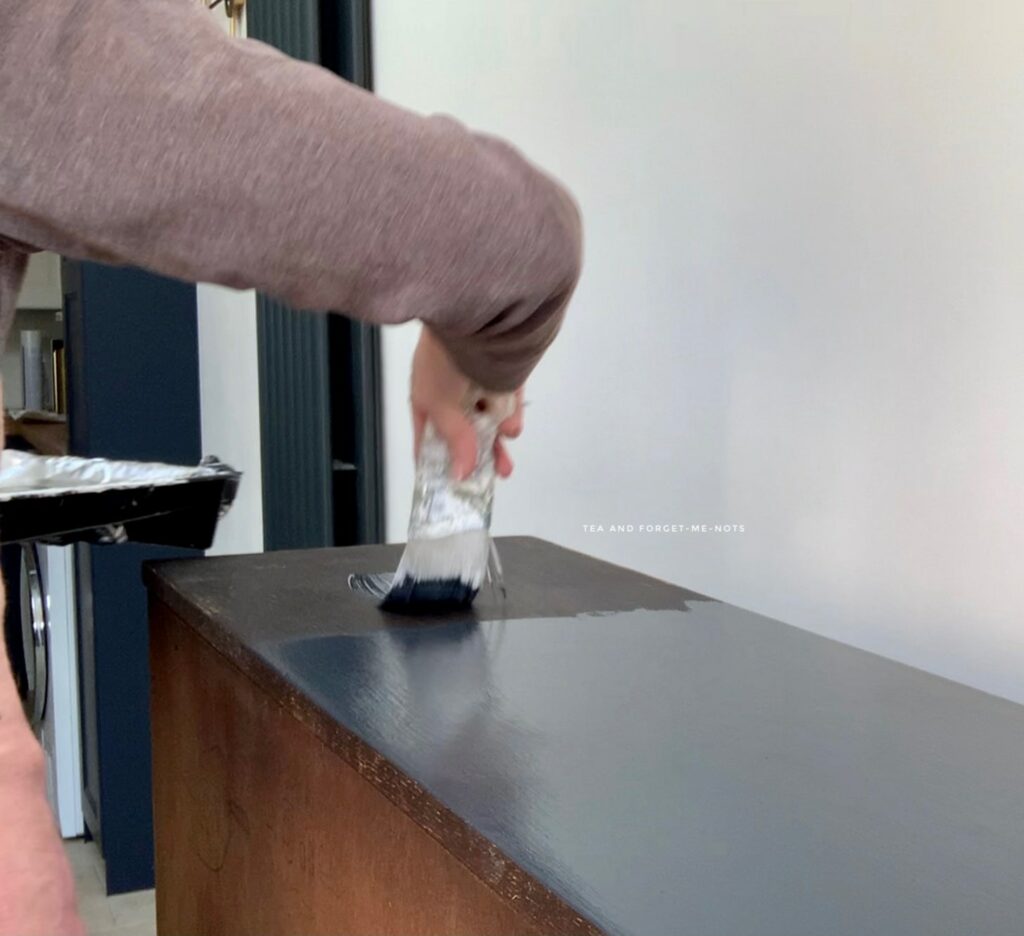
Painting with Black Sands
As painting wood furniture black can be hard, I started with a paint range that I already knew had good coverage.
This paint is Black Sands from Dixie Belle Paint’s mineral paint line, Silk. It’s a lovely soft black. Not as heavy-looking as some true blacks can be.
I needed two coats of Black Sands, which is the great coverage that I’ve come to expect of the colours in the Silk range.
If you’d prefer a true black with a matte finish, then Caviar is a great choice. Probably the best black paint option for chalk paint.
If you like black, this bumblebee makeover sold lightning fast!
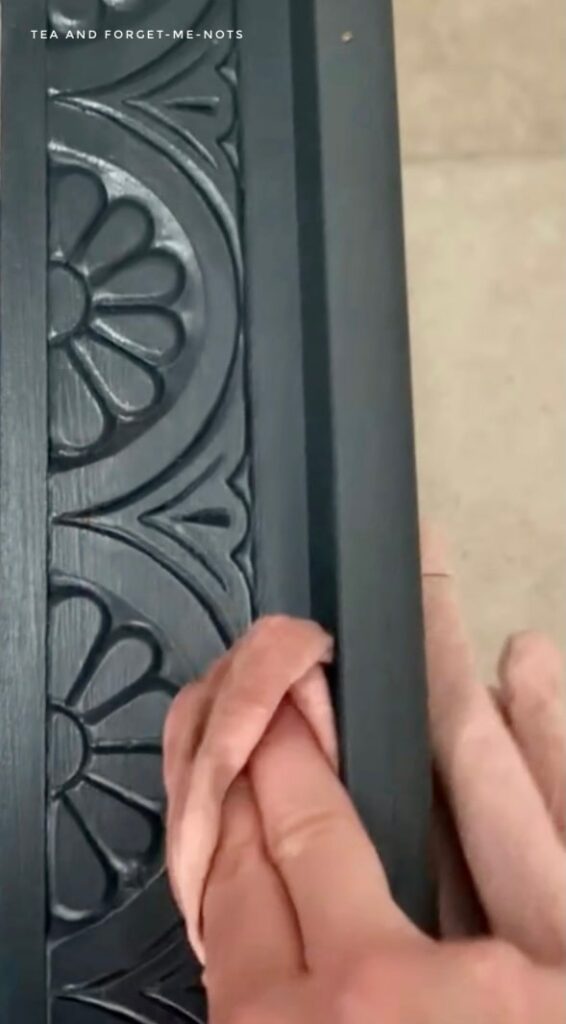
I used the same flat brush to paint the ornate area but a round brush would have worked better to get into the details. So, I went back over it with a tiny detail brush the second time.
After two coats of paint, one of the doors kept catching on the base. There are two solutions to doors catching. Either adjust the hinges to pull the door up or sand back some of the wood.
I chose to sand back the base of the door a few millimetres, which made it just thin enough so that it didn’t catch.
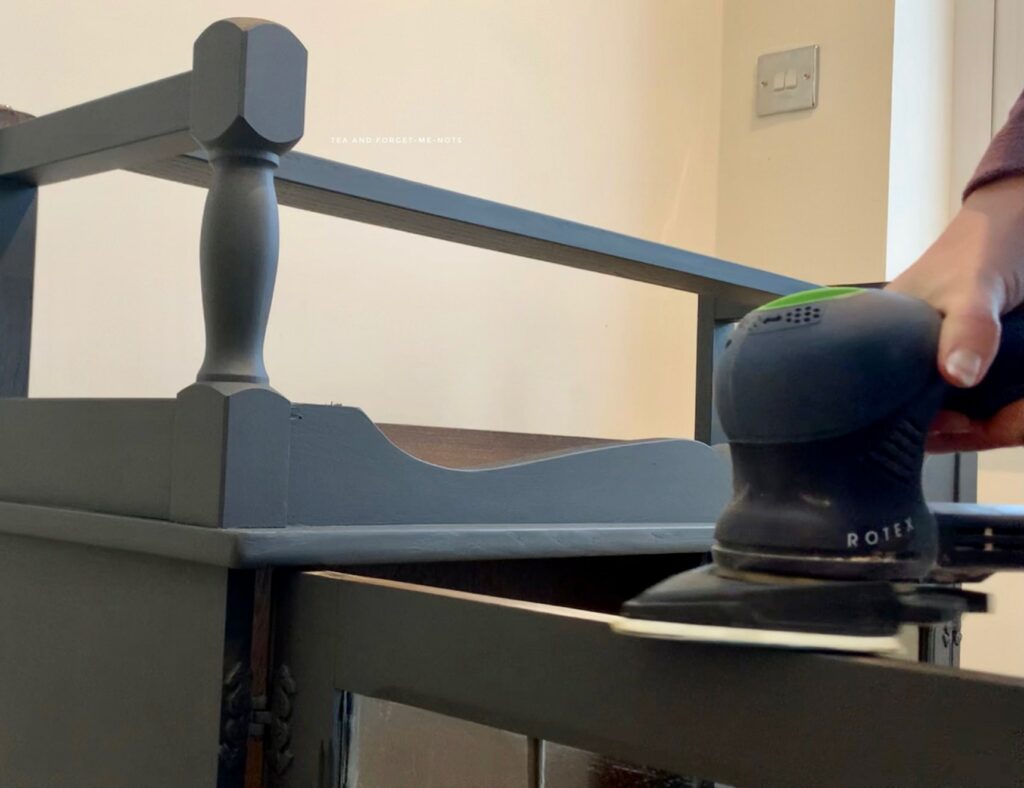
The advantage of having the piece upside down to sand the door was that it gave me a great view of the piece from other angles, to touch up any imperfections.
It’s something probably no one would ever notice but still a good opportunity to look it over.
Sealing the black cabinet
I’d been recommended hemp oil as a good top coat over black. Black is often tricky and lots of sealers leave streaks.
One of the best tips is to use an old T-shirt to apply a small amount of Howdy-Do hemp oil. It’s a really easy way to apply it, which was great.
I do like an easy life.
After a day, I wiped off any excess which hadn’t completely absorbed into the wood. As I haven’t used hemp oil before, I did two coats for extra durability.
Want to know 23 great DIY tools? Get the list!
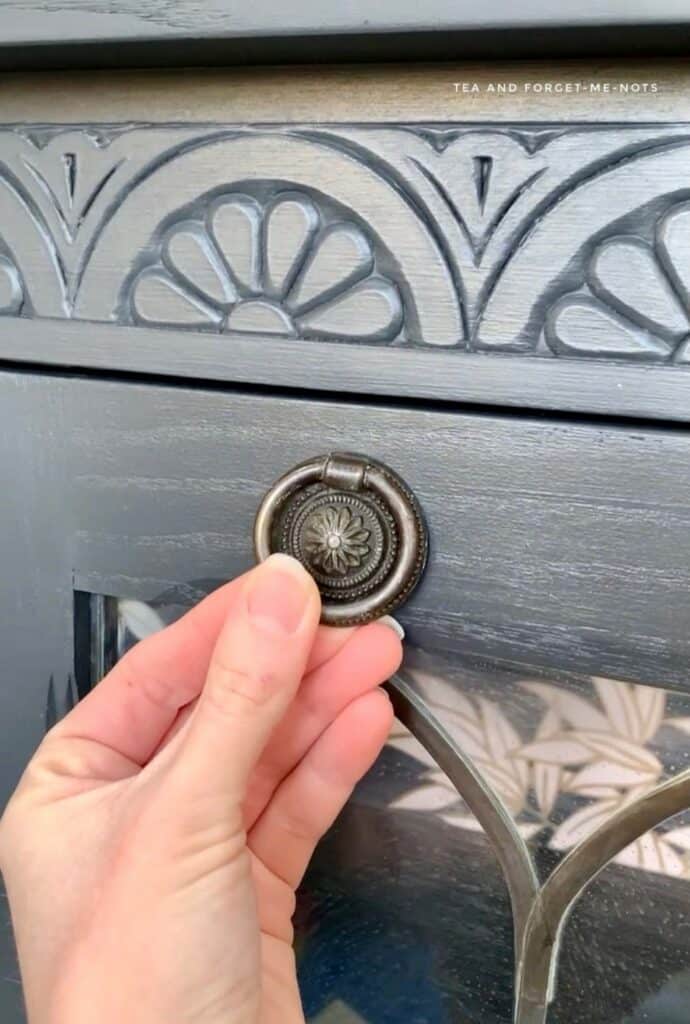
Adding new (old) handles
The handles were a bit too heavy-looking for my taste so I decided to change them.
I still had the original handles from the beautiful bird cabinet I made over. Those intricate handles would match the floral, ornate details of this cabinet nicely.
I used 180 grit sandpaper to rub off some tarnishing on the handles and create some shiny detailing.
Applying wallpaper to the cabinet
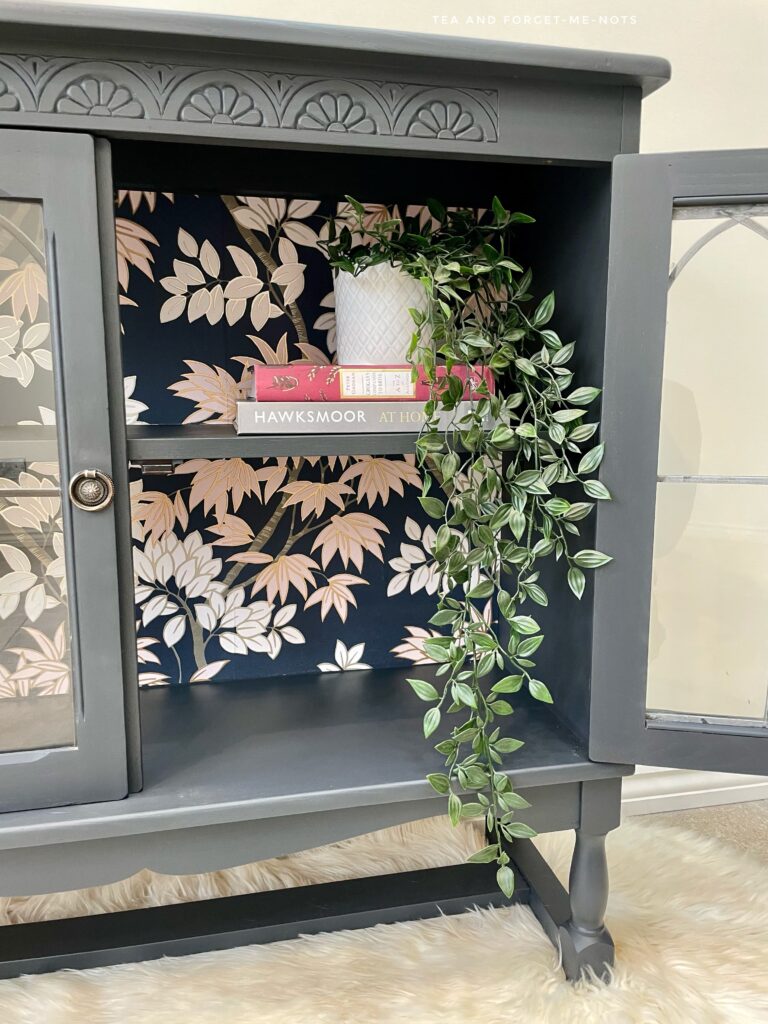
I chose to cover the back of the cabinet with wallpaper. This is called Japandi and is from B&M.
The pink and white leaves have gold edges that subtly complement the metallic handles.
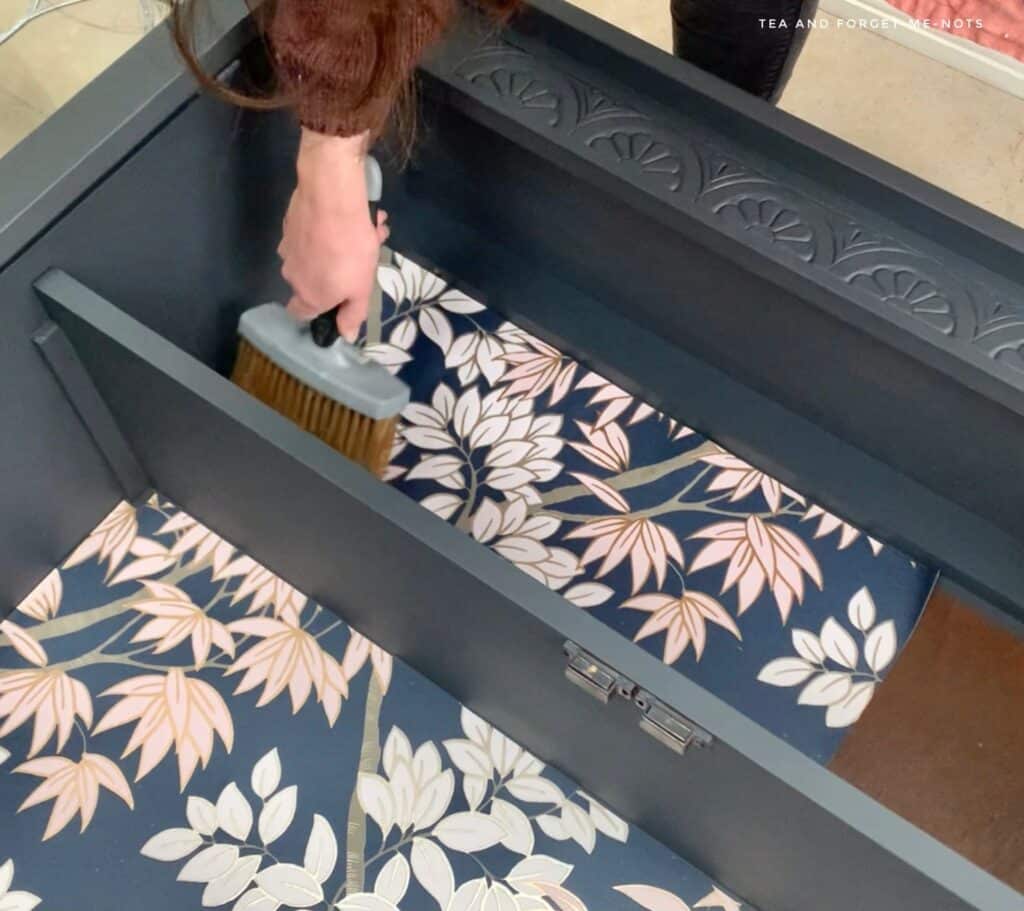
To cover the back, I needed four pieces of wallpaper and lined them up so the pattern matched both horizontally and vertically.
I attached the pieces with wallpaper paste and used a wallpapering brush to smooth the paper flat.
Transfers are another great way of adding a nature theme. Such as on this magazine rack.
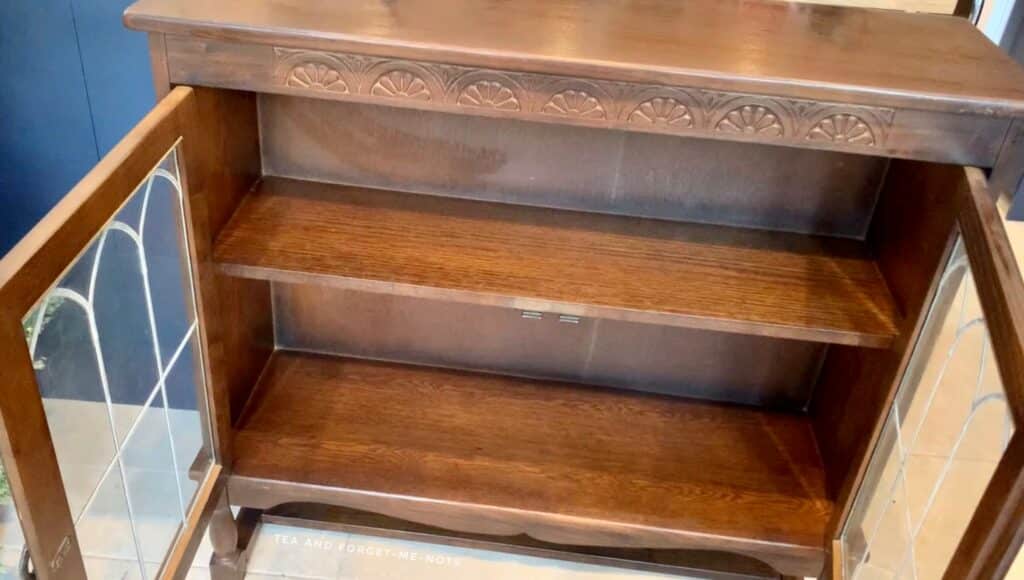
The finished wood cabinet
I like that the texture of the wood grain is still visible, particularly on the doors. The best thing is that it adds to the character and you can tell that it’s not just MDF. You can see the texture even better in the photo with the new handle, above.
I’m also really happy with the handles. As they’re smaller, they’re a bit more delicate and allow for the focus to be elsewhere on the cabinet.
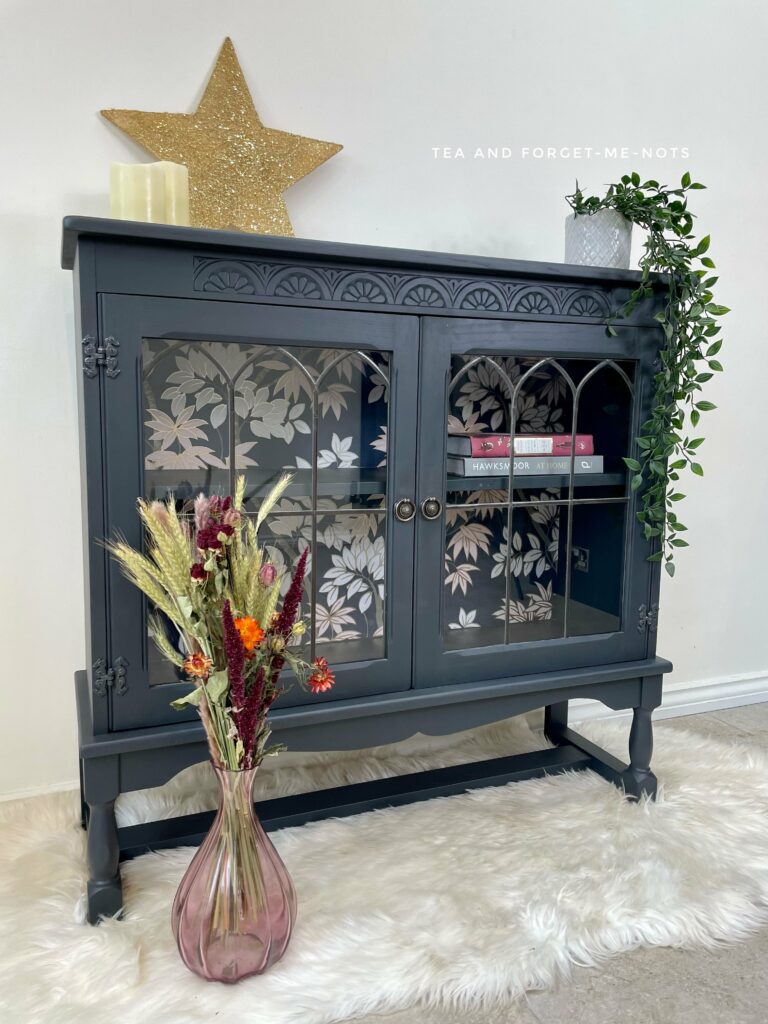
The old furniture could hold books or even bottles and glasses. The modern look makes it more of a statement piece.
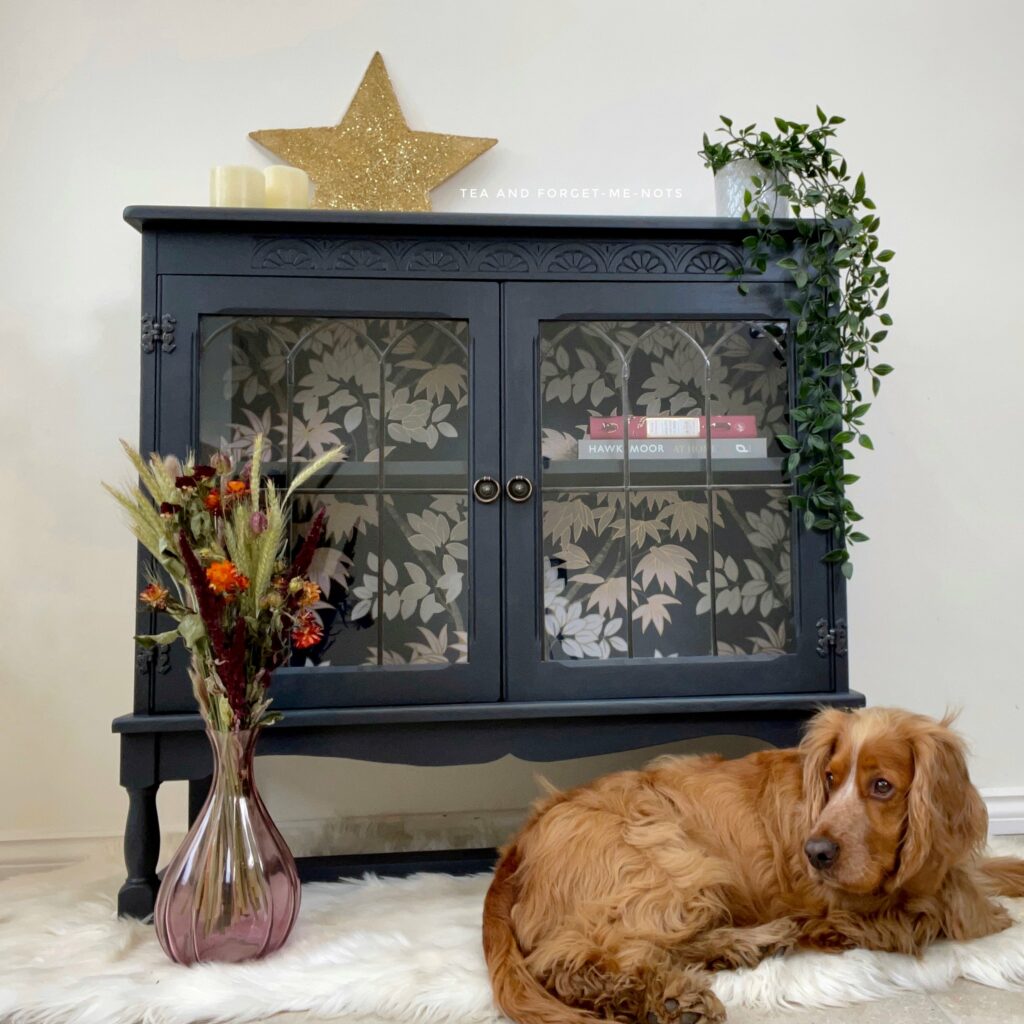
I couldn’t resist including this photo. My dog, Puzzle, was missing out on fuss when taking photos, so came to claim a spot on the rug.
I couldn’t have found a more beautiful accessory to the cabinet!
Have you tried to paint wood furniture black? Did it work well? Please share your experiences in the comments.
If you liked this post, you might also enjoy this one using pink paint…
FAQs
Do you need a coat of primer under black paint?
Black is one of the most forgiving colours when it comes to not needing to use a primer. You may still get bleed-through depending on your furniture pieces, however, it should be hidden underneath the dark paint.
If you are using primer for another reason other than bleed-through? For example to even out the surface texture after using wood filler, then priming is a good step to take.
How do you not get streaks in your top coat?
Black paint is notorious for being hard to top coat without streaks. Hemp Seed Oil is the best option to avoid streaks when painting an entire piece of furniture black. Another good choice is to tint your top coat with black paint to reduce streaks.
How do you get a smooth finish when painting with black?
Sanding between each coat of paint with help you achieve a smooth finish. Also, using a good quality brush will avoid brush strokes. Or alternatively, you can use a paint sprayer.
Pin it for later – How to Paint Wood Furniture Black

Hi there! I'm Rachel Bowyer, a passionate DIY enthusiast with a knack for transforming the old into something beautifully new. With a deep love for furniture painting, refinishing, and the art of crafting. I've been documenting my DIY projects and restoration journey since 2018. I specialise in techniques like decoupage, stencilling, and decor transfers. Join me as we explore the world of creativity and home improvement, one project at a time.
Looks beautiful! I love the print inside!
Thank you, it definitely adds something extra.
This looks beautiful! I love the wallpaper! And your sweet pup, the perfect model to showcase this wonderful piece.
Aw isn’t he? Couldn’t have placed him there if I’d tried!
You did an amazing job making over this cabinet. I absolutely love the end result.
Thank you, Paula. I’m really happy with it.
Such a dramatic makeover! I love how it turned out, the color is beautiful and the wallpaper looks amazing! Great job, Donna
Thank you, Donna. It’s quite a difference!
I love this 😍If only I had a bigger flat…
You find the furniture, I’ll do the painting!
This was a GREAT find! I love the new color and that wallpaper!
Thank you, I can’t believe they were going to throw it away!
I so agree, black and white are sometimes tough. I love it though. Great job.
Thank you.
Black is one of my favorite colors for furniture and I have painted several pieces using it. Great tutorial on this piece! Pinned 😊
Thank you, Cindy. Would love to hear if you have any advice for future projects.
You did a great transformation. Love the wallpaper you used.
Thanks, Kim!
Love this cabinet!
Thank you, Linda!
Beautiful! And I don’t usually like black furniture!
Thank you, yes black is certainly not for everyone.
This is a stunning transformation Rachel. I think you picked the perfect wallpaper for the back as well.
Needed that reminder to sand between each coat of paint for a smooth finish.
Thanks so much, Maria. Yes it feels counterintuitive to sand between coats but it does help.