How to create a beautiful floral chest of drawers
Want to create a statement piece of furniture? This dresser makeover is how to paint a floral chest of drawers using a furniture transfer.
Refinishing furniture can take a long time. If you start with a quality piece then you have a solid foundation on which to create something beautiful.
This post may include affiliate links so you can easily find the products I love and use myself. If you purchase these products, I may earn a small commission at no extra cost to you.
How to create a floral chest of drawers with paint
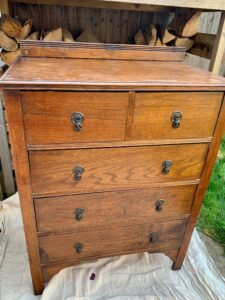
I bought this old chest of drawers on Facebook Marketplace for £15. Similar restored items sell for hundreds of pounds and you can see why.
My goal was to keep the character of the solid wood furniture while giving it a new life that someone would love.
Need a gift for the DIYer or upcycler in your life (even if that’s you!)? Here’s my holiday gift guide with some more unusual recommendations.
Apply Furniture Transfer Video
Prepping wood furniture to paint
Preparation of pieces of furniture before painting is the most important step. This includes cleaning, sanding and doing any repairs.
If the furniture is shiny or dirty, then the paint won’t adhere. It will stick to the dirt and then fall off. If there are holes or dents, the paint won’t hide them.
So, whilst I always want to rush on to the fun stuff, prep work must get done.
I started by cleaning the entire piece with Sugar Soap. Which I diluted in water.
Sugar Soap is a mild detergent. It has nothing to do with sugar. It gets its name from how it looks when in its powdered form.
It’s best to clean before sanding. As sanding can push dirt and grease further into the wood.
Fortunately, the piece didn’t need any repairs. There was only one area that I chose to make a change to and then use wood filler.
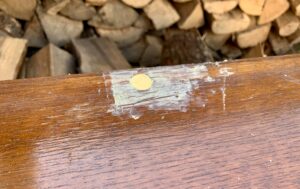
I removed the ornate backing piece from the top. It had a cleaner silhouette without it. And it didn’t add much to the character.
It just slotted off but it did leave two holes behind. The right way to fill a hole is to add wood filler just above the surface so that when it’s sanded smooth, the surface is flat. It took a couple of applications of wood filler because the hole was quite deep.
Fortunately, there were no deep scratches that needed filling either on the top of the dresser or the drawer fronts.
Here’s a piece where I went very overboard with the wood filler!
Sanding before painting old furniture
Sanding lightly scuffs up the surface of the old finish to help give the paint something to grab onto.
This sandpaper gives such great results as it has foam padding. But you can also use a sanding block which gives consistent pressure across the entire surface of the furniture.
I sanded it with 180 grit sandpaper. Then I wiped off the sanding dust with a damp cloth.

If I was trying to get the wood back to its natural colour, then I would have needed a power sander. But a scuff sand to take off the shine was enough by hand-sanding.
The piece was in good condition which was good news. Although there was some staining in one of the bare wood drawers. If this hadn’t been there I would have left the wood natural.
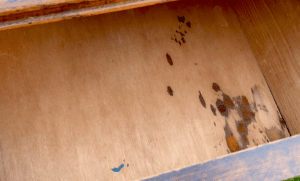
However, no one wants to store their clean clothes on top of mystery stains.
Want to know 23 great DIY tools? Get the list!
Using primer to prep furniture
Often with darker wood pieces, its tannins can bleed through after painting.
I used BIN Zinsser primer which is a stain blocker. The extra steps it takes to prime are worth the time.
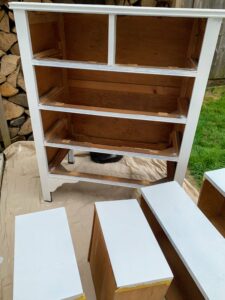
I primed all of the frame because you don’t want to prep, paint and seal and then have stains show up.
The only solution would be to sand it back to the wood and start again. Bin Zinsser is brilliant for avoiding bleed-through and worth the initial effort of doing a coat of primer.
Painting the old floral chest of drawers
After two coats of primer, I painted the piece and inside the drawers in creamy white paint, Raw Silk, by Fusion Mineral Paint. Two coats and a few touch-ups used one can and a bit.
I buy Fusion Mineral Paint from my local vintage furniture shop.
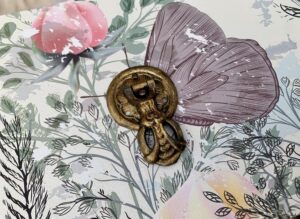
The original handles are beautiful. They were nailed on and had a maker’s mark cast on the back showing there’s some real history there.
To bring them back to life a little, I used Rub N Buff in Gold Leaf.

Applying the transfer to make the floral chest of drawers
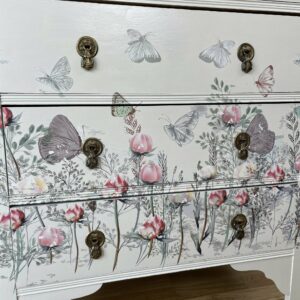
This transfer is Peony Fields by Hokus Pokus. It comes in three sections. So to make sure it was centered, I did the middle first.
If you want a perfectly applied transfer then you’ll need a completely flat piece of furniture. Mine has ridges so I didn’t try to make it perfect as the transfer already had a slightly distressed style (see the white patch on the pink flower).
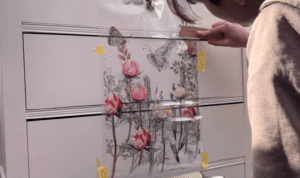
It’s an easy but time-consuming process. All you do is rub over the transfer with a flat object. Then pull back the plastic to check that it has applied to the piece.
If there is transfer left on the plastic just place it back and rub over it some more. Believe it or not, this whole transfer took about six hours to apply!
You can also get flowers by using stencils, here’s how to get a cherry blossom look!
This close-up is of the transfer part-way through being applied. The top left of the purple wing is a lighter colour which shows that it has transferred.
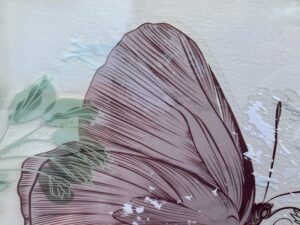
You can see the texture of the drawers which makes the transfer harder to apply as it has grooves and bumps to work around.
It would be faster to apply to the completely smooth surface of something with a factory finish. Maybe not as beautiful in the end though.
The mistake!
I learn from every piece I make. Whether it’s a mistake or a way to do something better. I think it’s important to show that mistakes happen and as long as you learn from them, it’s ok.
Can you spot the mistake here?
As the drawers are vintage they don’t have runners. Without handles attached, they would push back quite easily with the pressure of applying the transfer.
So, I attached a handle to be able to move them.
Except I attached just one. To the middle. Of a drawer that has two handles.
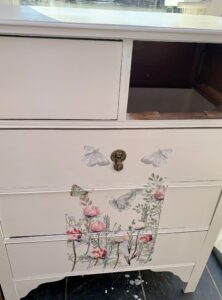
I didn’t even notice my mistake until about an hour later.
Not the end of the world but a waste of time fixing it. So, after completing the transfer, the next step was to remove the one handle, fill the holes, and repaint and seal it. Such is life.
With the handle in the right place. Doesn’t the gold look beautiful amongst the flowers?
I’m glad I kept the original handles. Here’s a chest of drawers where I used modern, new handles to create a very different style.
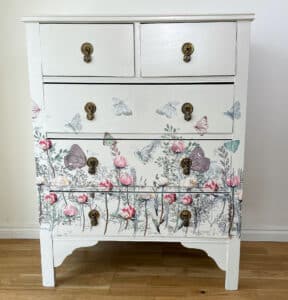
The finished floral chest of drawers
And there it is. The finished piece. I’m really pleased with how it turned out.
It helps to have a quality piece to start with and a lovely transfer to draw the eye. I think it’s charming and elegant.
It’s not for everyone but it would be a boring world to live in if it was.
Have you made any mistakes like me? I’d love to hear about it! They’re the best way to learn.
Like to see the process in real life? Watch the quick flip video!
If you liked this floral chest of drawers, you might also enjoy these other beautiful transfer projects.
More about upcycling and refinishing furniture.
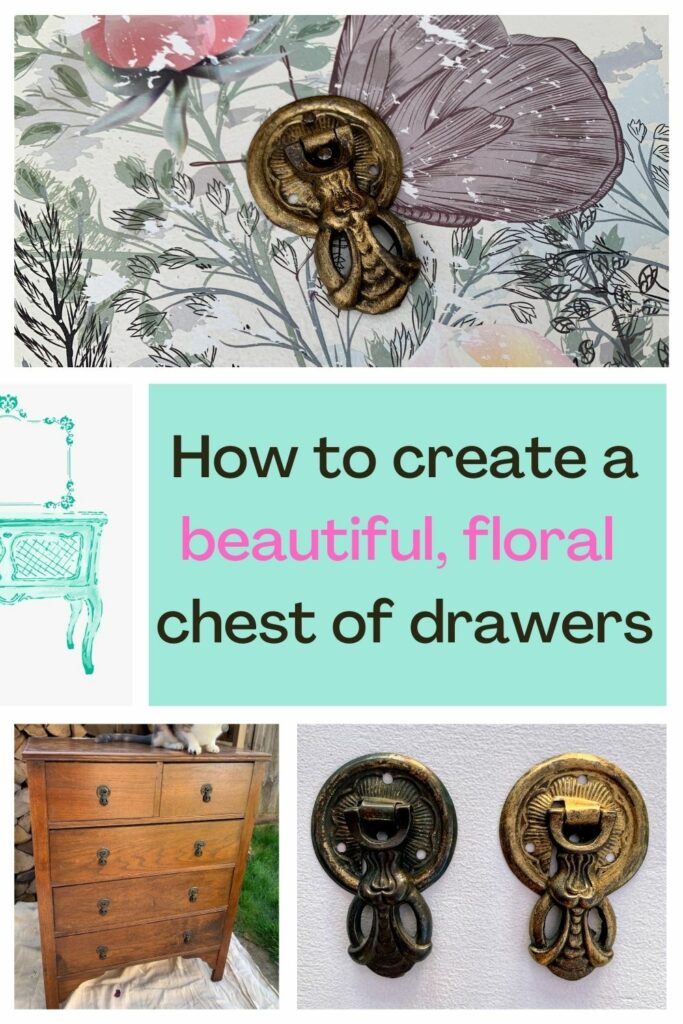
Pin it for later – how to create a beautiful floral chest of drawers
FAQs
What did you use for a top coat?
Good question as I missed this in the original post. I got distracted by the transfer and forgot to mention it.
I did a coat of Fusion Mineral Paint’s Tough Coat. And I didn’t do a second coat of this because Fusion Mineral Paint has a built-in sealer and gives a professional finish by itself. Tough Coat has a matte finish so it was barely visible on the painted dresser.
When did you apply the top coat?
Some furniture transfers want you to seal the piece before applying the transfer. And some after. For Hokus Pokus transfers, paint needs to be sealed 24-48 hours before the transfer is applied.
What is the best way to get a smooth finish?
The most important things to consider to get smooth surfaces are the paint and the tool you apply it with.
Firstly, it helps to have self-levelling paint. Fusion Mineral Paint is self-levelling. As are several other brands such as Dixie Belle which I use often.
Self-levelling paint is designed to flatten out across a surface as it dries. This minimises brush strokes and gives a clean finish.
In addition, a good idea to help with flat surfaces is to use a paint sprayer. Spray paint is often the easiest way to get a consistent finish for a fresh coat of paint.
If you use a paint brush on a furniture piece, you can lightly sand after the first coat, which is also a great way to even out the finish between coats of paint. You’ll want to do this with higher grit sandpaper, such as 400 grit. The goal isn’t to remove any paint, just any brush strokes or paint nibs.
How did you choose your paint color?
I immediately pictured this old dresser in white or cream paint. To me, this vintage dresser needed a classic colour to complement it.
I knew I wanted to use the floral transfer, like on this end table. A light color is an easy way to make transfers stand out on a painted piece of furniture.
Did the drawers have dovetail joints?
Unlike a lot of old piece of furniture, the sides of the drawers didn’t have dovetail joints. I didn’t show them because they were just plain.
To get a crisp edge with the paint, I used Frog Tape along the edges. This is a good tool when you paint furniture to avoid sanding off paint drips in the wrong places.
Which is the best paint to use?
This best type of paint is a personal preference for everyone. And most furniture painters have a different answer!
I really enjoy using mineral paint. It gives a smooth and even finish and often has a built-in top coat which gives extra durability.
A chalk-based paint is a classic for painting furniture. A brand like Annie Sloan is one of the originals for chalk painting. Chalk paint is fabulous for creating a new look for a furniture makeover by being easy to blend and very user-friendly.
Why did you paint the dresser top?
As I removed the back panel on the top of the little chest of drawers, it left some holes. I much preferred the look of the dresser without that panel. It was simpler.
But it’s difficult to stain a piece when you need to use wood filler like in this case.
However, if you want to try, a wood stain touch-up repair kit from Home Depot could help. I’m sure other hardware stores have similar products.
It’s a felt tip pen in the colours of common wood stains. If there was a good match for the original colour then there’s a chance that you could have mimicked the wood grain and kept it as it was. These pens are also perfect for touching-up scratches on small projects.
Why didn’t you remove the previous finish before adding the new paint?
You don’t often have to sand back to raw wood before painting.
The most likely reason for doing this is that the existing paint finish is very uneven and chipped. No amount of layers of paint will hide the indentation of chipped paint.
Fortunately, I had an even finish to start from. But there was still a previous finish there. So that’s why I sanded it.
This purpose was to take the shine off and remove that slick surface. By adding texture to the surface, the new paint has something to grip onto.
If you’ve painted on laminate, you can picture the paint sliding straight off. You need to create that barrier before the new paint can adhere. Either by a priming paint for slick surfaces such as with Slick Stick or by sanding.
How could you remove the paint in the future?
Trends and fashions change. What’s currently popular won’t be for long. It’s the same for furniture as for fashion.
Just look at how popular mid-century modern furniture is currently.
There are a few ways to remove paint effectively. Firstly, of course, paint stripper. This is a fast and quite effective way of stripping paint or varnish.
A tip for speeding up this process. After applying the stripper, wrap the area in cling film (saran wrap/glad wrap) and leave it for a day to do its work.
Alternatively, sand the paint off. Either by hand-sanding or with an electric sander.
There’s the advantage of no chemicals, as some strippers have. But sanding takes a long time and can be difficult in ornate and delicate areas.
Finally, a great hand tool for removing paint is a carbide scraper.
By applying pressure and pulling the scraper along the surface, it scrapes off the finish quickly. However, there’s a small risk that you take off some of the wood beneath the paint. Here’s it in action on latex paint.

Hi there! I'm Rachel Bowyer, a passionate DIY enthusiast with a knack for transforming the old into something beautifully new. With a deep love for furniture painting, refinishing, and the art of crafting. I've been documenting my DIY projects and restoration journey since 2018. I specialise in techniques like decoupage, stencilling, and decor transfers. Join me as we explore the world of creativity and home improvement, one project at a time.