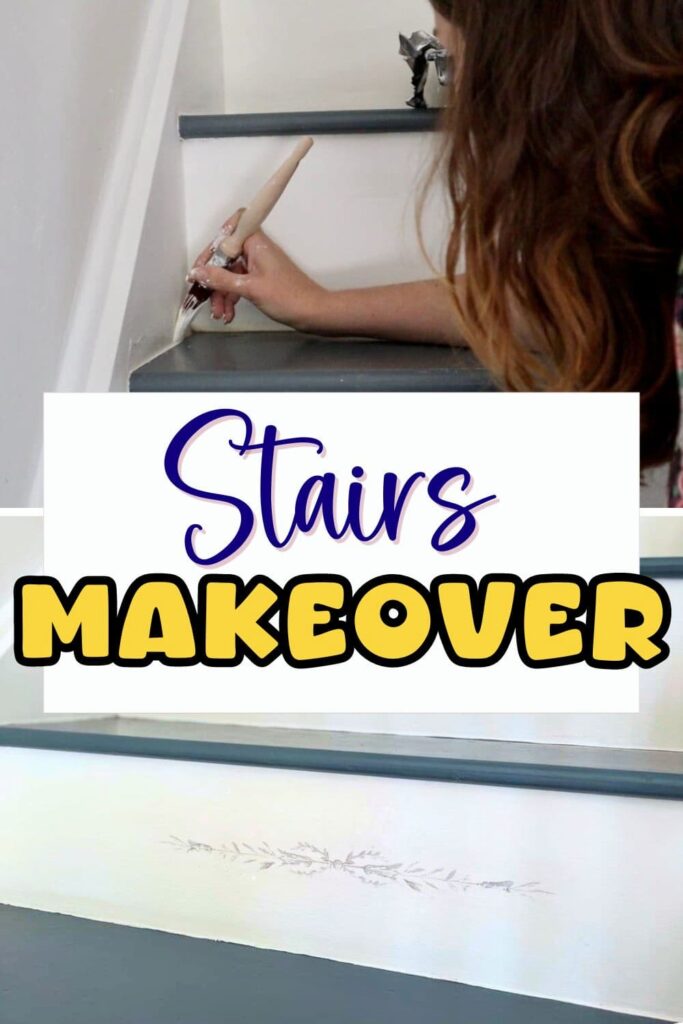
Easy Way to Paint a Staircase (DIY Painted Stairs Makeover)
Looking to do a DIY painted stairs makeover? Here’s how with durable paint and an extra decorative element.
Do you have anything in your house that when you walk past it you think you need to do something about it? Then you keep on walking because you don’t really want to?
That is the case with this DIY project.
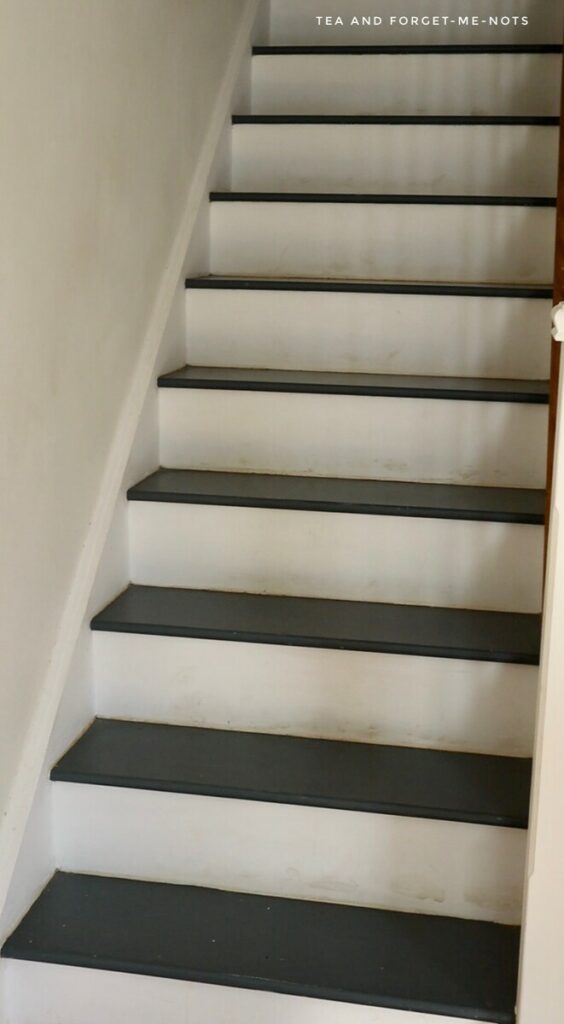
When I moved in, I took off the carpet and then painted the wooden stairs.
And left them to it. And they have been fine.
Learn how to paint wooden stairs
But now the old paint is a bit grubby and has scuff marks. So I’m going to give them a fresh coat of paint. And do something that should make them look a little bit cute too.
My simple stairs were painted with durable specialist floor paint. Tough floor paint is a good idea for high-traffic areas like a staircase.
Side note: if you’re also starting out with a carpet on your stairs. The process the first time was:
- Remove carpet
- Remove staples and tack strips
- Fill holes
- Sand
- Prime
- Paint
See the full step by step video tutorial
It’s worth noting that the original makeover was a bit messy. The hard work of removing the old carpet, and prep work using wood filler and sand paper was messy.
But worth it for a clean result.
If you’re starting with bare wood, you might want to do a first coat of primer.
So, this project is repainting and adding a little feature.
How to Paint Wooden Stairs Step by Step
Materials you’ll need
Step by Step Instructions
Step 1: Clean the Staircase
The first thing you need to do is sweep, or vacuum. An unusual step before repainting, normally!
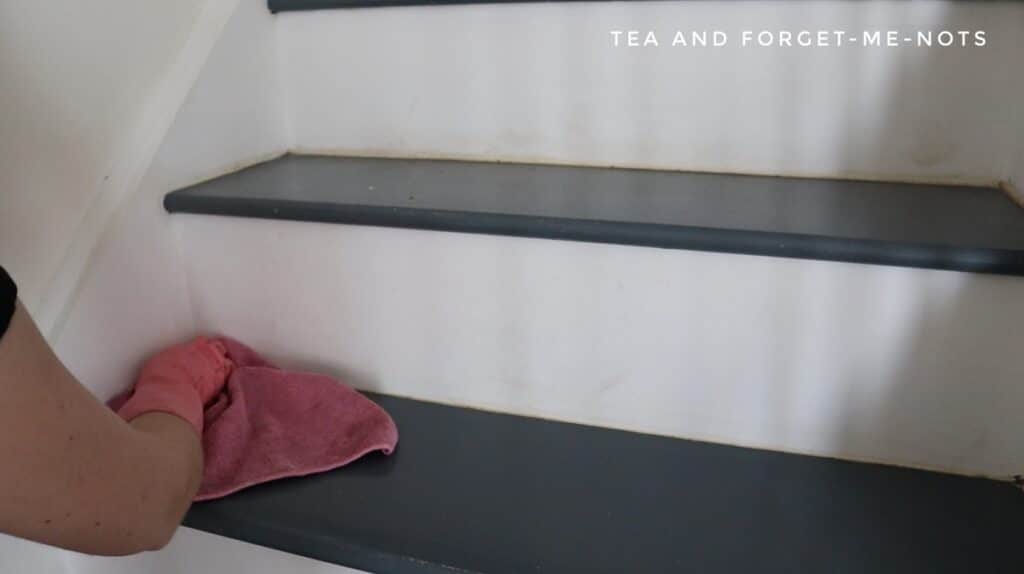
Then rubber gloves and cloth in hand, give them a good clean. I did this with TSP cleaner and washed it off with some clean water.
Step 2: Fill in Gaps
The bigger thing to fix before repainting was the stair stringers (the wood panel against the wall). They had cracked slightly. I used wood filler to fill in that gap and make it a little smoother.
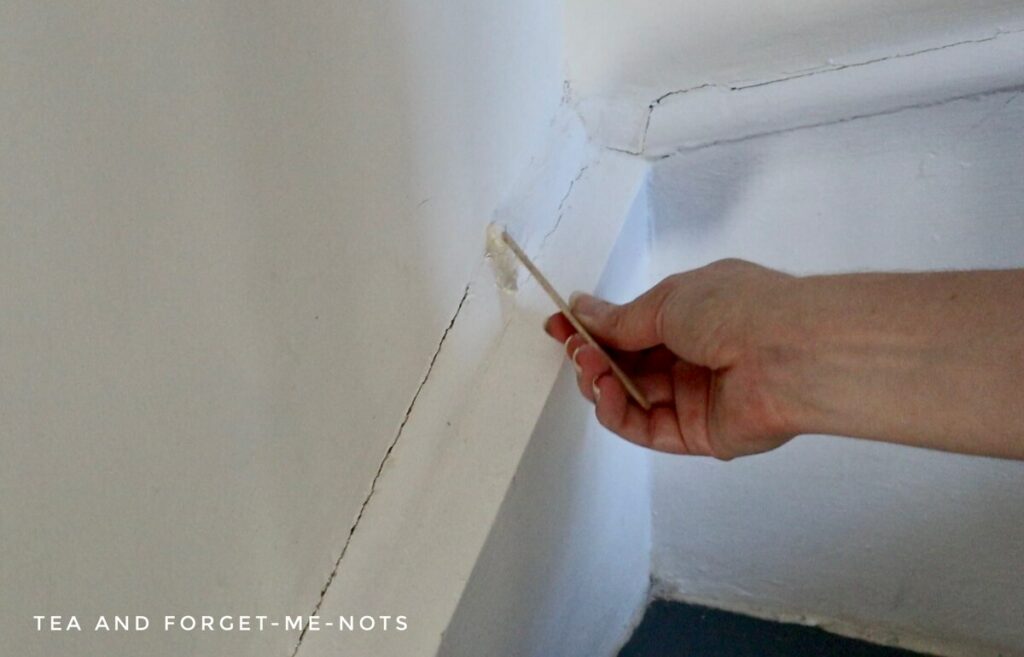
It’s a reasonably old house. It’s not surprising when you get things like this happening.
Fortunately, a pretty simple fix too.
Step 3: Paint the Stair Risers
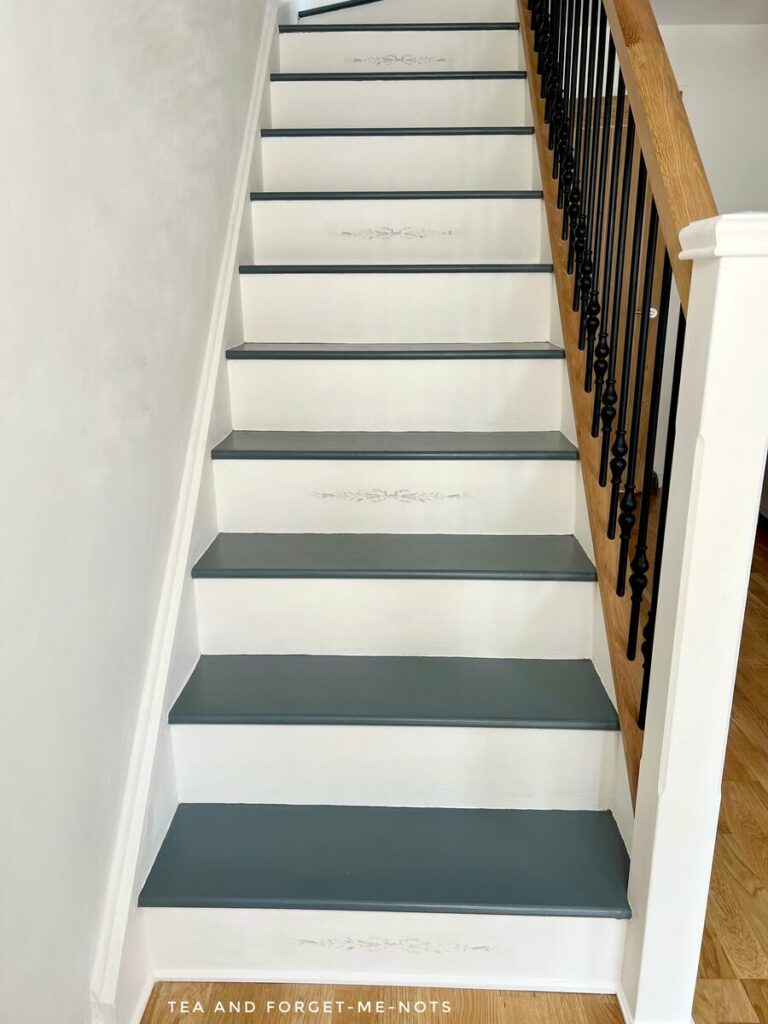
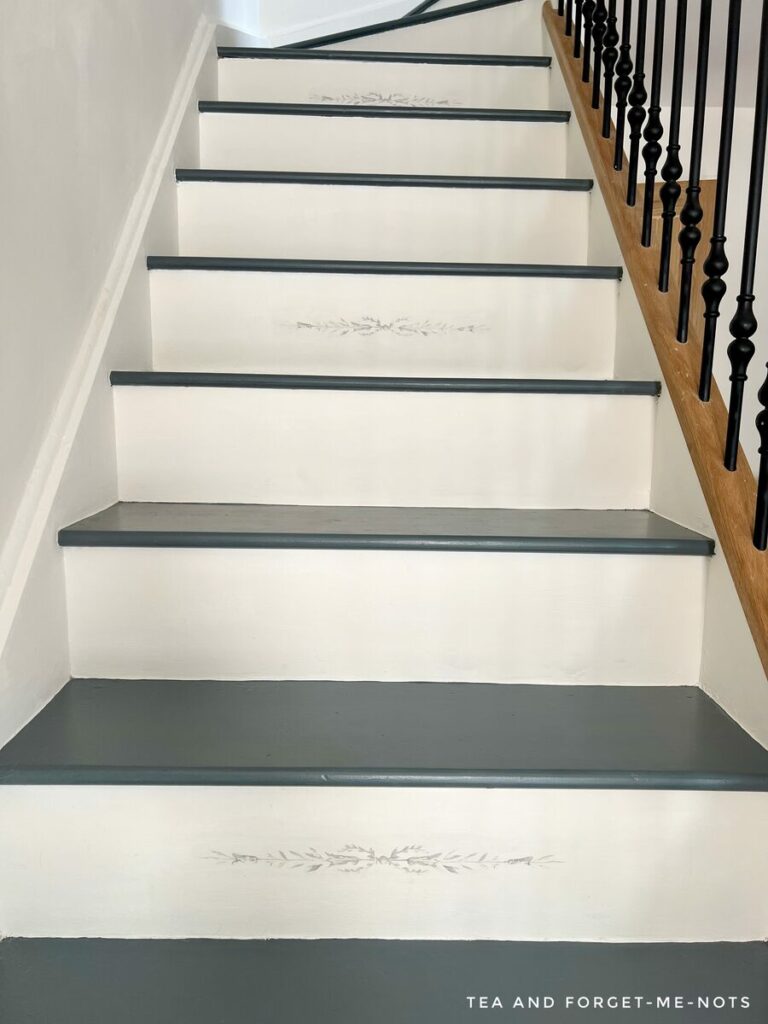
I didn’t use the same paint that was already on the stair risers. I went away from the brighter white paint. And used the Wimbourne White I already had on the wall.
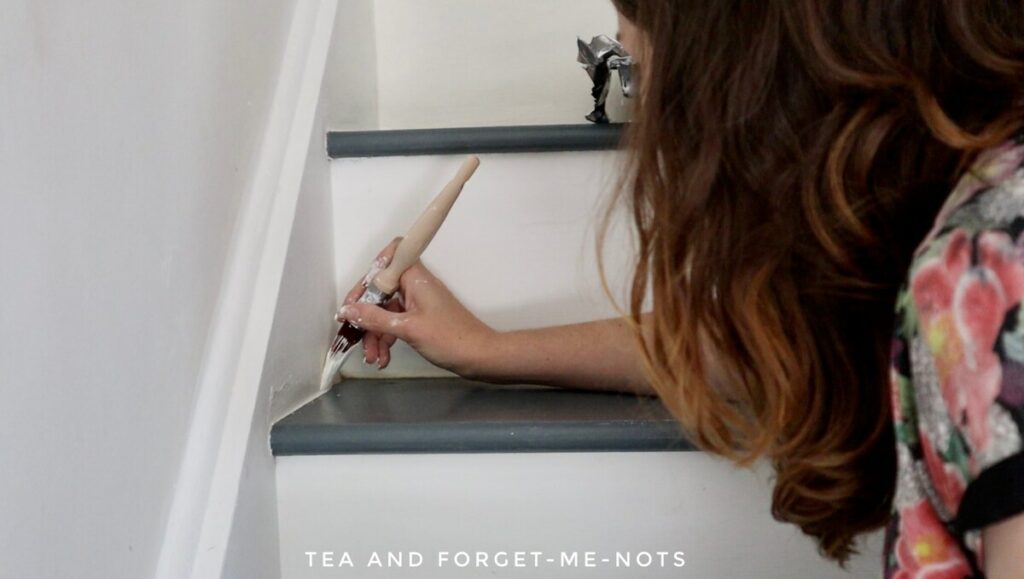
It was a duplicate of a wall colour that I had made up for me at my DIY shop.
The nice thing about that is that when they make up the colour for you, they keep the formula or the recipe on record. Which means that they can replicate it if you need more.
I’ve got two painted colours next to each other. But unfortunately, it’s not a case of being able to use painter’s tape for a perfectly straight line. The stairs are just not smooth enough for that.
I’m just going with making the best of it.
Step 4: Add a Decorative Element
(Skip to Step 9 if you just want the DIY painted stairs makeover)
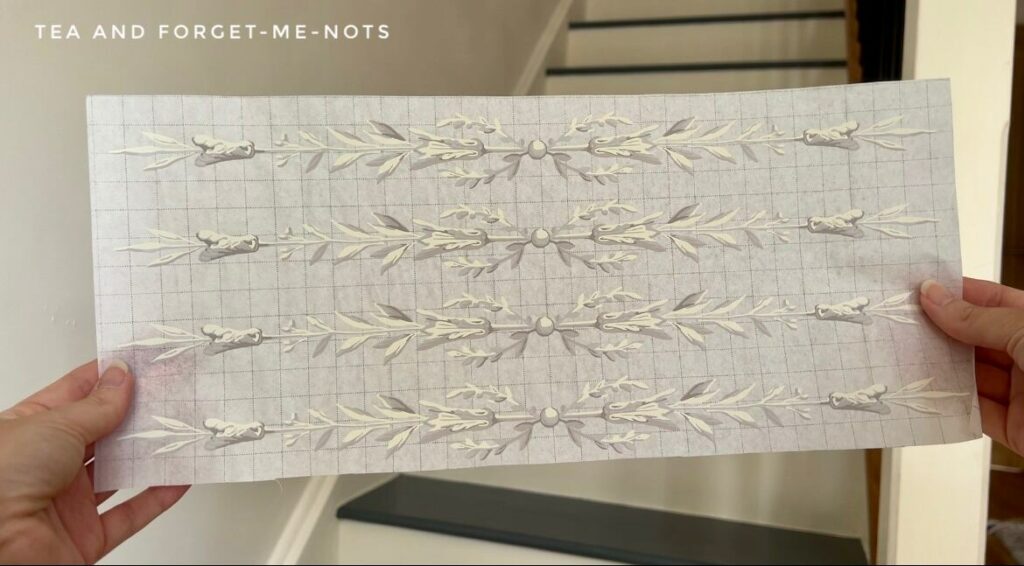
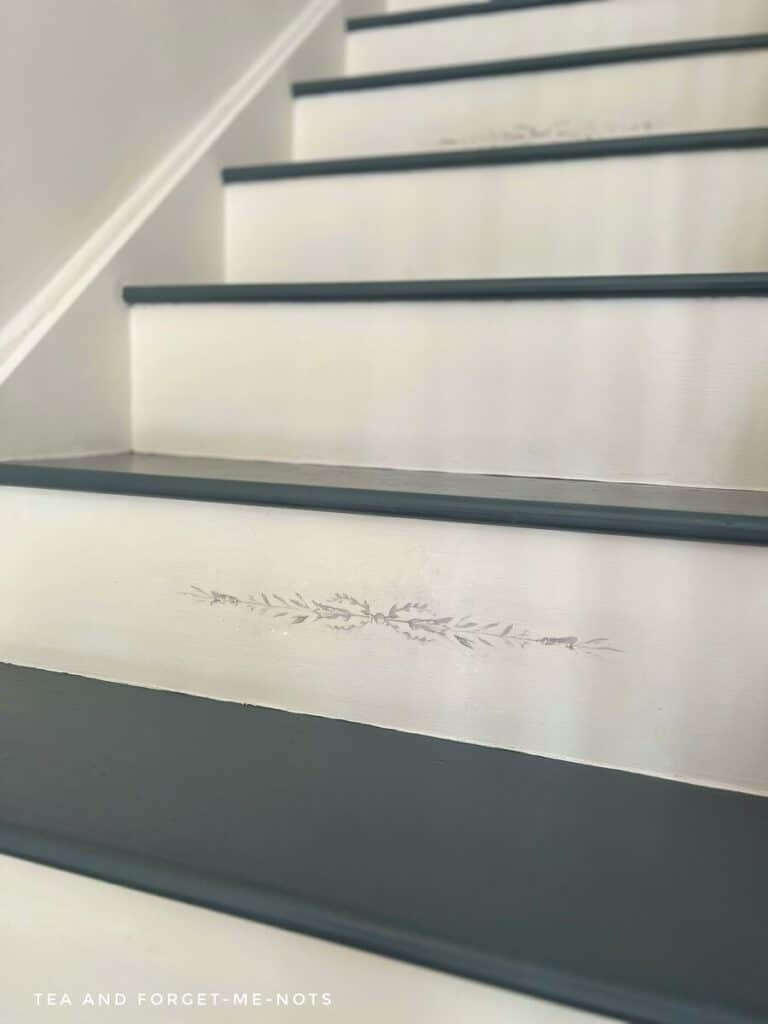
The next step was the little decorative element. I have chosen to use the new Iron Orchid Designs Paint Inlay called Trompe L’oeil Laurel. Which means a visual illusion.
One of the first things to do was to count the number of steps. So that I would know where to start and where I wanted them exactly.
Firstly, I cut out four of them to test where I wanted them. Frog Tape holds them in place which is helpful as it won’t pull off the fresh paint. It was good to try out which steps to place them on and how many to use.
To get the Paint Inlay in line across the stairs I used a tape measure.
I marked out the midpoint of the tread and the midpoint of the stair riser to ensure that each part was in line. There are gridlines on the Inlay to help you line this up.
Step 5: How to Apply a Paint Inlay
The best way to use a Paint Inlay is to lay it into chalk paint. And of course, the wall paint I used for the fresh coat of paint is not chalk paint.
I did one coat of chalk paint in Buttercream, which was relatively similar to the wall paint. I applied enough just to fit outside the area where the Paint Inlay would sit on top of it.
To apply the Inlay, you need the layer of chalk paint to be wet.
Then press the painted side down into the chalk paint. Don’t wiggle it around too much otherwise, it will smudge the paint.
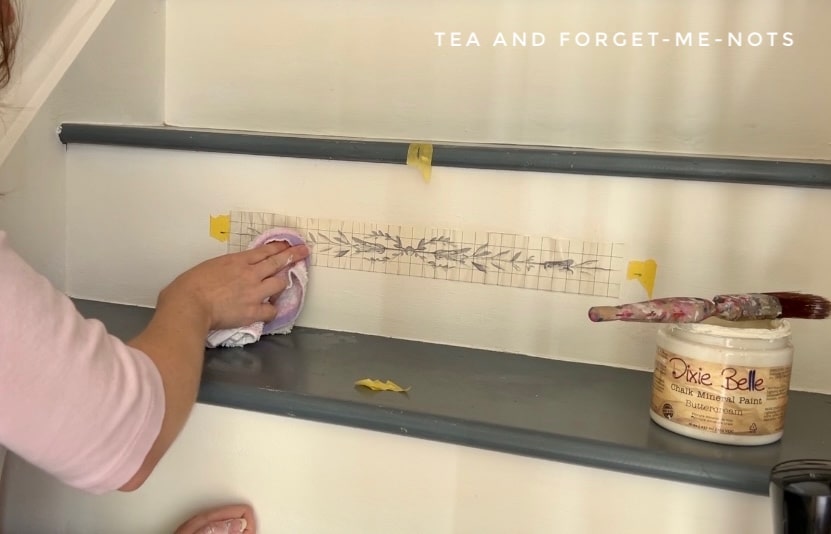
Use a mister bottle to get the back of the Paint Inlay wet and a cloth to pat it down. Make sure that all of it is secured to the wall.
Finally, leave it to dry.
How long this is for depends on the medium you’re using. You can use varnish for natural wood, for example, which will be a different dry time to the chalk paint.
As this was a small piece and it was a warm day, the Inlay was dry when I checked it after about 20 minutes.
Step 6: Remove a Paint Inlay
To remove the Paint Inlay, you get it wet again with a mister bottle.
Then carefully remove the paper. It’s unlikely to tear but if it does, or if it resists, it probably needs to be wetter.
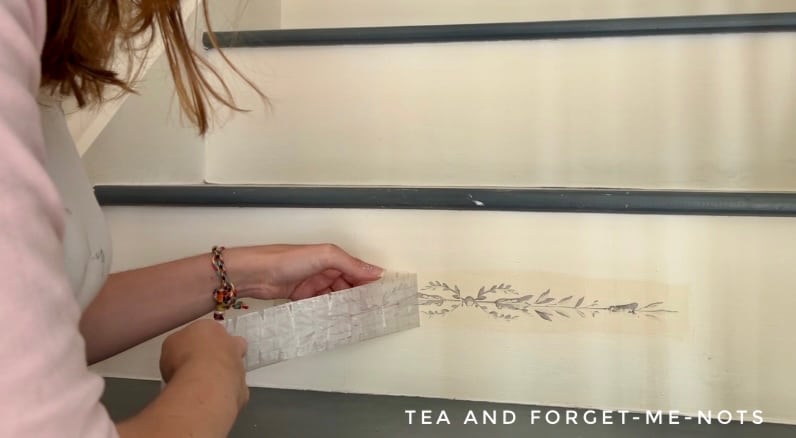
Once you remove it, leave the Inlay to dry somewhere flat. You can store it and reuse it again 2 or 3 times. Each time with an increasingly distressed look as the paint is transferred.
Step 7: Match the Paint to the Background
I needed to hide the chalk paint that I had laid the Paint Inlay into.
You wouldn’t need to do this if you painted the entire surface with chalk paint. But I didn’t want the stairs to be the colour of the chalk paint. Because that would mean repainting the wall of the stairs to match.
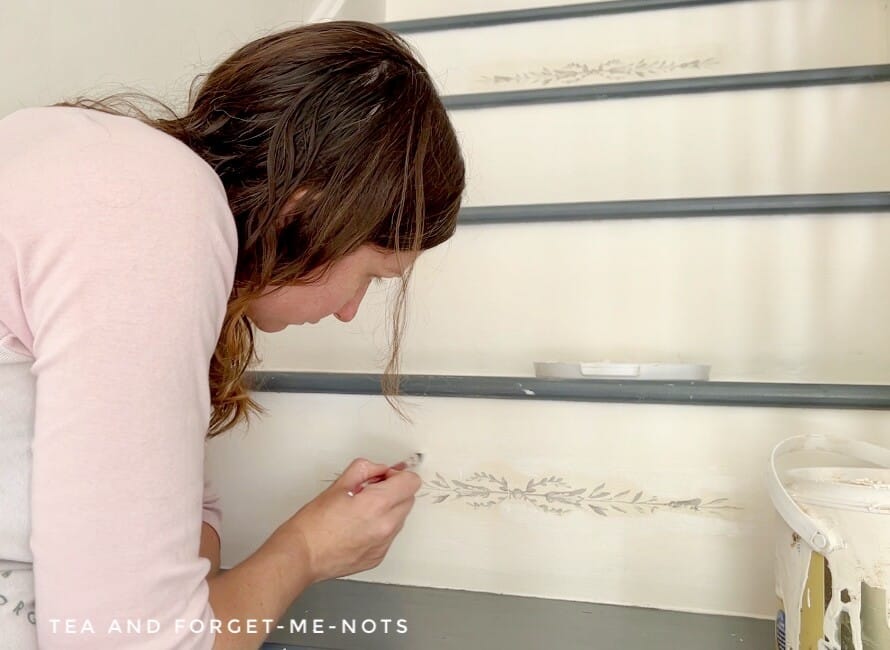
So I used an artist’s brush and a bit of patience to do the second coat and paint the background.
The nice thing about Paint Inlays is they can naturally look a little bit distressed. So actually a little imperfection is not a problem.
Step 8: Seal a Paint Inlay
Paint Inlays need a top coat as they’re vulnerable to water.
So, I did a couple of coats of water-based spray wax to protect them. This wax has a matte finish so it didn’t change the look of the Inlay against the rest of the white riser.
Step 9: Paint Stair Treads
I repainted the treads but the actual durability of the old paint on the stairs was pretty good. It had only come off a little bit on the edges. It held up really well considering the use it gets.
Then I painted the treads with the same semi-gloss paint as before. It’s important to choose the right paint for this area as it has such high foot traffic.
I did this after finishing the Paint Inlays so that I could avoid the stairs for a while as they dried.
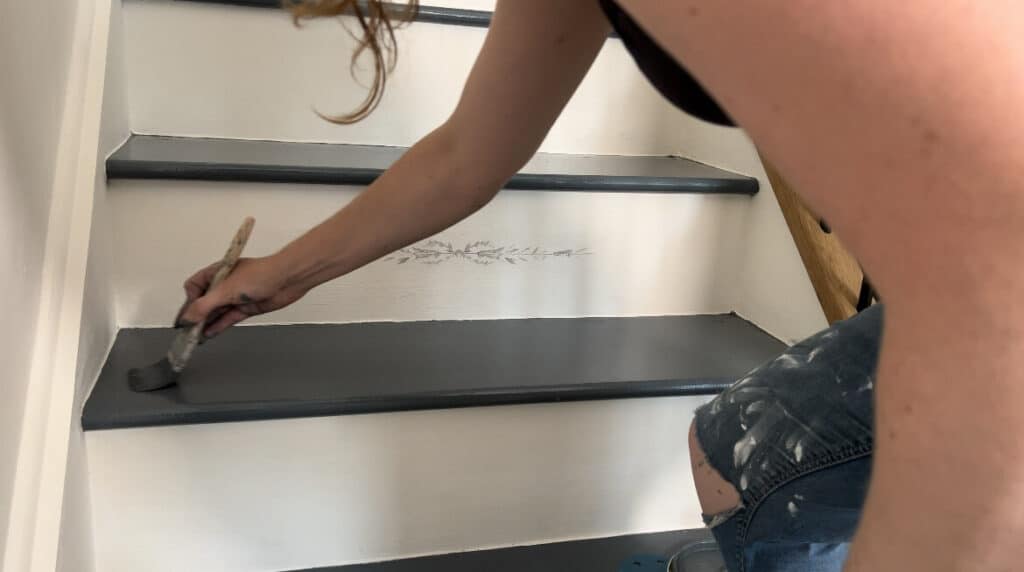
It’s a thick paint so it’s important to use thin coats. With not too much on your paint brush to get a smooth finish. In total, the treads now have three coats of paint.
The only thing with this type of paint is that it takes a long time to dry. It took about 13 hours.
If you need to have access to your stairs during this time, it’s a good idea to paint alternate steps. Then do the others a day or two later.
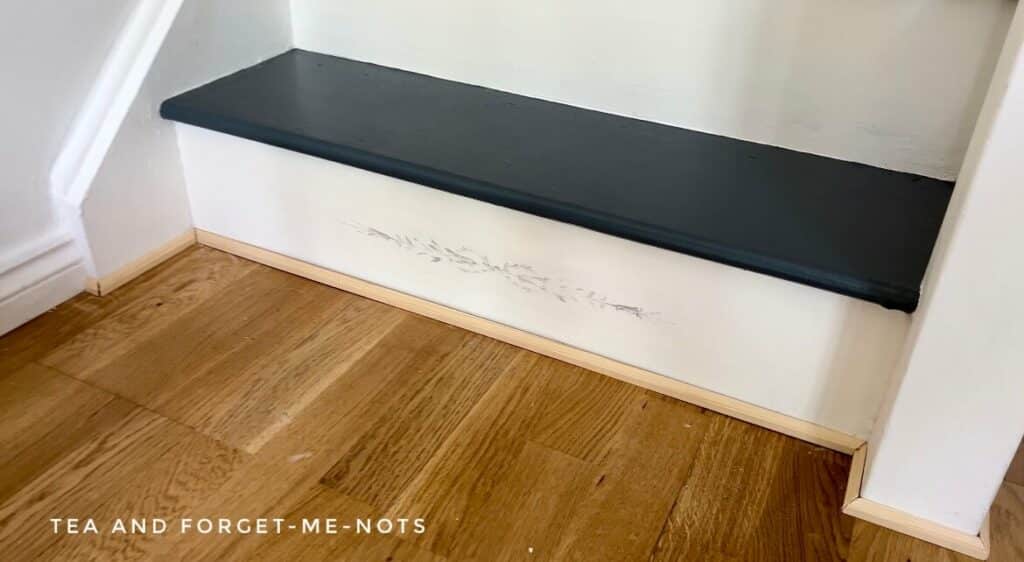
Step 10: Cut Trim for the Bottom Step of the Staircase
The final step was to put some skirting at the bottom of the stairs. This is where it meets the floor, to hide the gap.
The first step was to buy some edging. It had to be thick enough to hide the gap due to the wonkiness of where the floor meets the stairs.
I used a mitre saw to cut all of the trim pieces with a 45′ angle. These went around the bottom step and the newel post.
A top tip is to number each of the pieces to make sure that they go back in the right place. Particularly helpful when several are a similar size.
Then to blend them in well, I used the same colour as the risers for the trim paint.
If you need several layers of paint, it’s a good idea to use a high grit sandpaper between coats. This gives it a smooth surface.
To attach them I used some Gorilla wood glue. Spread out evenly across the entirety of the wood piece. Then pushed it into place and kept it there with painter’s tape.
Frog Tape was fine to keep them all in place apart from the long piece against the horizontal part of the stair. I used the end of the spare wood and wedged it into place so that it kept that pressure against it.
That worked perfectly.
Finally, I used wood filler to fill the edges in. Then used a little paint over the filler to match the stairs for a seamless look.
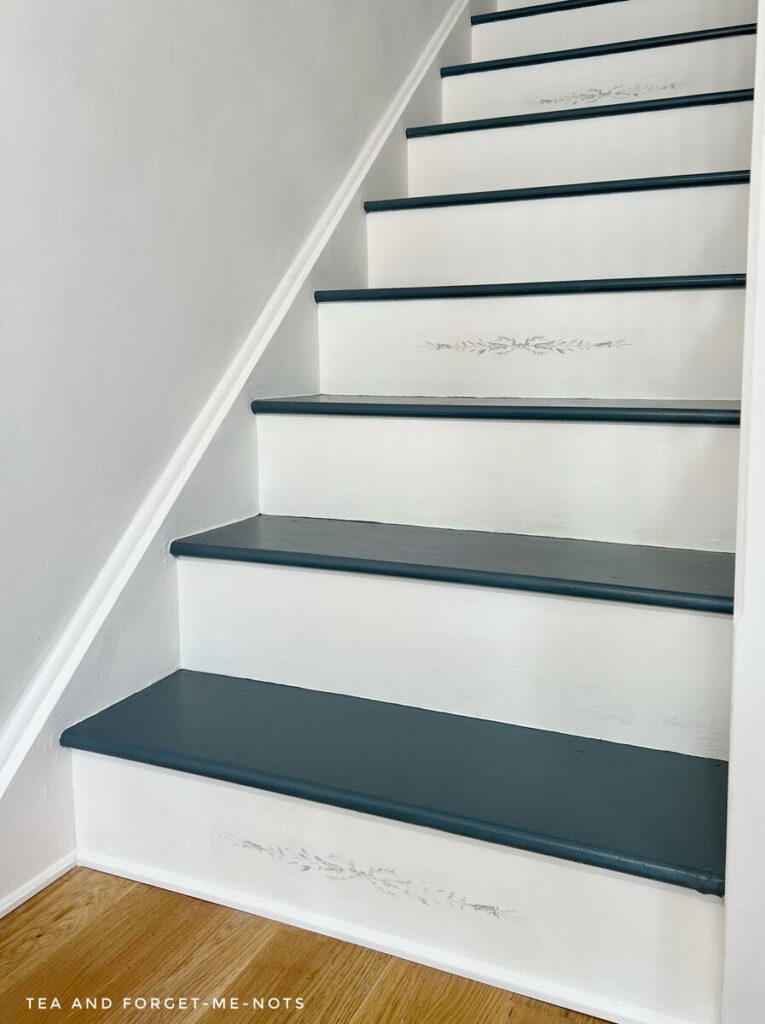
Painted Wooden Stairs Makeover
The stairs really needed their little refresh.
Especially with the risers so they look so much better with a fresh coat of paint. I really love the little added touch of the Paint Inlay too. It adds interest to an otherwise plain staircase.
And if you’re wondering how can you remove a Paint Inlay. As it’s just paint you can sand it off or paint over it.
If you try to reapply the same piece of Inlay, the next attempt will have a more distressed look.
This is such an easy and simple thing to do. It can really add such a lot of character.
Would you prefer to watch the video of the process? Check it out on YouTube.
Prefer carpet on your stairs? You can do the same process with a stair runner. If you wanted to use Paint Inlays or stencils you could decorate the sides of the steps for more interest.
Painting stairs is a great way to create a different look if you don’t want to use wood stain on bare wood stairs.
If you have natural wood floors at the bottom or top of the stairs, you want to think about having the stained wood either matching or contrasting.
Answers to Your Questions About Painting Stairs
Q: What’s the best paint for stairs?
A: A hard-wearing floor paint is naturally the best choice for a high traffic area such as a staircase.
Q: What’s the best paint finish for stairs?
A: Semi-Gloss paint or a satin finish is recommended for both durability and looking aesthetically pleasing.
Q: Are the painted stairs slippery?
A: Painted stairs are more slippery to walk on in socks than a textured carpet. Something to consider if you have young kids.
If you loved this project, you’ll love these projects too:
I love seeing what you do. Please mention @teaandforgetmenots and share your creations with me!
Pin it for later – DIY Painted Stairs Makeover

Hi there! I'm Rachel Bowyer, a passionate DIY enthusiast with a knack for transforming the old into something beautifully new. With a deep love for furniture painting, refinishing, and the art of crafting. I've been documenting my DIY projects and restoration journey since 2018. I specialise in techniques like decoupage, stencilling, and decor transfers. Join me as we explore the world of creativity and home improvement, one project at a time.
Great transformation, your stairs look like new! I recently saw a paint inlay in a store and was wondering how to use it! So Glad I saw this to learn more about them! The inlay is such a nice touch and adds so much interest to your staircase! Thanks for sharing, Donna
Thanks, Donna. Are you tempted by the inlays? They’re pretty quirky.