Hammered Flower Art For Easy DIY Mother’s Day Gift
The best Mother’s Day gifts are handmade. And this one using hammered flowers is a wonderful, unique gift idea. With this simple technique, no two smashed flower projects will look the same.
It’s also simple enough for younger children to help with too. From the flower picking to careful hammering of the flower petals.
Whether the gift is for a Mother, Grandmother, or simply wall art, it’s a beautiful result.
This version is made using a laser cutter. But you can also make a budget-friendly version using card.
This post includes affiliate links so you can easily find the products I use myself and recommend to friends. If you purchase these products, I may earn a small commission at no extra cost to you.
Creative Craft Hop
Welcome to another Creative Craft blog hop!
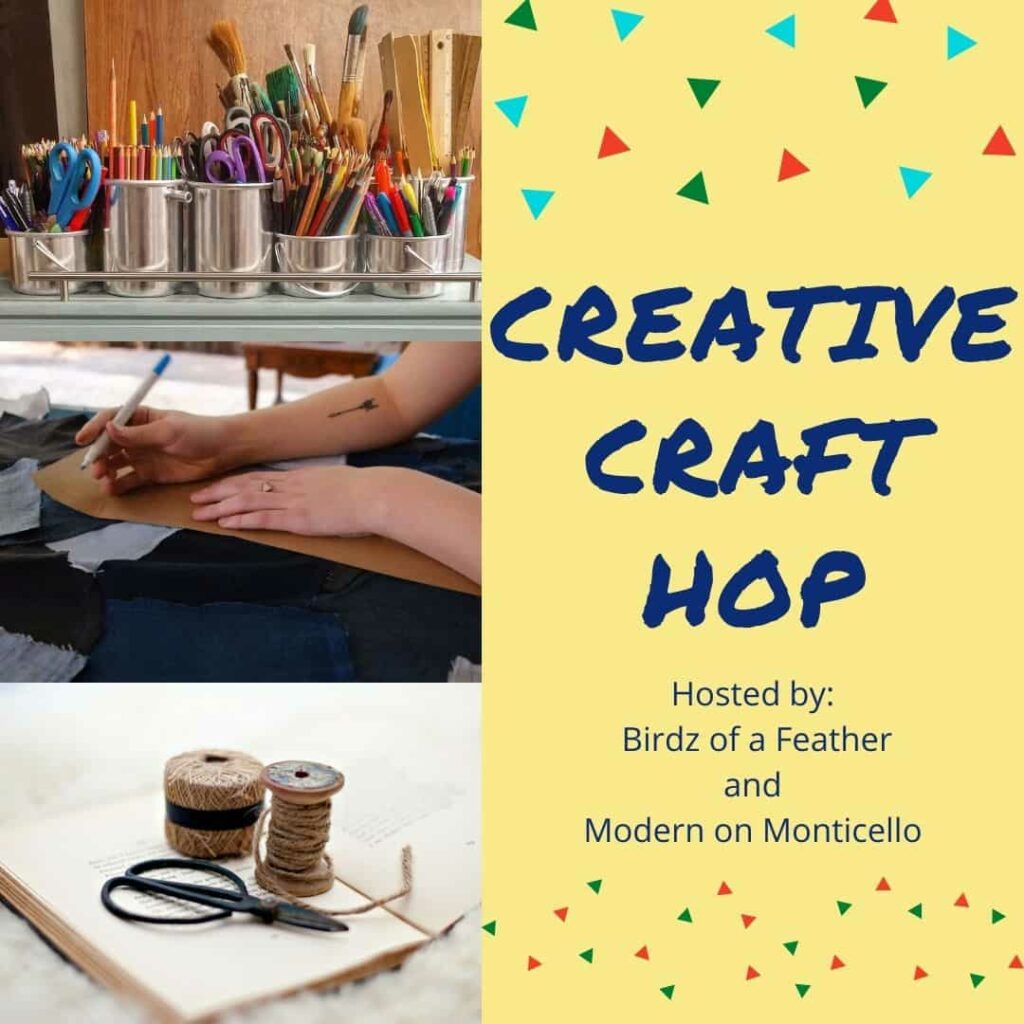
If you’ve come from Decorate with Tip and More, we’re glad to have you here! Wasn’t her paper mache bowl great? At the end of this post, we’ll guide you to the next stop on this journey. Make sure to explore all the other stops for a wealth of creative inspiration. Don’t forget to revisit us throughout the week to visit them all!
How to Make a Hammered Flowers Gift Step-by-Step
Materials you’ll need
Step by Step Instructions
Step 1: Supplies to Smash Flowers
The most important thing when smashing flowers is the flowers you choose. They aren’t all going to give good end results. The ideal flowers have thin petals and colourful flowers.
Flowers with thick petals, waxy surfaces or light colours are less likely to work.
I used purple pansies for this DIY gift because I had them in the garden already. Other good choices are marigolds, roses and dandelions.
It’s best to choose fresh flowers with vibrant natural dyes.
If you aren’t sure whether a flower will work well, the best way to test it is to try it out on a scrap piece of paper.
For more variation, you can use an assortment of cut flowers. That could be different flowers with complementary colours. Or those with a nice bright flower pigment and different sizes would also look great.
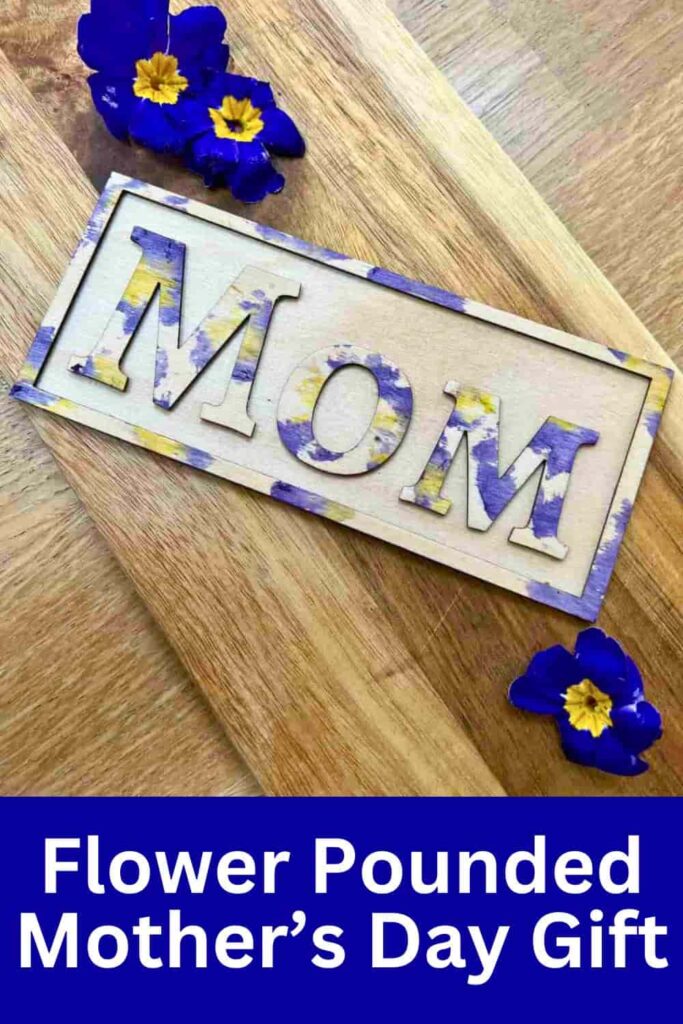
Next, decide on what you want the material of the project to be. This could be fabric, card or in this case, birch plywood.
Birch is a good idea because it is a light wood. It has a rustic look but also shows off the natural pigment of the flowers well.
Step 2: Create a Design for a Hammered Flower Background
It’s very simple to create a basic laser cut file in the xTool XCS software.
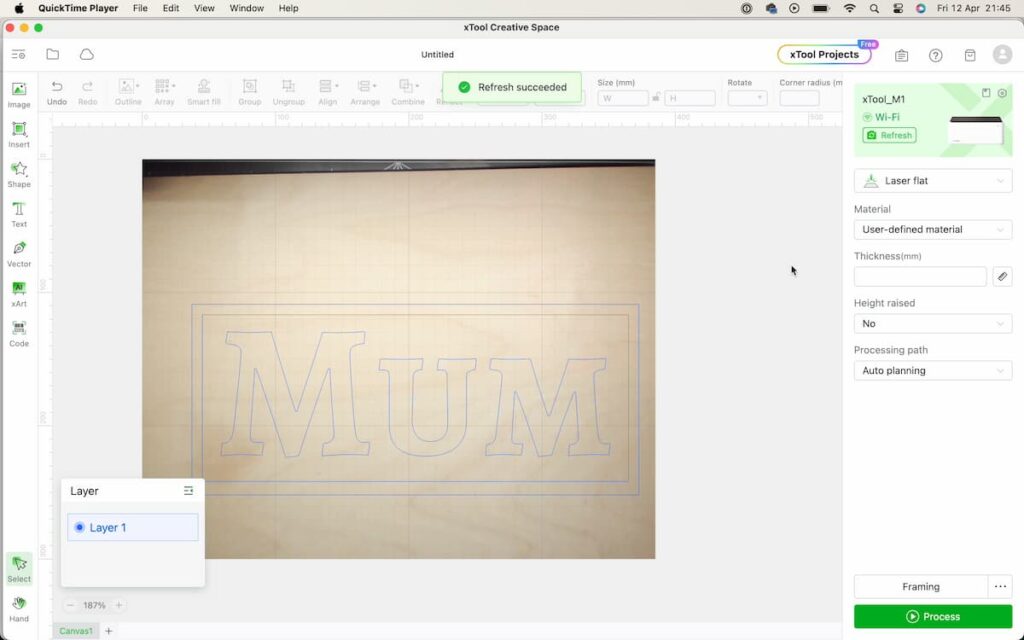
This design uses a rectangular background, a thin frame for the edge and the letters for ‘Mum’.
You could also do this by using a letter stencil to cut them out of card.
Step 3: Laser Cut Letters
You’ll need to do a test to work out the best settings for each different material you use. For this 1.5mm Birch plywood, the cut settings were Power 60 and Speed 5.
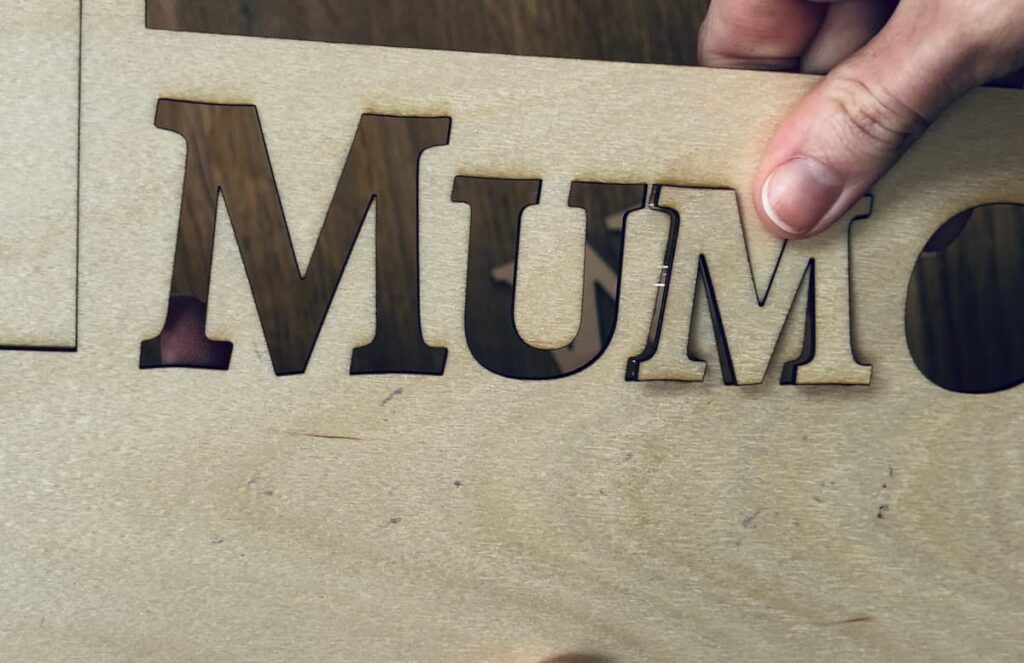
Adding masking tape helps to avoid char lines where the laser cuts out the letters. If you don’t use tape, you can sand off the darker edges with 180-grit sandpaper.
If you do use masking tape, you may need to adjust the cut settings to allow for the extra layer of tape.
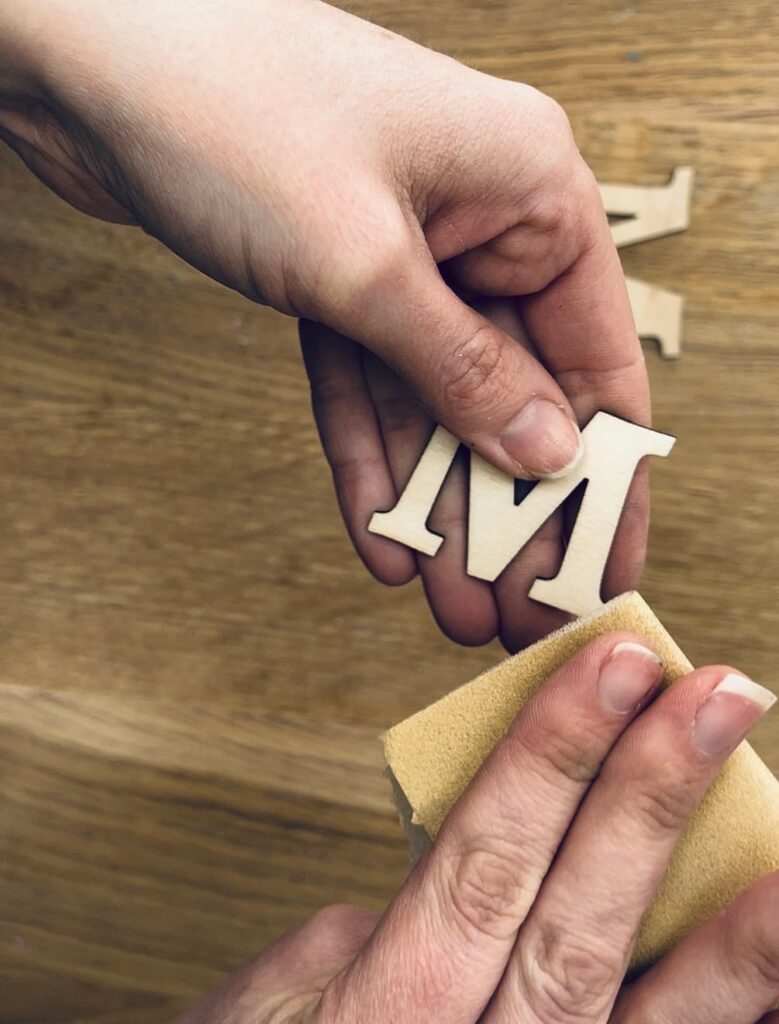
Step 4: Check Laser Cut Design
Once all the elements are cut out, you should lay them out to make sure you’re happy with them. Do this before starting the flower pounding.
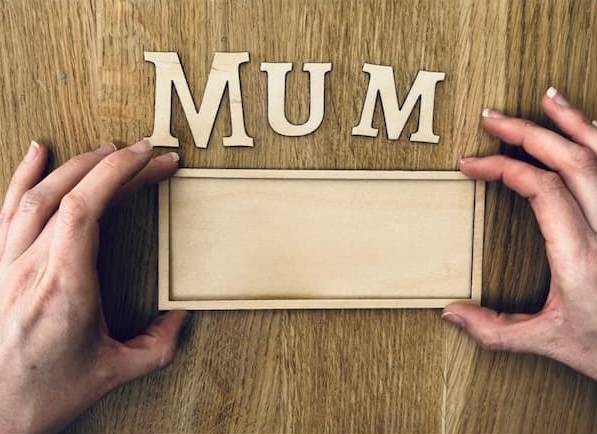
If you’re happy with the size and shape of everything, then you’re good to get the hammer out.
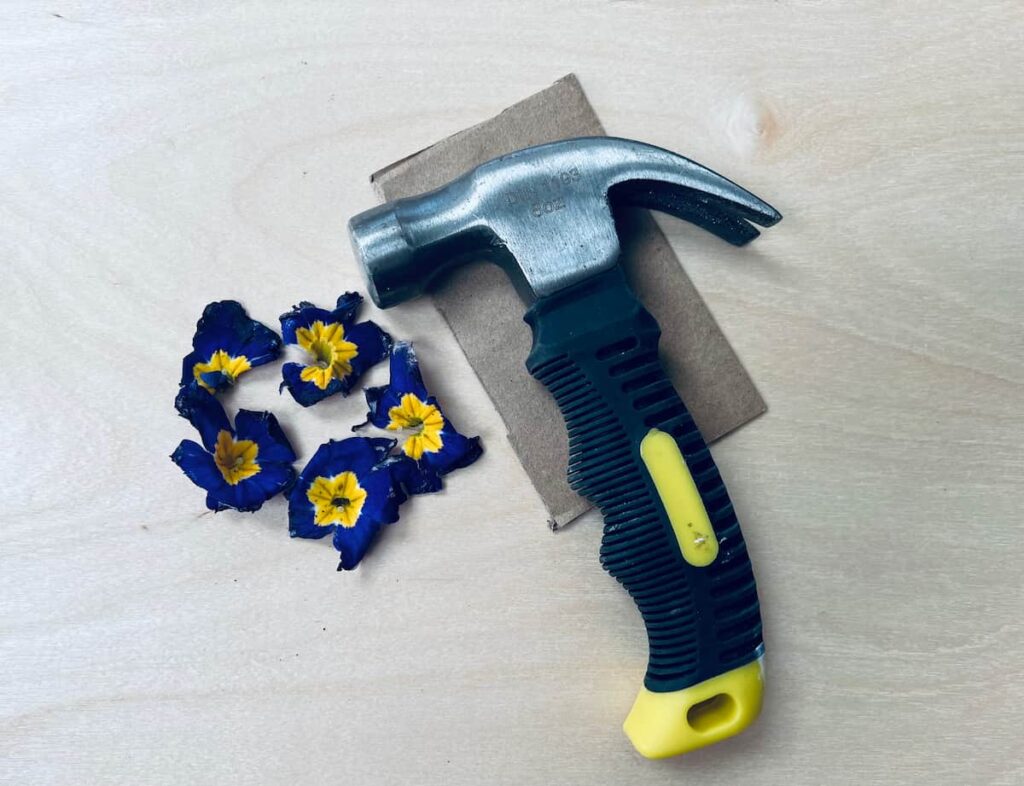
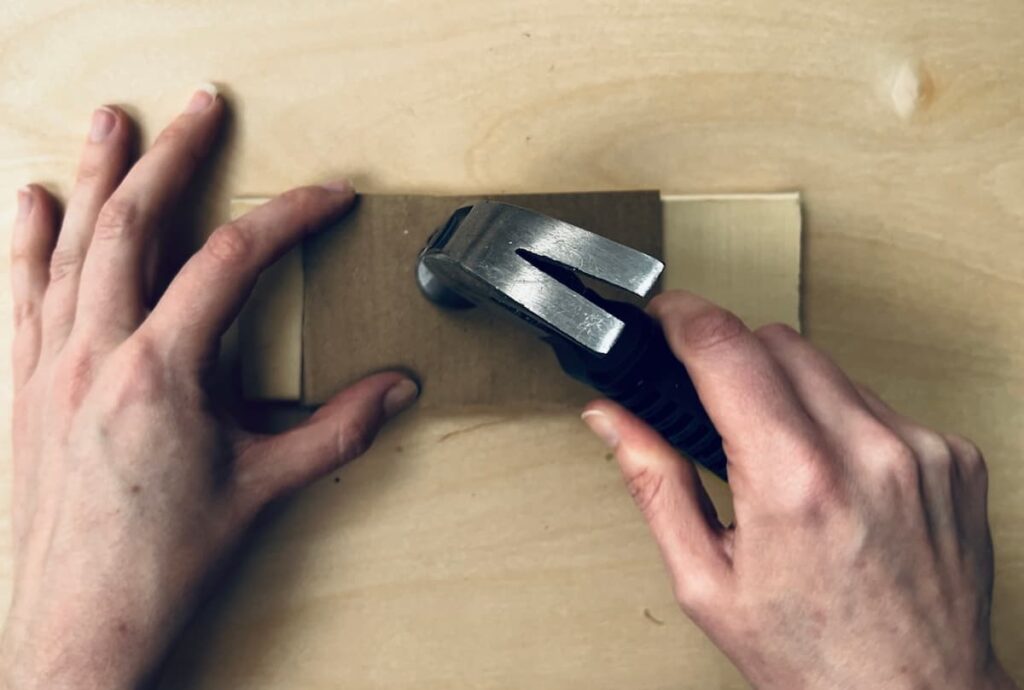
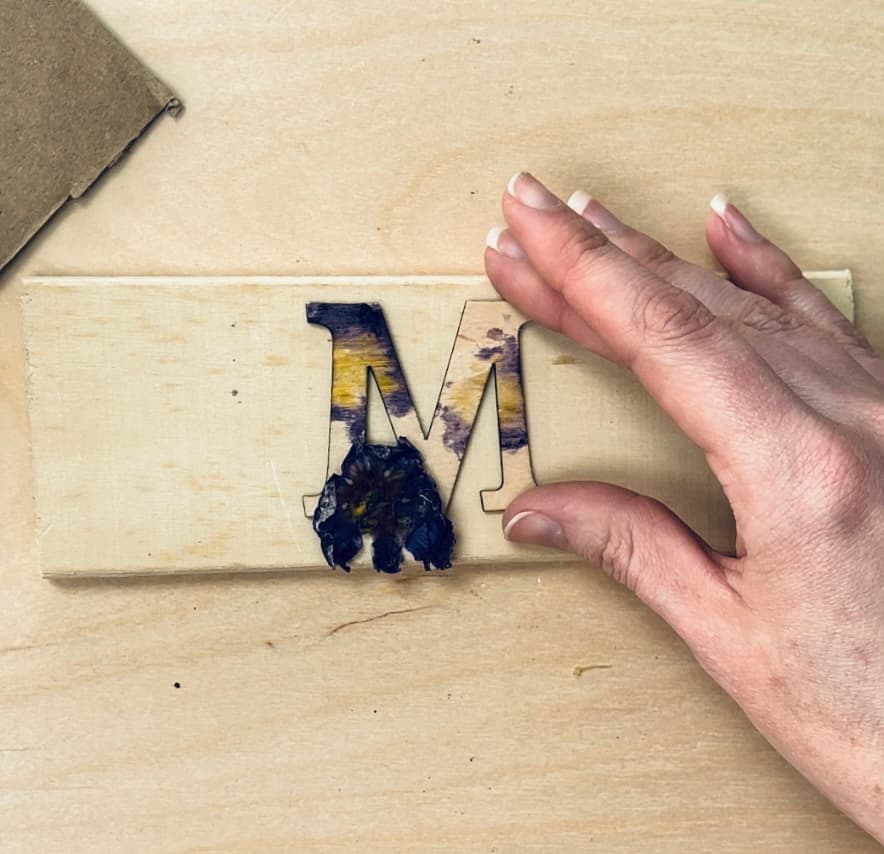
Step 5: Gently Hammer Flowers With Barrier
Firstly, you should lay down something with a hard surface such as a piece of wood. This protects the surface of the work area that you’re working on.
Then you need a barrier between the hammer and the flower. For me, it worked well using cardboard. You can also use a piece of parchment paper or a paper towel.
This barrier means that it’s more likely to keep the edges of the flower intact and the shape remains whole.
The flowers give the best results when the flower head is removed so that they lie flat. Flat flowers give the true petal shape rather than one skewed by the head protruding from the back.
Gently tap with the hammer. With cardboard, you can’t see if the flower print is working so you have to carefully check by removing the cardboard. Within about 10 seconds, these pansies had transferred their colour perfectly.
But depending on the type and colour of flower you use, this will vary.
If you don’t have a hammer or have children helping, alternatively you can use a rolling pin.
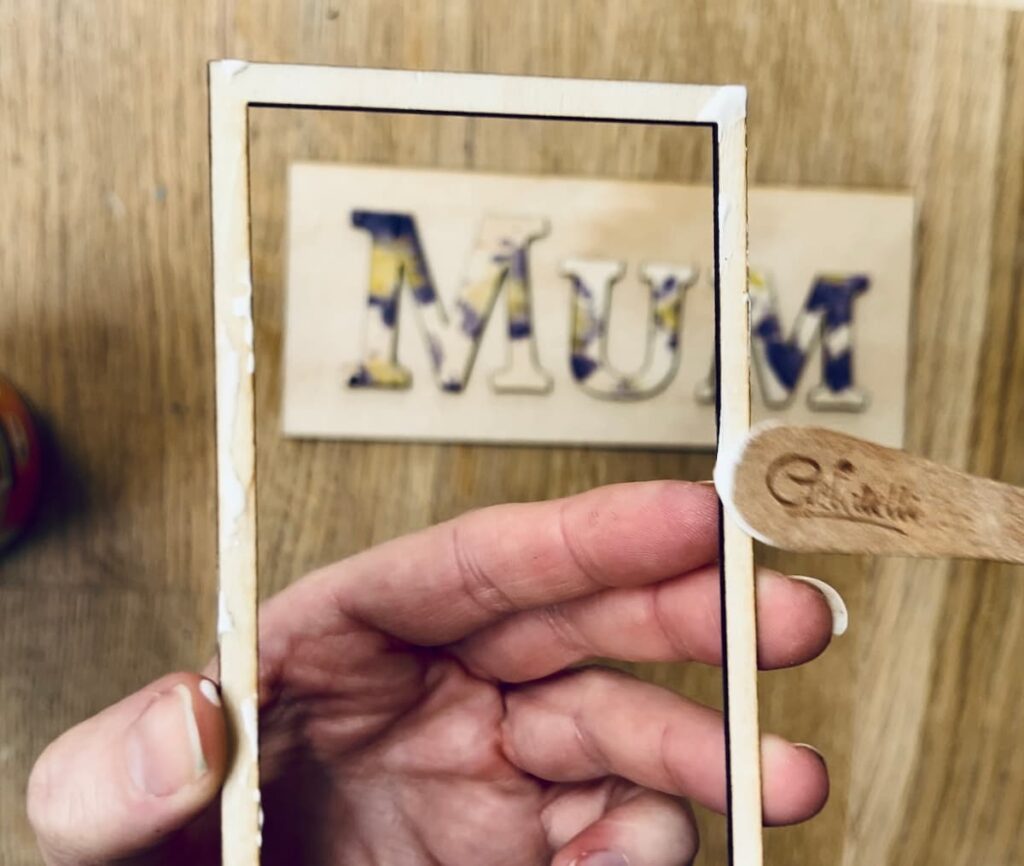
Step 6: Glue Frame Together
The letters and frame are very light so can be held together with wood glue or even double-sided tape.
Apply a thin amount of glue and press down gently until secure. It’s best to remove any excess glue before it dries.
If you create this as a card, then simply attach it to card stock.
For this version, I wanted to make it a fridge magnet. A self-adhesive magnet simply sticks to the back of the wood and once dried firmly attaches to a fridge.
Be careful with which magnets you buy as a lot of the reviews said the magnets aren’t strong enough. One of these magnets did the job perfectly.
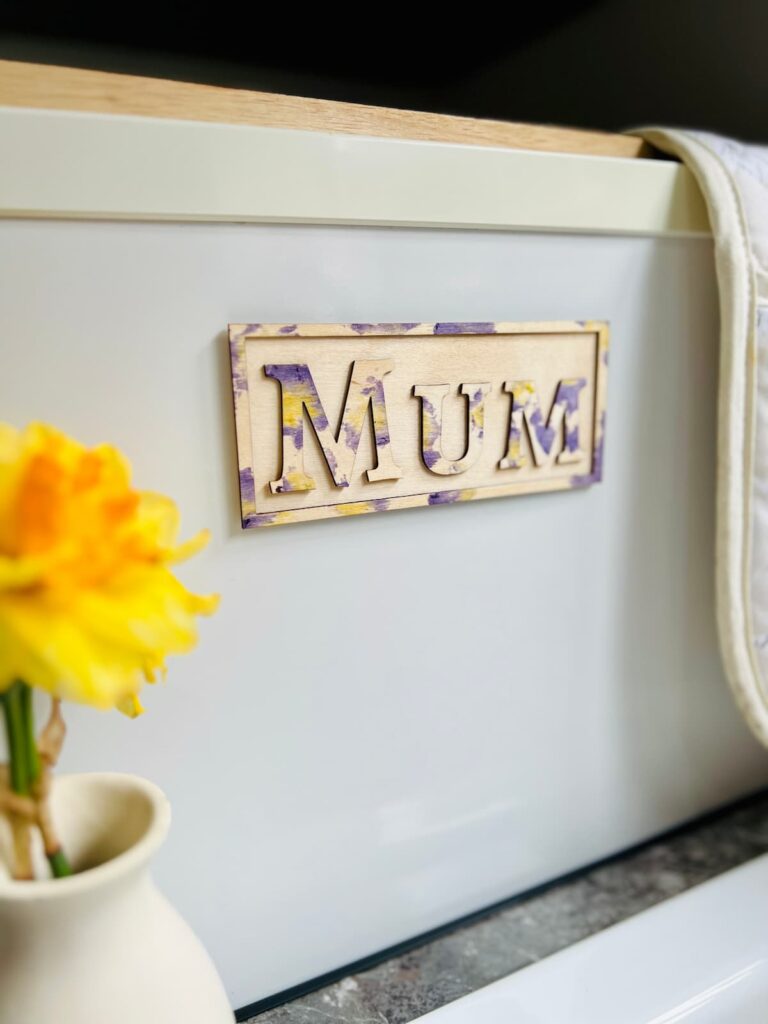
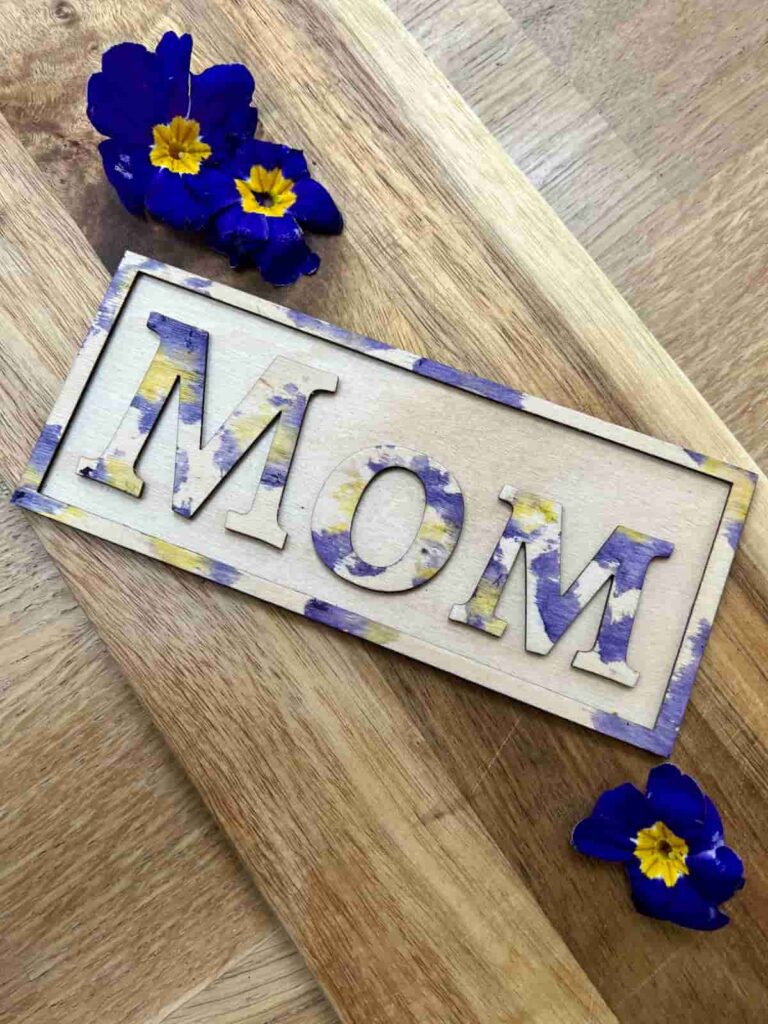
Hammered Flowers Mother’s Day Gift
The purple and yellow pansies are such a beautiful combination against the natural birch wood.
It makes for an elegant and pretty piece of simple decor. And with some help with the letters, can also be a great gift to be made by younger children.

There are so many ways that you could use this method to create beautiful botanical prints. It’s the perfect craft to give as a gift.
It’s pretty, thoughtful, quick and affordable.
These one-of-a-kind art pieces are a great way to show someone you care. And it doesn’t just need to be for Mother’s Day. You could write someone’s name or cut out pretty shapes to decorate in fun ways.
If you loved this project, you’ll love these projects too:


Did you make this Hammered flower art gift?
I love seeing what you do. Please mention @teaandforgetmenots and share your creations with me!
Pin it for later – Hammered Flower Art Mother’s Day Gift
Creative Craft Hop
Now it’s time to check out these great DIY Cooking Utensils from Patina and Paint. When you’re done, please remember to visit these other amazing talents below:
Upcycled Plastic Container Into Basket
Hammered Flower Art Gift (that’s me!)
Make Fun and Creative Pens with Beads (Instead of Jewelry)
How to Make the Prettiest Kentucky Derby Door Hanger
Special Occassion Blooming Wine Glass

Hi there! I'm Rachel Bowyer, a passionate DIY enthusiast with a knack for transforming the old into something beautifully new. With a deep love for furniture painting, refinishing, and the art of crafting. I've been documenting my DIY projects and restoration journey since 2018. I specialise in techniques like decoupage, stencilling, and decor transfers. Join me as we explore the world of creativity and home improvement, one project at a time.
Wow, I’m so impressed (pun intended) that you used real flowers; at first glance I thought this was decoupage. It’s so apropros for Mother’s day and so beautful! You can give mom flowers AND something that will last!
Thanks Sara. Yes it’s a win-win. In fact if you did this with a bouquet before it goes off, it’s an extra bonus.
Wow, this is gorgeous and very creative, Rachel! Love how the hammered flowers look! The colors are so tranquil! What a cool way to use flowers to create beautiful artwork! Thank you!
Thanks Gail. The colours are perfect for my family too.
I have never tried this, look interesting, so I will be doing this in a craft. Thanks Rachel!
Great, I’d love to see when you do.
Very pretty, Rachel. The color from the pansies is so vibrant. I may have to give this technique a try!
Thanks Ann, let me know if you do!
Rachel what a unique and beautiful sign. My husband has an Xtool and I keep thinking I’m going to learn how to use it – this might just push me to do it. Love using the flowers for color. Thanks so much for sharing!
Thanks Tammy. Ooh you have access to an xTool, that’s great, it’s very fun to play with.
Wow Rachel, this is a unique and totally new technique to me! It’s magical the way the colors transfer from the flower to the wood. A lovely gift idea with infinite possibilities! I love the purple and yellow, so pretty!
Thank you so much, Jenna. It’s so easy and I love how unique it is.
This is a project I would never have thought of. I love the creativity of it. The colors of the pansies really popped out for a pretty result.
Thanks so much, Carol.