How To Make Dehydrated Oranges Slices For Decorations
Dried or dehydrated orange slices are easy to make. Here’s how to make dehydrated oranges plus two simple ideas for Christmas ornaments.
Oranges make for beautiful, natural winter and Christmas decor. From decorations to gift tags and garlands, there are so many ways you can add them to your festive decor.
You don’t need any fancy supplies such as a food dehydrator. You can get the best results with just an oven.
The thing you do need is time.
You’ll need to be on hand to flip the orange slices over several hours. So, set aside half a day when you’re at home and have the time to create these easy orange slices.

And this is where it comes to the Amazing Creators Merry & Bright Christmas blog hop.
Amazing Creators is a group of talented bloggers who love to upcycle, craft and decorate.
Get inspired with a host of new ideas to make your home even more lovely this year.
Check out all the Amazing Creators ideas at the bottom.
How to Make Dehydrated Oranges Step by Step
Materials Needed
Step by Step Instructions
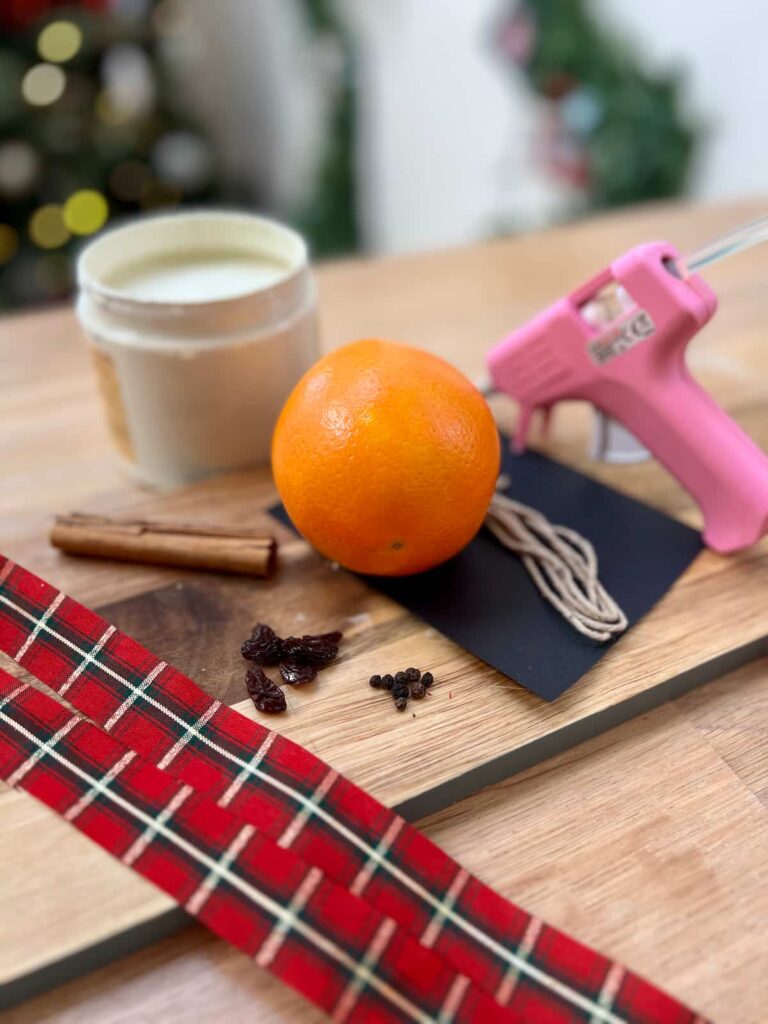
Step 1: Supplies for Dehydrating Oranges
Start with fresh oranges. The type of orange you choose does make a difference. These are Jaffa oranges which are almost seedless oranges and therefore have fewer holes.
Navel oranges are also a good choice for this project. And blood oranges with red inside create a different look. The contrast between the red and orange colours when paired together is beautiful.
Step 2: What Size to Cut Oranges for Drying
Use a sharp knife to thinly slice them. A serrated knife is the easiest way to slice the orange pieces without squashing the shape.
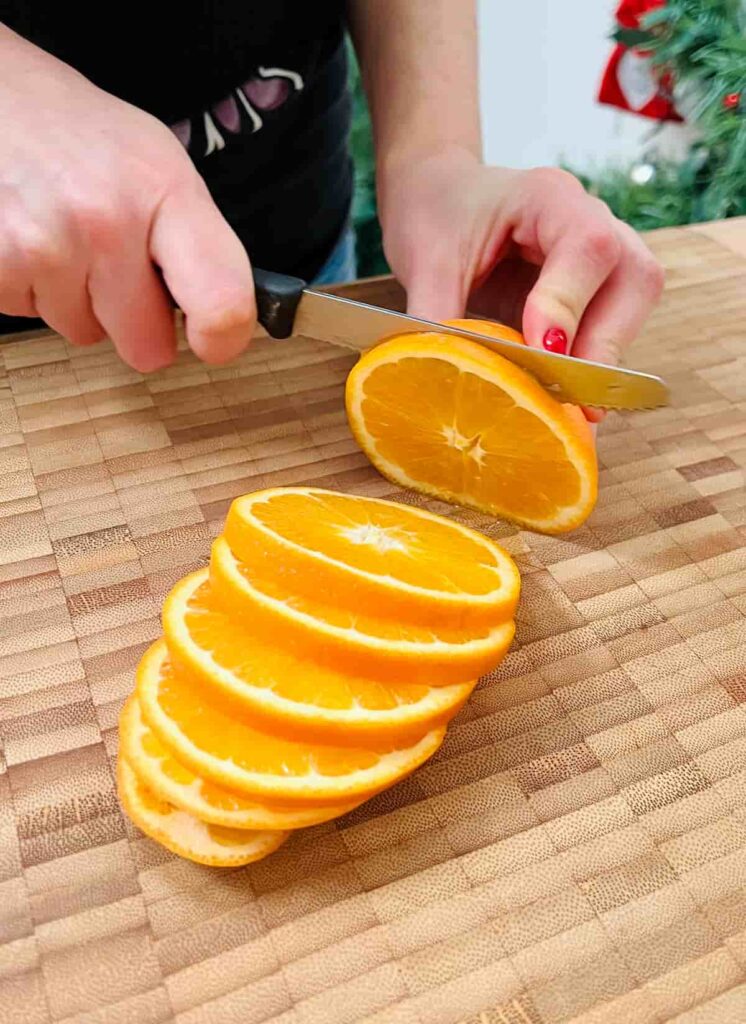
The slices should be quite thin (about 1cm or .5 in). But more important than the exact thickness of the slices is that they are consistent in size. If it is much thinner at one end then it won’t dry evenly.
Also pay attention to the slices being a similar thickness, in general. This will help them dry in the same timeframe in the oven.
It may help to use a mandoline slicer which will create the same-sized thin slices for you.
Step 3: How to Prep Oranges Before Dehydrating
The next step is to remove as much of the moisture from the oranges as possible. This will reduce the time that they’ll need to be in the oven.
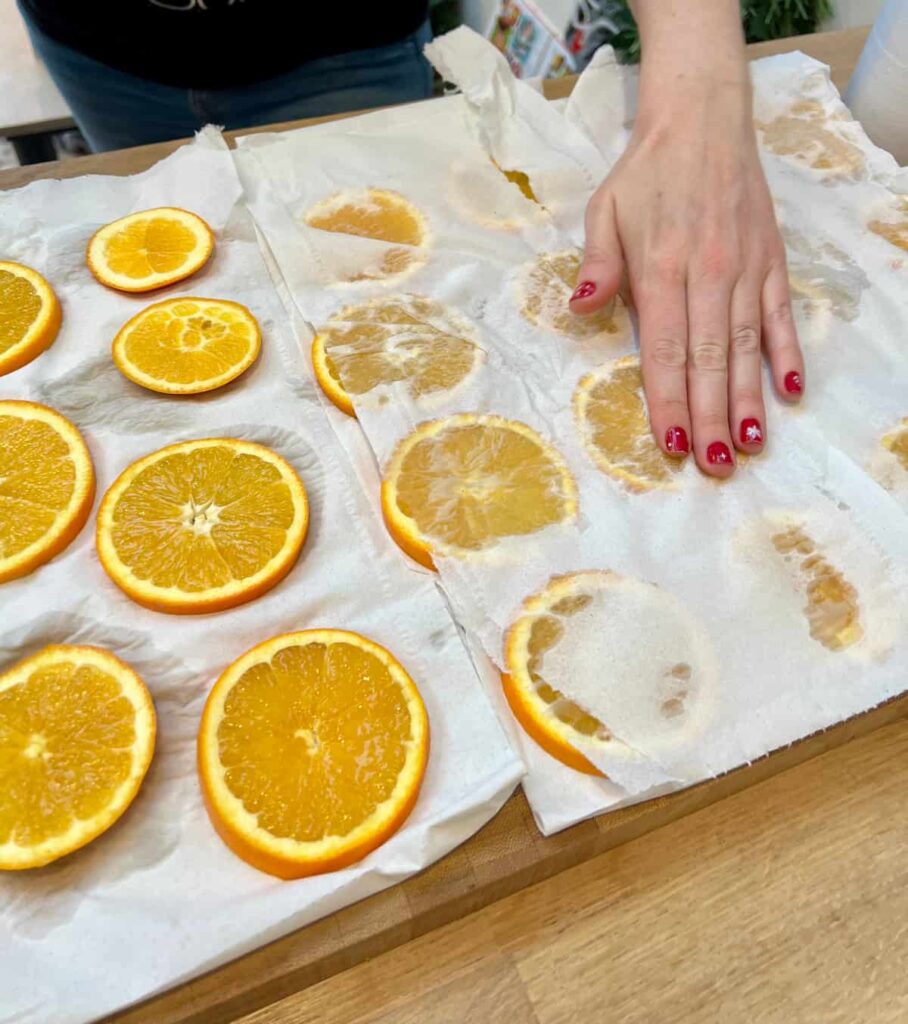
Use a paper towel to pat the excess moisture out. If you have a paper towel on the bottom and the top, it will speed up the process.
Step 4: How to Make Dehydrated Oranges in the Oven
Next, you can use either a wire rack or parchment paper to help dry the orange.
Using a wire rack helps the heat to get to both sides of the oranges at the same time. If using parchment paper, add that to the top of a baking sheet.
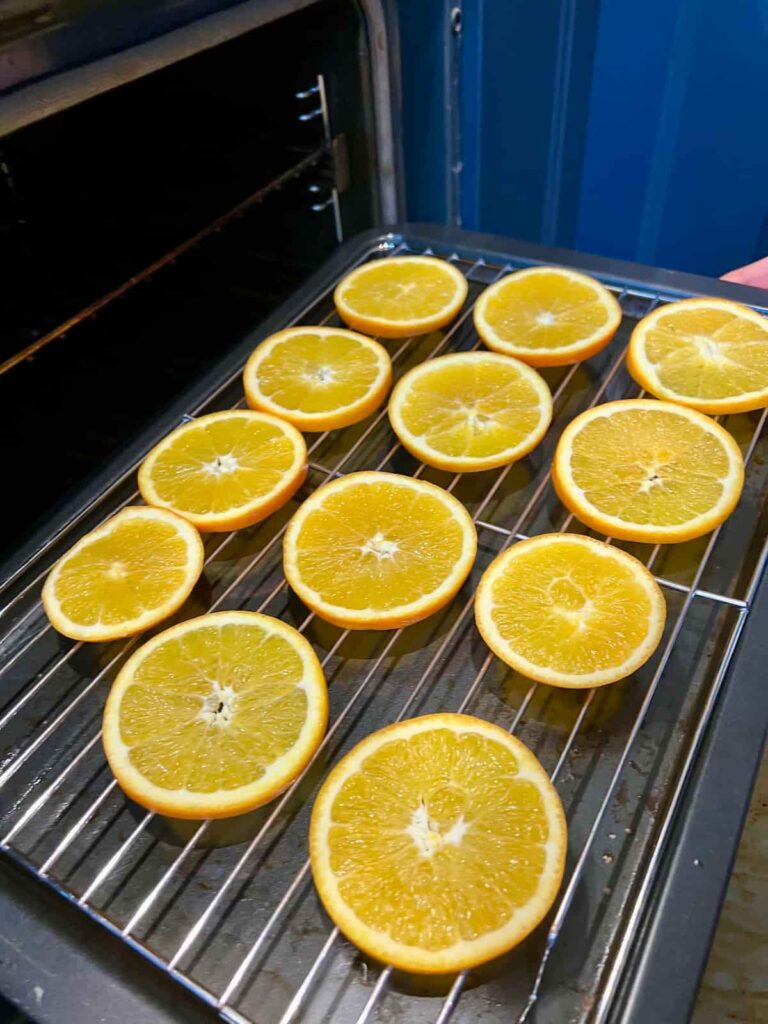
Lay the oranges out in a single layer. If they’re overlapping at all then the areas underneath won’t dry evenly.
The temperature to dry orange slices should be about 90°c or 194°F.
As ovens vary, there is some flexibility in the temperature. But you want to dry the slices for several hours on a low heat. This dries them slowly and thoroughly.
If the oven is too hot, they will burn before drying.
How do you dry orange slices without burning them?
The key to not burning oranges is to regularly flip them. This should be every 30-60 minutes.
By turning them over often, both sides dry evenly. If one side dries before the other, then it will start to burn while the other is still drying out.
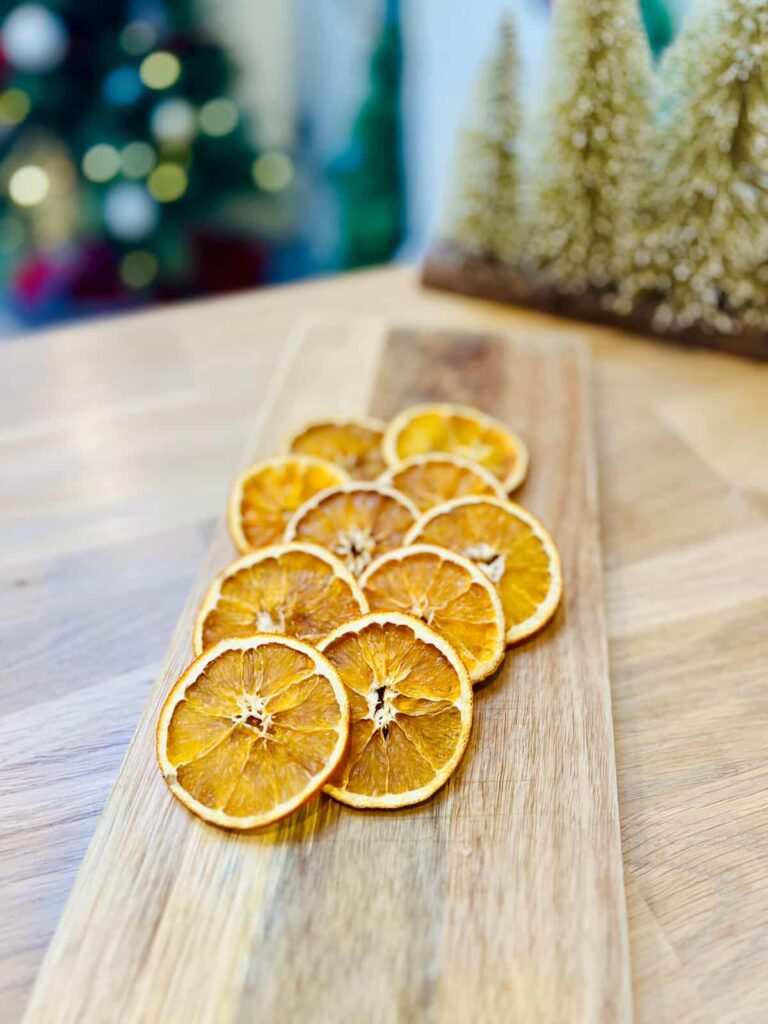
Step 5: How Long Does it Take to Dehydrate Oranges?
These oranges took 4-5 hours to fully dry.
You can tell they are dried out because the flesh is no longer sticky or soft. But if there is a little squishiness left in them, they will finish drying at room temperature on a cooling rack over the next day or so.
It may take more than 4-5 hours to dry the oranges fully. It depends on the oven temperature and thickness of the orange slices.
But with regularly checking and flipping the slices, you should be able to see when they’re ready.
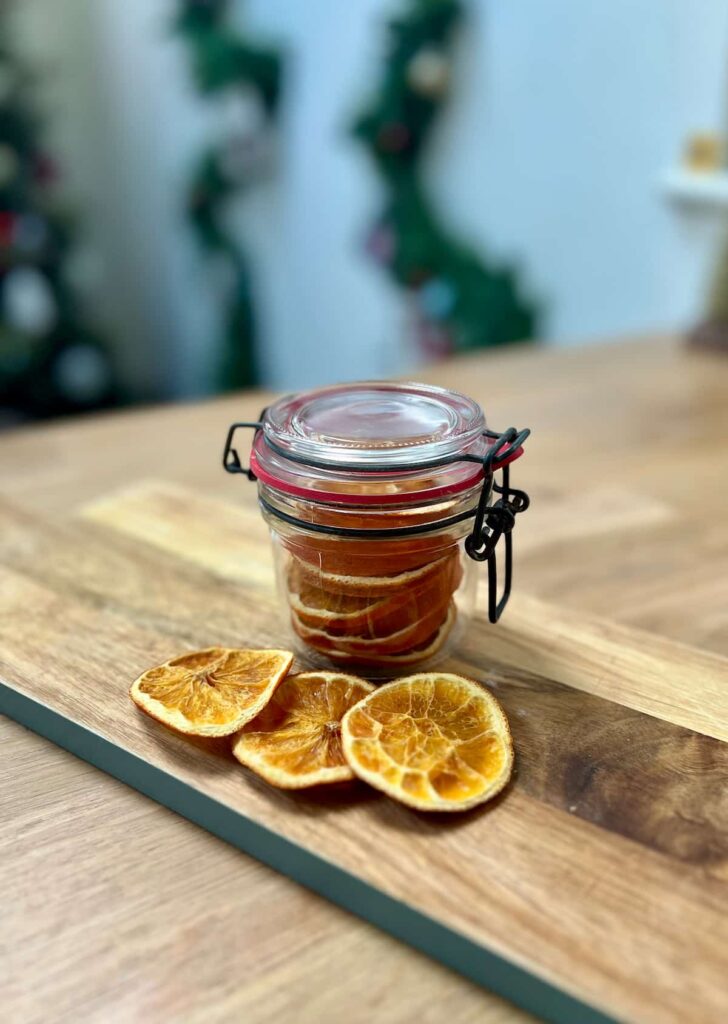
Step 6: Storing the Dried Oranges
If stored properly, the dried oranges should last for years. This should be in an airtight container like a mason jar, ziploc bag or Tupperware container.
The important thing is that air doesn’t get to the oranges.
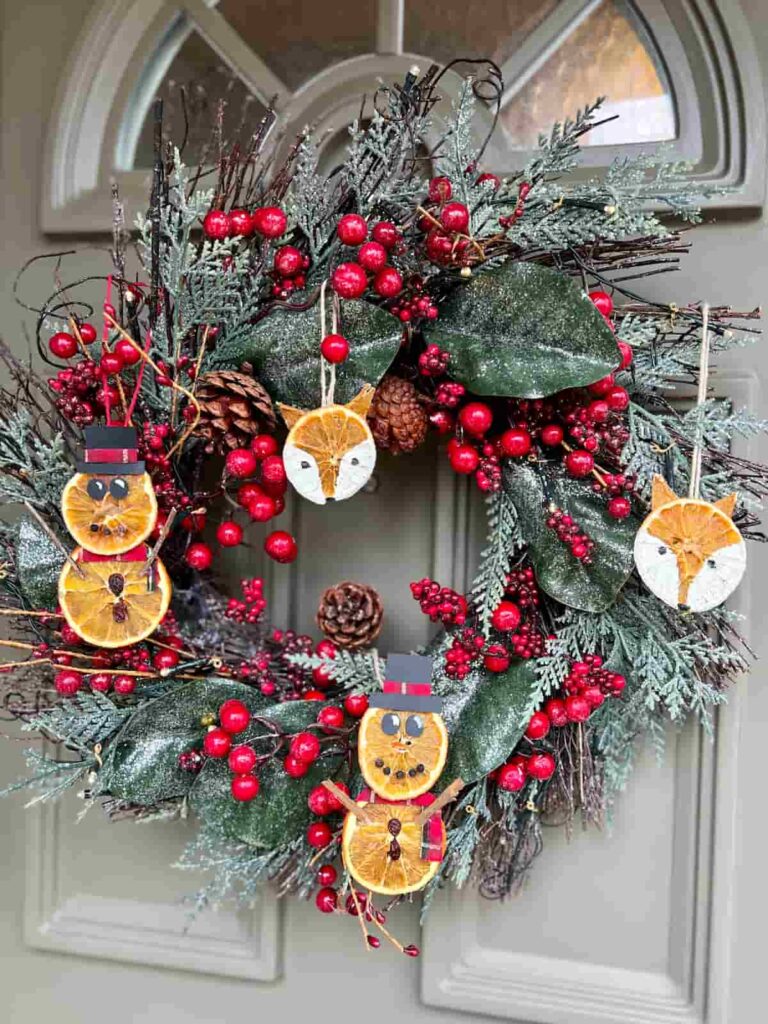
Decorating Ideas for Dried Orange Slices
There are lots of different ways to decorate with orange slices. But as you’ve probably seen the classic Christmas garlands, and homemade potpourri before, let’s try some new fun ways.
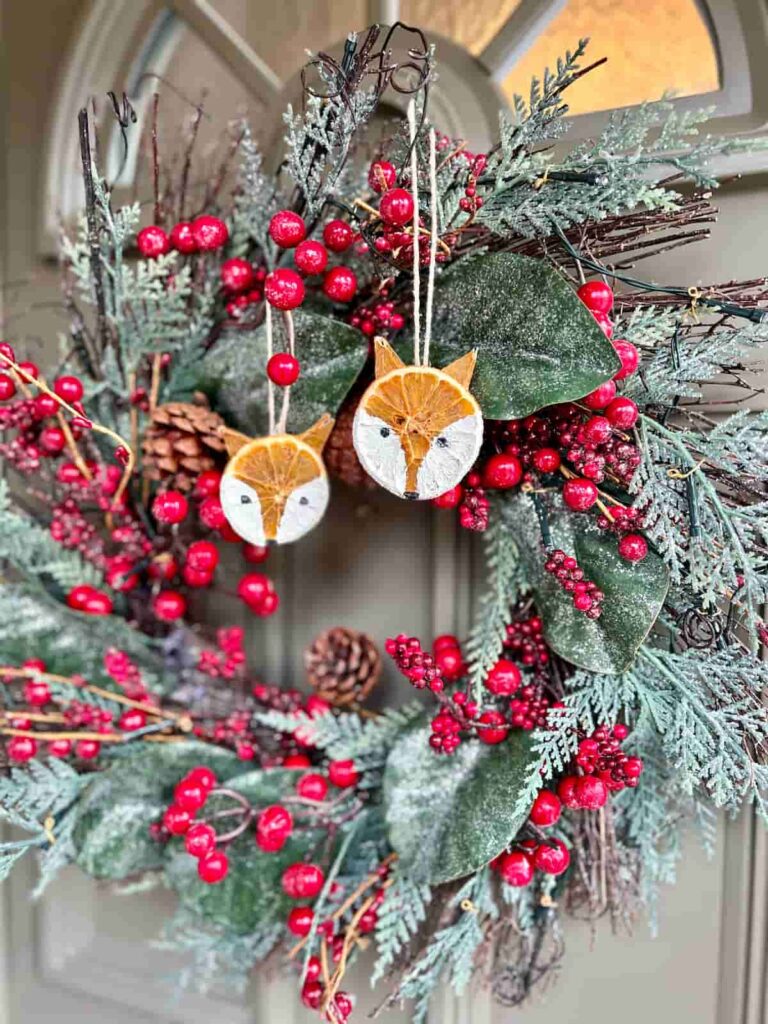
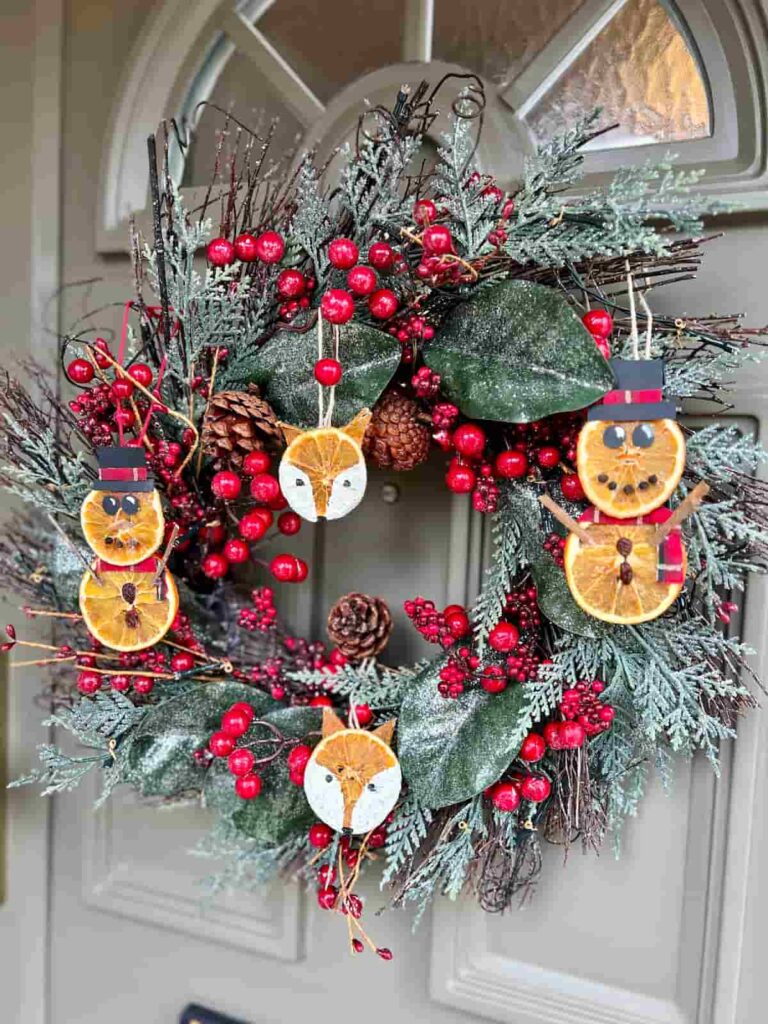
These are a great addition to a Christmas tree or wreath. And you could get children involved in decorating them too.
Step 1: Snowman Dried Orange Decoration
For the snowman decoration, you need two oranges, one bigger than the other.
Firstly, attach a length of ribbon across the top of one of them and down the side. This is the scarf. Add this before securing the oranges together so that they sit under the orange that is the head.
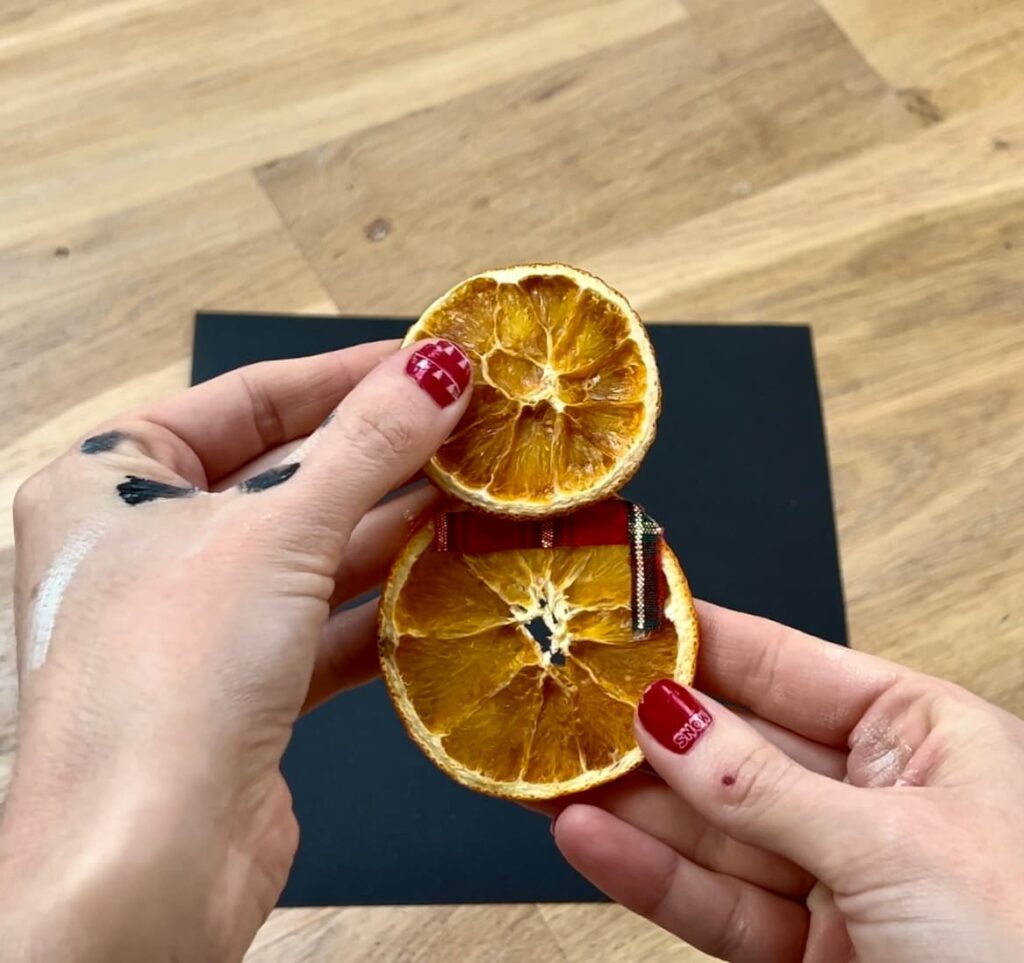
Next, use hot glue to attach the head and body. It’s best to glue the rims of the orange, as it is flatter so will attach more easily.
Step 2: Adding Details to Dried Orange Snowman
You can be creative with the supplies you use for the eye, buttons and nose.
I used raisins for the buttons and peppercorns for the mouth. Then black paper and paint for the eyes. Then you can add a black hat with a sash made from the same ribbon as the scarf.
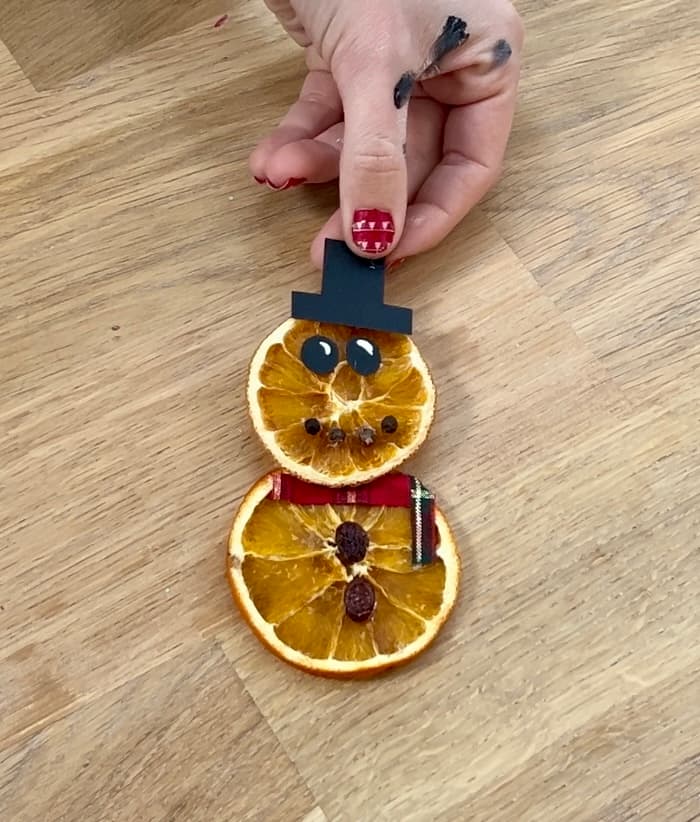
Finally, you can choose to attach arms with either real sticks or cinnamon sticks.
How adorable as these orange slice snowmen?

They look so friendly and happy!
One more decoration made with dried orange slices…
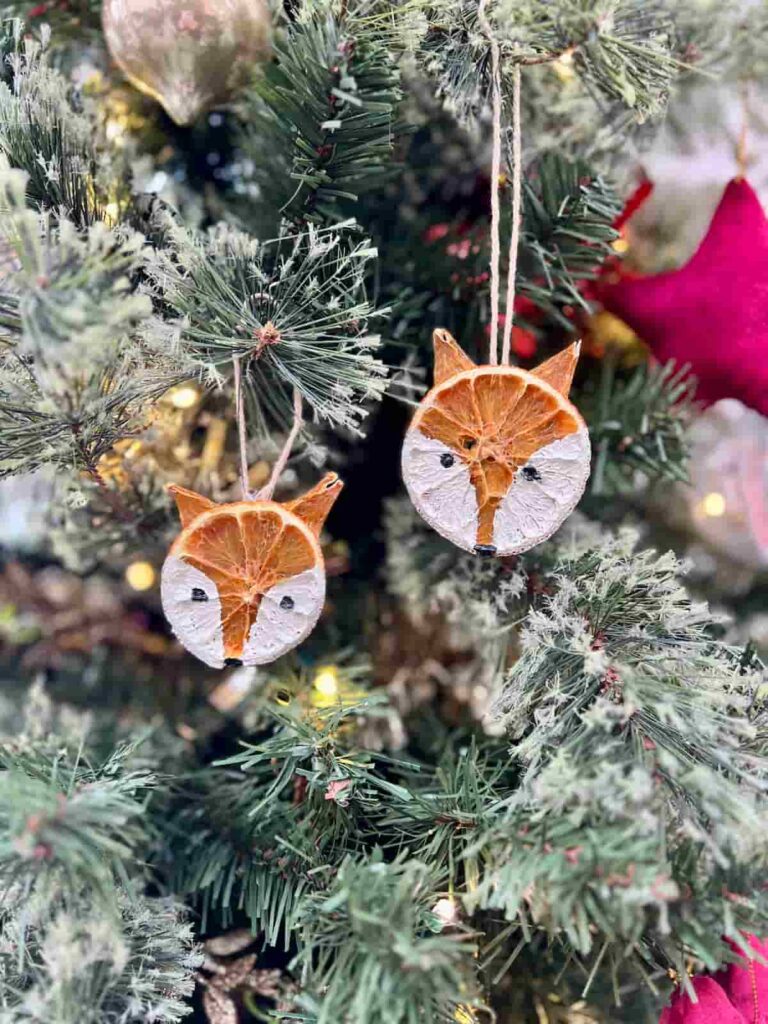
Step 1: Making a Fox Orange Slice Decoration
These foxes are so easy to make and look pretty.
Firstly, choose one of the dried slices in a round shape. Then get a second slice for the ears.
A partial one works great if you have a failed slice. I had this when the knife I used wasn’t sharp enough so it squashed the orange.

Firstly make smaller pieces for the ears by cutting two triangle shapes. The segments naturally divide so should be easy to cut the same size for both ears.
To attach the ears, glue them with the single point facing up.
Step 2: Paint the Fox’s Face
Next, you need white paint or paint pens to add colour to the face. Paint two almost-semi circles from the top third of the face down to the bottom. Leave a space between the semi-circles so that they don’t touch.
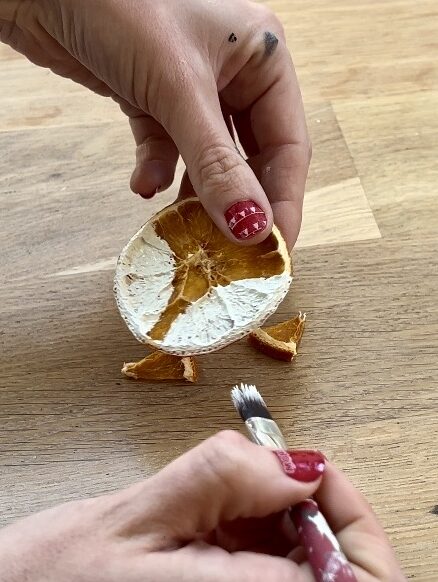
Finally, add a dab of black paint at the bottom for the nose. Then two little eyes near the top of the white sections.
So easy and so pretty. This design takes a few minutes.
Using natural elements in your festive decor always feels so rustic and calming.
It’s an inexpensive and sustainable way to create new decor that can last for years.
Answers To Your Questions About How To Make Dehydrated Oranges
can you air-dry orange slices?
You don’t need to use special equipment or an oven to create dried oranges. But they are the fastest way to complete the drying process. You can also hang oranges to naturally air dry over a few days.
If you store the oranges in an air-tight place, the decorations can last for years. They may start to dull after 2-3 years but will still be perfectly good as Christmas decorations.
As long as each orange slice is completely dehydrated, it will not attract bugs or flies.
If you loved this project, you’ll love these projects too:
Did you make this craft?
I love seeing what you do. Please mention @teaandforgetmenots and share your creations with me!
Pin it for later – How To Make Dehydrated Oranges For Decorations

Amazing Creators Merry & Bright Christmas Blog Hop
Check out these other fabulous festive ideas below…

Hi there! I'm Rachel Bowyer, a passionate DIY enthusiast with a knack for transforming the old into something beautifully new. With a deep love for furniture painting, refinishing, and the art of crafting. I've been documenting my DIY projects and restoration journey since 2018. I specialise in techniques like decoupage, stencilling, and decor transfers. Join me as we explore the world of creativity and home improvement, one project at a time.
These are so adorable! Pinned!
Shelley
Thanks so much!
I absolutely love how you turned the orange slices into snowmen. They’re adorable
Thank you, they’re definitely different!
Love the smell of oranges at Christmas. The ornaments you made are really cute!
Thanks so much, Linda.
What cute shapes! I could smell the oranges as I read through your steps….. mmmmm.
Haha yes oranges are one of those.
The orange slice snowman ornaments are absolutely adorable! Thanks for sharing how to dry the orange slices! Merry Christmas!
Thanks Kimberly, Merry Christmas!
What a cute idea! I’ve always wanted to dehydrate oranges and use them as decor but have never done it! Maybe I finally will! Thanks for the tutorial! It was so helpful!
You’re welcome, Stephanie. Let me know if you try it.
There’s nothing like dried oranges from fall through Christmas. The snowmen are too cute and so is the fox! Happy Hopping
Thanks Cindy.
Rachel thank you for the step by step instructions on how to dry the oranges! I am in love with how you turned a dried orange into a fox!!! That has to be one of the cutest projects I have seen. You are so creative. The snowman is great too!
Thanks Crystal, yes the fox works nicely because you don’t see many orange snowmen!
These are so cute and such a great idea! Thank you for the tutorial I’m going to try and make dehydrated oranges your way, usually mine turn out not so good!
Ah brilliant, I hope it works for you.
Great tips on prepping and dehydrating orange slices, Rachel! Your holiday wreath is absolutely adorable and so clever.
Thanks so much, Kristy.
Rachel, this is one of the best tutorials I’ve seen for drying oranges. Those ornaments are so cute!
Thanks so much, Carol.
I haven’t dried oranges in years! I used to make a wreath with dried oranges, bay leaves and cinnamon sticks. You have inspired me to start drying oranges again! Thanks for sharing all your tips! It was great hopping with you this week!
Aww that’s great, that wreath would smell amazing!
I’ve seen so many drying oranges and using as crafts, but you really take it up a notch by making them into a snowman or fox. So fun.
Thanks Rosemary, they’re a lot of fun to make too.