How to paint shutters (and why they’re a great tool for a retail booth)
Shutters for a rented retail booth can be a great solution to challenges such as how to display products without a wall. So, here’s how to paint shutters.
Firstly, and the reason why I’m giving wood shutters a makeover in this post, is to avoid making holes in retail space walls.
Holes can be a pain to fix and in some cases, you can’t make holes in a rented space.
I have constantly changing products for sale, with all different size fixtures and fittings. Needing one or two holes for each piece.
Each time I need to make a hole in the wall, if I don’t have another piece with the same fixtures to replace it, the holes are visible.
A good idea to solve this is mixing a little bit of the wall paint with some wood filler, to hide them.
However, it’s not ideal.
How to Paint Shutters with Clay Paint Video
This post includes gifted products and affiliate links so you can easily find the products I use myself and recommend to friends. If you purchase these products, I may earn a small commission at no extra cost to you.
Why use old shutters for rented retail booth
Another advantage of having shutters is when you don’t have walls. In the right place, it gives you a divider between your area and others.
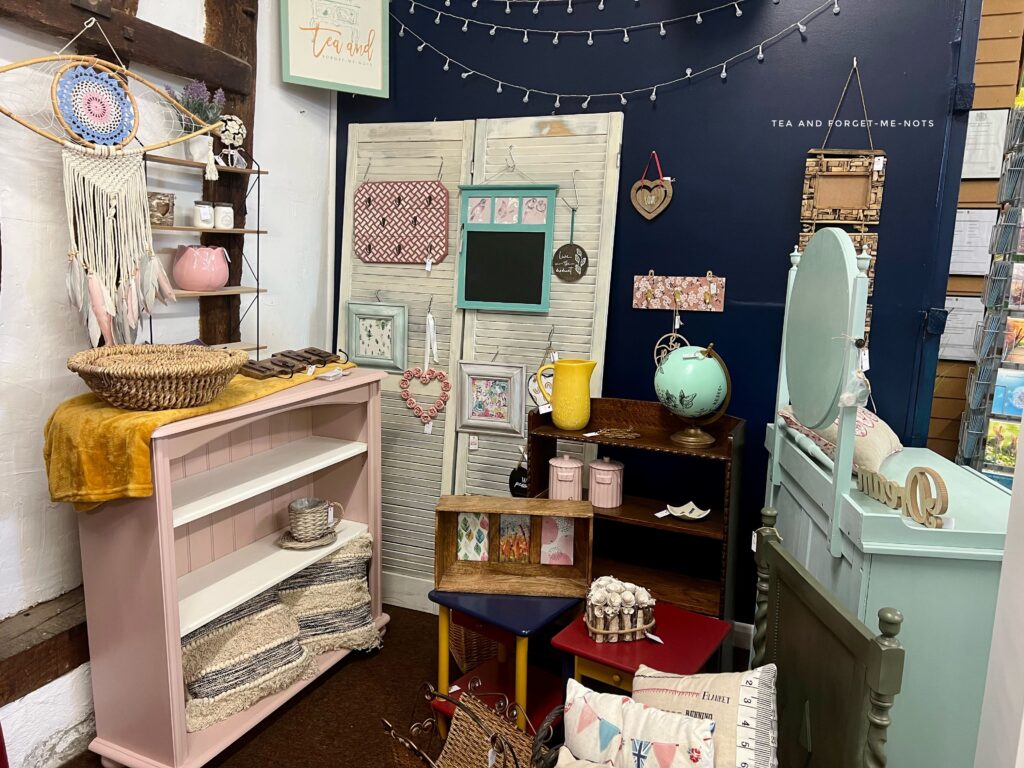
A set of shutters is a great way for displaying products on. Each slat is somewhere you can hang a hook. It’s such a flexible space, like having walls but without restrictions.
Another nice thing about shutters is that they add texture and visual interest to an area.
And finally, my favourite pastime. You can paint them as decorative shutters.
It’s a temporary accent wall. One you can repaint as your style evolves or with the seasons.
So they’re useful for products, flexible to break up a space and can be a canvas in their own right.
My retail space is at Homemade at The Barn in Cambridgeshire, England. I’ve been there since March 2021 and my space has changed a lot over that time.
And will continue to, no doubt!
But here’s how it looked when I moved in!
When I moved into my current booth, I painted the large wall navy blue. I used a paint from Valspar called Night’s Blue Arch, which was easy to use and covered reasonably well.
It needed three coats for good coverage. That’s about standard for an emulsion paint.
Sometimes it’s about using the right paint. Other times it’s just knowing that it takes a few coats to go from a light to a dark colour on a painting project.
I protected the floor with a drop cloth. It’s the best way to quickly clear up any drips. And as emulsion paint is water-based, it’s also an easy cleanup with soapy water.
I liked my wall but every time something sold, I had a hole to hide or cover.

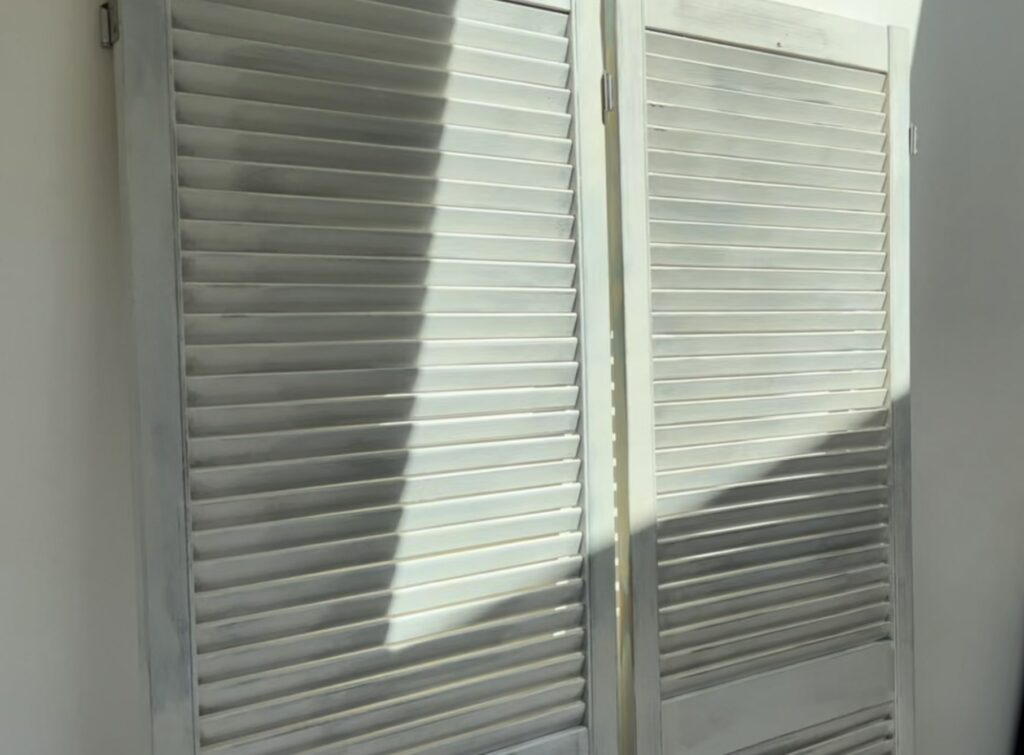
Thankfully, I was offered shutters to avoid making holes in my wall. They were in good condition. But they had old layers of paint and were a bit distressed, great for a rustic barn.
But it niggled at me that they didn’t suit my blue wall.
So, even better, they were allowed a fresh coat of paint. I planned to start with the same blue paint, to make them look cohesive.
Fortunately I bought enough paint so that I would have leftovers for touch-ups. And I still had plenty left.
Want to know 23 great DIY tools? Get the list!
How to paint shutters
So, I took the old shutters home for a new paint job.
And this is when I realised that I have been spoiled by using furniture paint. Because it took so many coats to get good coverage.
In fact, I actually gave up!
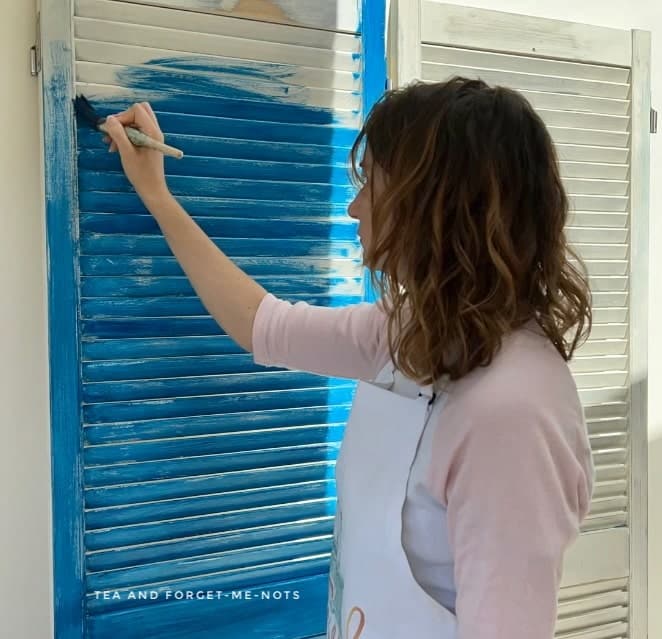
When I painted the wall with its fresh look, it took three coats.
The door on the right is after one coat. The door on the left is after a second coat. It had glimmers of the dark blue but was a long way from solid coverage.
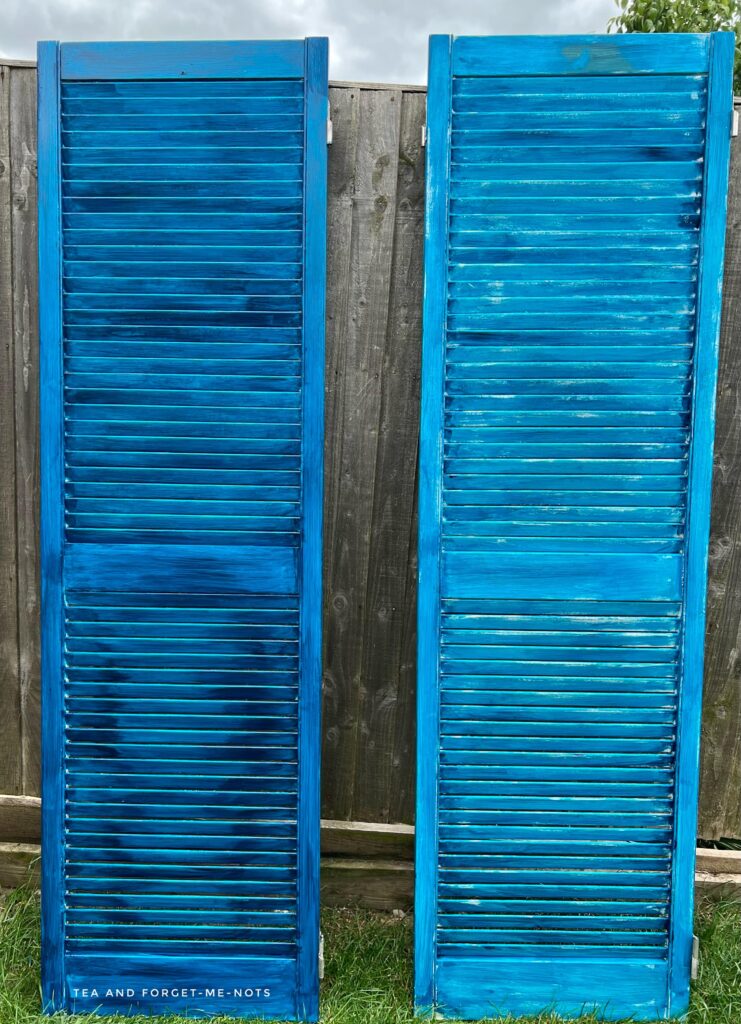
I stopped on coat four on these shutters. And they weren’t a match yet.
This piece needed the most coats of paint I’ve ever done, phew!
It still wasn’t as dark as the wall. However, I knew that I was going to add more paint, so decided that it was enough.
There’s a reason why professional painters use the best paint for the job. It’s the easy way to achieve a good finish.
It may have helped to use a coat of primer first. Or the best results may have been with a first coat of black to more closely match the new colour.
And if they were plastic shutters or new shutters? I first would have done a coat of Slick Stick across the entire shutter, to help the paint adhere.
Painting old shutters with clay paint
Terra, is a clay-based type of paint. Great for blending and layering.
Clay paint is an artistic kind of paint. So, it was time to get creative.
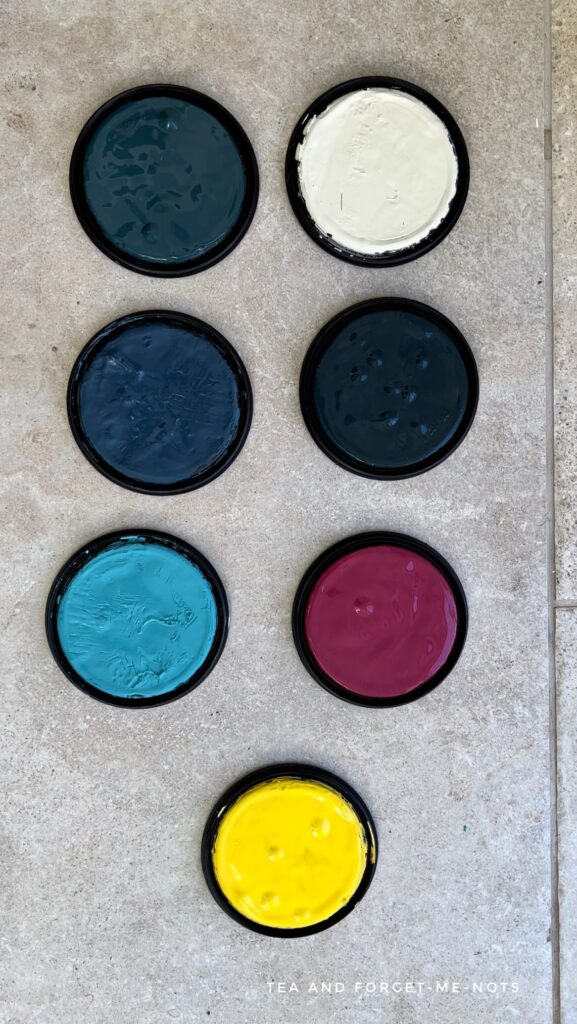
I had this selection of paint colours to choose from. I imagined a space-galaxy kind of look. As I was starting with a dark blue base, that would tie together well.
This pretty thing was the first project I used with these new paints.
There wasn’t a strategy for my painting. I literally used one brush and a spray bottle and played around with adding different colours and blending them together.
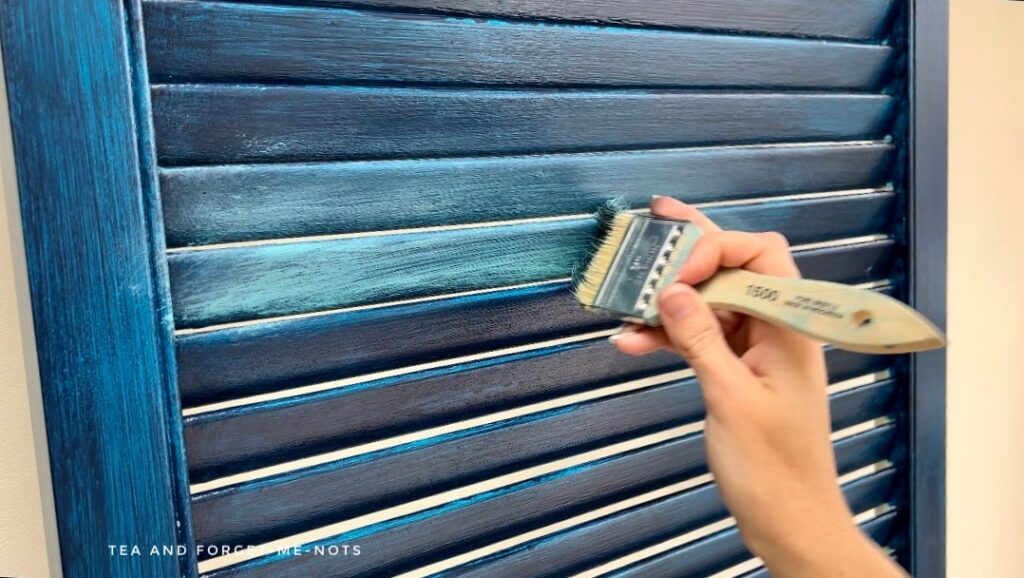
It helps to have a high quality, flat brush or even an airless sprayer to get the paint into all the areas of the shutter slats.
I didn’t think I would use much Daffodil yellow but it was the best choice to add a nice highlight.
My favourite colour was Bougainvillea, the red colour. Thank goodness for spellcheck, as I haven’t written that name correctly yet.
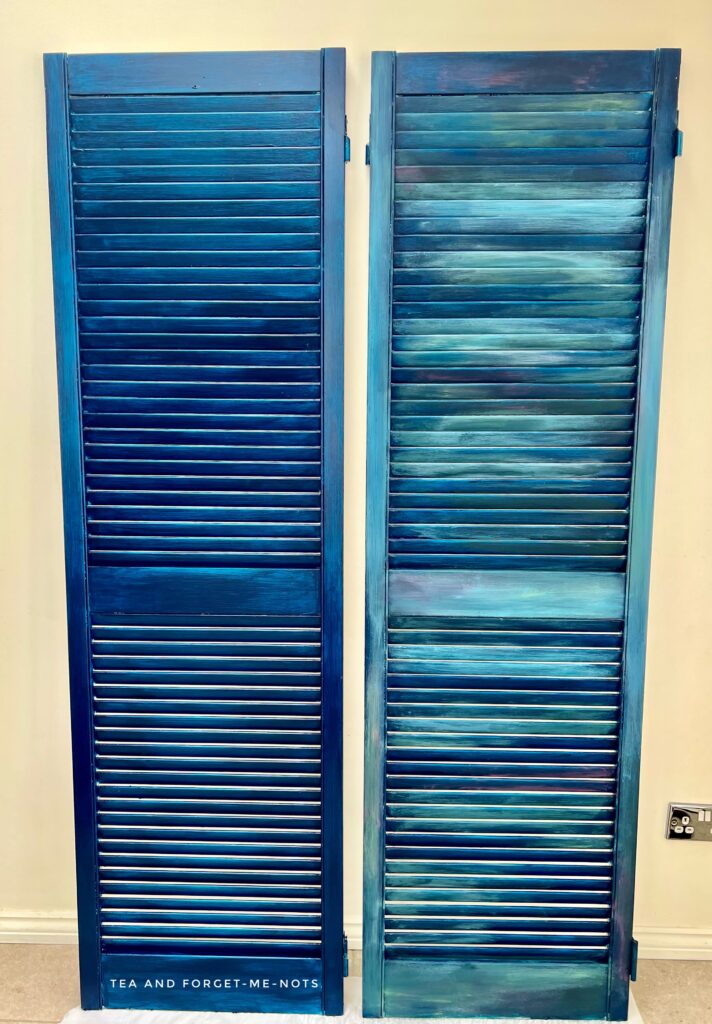
I decided to finish painting one door before starting on the other so I could compare them.
Isn’t it a dreamy melting pot of colour? Like an ocean.
How to seal clay paint
While these functional shutters are in a low-traffic area and only for displaying products. They still need sealing because the paint is clay-based and therefore can smudge if it gets wet.
On my last clay-paint project, I used spray wax. But hand-spraying all the slats didn’t appeal to me.
I used Howdy-Do Hemp Seed Oil instead. It really is one of the easiest top coats you’ll ever use.
This is how hemp seed oil looks over black paint.
I poured some hemp seed oil onto an old t-shirt and wiped it across each slat. This made the bright colours pop even more. It looks so vivid and pretty.
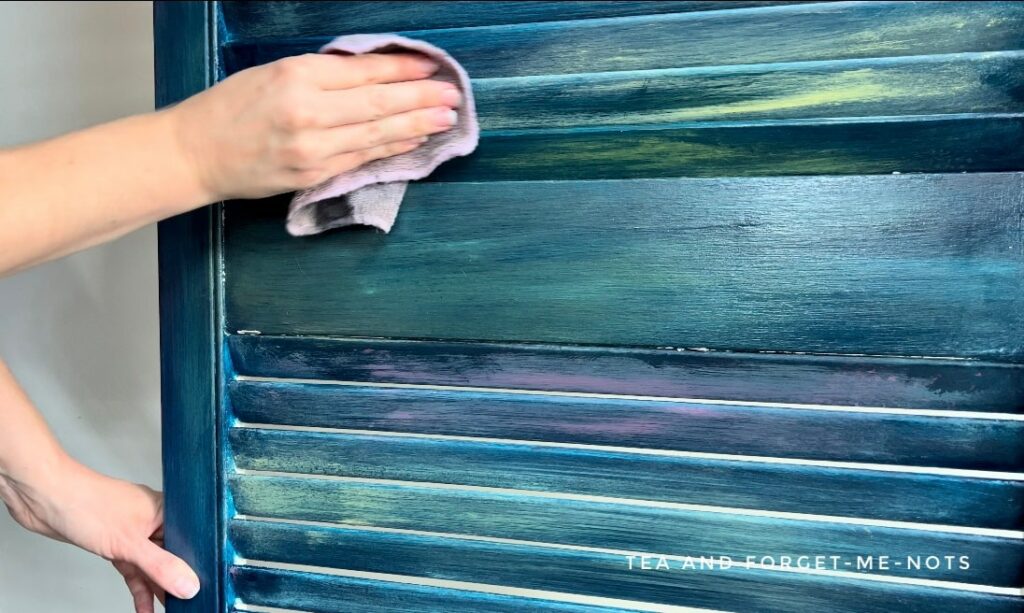
The next day I checked to see if there was any left on the surface. If you can see any it’s because the wood can’t absorb anymore and needs wiping off.
It gives lower protection than some sealers but is perfect for these old shutters. Hemp oil dries to a matte finish so is the best option for a flat sheen.
A satin finish is a more durable finish than matte. For that, you could use my most-used sealer.
I can’t decide if they are galaxies or oceans but I love them either way.
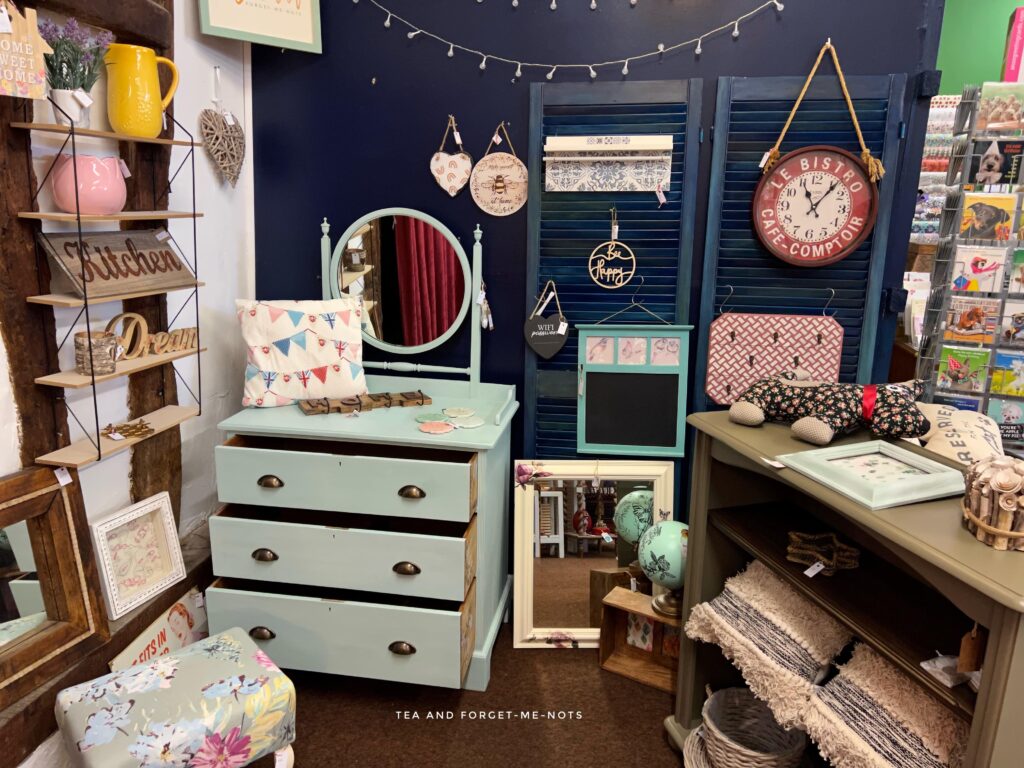
A great low-effort solution for displaying products in a retail space. I highly recommend them as an option if you struggle with your rented space.
You might enjoy seeing some progress photos of my time at The Barn. It is such a beautiful location to be in.
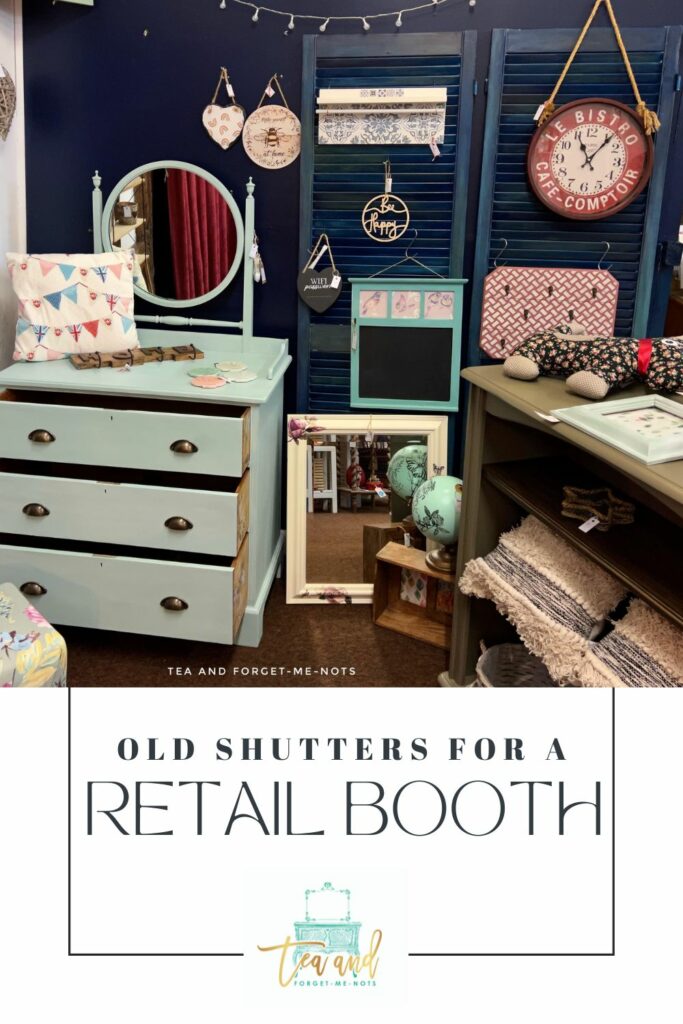
Pin it for later – how to paint shutters for use in a retail booth

Hi there! I'm Rachel Bowyer, a passionate DIY enthusiast with a knack for transforming the old into something beautifully new. With a deep love for furniture painting, refinishing, and the art of crafting. I've been documenting my DIY projects and restoration journey since 2018. I specialise in techniques like decoupage, stencilling, and decor transfers. Join me as we explore the world of creativity and home improvement, one project at a time.
Fab idea Rachel, they look the biz! I love to read your blog with my morning coffee, it’s so interesting & I always pick up great tips which I take back to my friends upcycling shop here in Edinburgh.
A big thank you for taking the time to write, it’s always appreciated ❤
Thank you Lyn, what a lovely comment to start the day with. I’m so glad you enjoy it.
Great idea to use shutters in your retail space! They add visual interest and are so functional! I love the paint treatment you used! You have a wonderful space! Good luck with your booth!
Thanks very much, Donna. It certainly is a great all-rounder.
These shutters add to much character! I love the friendly, happy color you chose.
I’m glad you like them too, thank you.