Easy Tutorial On How To Make A DIY Front Door Mat
A DIY front door mat is an easy project. It’s also a fun way to show off your personality when welcoming guests to your home.
This DIY doormat tutorial shows you how to design, paint and seal your doormat.
It doesn’t even need to be a new doormat. I’m revamping my used front door mat, which even has a hole in it!
This post includes gifted products and affiliate links so you can easily find the products I use myself and recommend to friends. If you purchase these products, I may earn a small commission at no extra cost to you.
Why buy a new doormat when you can have fun painting an old one first?
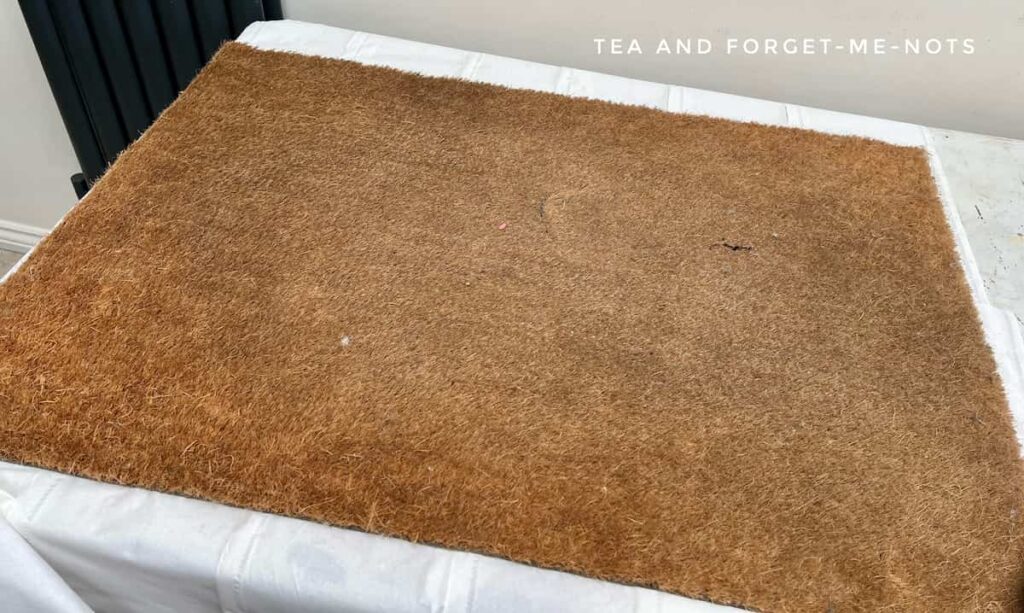
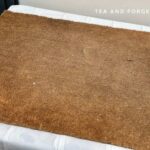
Plain coir door mats are the perfect place to start.
As my DIY door mat is used, the first thing I did was give it a good vacuum. The good news is that was all the prep done.
How to Make a DIY Front Door Mat Step-by-Step
Materials Needed
Step by Step Instructions
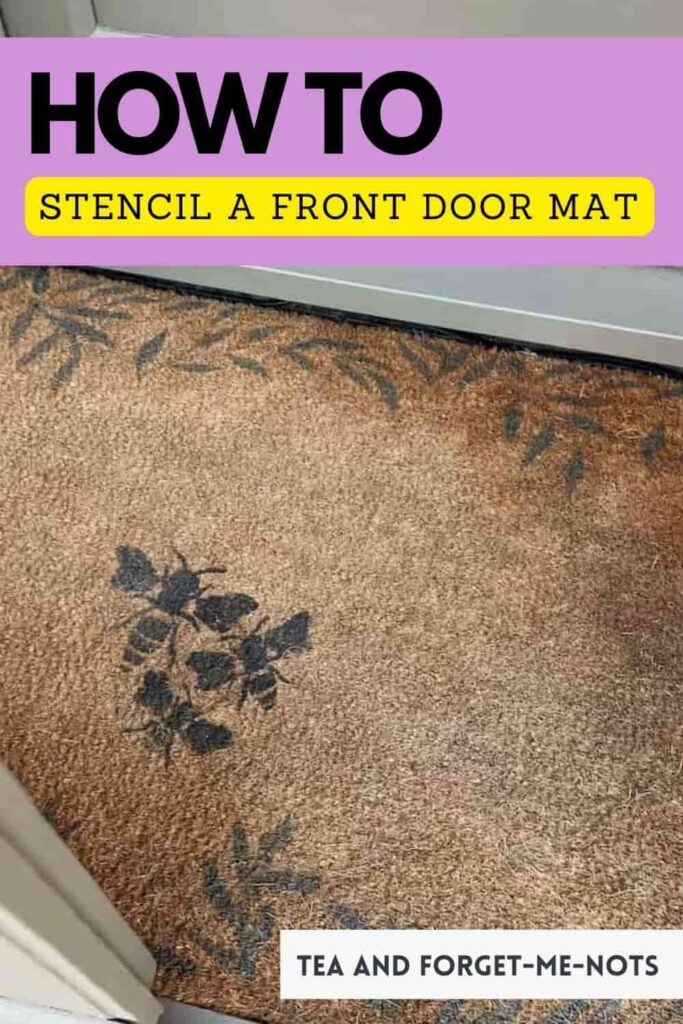
How to Stencil a Custom Door Mat
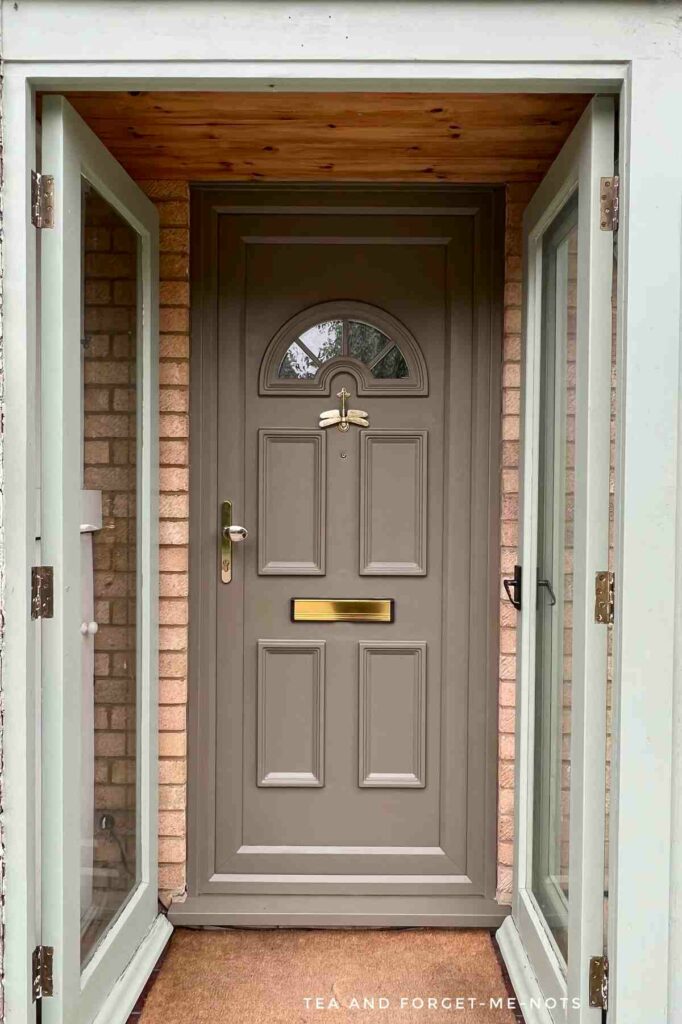
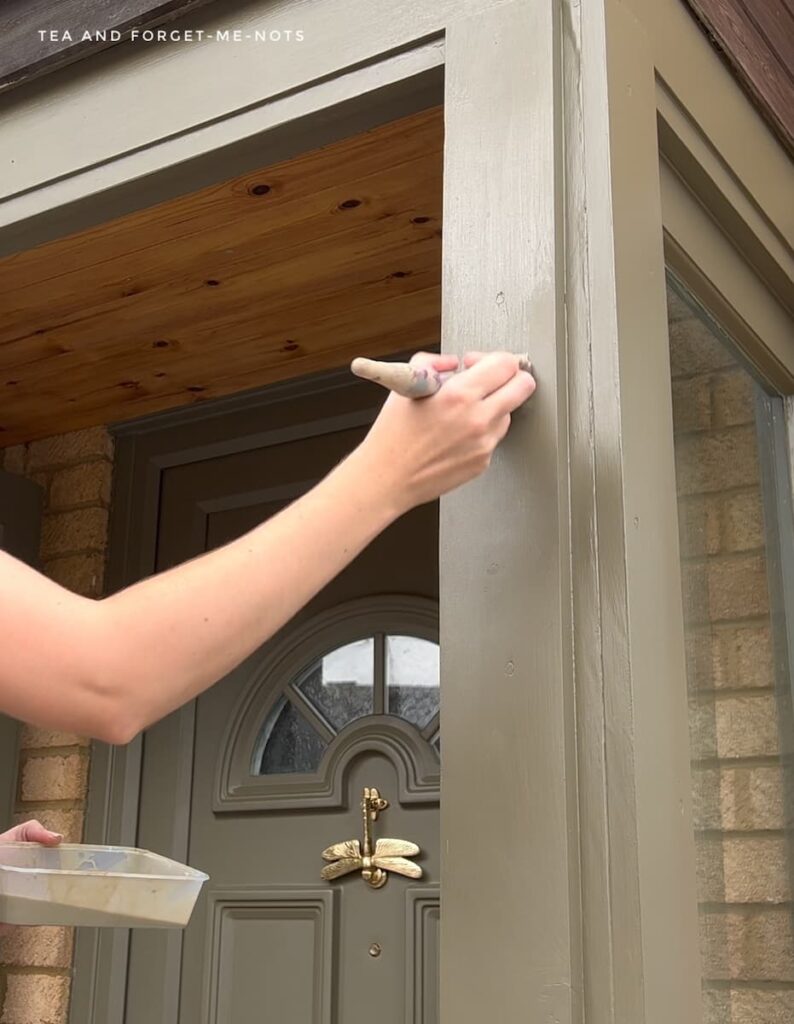
I have created a nature-inspired theme for my front porch makeover. I used earthy green colours and a dragonfly door knocker on my painted plastic door.
So, it made sense to maintain the theme for my own DIY doormat.
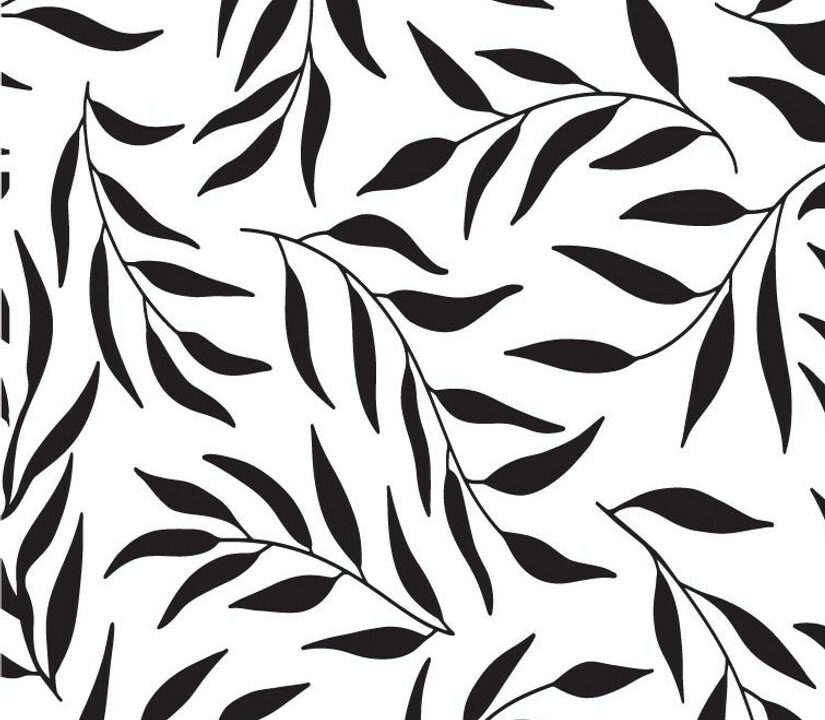
Firstly, I chose the stencil called, Leaf Me Alone. Fortunately, the stencil doesn’t say those words. It might make a funny doormat but wouldn’t be the friendliest of welcome messages!
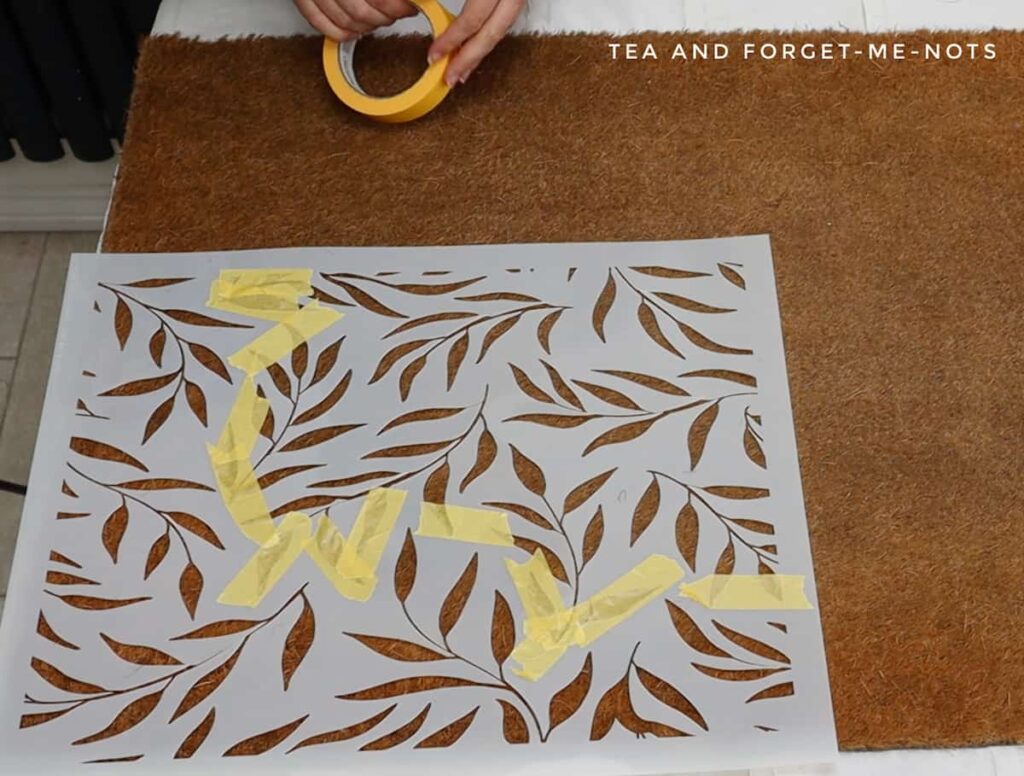
The Leaf Me Alone stencil is a repeating pattern of leaves. A lovely way to bring an element of nature inside. Or to my porch, at least.
I chose to use this stencil as a border rather than the full block of the image.
Mostly because I had a second stencil that I wanted to place in the middle. But also it gave me the option to add the full stencil in later if I decided I didn’t like the look of the border. (Fortunately, I did like it!).
If you have a Cricut machine then the world is your oyster when it comes to creating a DIY message. You can make whatever you can think up. I even used a Cricut Explore Air to stencil a message onto a mirror.
You can choose an image or text in the Cricut Design Space. It’s very easy. But only if you already have a Cricut. Otherwise buying a ready-made stencil is the cheaper option.
For how to clean a stencil, check out of the end of this post.
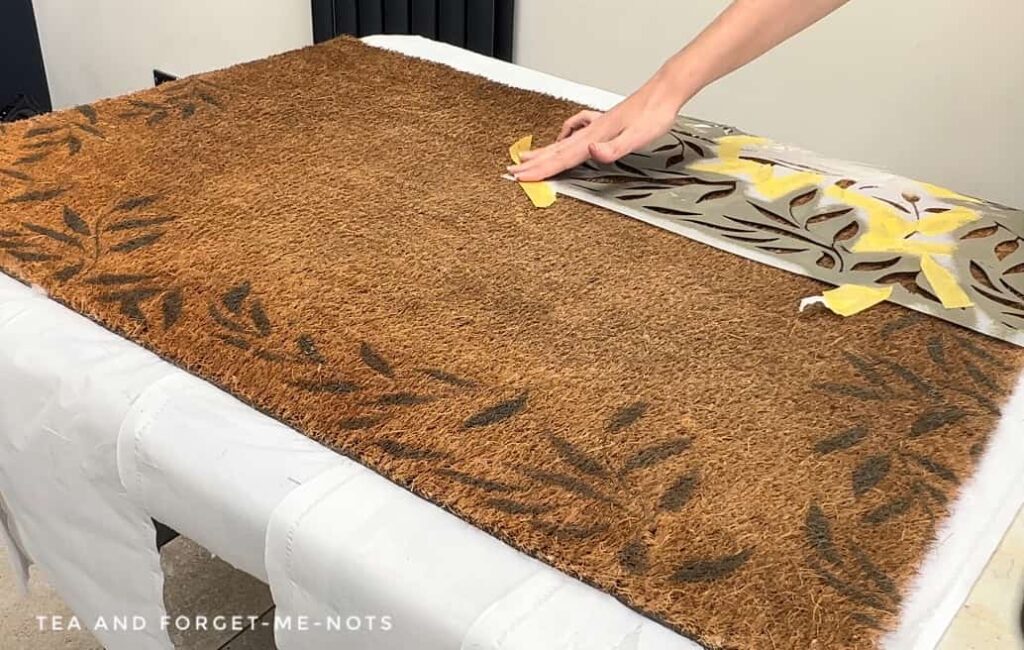
How to Apply a Stencil to a Coir Door Mat
I will tell you what I did to secure the stencil to the doormat. And then I will say that neither of those options worked well… Luckily the stencil turned out great but not because of my preparation strategies!
Firstly I used stencil adhesive and applied it to the back of the stencil. For this, you wait 30 seconds for the adhesive to get tacky before laying it in place.
Normally, this is the perfect way to keep a stencil in place. And when you remove it, there’s no sticky residue on the piece.
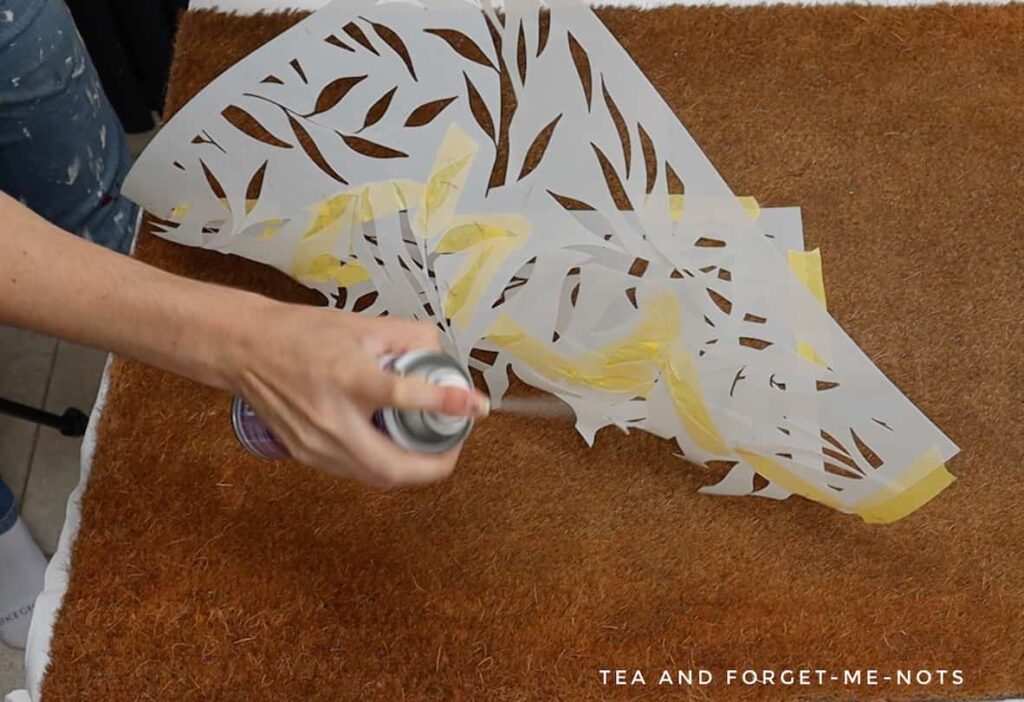
But it didn’t do anything to keep the stencil in place.
This might be because my coir mat was used and not new. Therefore the natural fibres were more uneven than a new mat would be. Which gave it less area to stick to. Or maybe it’s just a difficult surface to use spray adhesive on.
In addition to this, I used painter’s tape around the edges. Painter’s tape is another excellent way of keeping a stencil in place.
However this also barely secured the stencil. The helpfulness of painter’s tape is that it is low-stick so that it is removed easily. But then it also doesn’t grip on too well either.
So, with both of those methods not working overly well, I just held on to the stencil by hand.
What Paint Brush to Use To Paint a Basic Doormat
The best paint brush to use is a large natural fiber brush, called The Big Daddy. It’s a rough-bristled brush which is the best material as it can take on the rough edges of the blank coir doormat.
This is better than a roller or sponge dabber as the little bit of variation in bristle length pushed the paint deeper into the coir material.
For the paint, I used an earthy green called Hampton Olive. The colour would match my newly painted UPVC front door. Hampton Olive is a mineral-based kind of paint. So, it has a built-in primer and top coat.
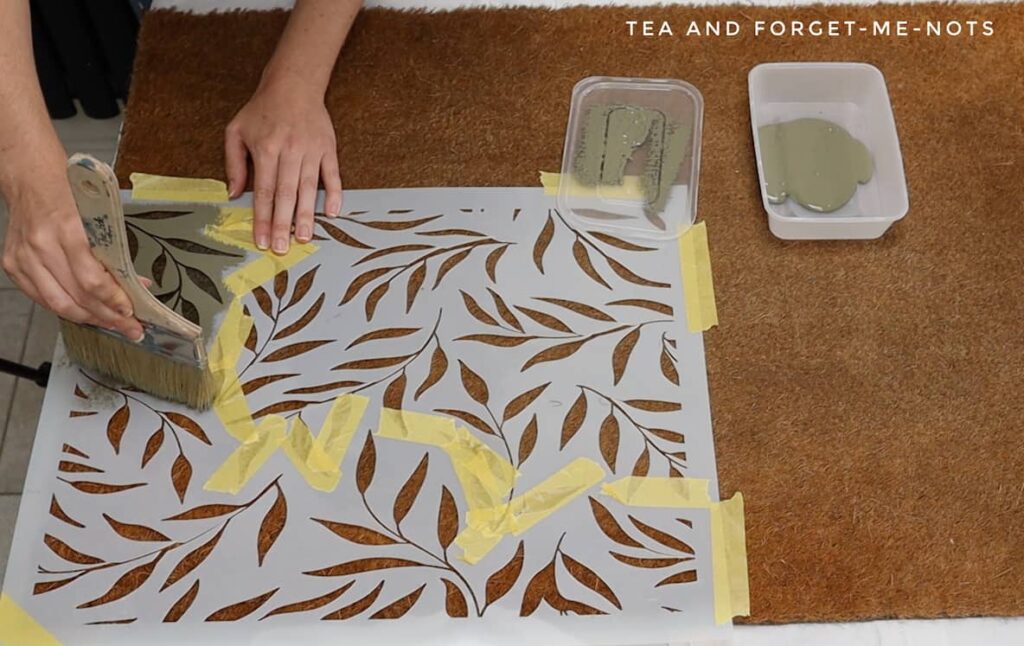
My tip for getting crisp lines on the stencil, considering the base material moves, is to paint the stencil once and move on.
Instead of blocking out the full image with paint, I just got the basic shape. As I could see that the stencil shifted as I went along. So, I didn’t go back to parts of the stencil to add more paint or fill them in further.
Instead, I used an artist’s brush to fill in any details once the stencil had been removed.
This technique worked well. There were hardly any areas that lost small pieces of detail. There’s no reason why this wouldn’t work for letter stencils too. I would just pay particular attention to when the stencil shifts and stop painting that area.
The next step was to disguise the slice in the middle of the doormat. It didn’t need to be perfect. It was a used doormat after all. But my goal was to draw the eye away from it.
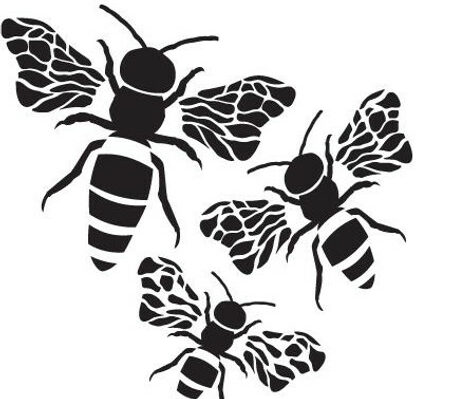
I chose the three bee stencils in The Bee’s Knees stencil set.
I placed them over the area with the hole in it. There were a lot of small details in the bee stencil, especially in the wings. I painted over some of those details because the definition got lost in the textured surface.
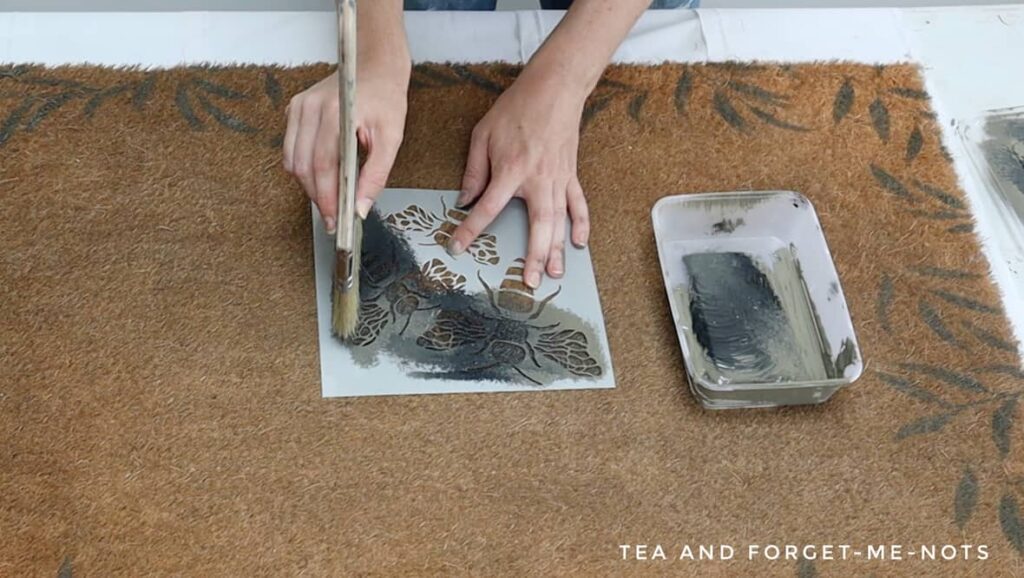
For the bees, I used a combination of Hampton Olive and a black paint, Anchor.
I didn’t mix the colours but left them separate when applying the paint to the brush. Which resulted in a slight ombre finish to the bees. It’s subtle but up close looks really pretty.
How to Seal a Custom Doormat
Finally, it was time to seal the mat. Some people don’t recommend sealing a painted doormat because it might impact the effectiveness of the coir material. Also, doormats naturally wear down so the paint will eventually rub off too.
So, why bother?
Well, if you can delay the inevitable and protect your doormat for longer, then why not try?
Of course, I’m the person who painted a broken and used plain doormat rather than buying a new one. So, I do like to get my money’s worth!
I used a spray sealer suitable for exterior use and outdoor paint. Flex Seal is another product that I’ve seen recommended, so that could be a good choice too.
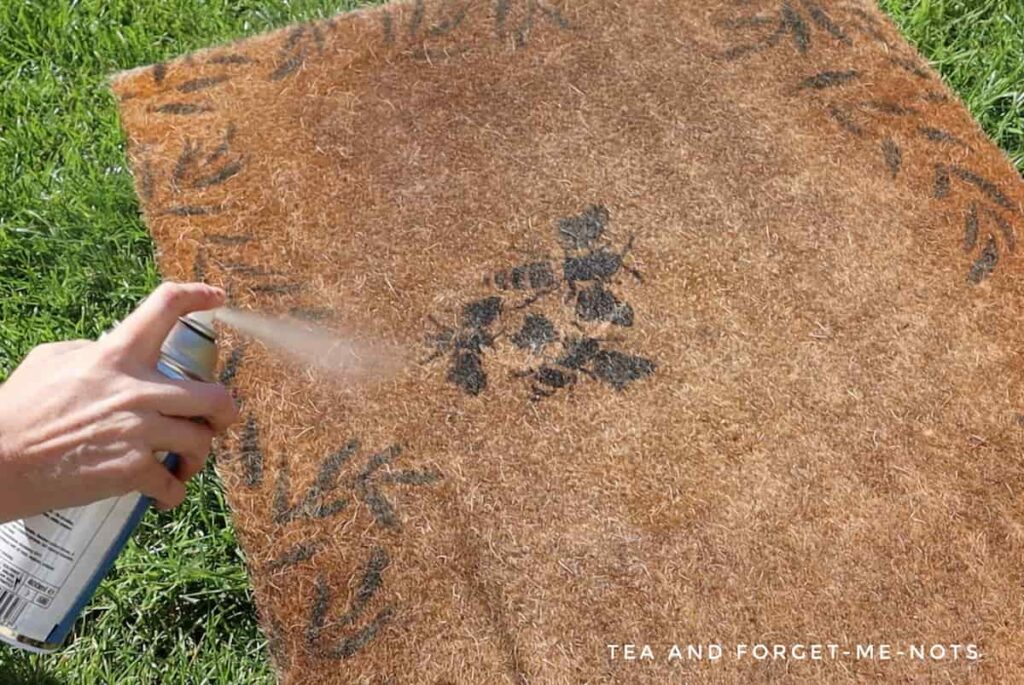
I did two coats of the sealer. I paid more attention to the painted sections. Although covered all of the doormat in case it left an uneven finish.
Then I left it to dry for a couple of hours in between coats.
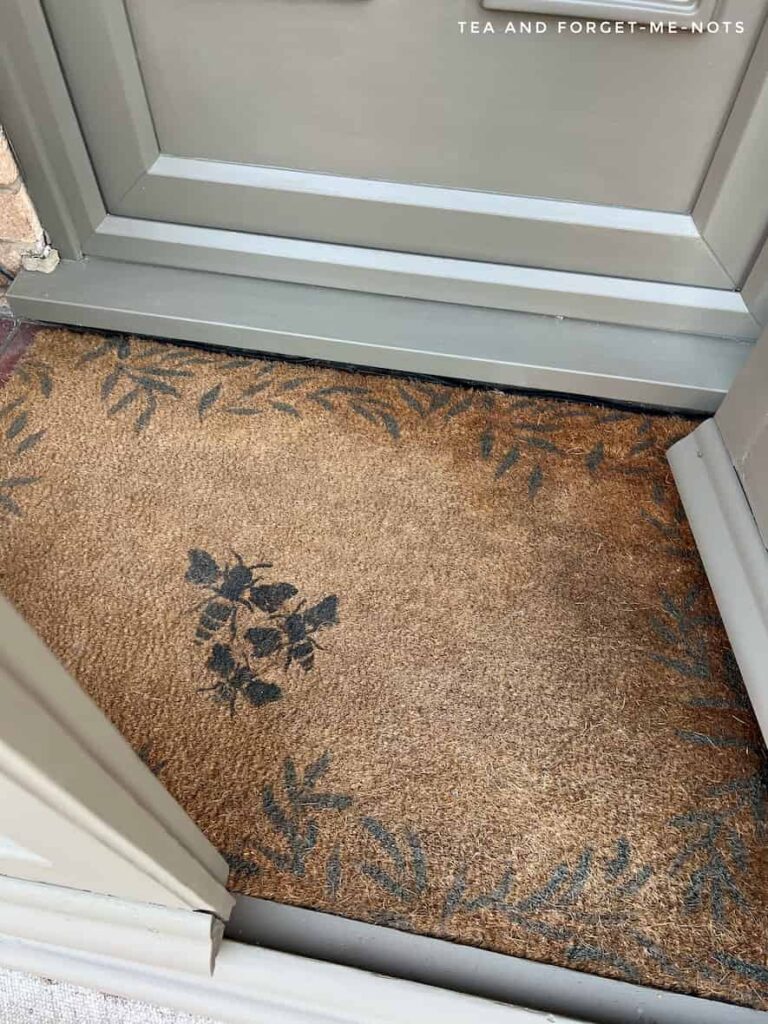
Painted Door Mat Project
Do you see blank doormats and think of the possibilities of what you could put on it? It’s the easiest way to add some personality to a boring, functional item.

I especially like the combination of two different stencils on this one. And how they were used to disguise the lumps and bumps (and holes) of its life so far.
It’s a fun option to give a personalised welcome to your home.
How to Clean a Mylar Stencil
Not directly related to the custom welcome mat, but useful to know. Do you know how to clean your stencils?
I have been known to leave my stencils too long after using them and the paint has dried. Then it’s a challenge to remove it.
Here’s how you simply clean the stencil after painting. The best way is to use Scrubby Soap. Scrubby Soap is a soap that works for cleaning paintbrushes and bare feet (yes really!).
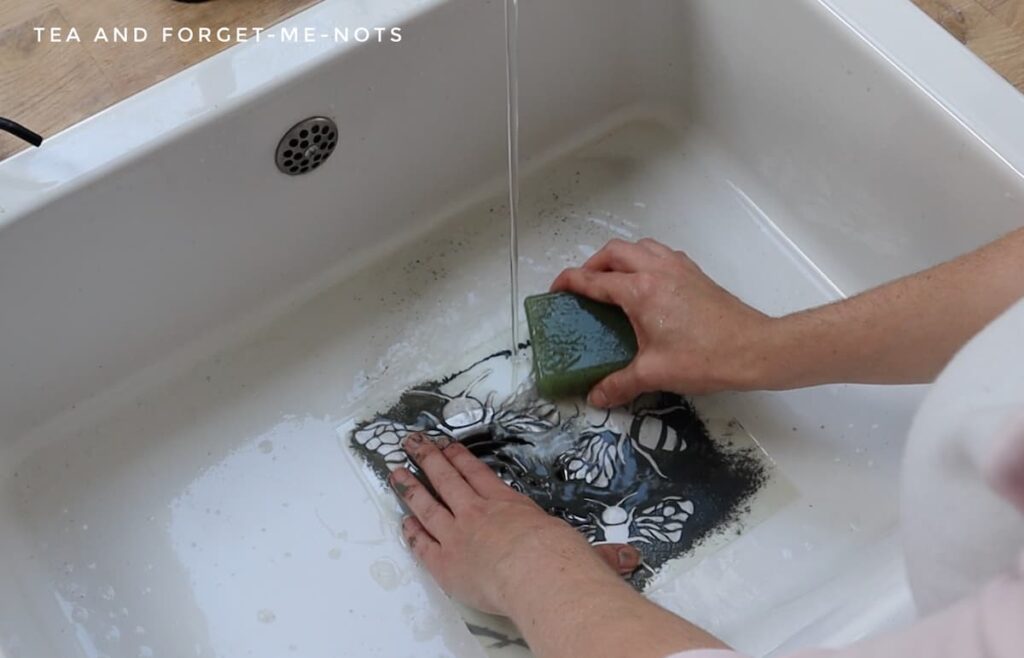
Use it with warm water and gently rub the stencil with the textured side of the soap. Make sure to pay attention to the design of the stencil so that you don’t bend back any of the details.
Then dab the excess water off and leave the stencil to dry before storing it.
Why does it matter if your stencil dries with paint on? Either the first time or after a few times, the paint will crust around the image. Leaving an uneven line rather than a straight edge to the stencil.
Whether it’s a Cricut stencil or a store-bought one, the best option is to keep them clean and reusable.
Find The Supplies
Here are some of the supplies that I used when making this DIY front door mat!
Door mat
A blank canvas to create any message you like on a door mat.
Leaf Me alone
A pretty stencil with many elegant ways to use it.
The bee’s Knees
Bees, a honeycomb and a sunflower, there is plenty of variety in this stencil.
If you loved this project, you’ll love these projects too:
Did you PAINT A DOOR MAT?
I love seeing what you do. Please mention @teaandforgetmenots and share your creations with me!
Pin it for later – How to Stencil a DIY Front Door Mat

Hi there! I'm Rachel Bowyer, a passionate DIY enthusiast with a knack for transforming the old into something beautifully new. With a deep love for furniture painting, refinishing, and the art of crafting. I've been documenting my DIY projects and restoration journey since 2018. I specialise in techniques like decoupage, stencilling, and decor transfers. Join me as we explore the world of creativity and home improvement, one project at a time.
LOL, I think I’m going to steal your idea of making a Leaf Me Alone doormat. Sometimes that’s exactly how I feel when people pop in unannounced and expect me to drop everything I’m doing. Pinned to make one day soon.
Oh yes, unannounced is a no-no. Would love to see it!