How To Paint a UPVC Front Door – Easy DIY Makeover
Want to paint your UPVC front door? Here’s how to create a beautifully DIY painting front door, without sanding.
Whether you have existing paint on a front door that you want a fresh new look for. Or you have a plain plastic door that you want to give personality to. This is the best way to do it.
Thank you to Dixie Belle Paint for sponsoring this post. This post includes gifted products and affiliate links so you can easily find the products I use myself and recommend to friends. If you purchase these products, I may earn a small commission at no extra cost to you.
I’m going to show you how to paint a UPVC, plastic, front door. Which is a really common front door in the UK.
This is how to give plain white plastic a little character.
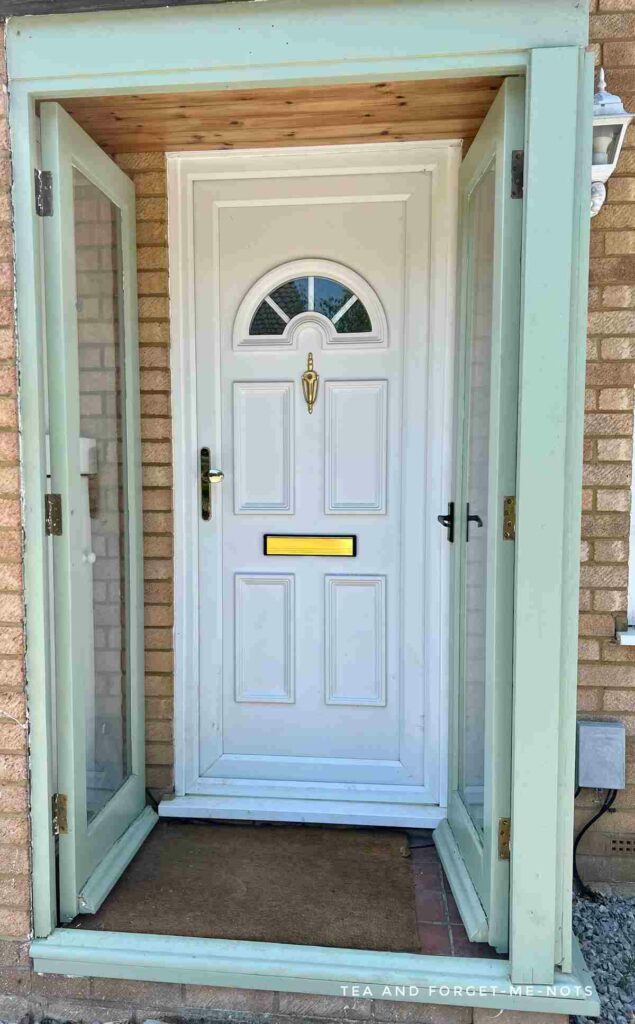
A front door is, naturally, a high-traffic area. This one is in a small porch area. It takes on shopping bags, a very enthusiastic dog and quite an enthusiastic toddler.
So, the paint job on this door really needs to hold up well.
Rather watch a video tutorial instead of step-by-step instructions? I’ve got you covered with a comprehensive video that guides you through the process of painting a front door.
How To Paint a UPVC Front Door Step by Step
Materials Needed
Step by Step Instructions
Step 1: How to Prep a UPVC Door For Painting
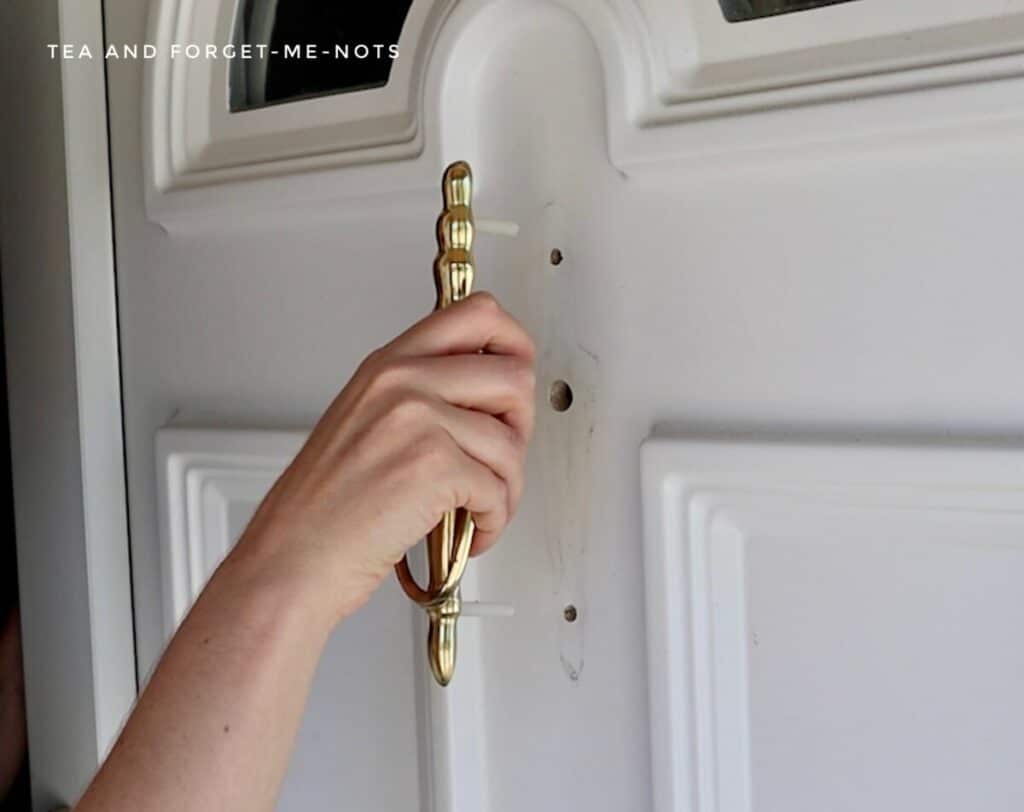
The first thing to do is to remove the existing door hardware. This door knocker with a peephole or spyhole is a classic feature for this kind of door. Perfectly fine but I have a much prettier door knocker planned.
If you don’t want to remove the door accessories before cleaning, you can tape them off.
The next step is to get rid of all the dirt and dust. With muddy dogs and children, cleaning is a constant process.
I used a TSP cleaner and a damp cloth to wipe over the plastic door. Fortunately, it’s easy to see when the door is clean. Sometimes when cleaning furniture, it’s difficult to tell whether you’re actually taking off the dirt or just the previous finish.
But this was a simple process. After finishing with the White Lightning cleaner, I removed any residue with clean water. A nice clean surface of the door to start from.
It’s a good idea to paint not in direct sunlight. As the sun dries the paint more quickly. So it will be harder to get a smooth finish.
If you have a choice, then wait to paint your exterior door after the sun has moved.
This UPVC door is an exterior door but in a porch. So won’t be in direct contact with the elements. But it does get partial sunshine.
Step 2: Tape Anything You Don’t Want To Paint
The next thing I did is use painter’s tape to tape up the small arched window. I used Frog Tape for this to avoid getting too much paint on the glass.
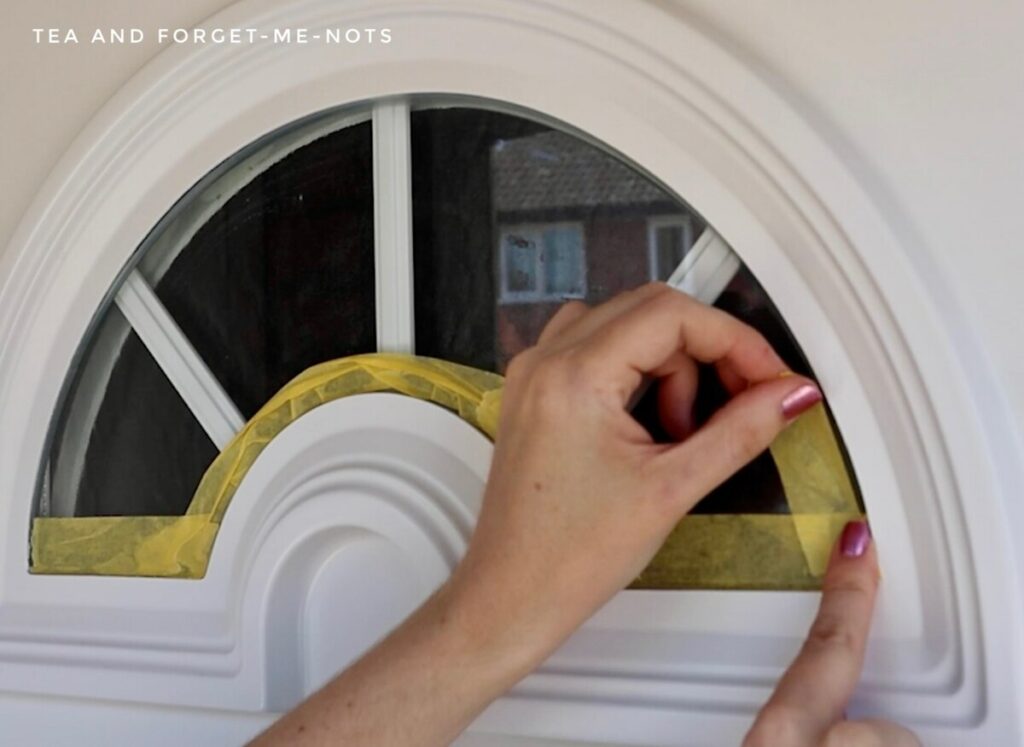
With a curved surface, it’s likely that you’ll need to do a touch-up or two. A good way to remove paint if you do get it on the glass is to use a razor blade and some shaving foam and gently scrape it off.
You can either do the work at the start and tape it up. Or do the work at the end and clean up the excess paint.
Step 3: Do You Have to Sand a Plastic Door to Paint It?
Before painting you would normally sand. But that is not going to work well for a UPVC plastic front door.
The most important thing for an exterior door is the type of paint you use. So I’m going to use a primer-type product for shiny and laminate surfaces.
The product that is going to make this mineral paint adhere well to this plastic door is Slick Stick.
You use Slick Stick on surfaces such as glass, metal or plastic. Perfect for a DIY project like this. It gives it a matte finish for the new paint to stick to.
It’s used instead of sanding, as it would be hard to sand something like metal. Such as when I painted this fridge.
I did two coats of Slick Stick over a couple of hours. Then you need to wait 24 hours before continuing to paint.
Have you ever tried to paint something shiny and get watery, blotchy streaks? That’s what Slick Stick avoids, by giving a grippy surface as a barrier.
By painting on top of Slick Stick rather than the plastic door, the paint applies as if it were on wooden doors.
Step 4: How To Choose Your Front Door Paint Color
There are a few ways to help you decide what colour to paint your front door. Firstly, look around the door frame, what colour is it? Red brick? Yellow brick? Wood? You want to choose a complementary colour.
Similarly, if you have hardware that you have to keep, what would pair nicely with that?
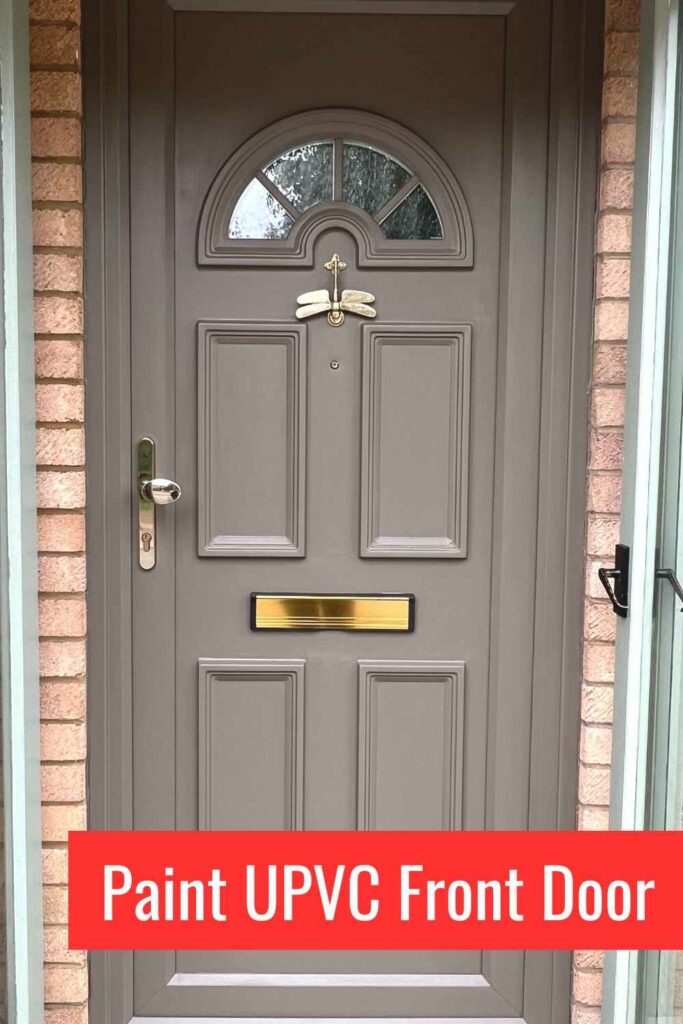
I had to keep my door handle as there is limited choice for UPVC doors. I have yellow brick and gold hardware. A natural choice for the paint colour was olive green.
Here’s a whole post on how to choose the best paint colours.
Hampton Olive is a really lovely neutral green-brown. It’s quite moody and earthy. It’s from the Silk mineral paint line. Which has a built-in coat of primer, topcoat, UV protection, water, mildew and scuff resistant.
All in all, pretty robust for a front door paint.
It’s not a dedicated exterior paint. But it works for outside. And coupled with an additional top coat, should do a great job in a front porch.
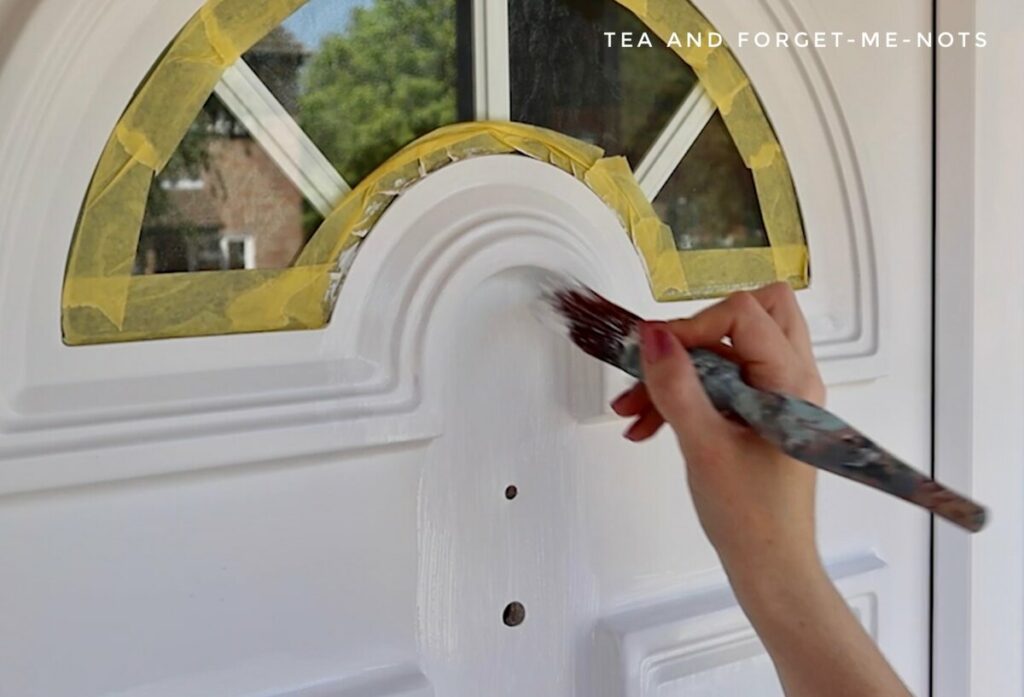
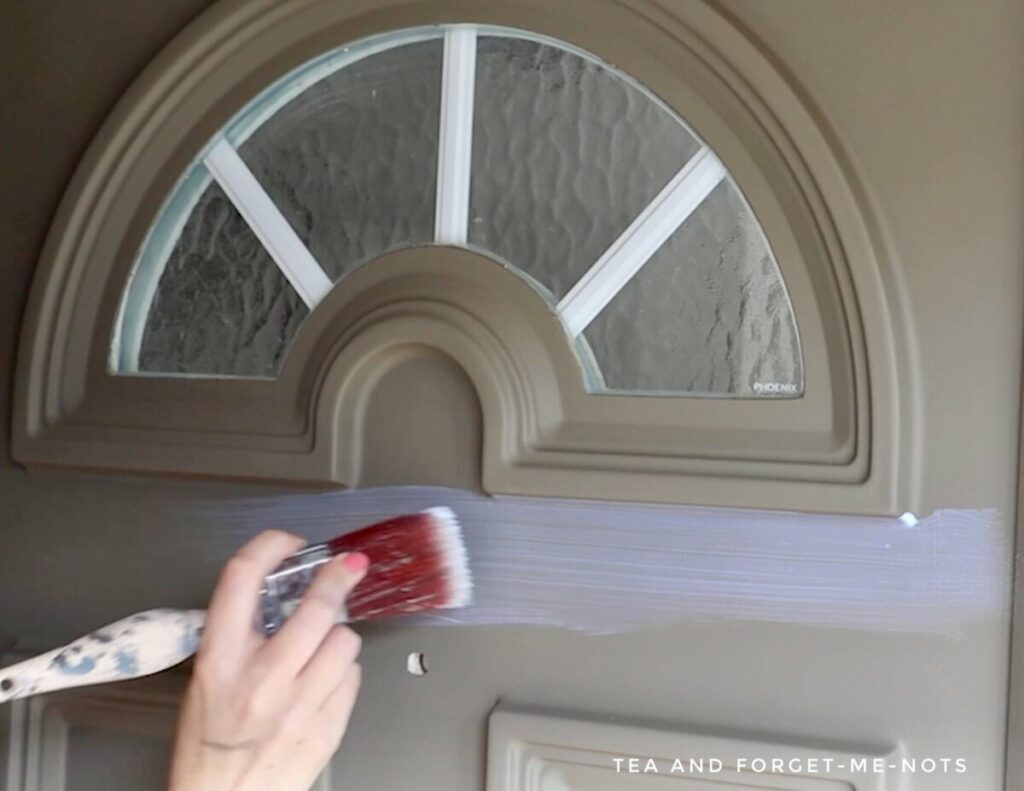
Step 5: How To Paint a UPVC Front Door
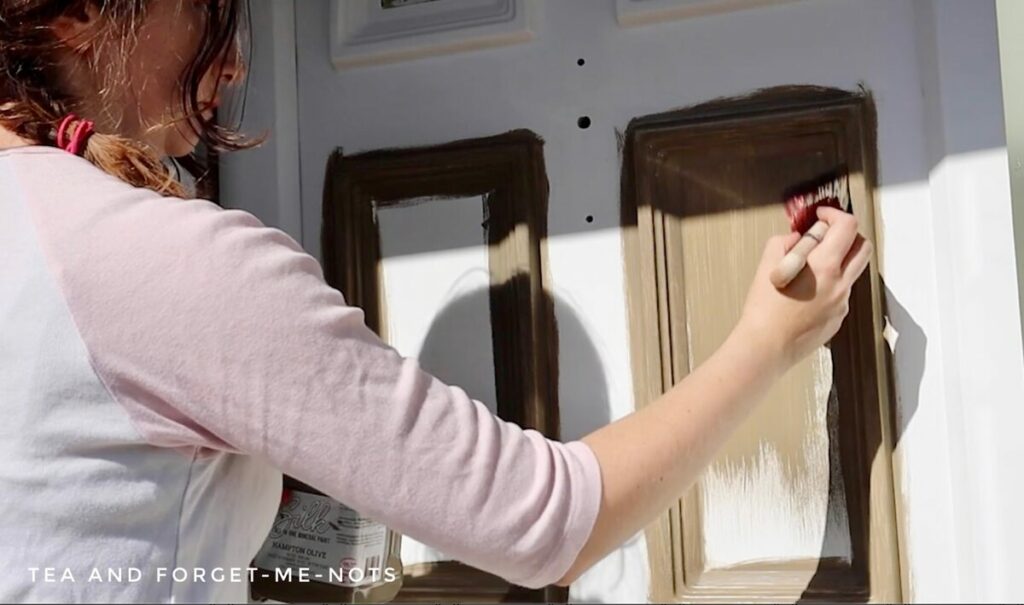
It’s helpful to paint any ridges and decorative areas first. I get the colour on quickly with a paint brush. Then use a roller to smooth out any brush strokes or paint drips in the larger areas.
Essentially if your first coat of paint looks good then you’re probably putting far too much paint on the brush.
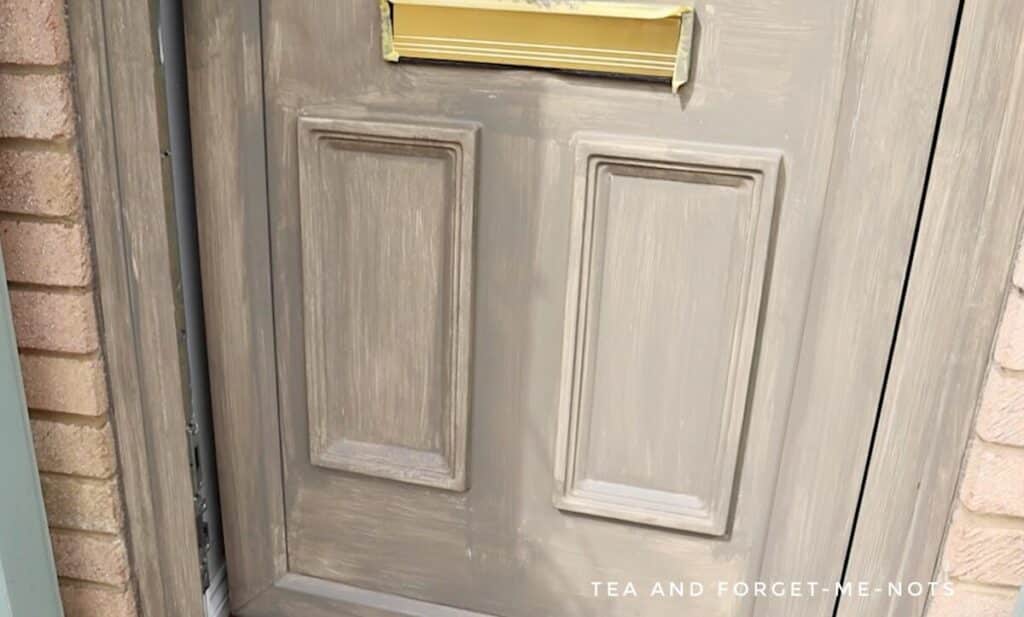
Luckily, I’ve used this paint colour before so I know that it will turn out beautifully. But this first coat was not doing it any favours. it was quite a dull brown.
This is one of those interesting colours that looks really different depending on the natural light.
I ended up with three coats of this kind of paint for full coverage.
Do you ever find hairs or nibs in your paint? If the paint is still wet you can pick them out with tweezers. If you notice them after the paint is dry, you can lightly sand away the hair. Then do another coat of paint on top of that.
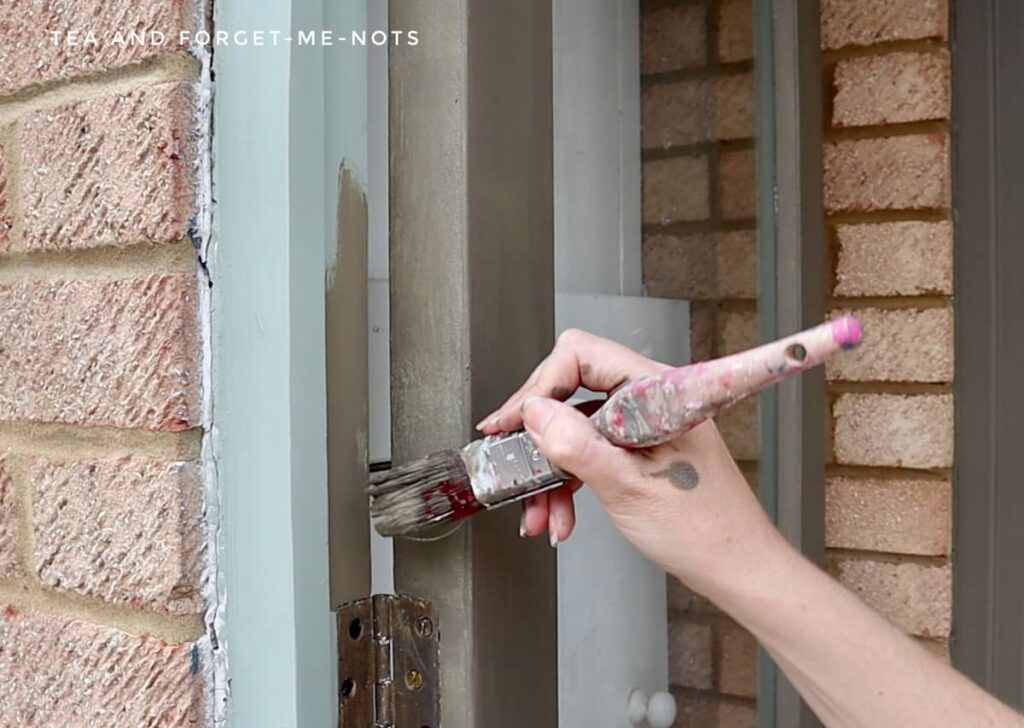
You will probably also want to paint the door frame and bottom of the door too, unless you want it to contrast.
I had some wobbly caulking up the door frame against the brickwork. Fortunately, the colour I was painting the whole door was not dissimilar to the mortar between the brickwork. So that actually blended in relatively well.
I needed a chair to paint along the top edge of the door frame.
If you need to stretch to reach something, it’s a good idea to get a chair or a ladder so that you are comfortable at the height. If you’re trying to stretch you might get wobbly brush marks.
In total, I needed 5 coats of paint. 2 coats of Slick Stick and 3 coats of Hampton Olive.
Like Hampton Olive? Here’s what it looks like on a bookshelf.
Step 6: Can You Paint The Plastic Strips in the Glass?
0/10 points for my observation skills on this one.
Only after the 5 coats of Slick Stick and paint, did I notice three plastic strips in the glass window. They were embedded within the glass. which I couldn’t get to.
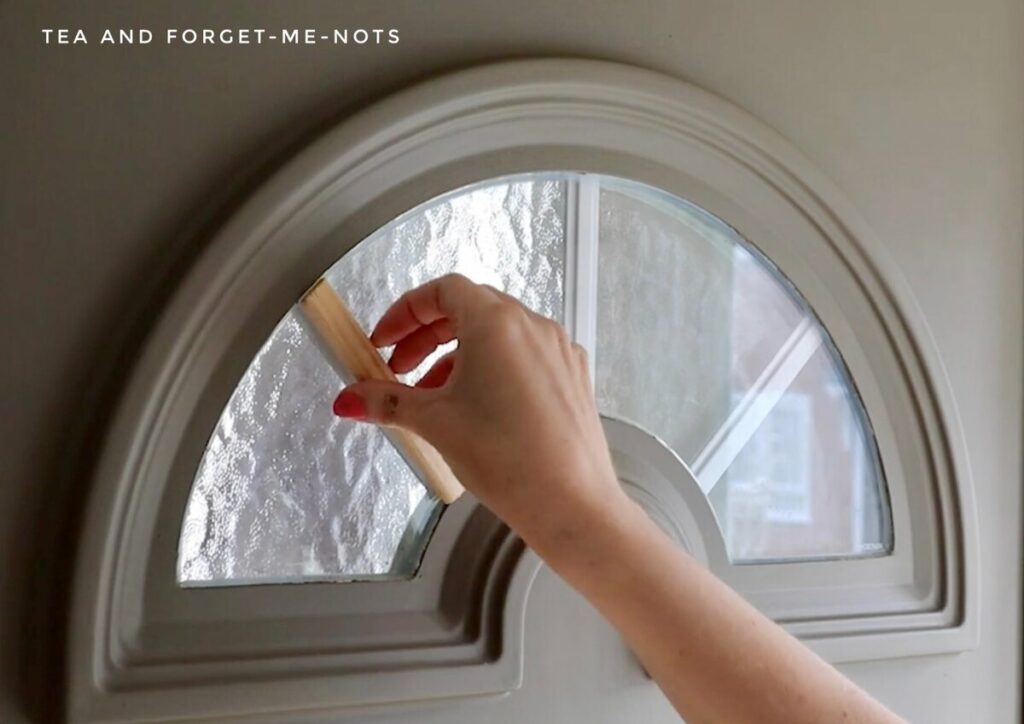
I had a choice of either painting over the glass or trying something to hide them.
My plan for hiding the white strips was to use some scrap wood. After painting the wooden pieces I attached them to the glass with E6000 glue. Then secured them in place with Frog Tape until the glue had set.
Step 7: Do You Need To Seal an Exterior Door After Painting?
If this door was fully on the exterior of the house rather than in a porch? A great way to give maximum durability would be to top coat with the water-repellant Gator Hide.
But even with a built-in top coat, it’s a good idea to seal the paint on an exterior door in a porch to protect it properly.
Some people question why I seal Silk paint as it does have a built-in top coat. However, a front door is one of the most high-traffic areas of a house.
So I want to give it the best chance of survival as possible.
I did two coats of a satin clear coat. A satin finish is a good middle ground. It gives a medium sheen and a medium level of durability.
The first two to three weeks is when the paint is most vulnerable to scratches. You need to be extra careful during that time.
Step 8: Can You Add a New Knocker to a UPVC Door?
You can easily change the standard door knocker on a UPVC front door. You may need to drill new holes for the new fittings. Or fill in holes for ones you don’t need any more.
My new door hardware was very late arriving in the post. I’m sure everyone has a story about a poor delivery service!
Normally, I would have waited until that had arrived before starting on the door.
The process I recommend is to use wood filler and drill new holes for door knobs before painting. That means you have the holes in the right place so aren’t trying to match painted wood filler after you’re finished.
You also don’t risk damaging your new paint surface.
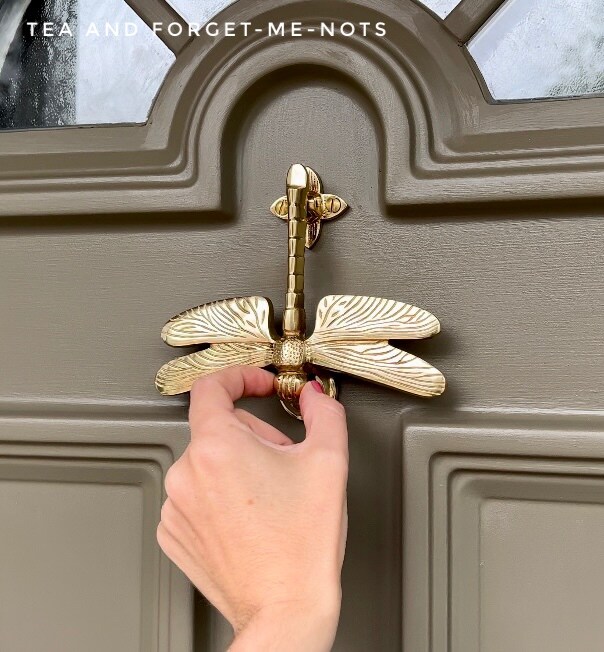
But finally, my new door knocker did arrive! I hadn’t seen it in person yet so I was really hoping that it was going to fit nicely. I had measured it but you’re never quite sure.
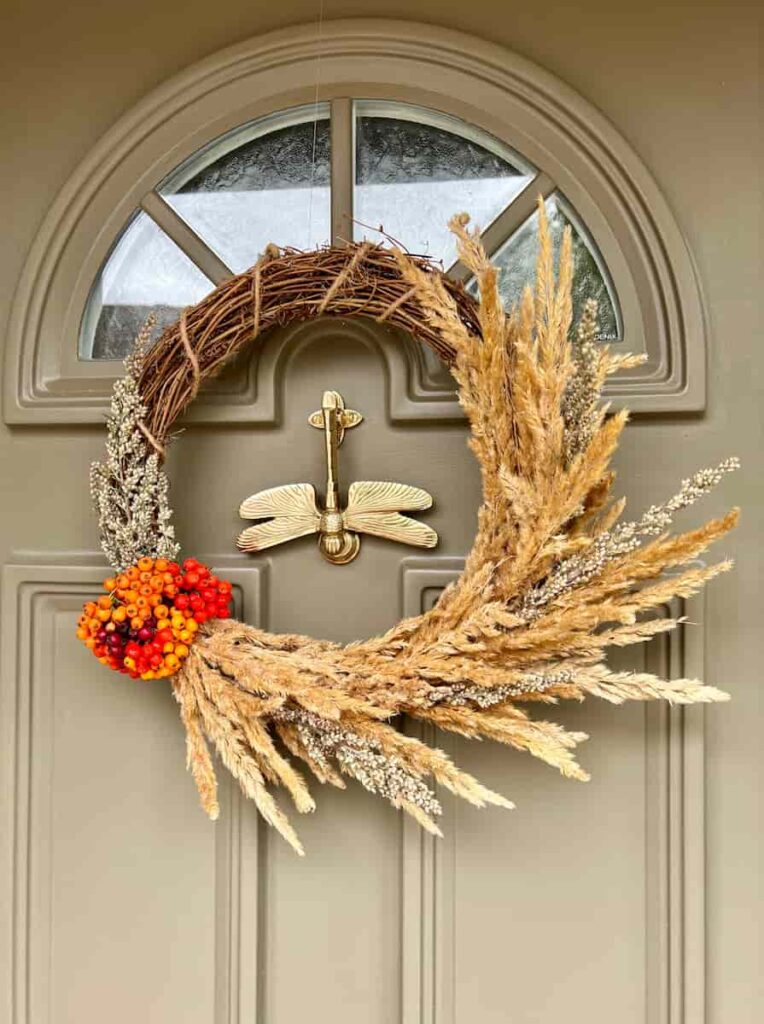
It was as pretty in person as I hoped. I went for a gold dragonfly design. If you’ve seen many of my other projects it probably won’t surprise you that I’ve gone for a nature theme.
I was able to use the original hole for the peephole and use that for the knocking plate.
In the end, there was only one hole that I needed to cover up. I used wood filler. It needed two applications to get a flat surface in line with the door.
Then to attach the knocker I made very small pilot holes where the dragonfly knocker needed to go. Then screwed it in by hand.
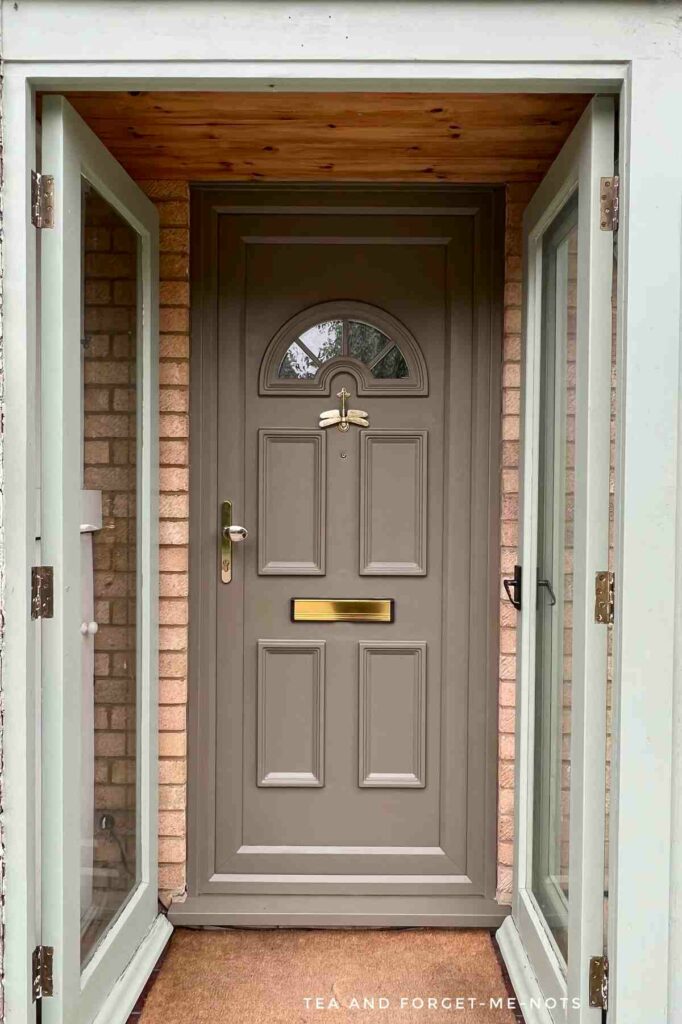
DIY Painting Front Door Result
The front of your house is the first thing guests will see. This is a relatively easy DIY project but with a big impact.
I’m in love with the end result of this fresh look. The dark and moody colours plus a pop of bright gold.
This is just the start of overhauling this porch. It needs a little bit of love. But I think when it’s finished it will look really lovely.
If you have a garage door that you want to match, I would follow the same step-by-step guide.
If you’d like to see the front door come to life, watch it on YouTube.
How To Paint a UPVC Door Instruction Video
You can find more video tutorials on my Youtube Channel
My Favourite Supplies
Here are some of the supplies that I used when making this project!
Dragonfly door knocker
Pretty brass door knocker in a dragonfly shape.
hampton olive
A neutral green-brown mineral paint with built-in top coat.
slick stick
A fabulous product to use instead of sanding on shiny and laminate surfaces.
Answers To Your Questions About Painting a UPVC Door
Can you paint a front door without removing it?
You don’t need to remove a door before painting it. But you do need to be able to leave the door open while it dries. If you close the door before the wet paint is fully dry then the edges of the door will not dry smoothly.
Can I paint over paint on a front door?
If the paint is in good condition then you can scuff sand the paint and then paint over it. But if you have peeling paint then you’ll need to sand the surface flat first before applying a fresh coat of paint. The best way to remove sanding dust is with a tack cloth.
Can you paint a metal door?
Just as with a plastic door, you can paint a metal door by taking the first step of prepping it with Slick Stick. Then follow the same simple steps above.
Is it better to paint a door with a brush or a paint roller?
An easy way to get a smooth finish is to use both a brush and a roller. The decorative elements are best cut in with a brush. Then the rest of the door and flat areas are smoothed out with a roller.
Alternatively, you could use a paint sprayer to get clean lines, as long as the door frame is masked off carefully.
If you loved this project, you’ll love these projects too:
Did you paint your front door?
I love seeing what you do. Please mention @teaandforgetmenots and share your creations with me!
Pin It For Later – DIY Painting Front Door

Hi there! I'm Rachel Bowyer, a passionate DIY enthusiast with a knack for transforming the old into something beautifully new. With a deep love for furniture painting, refinishing, and the art of crafting. I've been documenting my DIY projects and restoration journey since 2018. I specialise in techniques like decoupage, stencilling, and decor transfers. Join me as we explore the world of creativity and home improvement, one project at a time.