How to make over a small side table with golden glamour
A small table is a low risk way to start upcycling. Here’s how to make over a small side table with a golden wow factor.
They’re small so don’t use a lot of paint. Often have straightforward shapes so won’t need fancy tools or brushes. And will hopefully be quick so you can see if you enjoy the process.
It’s also possible to get them cheaply!
If you’re looking for a way to find free furniture so you can have a go, check out these suggested places.
This post may include affiliate links so you can easily find the products I love and use myself. If you purchase these products, I may earn a small commission at no extra cost to you.
How to make over a small side table with golden glamour
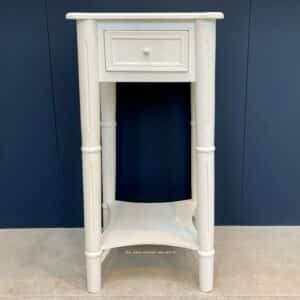
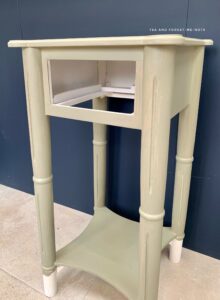
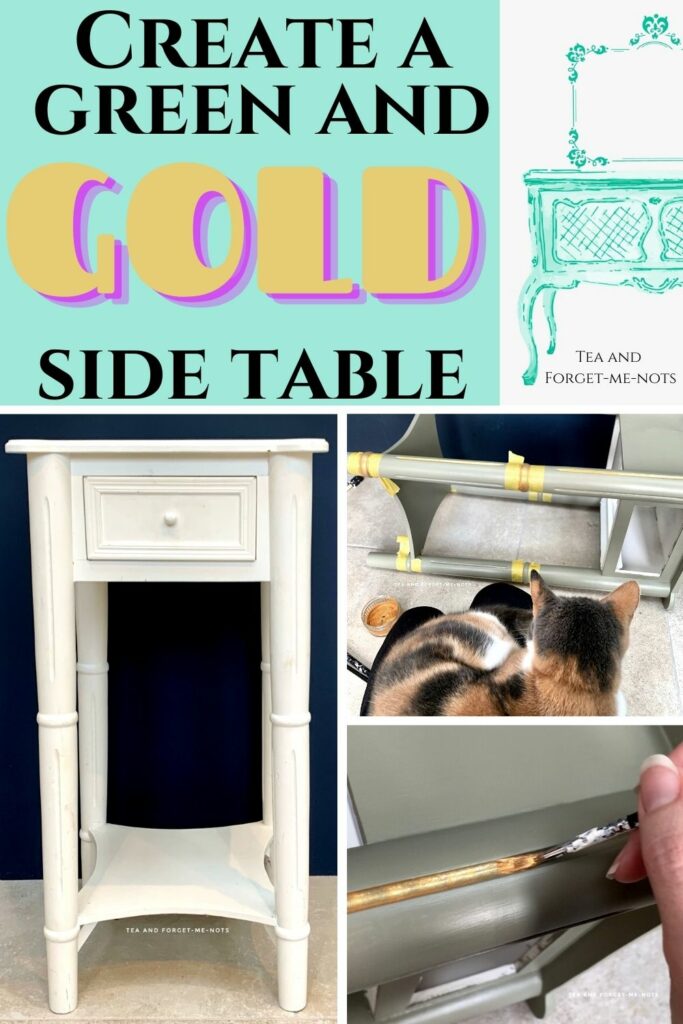
My parent’s found this small side table for me at Thames Hospice charity shop. It cost £5. It was in decent condition apart from a dent on the top and mostly just needed a good clean.
If you need small side table inspiration, here are two more makeovers.
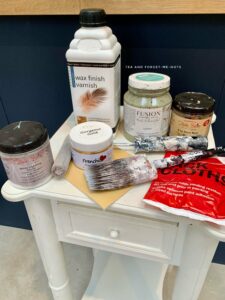
These are the supplies I used to tackle the project. Or the supplies I expected to use at the start of it, anyway. I used a Zibra brush instead of the roller in the end because it gave a smooth enough finish by itself.
Prepping the side table
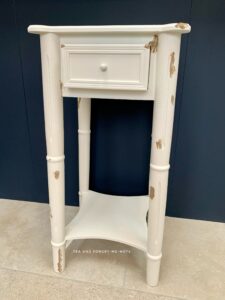
I cleaned the piece really well using White Lightning. If I wasn’t going for a glam look, that would have done a good job of making the table nice enough again.
I then filled the dings with Dixie Mud. Most of the dents were minor and as usual, I got carried away with the filler. Only one crack on the top needed a real repair to ensure a nice finish.
Sometimes you can sand out shallow dents so they won’t need filling at all, in which case it makes sense to sand the piece first. But I waited until the wood filler was dry before sanding the entire piece.
I used 120 grit sandpaper to scuff up the surface and give the paint something to grip onto.
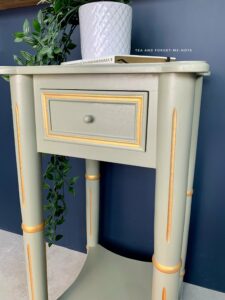
A side of greens
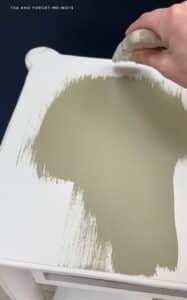
I receive so many lovely comments on the bookshelf where I used this colour, Lichen, by Fusion Mineral Paint. So, it was time to try it out again.
I used the Zibra Palm Pro brush, which if you’re in the market for a quality brush, I highly recommend. I planned to use a roller on the top of this side table but I didn’t need it as the finish was brilliant.
Looking for gift suggestions for the upcycler in your life (even if that’s you!)? Here are 21 ideas, including some pretty unique options.
This was after the first coat of paint. I painted in two sections as I could either do the bottom of the legs or the top of the table in one go without painting the floor too.
I didn’t use my trusty painter’s pyramids this time.
Lichen’s coverage is great and I only needed two coats to get it beautifully even. Then I sealed the piece with Polyvine’s Wax Finish Varnish (with two coats on the top for extra durability). The varnish gives it a slight sheen but is still quite matte.
Want to know 23 great DIY tools? Get the list!
Boring no more
I knew that Lichen and gold worked well as I painted my Princess Jasmine table with it this year.
This table had the ideal details for adding a touch of glamour. The indentations and rings on each leg were perfect places to add an accent colour.
To create the gold, I used the Frenchic’s Frensheen gold powder. I mixed it with the Polyvine varnish until it was a smooth texture and applied like paint.
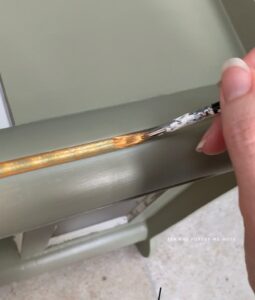
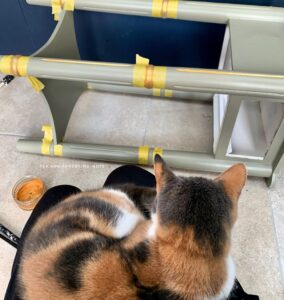
I taped up the leg rings so I didn’t have to overly worry about having a steady hand. Little did I know that my cat would demand attention at the time so she added an extra challenge for me.
Say hello to Pastel the cat!
I also added a highlight around the ridges of the small drawer. So all in this was two coats of paint, one coat of sealer and one coat of gold.
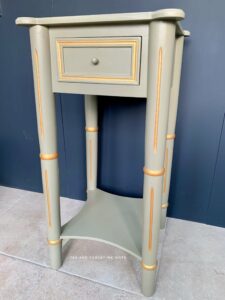
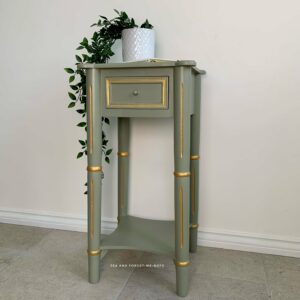
I think this could work as a small hall table for keys or next to an armchair for books and drinks.
It’s small but has pretty details that just needed enhancing.
Of course, gold isn’t for everyone and it’s more of an acquired taste now. But where’s the fun in keeping everything neutral.
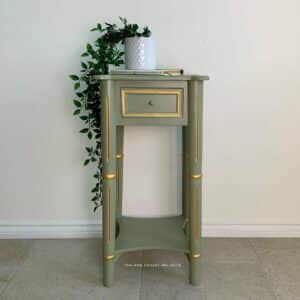
So, we have the big sister to Princess Jasmine. It’s now something to talk about rather than just a table to get grubby again.
If you liked this post, you might also enjoy this other one featuring a gold accent…
Pin it for later – make over a small side table

Hi there! I'm Rachel Bowyer, a passionate DIY enthusiast with a knack for transforming the old into something beautifully new. With a deep love for furniture painting, refinishing, and the art of crafting. I've been documenting my DIY projects and restoration journey since 2018. I specialise in techniques like decoupage, stencilling, and decor transfers. Join me as we explore the world of creativity and home improvement, one project at a time.
Great job on your table! I love the gold accents! Your post has inspired me to try that sometime! Thanks!
Brilliant, please share when you do!
What a beautiful transformation!! I love the color, and it’s amazing with the gold accents!
Thanks, Kim.
This so pretty. This French decor lover is loving the gilding
Ah, high praise indeed! Thank you.
I love the gold accent! Great job!
You did a wonderful job updating this piece. I love the colors that you used.
Thanks, Paula
Ohhh I really like this combo. Feels sort of like Louis XVI a with the gold trim. The green reminds me of Laduree (sic) Love!
Thanks, reminding you of royalty is a definite improvement!
It looks beautiful!
Its fabulous! I love the gold detail work.
Thank you, Jennifer