What you need to know about how to paint a layered stencil
Want to be able to use furniture stencils? Here’s what you need to know on how to successfully paint a layered stencil.
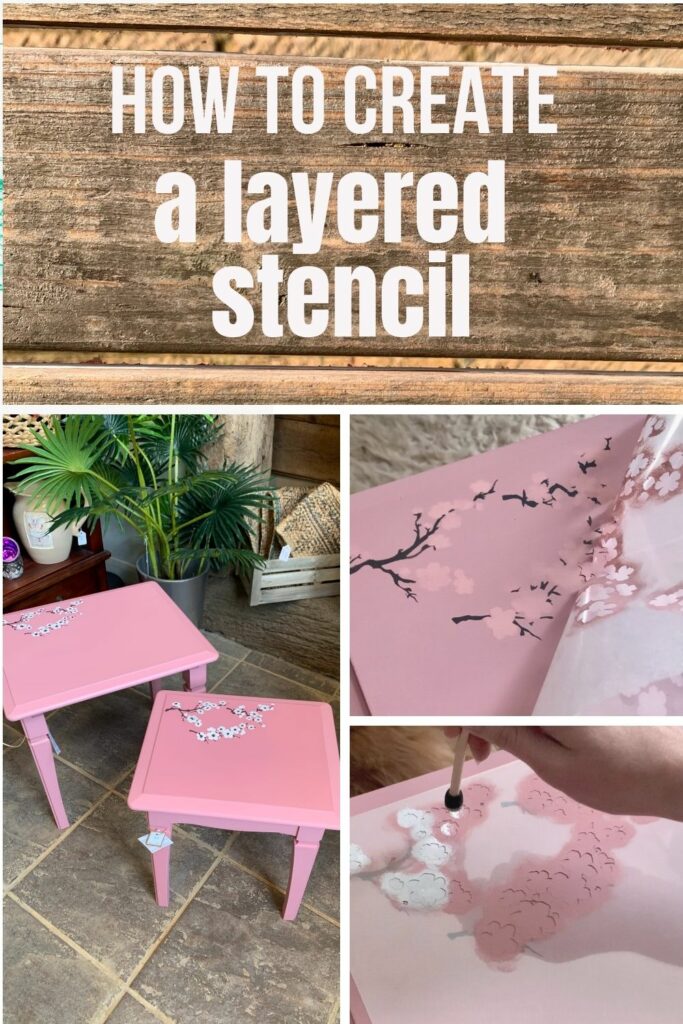
Creating the stencil
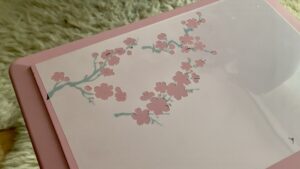
I bought this cherry blossom stencil from Etsy. I paid £3.42 for a digital file with an instant download. A bargain, saving me the time to design and test my own version or wait for delivery of one in the post.
I cut out the stencil using my Cricut Explore Air 2 on two plastic mylar sheets.
If you like flower projects, here’s my favourite ever piece!
This post may include affiliate links so you can easily find the products I love and use myself. If you purchase these products, I may earn a small commission at no extra cost to you.
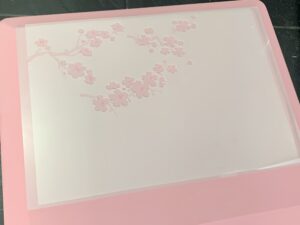
When you buy a physical stencil it comes on one sheet. By having the digital file, I was able to separate the elements by their colours and make them into two different pieces.
The reason for this was to create depth with the stencil. The flowers should appear like they are on top of the branches. By painting the branches and then the flowers, it creates natural depth with the layers.
Need a gift for the DIYer or upcycler in your life (even if that’s you!)? Here’s my holiday gift guide with some more unusual recommendations.
What you need to know about how to paint a layered stencil
The process
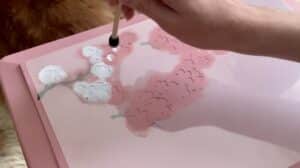
Starting with the bottom layer, I used adhesive spray on the back of the stencil while painting. It’s sticky enough to keep it in place but removes easily without taking any paint off of the piece.
I painted the first layer the same colour as the table, which is Thrift by Cornish Milk Mineral Paint. The paint looks like a different colour only because it is still wet but disappears when dry.
Are you a fan of pink? How about this pink makeover of a bookshelf?
The reason for doing an initial coat in the colour of the table is that it creates a layer for the later paint to stick to. This avoids the paint bleeding out past the stencil lines, ruining the crisp edge.
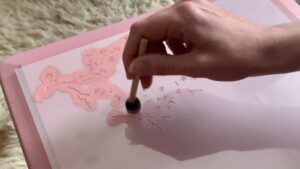
The best way to add the paint is by using a flat sponge brush and dabbing it lightly. You don’t want much paint or it could seep under the stencil.
If you use a paintbrush, the bristles are also more likely to get under the stencil, ruining the edge.
Stencilling is all about getting that nice, clean line. It’s better to get the right tools and process to start with so you save time having to repair and tidy up later.
After letting the base coat dry, I went over it with my branch colour, Fusion Mineral Paint’s Ash.
Layer one complete.
Enjoy stencilled projects? Check out these others.
Want to know 23 great DIY tools? Get the list!
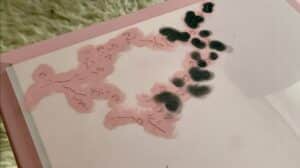
Layer 2
Then I lined up the second stencil matching the flowers to where it sat on top of the painted branches.
With a base coat of pink, seeing it start to come together.
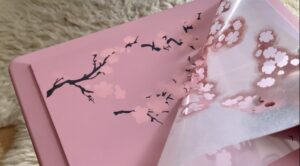
Next, I used Fusion Mineral Paint’s Picket Fence to add the flowers.
The original stencil has the cherry blossoms in pink but as the table was pink, white stands out better. Also. many blossoms are very pale pink, almost white, so it’s still natural.
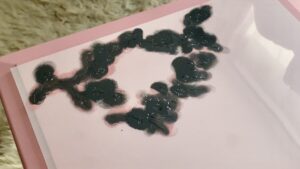
Going back to stencil one, I added the black middles of the flowers. I didn’t do a base coat of the pink table colour because these were on top of the white flowers.
The black didn’t bleed out of the lines because there was enough texture for the paint to grip on to.
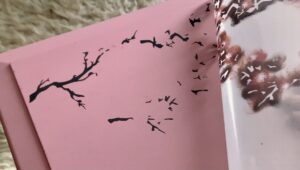
The result
The final piece with all three layers combined. What do you think? Was it worth separating the stencils for the added depth?
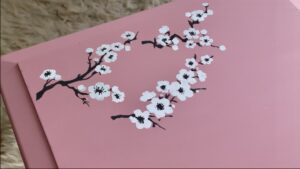
So, it took about an hour to do because of waiting for the various coats to dry. It’s simple but pretty and delicate.
Would you try this technique to paint a layered stencil? Let me know in the comments below.
If you liked this post, you might also enjoy this stencil on a wine cabinet…
Pin it for later – how to paint a layered stencil

Hi there! I'm Rachel Bowyer, a passionate DIY enthusiast with a knack for transforming the old into something beautifully new. With a deep love for furniture painting, refinishing, and the art of crafting. I've been documenting my DIY projects and restoration journey since 2018. I specialise in techniques like decoupage, stencilling, and decor transfers. Join me as we explore the world of creativity and home improvement, one project at a time.