How To Make 4 Easy DIY Concrete Bowl Trinket Dishes
Want to create some original trinket dishes for your home? Here’s an easy tutorial on how to create a DIY concrete bowl.
Like the industrial look of concrete, but don’t know where to start? This is the beginner-friendly type of project that you want.
The entire thing takes only a couple of hours of work (mostly it’s just a lot of time drying).
The result you get will be different each time. Which is the best part about creating something with an original look.
This post may include affiliate links so you can easily find the products I love and use myself. If you purchase these products, I may earn a small commission at no extra cost to you.
How to make a concrete bowl with a balloon mold
This method uses balloons as the mold. But you can also do this with plastic bowls. You just need to include a non-stick spray when demolding.
Here is the overview of the steps:
- Inflate the balloon to the size you want the bowl
- Secure the balloon
- Mix the concrete
- Apply the concrete onto the balloon
- Let dry
- Pop the balloon and remove it
- Decorate
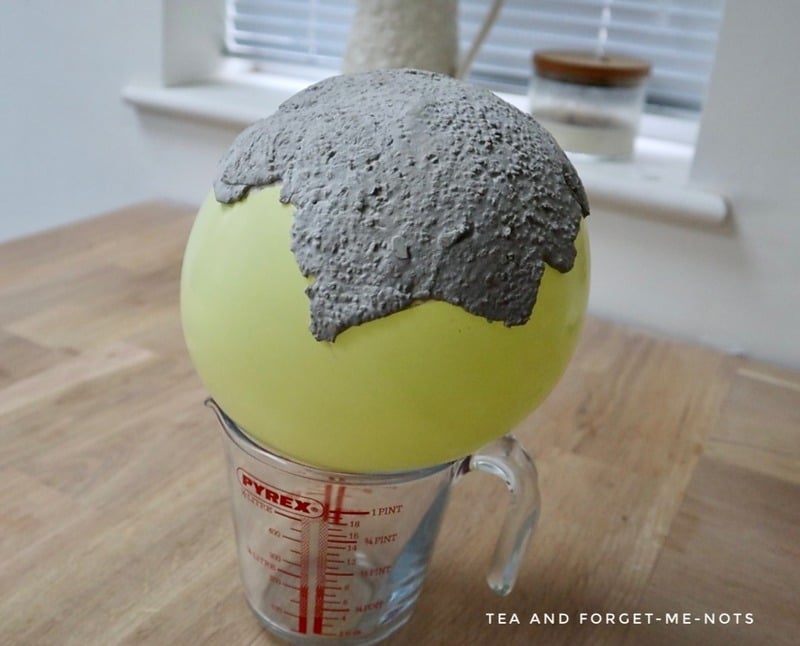
For the bowl molds, I blew up four balloons to medium size. The top of the balloon is where the trinket dish shape forms.
I made a variety of small bowls to medium size trinket dishes by applying a different amount of concrete to each balloon.
What’s The Best Concrete For DIY Projects?
I used a quick setting concrete mix, especially for thin-walled decorative pieces.
This one is also suitable for outdoors. A great way to create many projects from the same concrete mix.
You do need to wear appropriate protection. I wore a mask and rubber glove to protect myself.
I weighed 300g of the concrete powder. Then mixed it with 45ml of water. How much water you have increases with the amount of concrete powder you use.
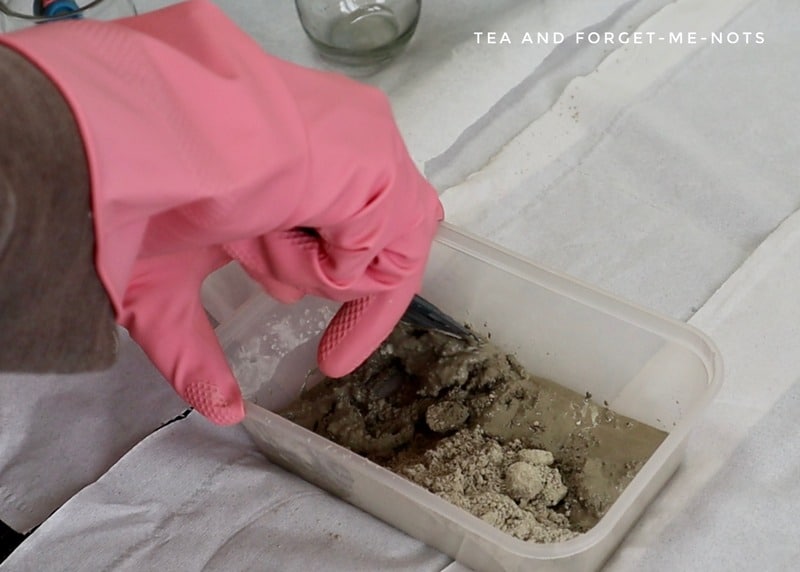
I used a plastic spatula to mix the wet concrete into a thick paste. A putty knife would also work well for this. Then I used a disposable box as my mixing bowl.
How to Apply Concrete to a Balloon Mold
I applied the concrete with a plastic spatula to the top of each balloon. Making sure that there was enough concrete to bind it together, but without being too thick. You can test a small area first to ensure that it will secure to the balloon.
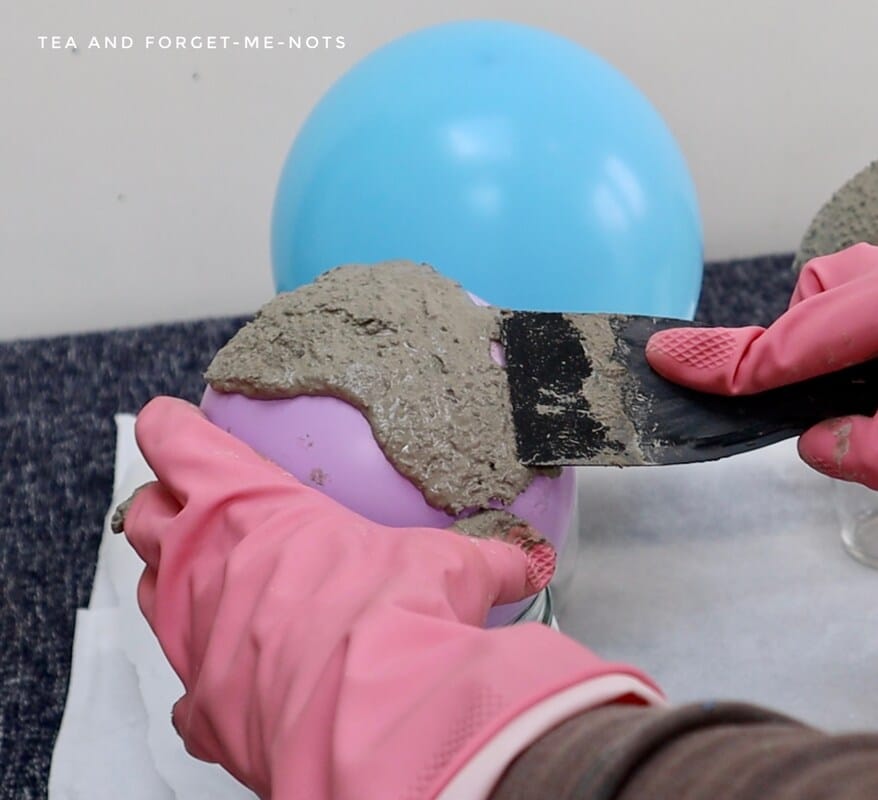
The further down the balloon you go, the higher the sides of the bowls will be.
I weighed the balloons down with a peg to stop them from going upside down. Also resting them on glass jars.
I kept a paper towel underneath each balloon in case any concrete fell. Or if a balloon unexpectedly burst.
The concrete cure time is around 24 hours. But dry times will vary depending on the concrete or cement mix you use.
To de-mold, these concrete bowls, is the fun part. Pop the balloon!
The balloon should easily peel out of the bottom of the bowl. Leaving the formed dry concrete mix.
The inner part of the bowl should be beautifully smooth. The outside of the bowl will have a rough concrete texture.
The finer the mixture you make at the start, the less textured the final result will be. The goal is to make the mixture the right consistency of the final look that appeals to you.
That’s the simple process of creating cement bowls. Next are the different ways I decorated them to turn them into pretty trinket dishes.
How to Decorate DIY Concrete Bowls
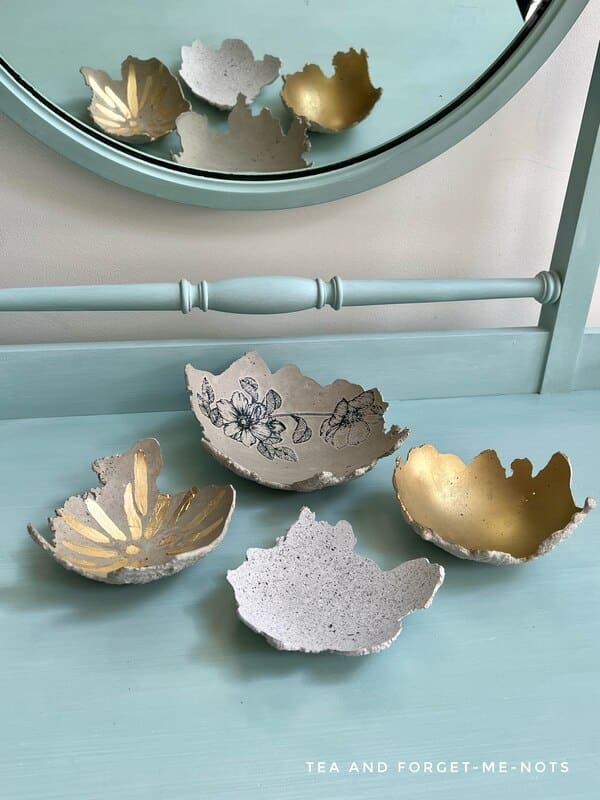
I created four unique designs, each perfect to hold jewellery or keys.
Stone-effect DIY Concrete Bowl
For the first project, I used a stone effect spray paint to enhance the rocky look of the concrete.
Here’s how the same spray paint looks on candlesticks.
I also used one of my favourite tools, which is a spray paint can attachment. This adds a trigger grip to the can. Which gives a comfortable way to spray, without the pressure on one finger. It also creates a consistent coat of paint.
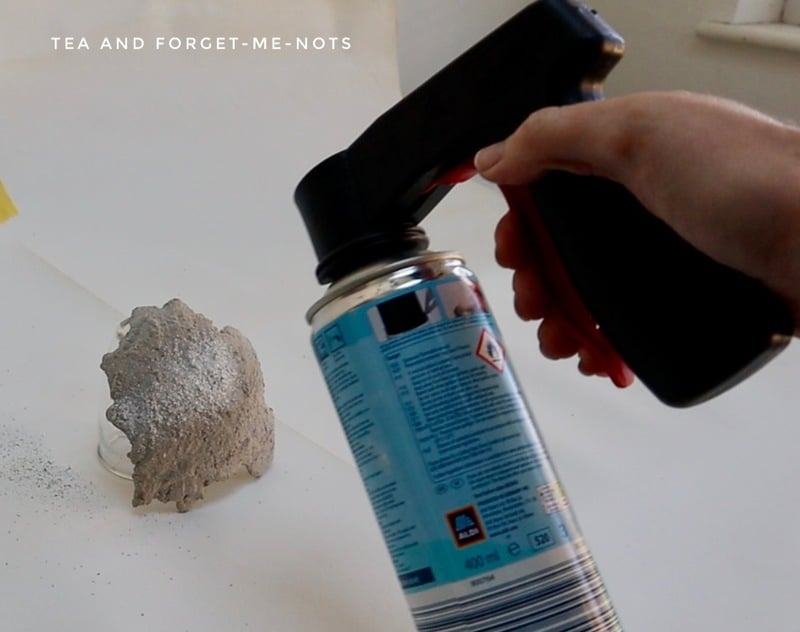
I coated both the inside and the outside of the small bowl separately. To give the same stone-effect texture on both sides.
This was on the smallest of the trinket dishes. The varying colours in the spray paint give a neutral background and nice contrast to the shiny trinkets that go on top of it.
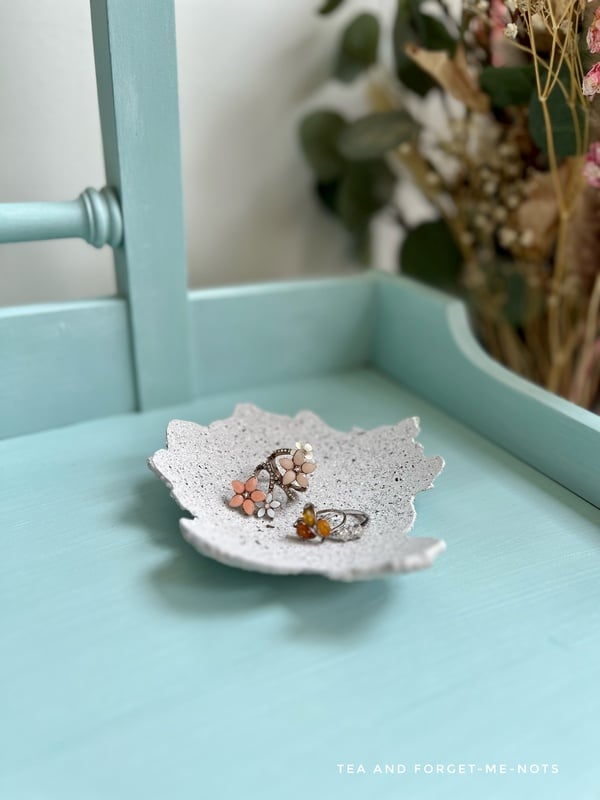
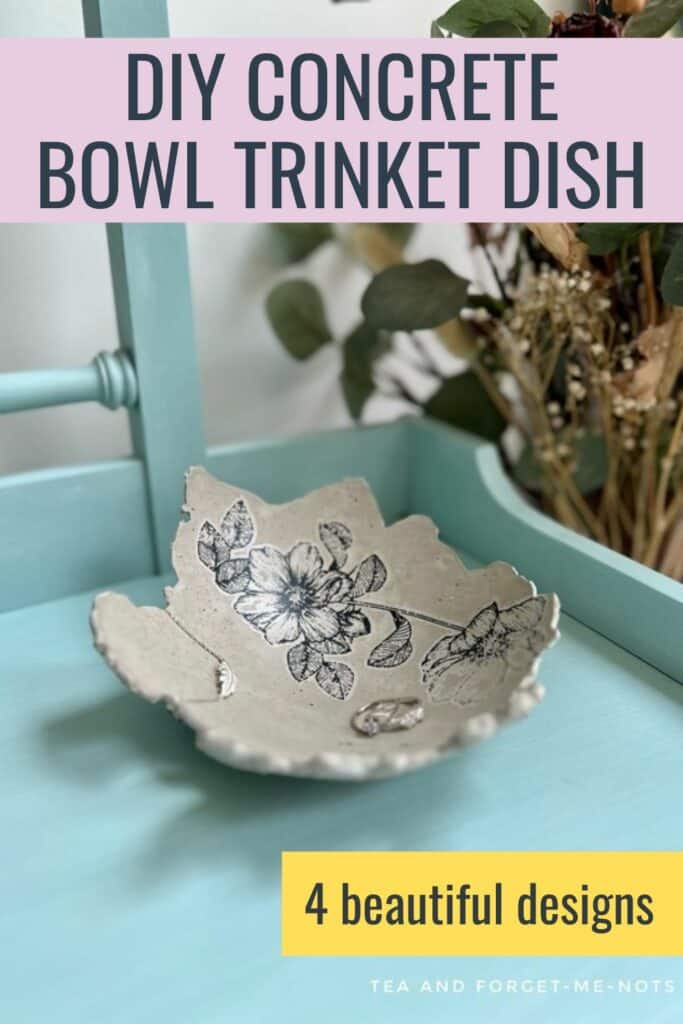
Flower Transfer Concrete Bowl
For the second bowl, I used a flower from the transfer Spring Meadow Life by Redesign with Prima.
This is a transfer that is made up of many separate flowers. I’ve used parts of it before on both a children’s globe and a fire screen. And still, have plenty of it left.
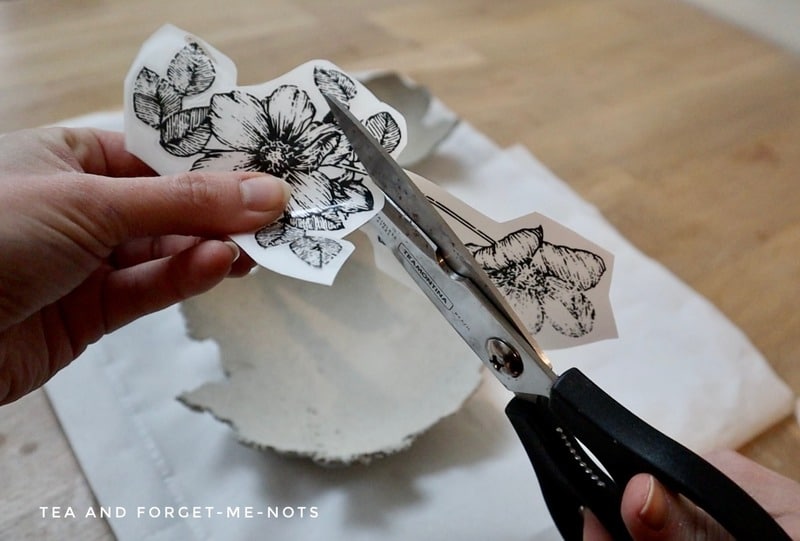
It is more challenging to apply a transfer to a round object than a flat one. I cut closely around the transfer to help it apply smoothly within the round trinket dish. I also cut it in half to apply the pieces separately.
Then I used the ruler tool to rub the transfer carefully onto the concrete. Not pushing too hard.
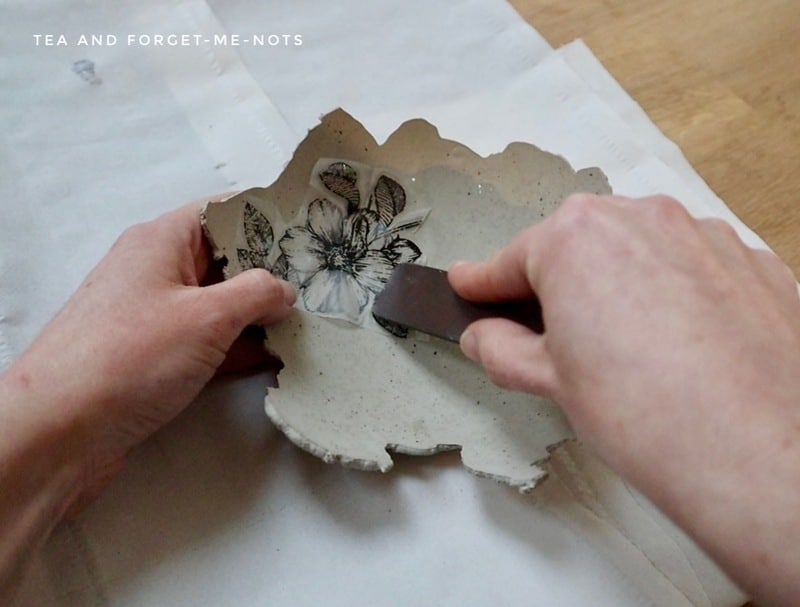
After it was in place, I used my finger to secure the edges of the transfer to the inner bowl.
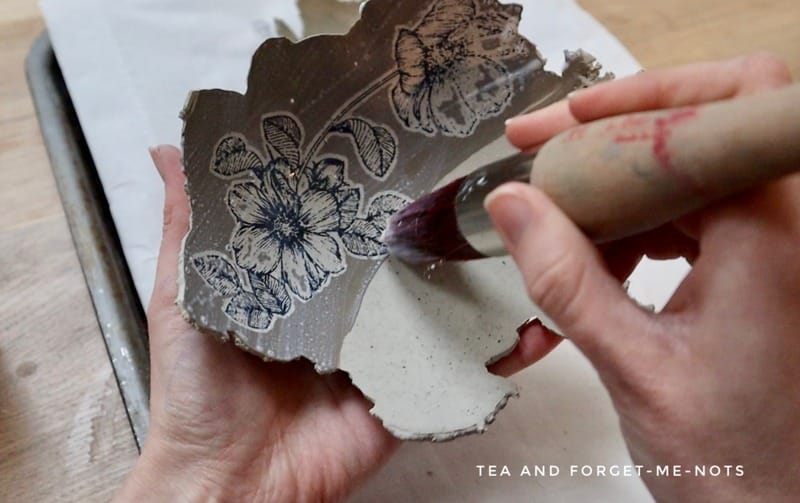
Finally, I sealed the inside of the bowl and the transfer with Polyvine’s Decorators Varnish in Dead Flat. I used Dead Flat because it gives a matte finish, so it maintains the finish of the concrete underneath.
Gold Painted Concrete Bowl
For the third concrete bowl, I spray painted the inside of the bowl with gold spray paint.
I only needed one coat. So, this was the fastest and simplest of all the trinket dishes.
It gave a nice finish and beautiful contrast to the rough grey outside.
Like the gold painted look? Here’s how I made over a table like Princess Jasmine!
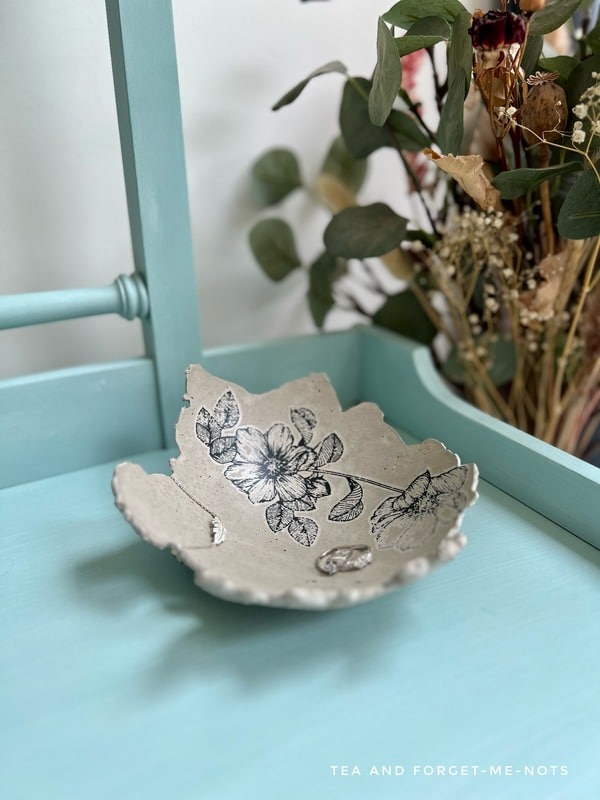
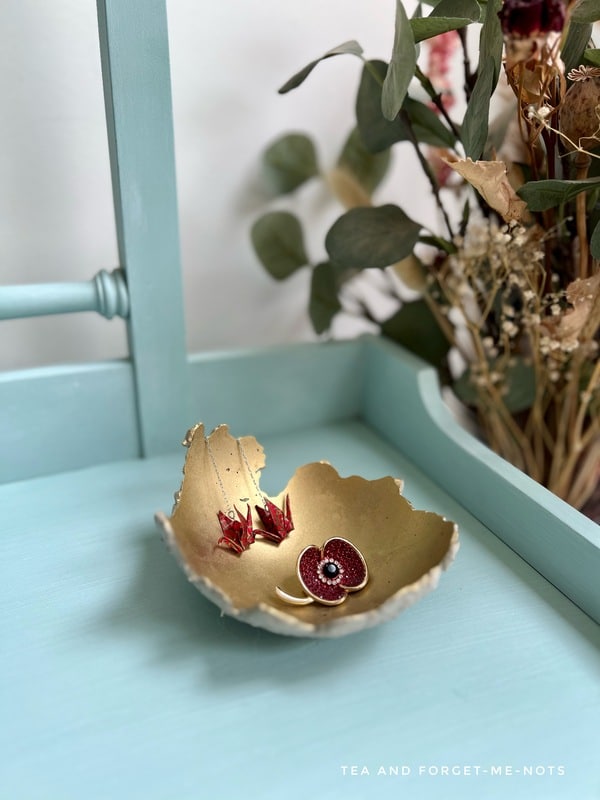
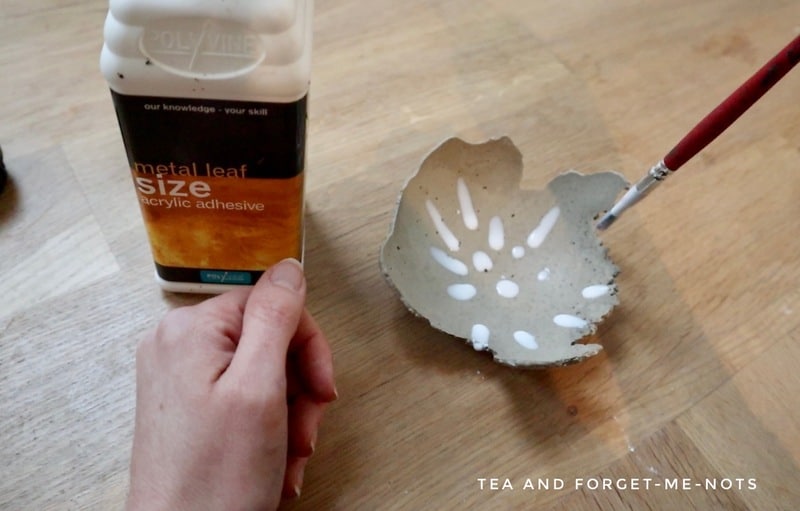
Gold Leaf Concrete Bowl
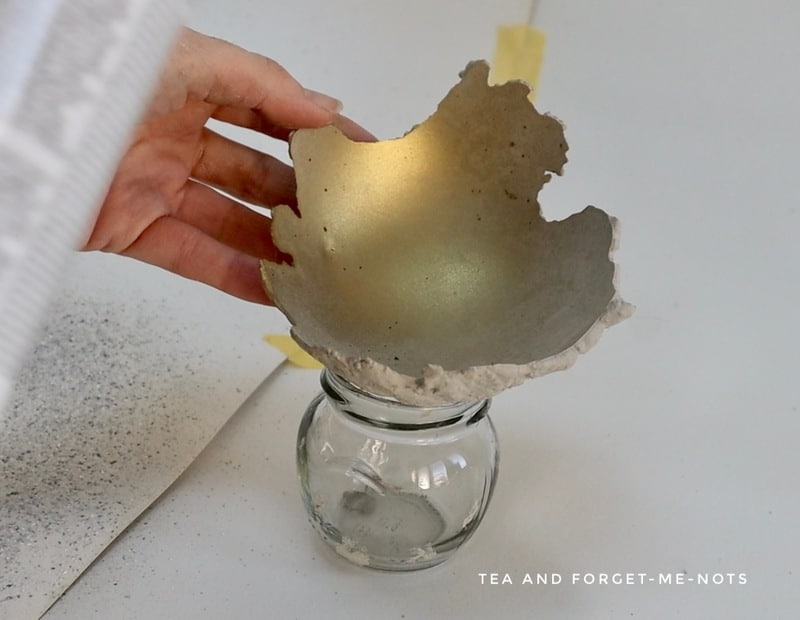
The fourth design was the largest bowl. So, I used gold leaf.
Firstly, I applied one coat of Polyvine’s Dead Flat Varnish to seal the porous surface of the concrete.
Once that was dry, I applied Metal Leaf Size. I placed it in a random pattern dripping down the inside of the large bowl. Once the size was clear, it was ready to apply gold leaf.
I added the gold leaf into the bowl and pushed it down with a soft, dry paintbrush.
I let the leaf scrunch up a little bit to build some texture. Then I dusted away the loose leaf where there wasn’t any glue.
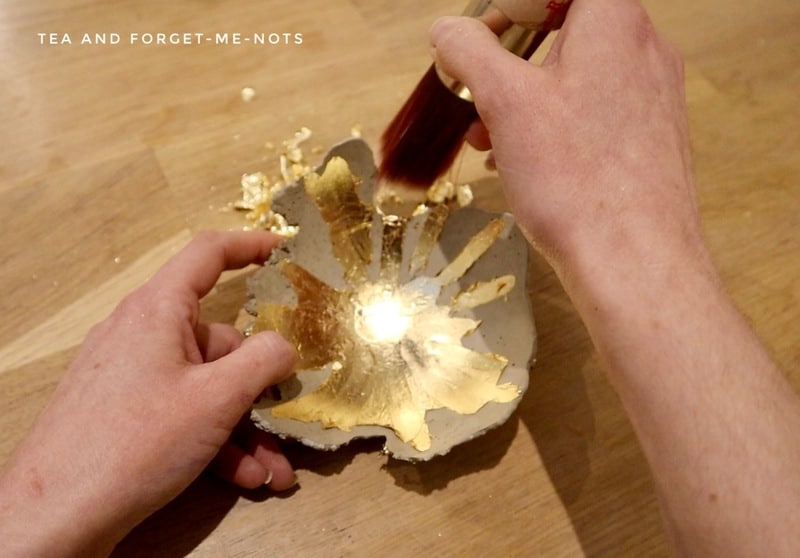
The only problem was that there were a couple of spots where the edges needed tidying up. So, I removed some of the extra gold leaf with acetone and a Q-Tip.
The final result was striking as the drips draw the eye down into the dish. And the golden shimmer looks lovely against the grey.

Four Easy DIY Concrete Bowl Designs
I love the contrast between the gold trinket dishes and the stone concrete look. The gold ones are glamorous whilst the concrete-coloured ones are more natural.
With a little effort, you can easily make concrete bowls into dishes. Or a more substantial concrete project such as concrete planters.
As the concrete I used is weatherproof, there are all kinds of garden accessories you could create. Just remember the drainage hole in a concrete bowl planter!
They are simple to make. Fun to decorate. And make a unique piece of decor for your home.
For more DIY inspiration, check out my YouTube channel!
Pin it for later – Easy DIY Concrete Bowl Trinket Dishes

Hi there! I'm Rachel Bowyer, a passionate DIY enthusiast with a knack for transforming the old into something beautifully new. With a deep love for furniture painting, refinishing, and the art of crafting. I've been documenting my DIY projects and restoration journey since 2018. I specialise in techniques like decoupage, stencilling, and decor transfers. Join me as we explore the world of creativity and home improvement, one project at a time.
How did you come up with this idea?? They turned out so cute! I like all four of them! Thanks for sharing such a creative and fun DIY!
I can’t even remember now but I love how they turned out. Thanks, Donna.
What a fun idea! I’m going to see if my teen would do this with me. Thanks!
If not, then surprise them with one!
Unbelievable Rachel, what made you think of this idea? I love how these turned out and especially with the transfers.
Thanks, Cindy. I really can’t remember how it came to me.
These are so cool! You should sell them on your Youtube store!
Thanks. I’d prefer to sell in person when I don’t have to worry about them getting thrown around in a delivery van!
What a great project! So creative and beautiful! Pinned!
Thanks so much, Lynne.
Woah this is so good! I quite fancy a go at this. Pinned for a day off 😊
You definitely should. Just think of all the ideas you could do!