Make an Easy DIY Easter Garland (Pretty Spring Craft)
Looking to create a beautiful DIY Easter garland? Here’s how to create an easy garland for the Easter season, inspired by flowers and nature.
Easter decorations don’t have to be all about eggs, bunnies or pastels. But having a touch of them within a burlap garland can be a great way to decorate for this time of year.
This tutorial shows you how to create a beautiful and festive burlap bunting using upcycled materials.
And it can be made in just a couple of hours. They’re the perfect Easter decorations for beginner crafters.
This Easter bunting would look beautiful on a fireplace mantel, in a porch or hanging between shelves.
DIY Easter Garland Supplies:
- Burlap Garland
- Wildflowers Transfer
- White Glue
- Wheat Clay Paint
How To Make a DIY Easter Bunny Garland
The great thing about this garland is that it is made with upcycled burlap. This cost £1.75 from a charity shop. Which makes it a very affordable Easter decoration.
It’s helpful to start with a ready-made garland. This means that you can skip the step of creating the bunting.
However, it is an easy process to create bunting.
You can either cut out triangle shapes from card. Or cut out fabric shapes and create a loop at the top for the string.
Firstly, take the garland apart so you can work on each flag individually. These were kept in place with a stitch but otherwise just slid off of the string. If you keep the same shape as the original bunting, you don’t need to remove them from the string.
Free-hand Easter Bunting Template
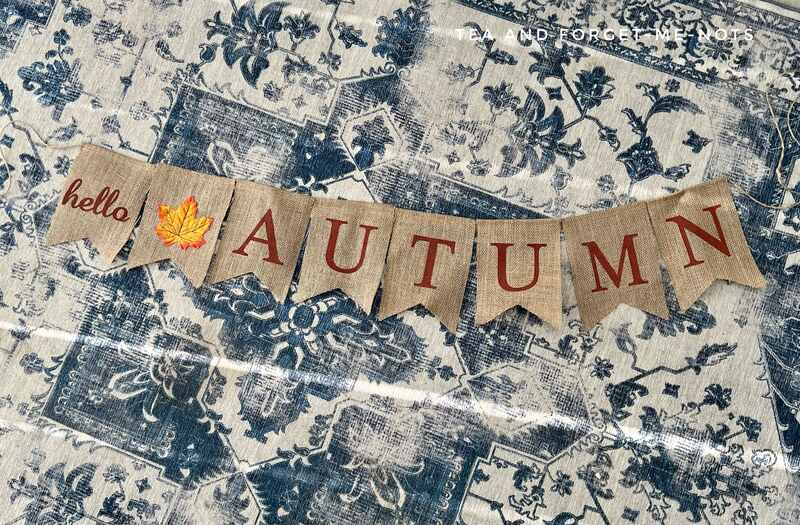
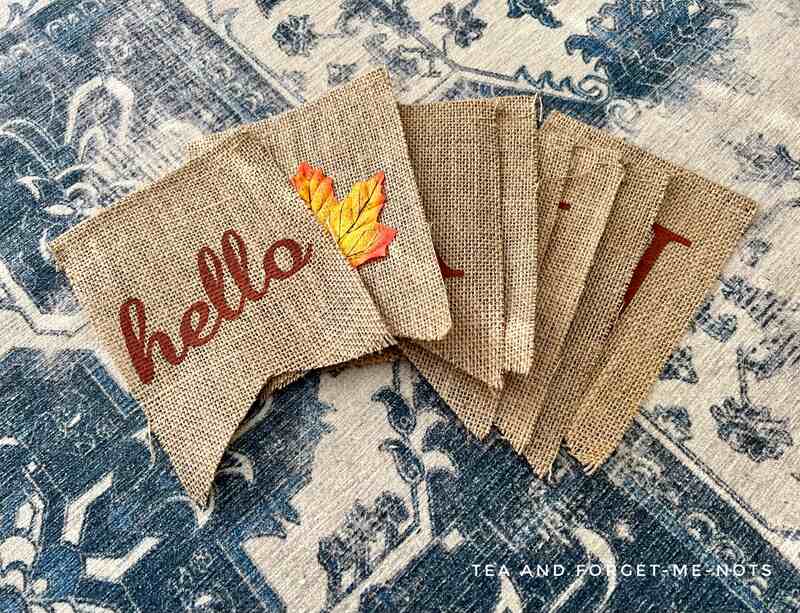
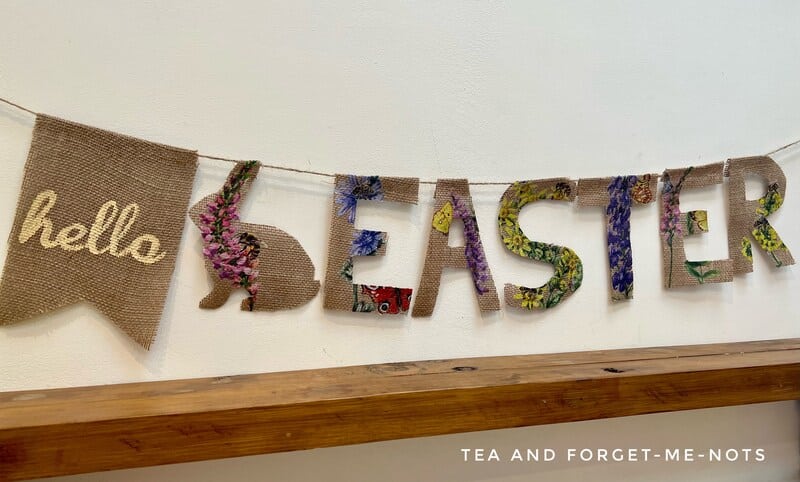
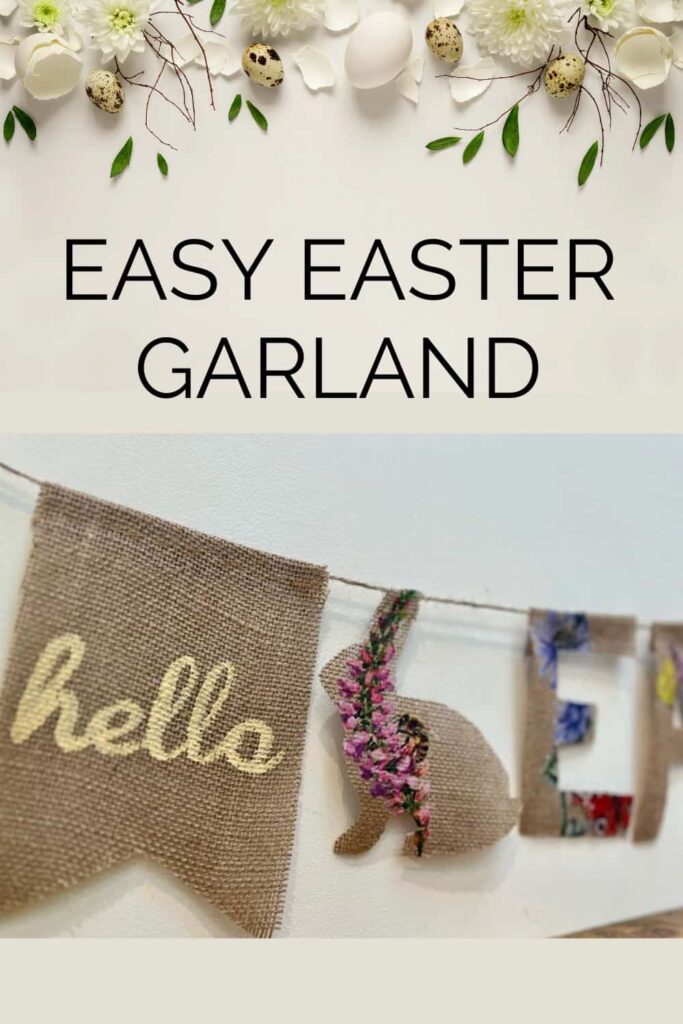
For this Easter garland DIY, I wanted to change each bunting flag into a letter of the word Easter.
To do this, it’s a good idea to create a stencil for each letter of ‘Easter’. Try to let each letter have as much length as possible along the top edge. This is what will be attached to the string and make it more stable.
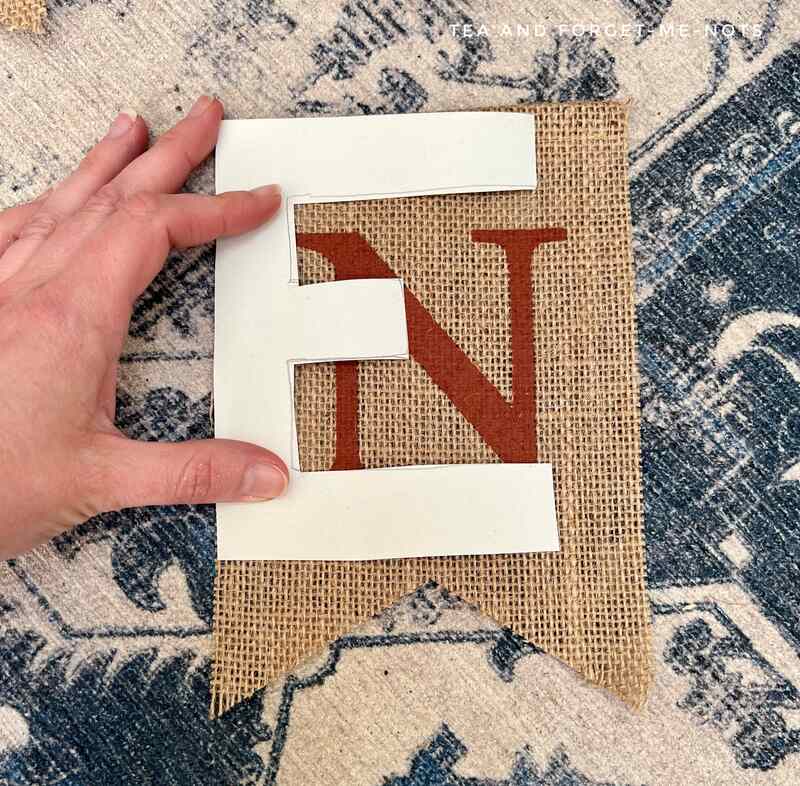
After making the first letter stencil, use it as a template to be the same size, for consistency.
Then cut out each letter from the burlap flag.
How to Repurpose Old Bunting
You can paint over the burlap to hide the original design. You could do this with typical Easter colours like pastel pinks and greens.
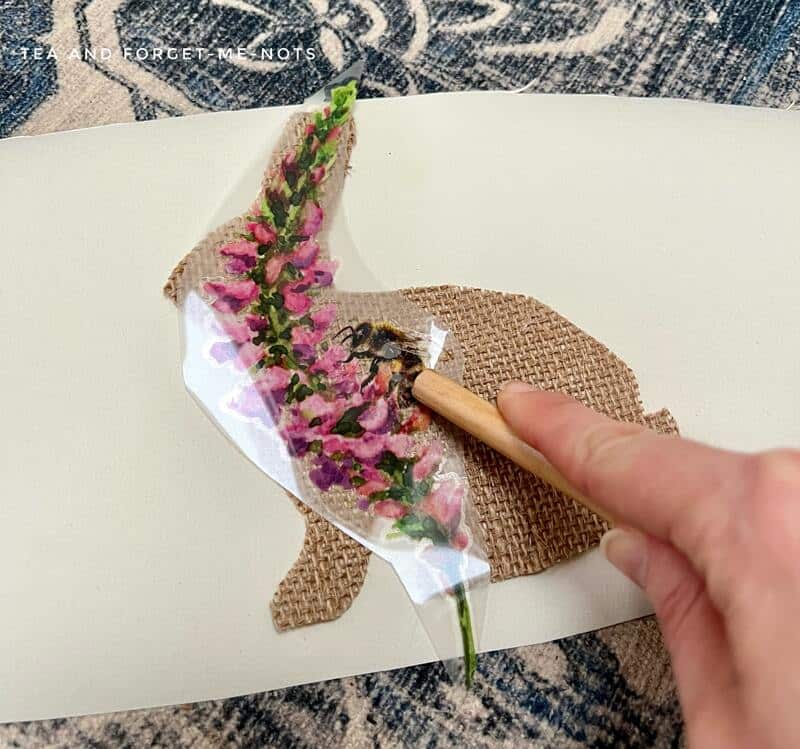
Alternatively, you can cover the design with a floral transfer. A transfer is like a sticker and is suitable for decor, crafts and furniture.
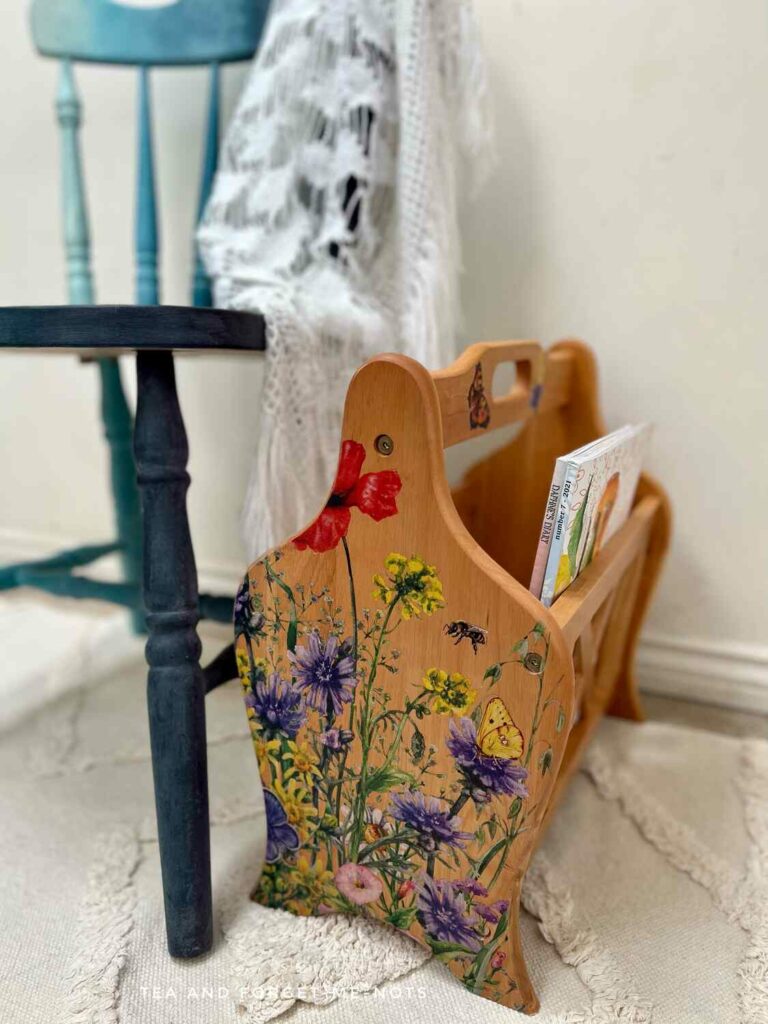
A lovely Spring design is the Belles and Whistles, Wildflowers and Butterflies transfer. There was enough to make the Easter garland just using the leftover pieces from a repurposed magazine rack makeover.
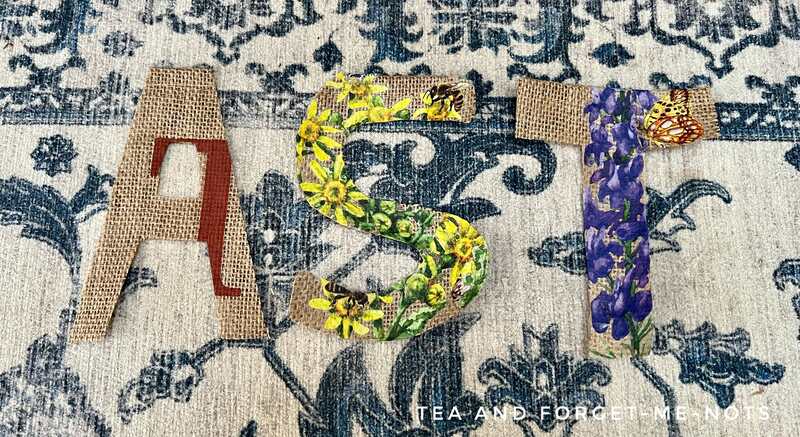
You can strategically place them over the parts of the original letters of the word Autumn.
Transfers apply easily to burlap. Simply remove the backing sheet and rub it into place with something with a flat edge like a ruler.
The different flower designs make it easy to know which flower will best match the shape of the letter. Such as the tall purple flower fits best with the stem of the letter T.
Then there are additional bees and butterflies that you can use to help cover any extra bits of the old design.
Creating a Burlap Bunny Garland
Fortunately, the words Autumn and Easter have the same amount of letters in them. So it was easy to repurpose those flags. That left an extra flag with a faux leaf on it which peeled off easily.
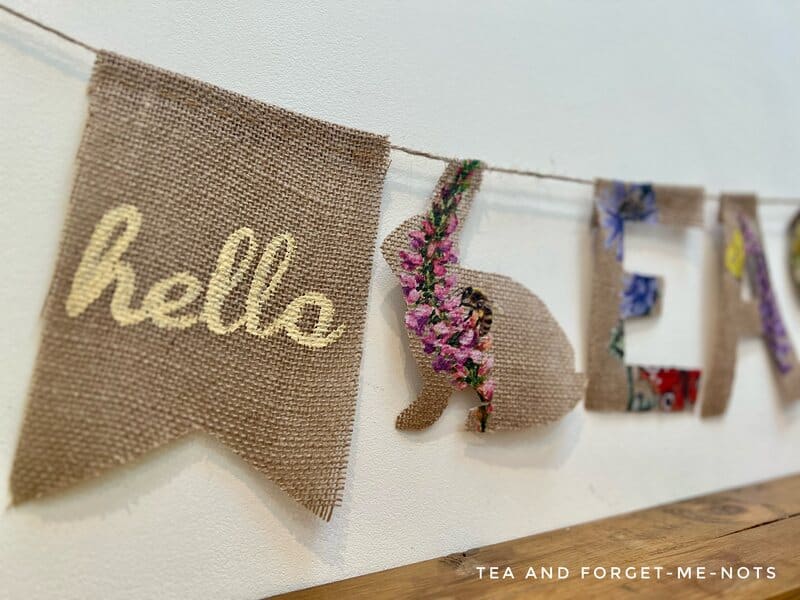
Now, to create something extra with an Easter feel. A hint of those Easter bunnies!
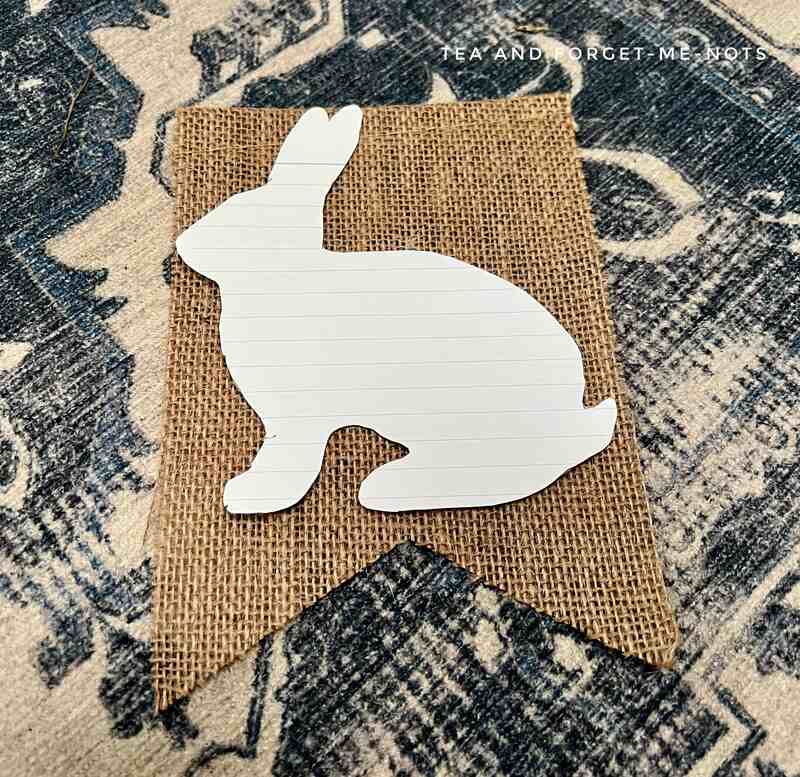
You can use an outline of a bunny shape as the template. Make sure that the ears connect to the top for the string to go through that area.
The final flag at the start of the bunting said ‘hello’. Which was already the perfect friendly idea.
But the red wasn’t suited to Spring and Easter.
So, simply cover it with a more Spring-like colour. I chose a yellow clay paint called Wheat. One coat was enough to hide the red, using a small artist’s brush.
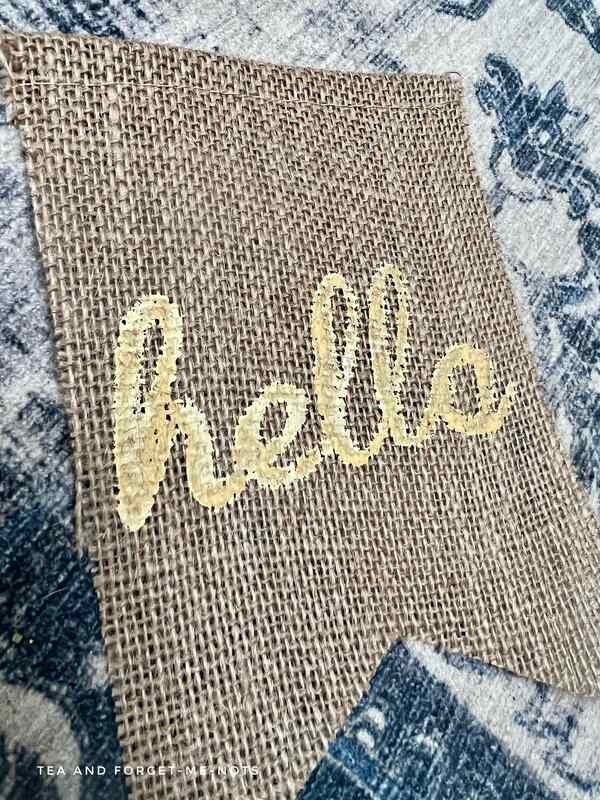
The mix of the yellow paint over the crisscrossed burlap looks so pretty. It gives a beeswax effect.
As this is clay-based paint, you do need to seal it. Otherwise, it will become runny again if it comes into contact with water.
How to Stiffen Burlap
Burlap is quite flexible, so it needed to be stiffened up slightly. Finally, you can apply a coat of white glue to the back of each piece of the bunting.
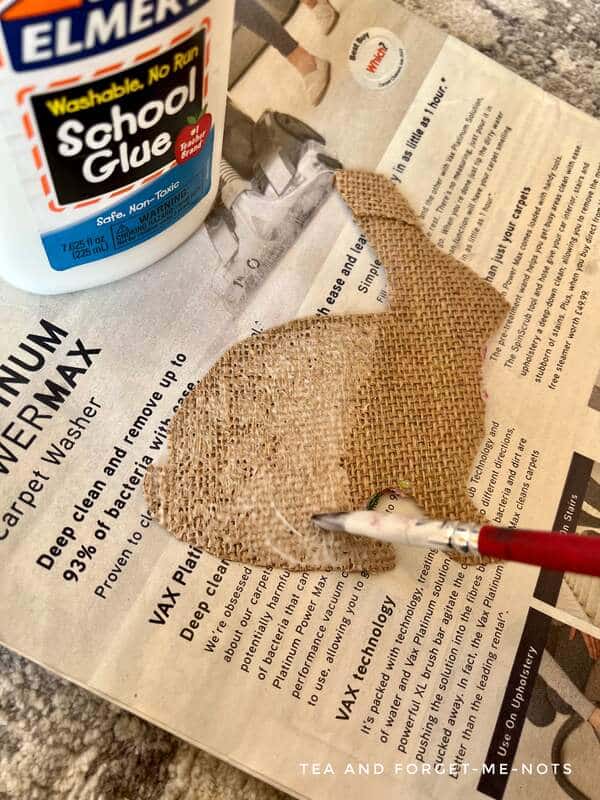
This creates more structure and keeps the flags hanging straighter.
It also helps to seal the edges of the burlap. As it can sometimes fray.
Finished Simple Easter Garland
As far as DIY garlands go, this one is so pretty. The natural brown of the burlap and the colourful flowers are a lovely mixture of rustic and floral.
Between the thrifted bunting, using scraps of a decor transfer and a tiny bit of paint, this is a very budget-friendly Easter project.
If you changed the word, it could also easily be a Spring garland. You could use artificial flowers or stencils of cherry blossoms, for example.
More Cute Handmade Easter Garland Ideas
There are lots of great ideas for how you could make this more child-like too.
An easy way would be to add pom poms in between each letter. You could use a pom pom maker or ready-made craft supplies.
You could create a fun easter decoration of a DIY Easter egg garland. Using an egg shape instead of letters. If you use paint chips, you won’t even need to paint.
Easter crafts typically lend themselves to the cute bunnies, chicks and plastic eggs kind of decor.
But it’s so much fun to create something suitable for an adult living room space. This DIY Easter garland would also work on a front door to welcome guests to your home.
It’s a lovely Easter decor idea and a fun craft to make.
For more decor ideas, check out my YouTube channel.
Answers to Your Questions About Making Different Easter Garlands
Q: How do you make a bunny garland?
A: A few ways you can make a bunny garland is to cut out a bunny shape from card stock. Cut a bunny shape from fabric and fill it with stuffing. Or make pompom bunnies with card or felt for ears.
Q: How do you make a plastic easter egg garland?
A. If you want to add plastic Easter eggs to your garland, make a hole in the bottom and top of each egg. Then add string through the middle and tie a knot at each end to stop them moving.
If you loved this project, you’ll love these projects too:

Pin it for later – DIY Easter Garland
Did you make this craft?
I love seeing what you do. Please mention @teaandforgetmenots and share your creations with me!

Hi there! I'm Rachel Bowyer, a passionate DIY enthusiast with a knack for transforming the old into something beautifully new. With a deep love for furniture painting, refinishing, and the art of crafting. I've been documenting my DIY projects and restoration journey since 2018. I specialise in techniques like decoupage, stencilling, and decor transfers. Join me as we explore the world of creativity and home improvement, one project at a time.
I love the burlap. I used to make some but I used a canvas and stamped words and letters. Haven’t thought about those in a while.
Stamped words would look so pretty!