Make Easy Christmas Gift Tags DIY Gift Wrap and Cards
Making easy DIY Christmas tags, gift wrap and greetings cards adds a personal touch to Christmas gifts. Here’s how to easily make gifts more special for your friends and family members.
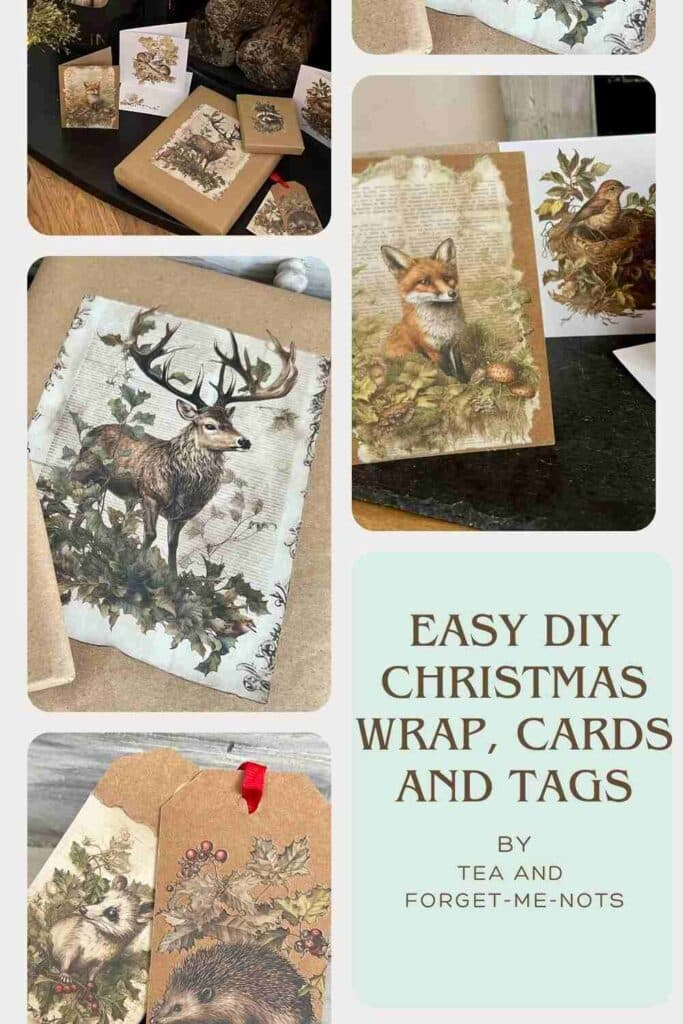
You don’t have to be an artist to create beautiful holiday cards, wrapping paper and DIY gift tags. The easiest way is to use decor transfers. And a bonus is that they’re so much fun to make!
Thank you to Iron Orchid Designs for gifting these beautiful transfers.
This post includes gifted products and affiliate links so you can easily find the products I use myself and recommend to friends. If you purchase these products, I may earn a small commission at no extra cost to you.
Iron Orchid Designs has released two Christmas-themed decor transfers for this year. Candy Cane Cottage is a good choice for larger seasonal projects such as this cocoa station.
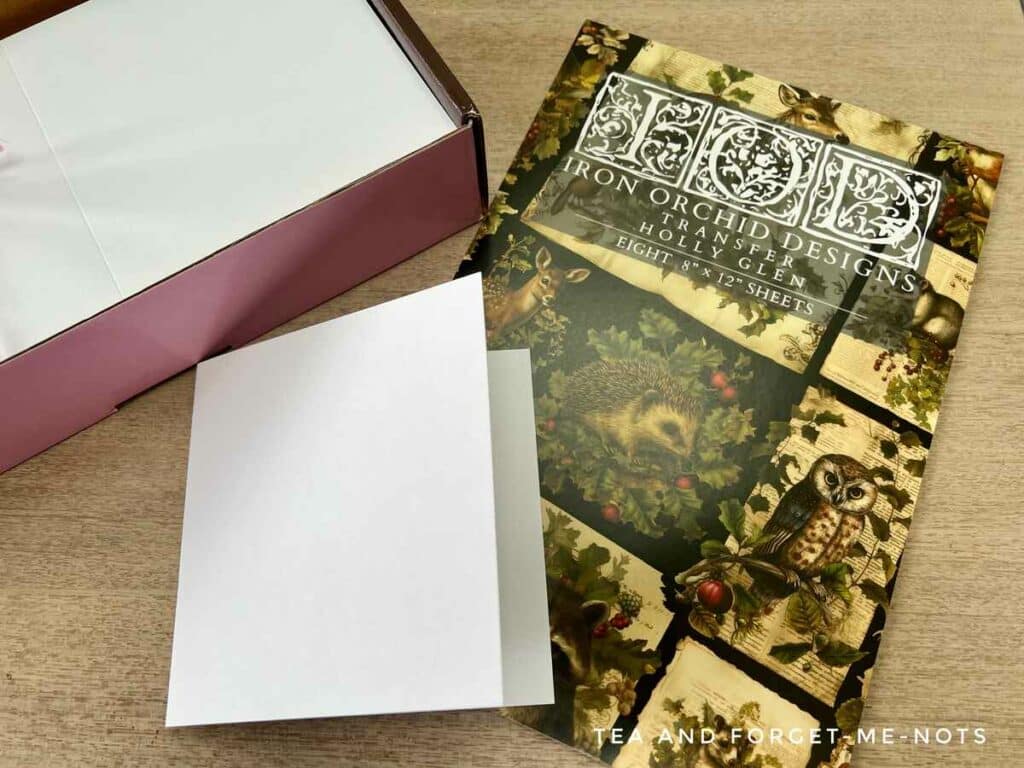
But for Christmas presents, the vintage animal designs from the Holly Glen transfer set are perfect.
In this post, I’ll share creative ways how to easily decorate wrapping paper. What you can use to make your gift tags. And how to add decor transfers to the front of cards and envelopes.

For the first project, I’m using the Holly Glen transfer. It comes as a set of 38 different animal designs.
In the set, there are three large festive animals up to 19cm/7 inches in size. 17 images that are from 9cm/3.5 inches in size. Finally, 18 smaller images are around 6cm/2.5 inches.
Some of these have a background of vintage book paper. Others have the shape of the outline of the animal and the foliage around them. Many of them feature holly and berries for a festive look.
These images wouldn’t look out of place framed next to a Christmas tree. But you can also use them as a simple way to make your gift wrapping more charming.
Would you rather a video tutorial instead of step-by-step instructions? Here’s a video of the process of creating Christmas tags, wrap and cards.
Make Easy DIY Christmas Gift Wrap, Tags and Cards
How to Make DIY Christmas Gift Wrap
Decor transfers are a great way to create unique gift wrap.
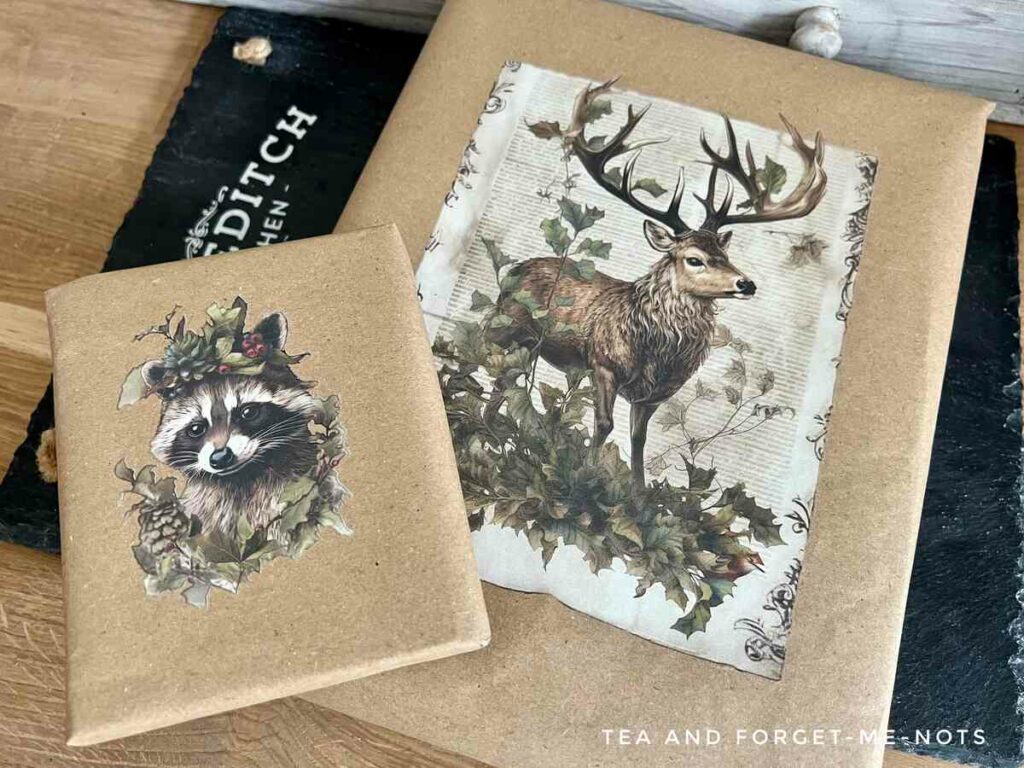
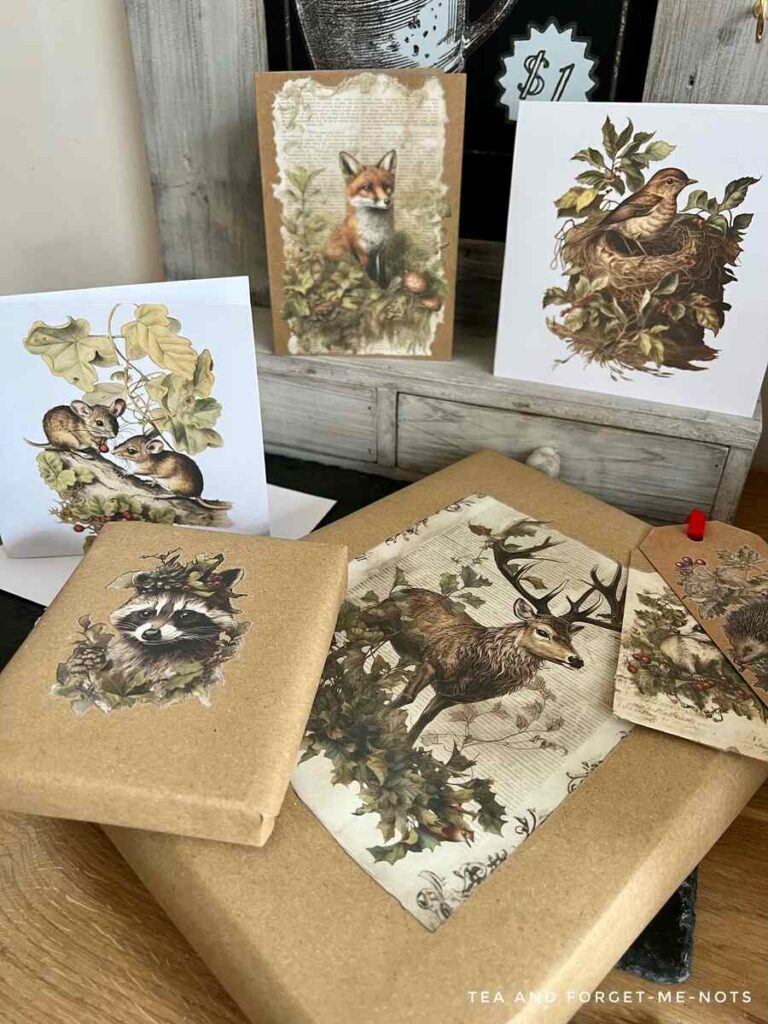
Instead of buying wrapping paper, you can customise brown craft paper. Brown paper is a budget-friendly option for wrapping gifts. It has that authentic natural look.
For this, you get the best results if you wrap your gift first. That way you have the shape you need before applying the decor transfer to it.
If you apply a decor transfer to a piece of fabric, or paper first, then it might not be positioned in the right place once the gift is wrapped.
Brown paper works perfectly with these vintage animal designs because it complements the rustic look. A single colour works best as it helps the transfer to stand out rather than being hidden amongst a pattern.
The size of the gift will determine which size of decor transfer you want to use. Maybe a large transfer that covers most of the gift. Or a small transfer for smaller gifts.
Alternatively, as a corner accent decorative element.
You can just as easily do the same process for gift bags or a gift box.
The Easy Way To Make Custom Gift Tags
DIY pretty gift tags are such easy ways to add a special touch to a present.
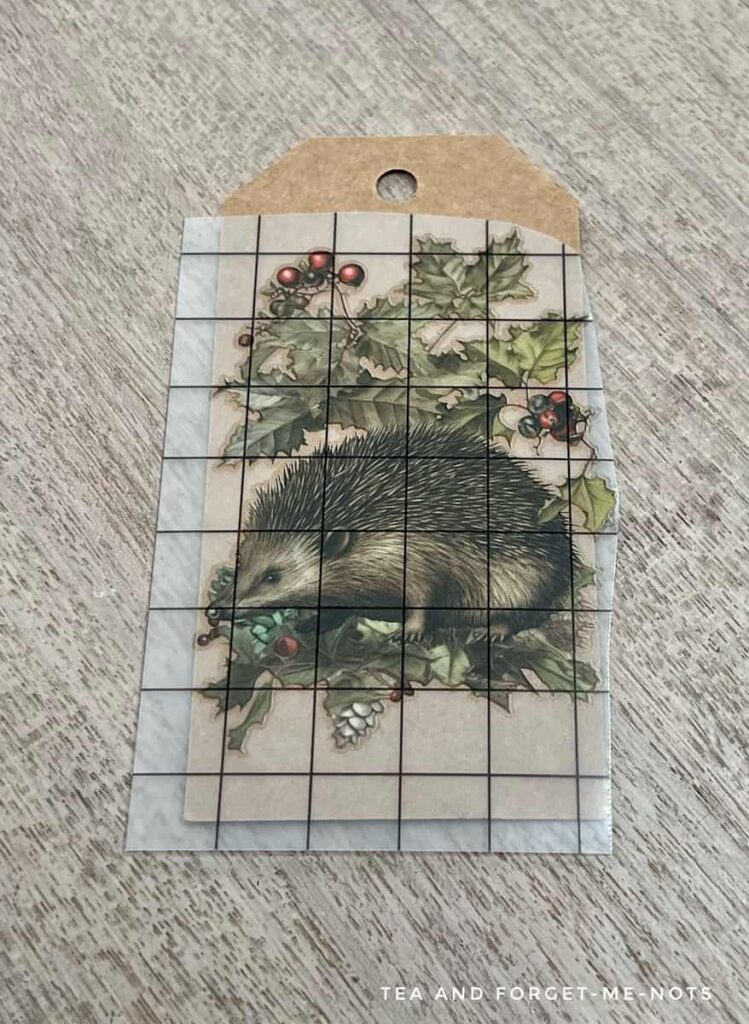
The smaller animal transfers are the best thing to use for homemade Christmas gift tags. And it does double duty if you choose an animal that the person you’re gifting something to loves.
You can either use pre-made tags or easily cut your own gift tags from plain brown or white cardstock.
For homemade gift tags, simply cut the paper out in a straight line. Then use a hole punch to add the hole for the string or ribbon.
The fun part is choosing which of the festive animals will make the best gifts for your recipient.
Do you have a family member who loves hedgehogs, mice or foxes? There are 18 Christmas gift tag ideas just with these smaller animal images.
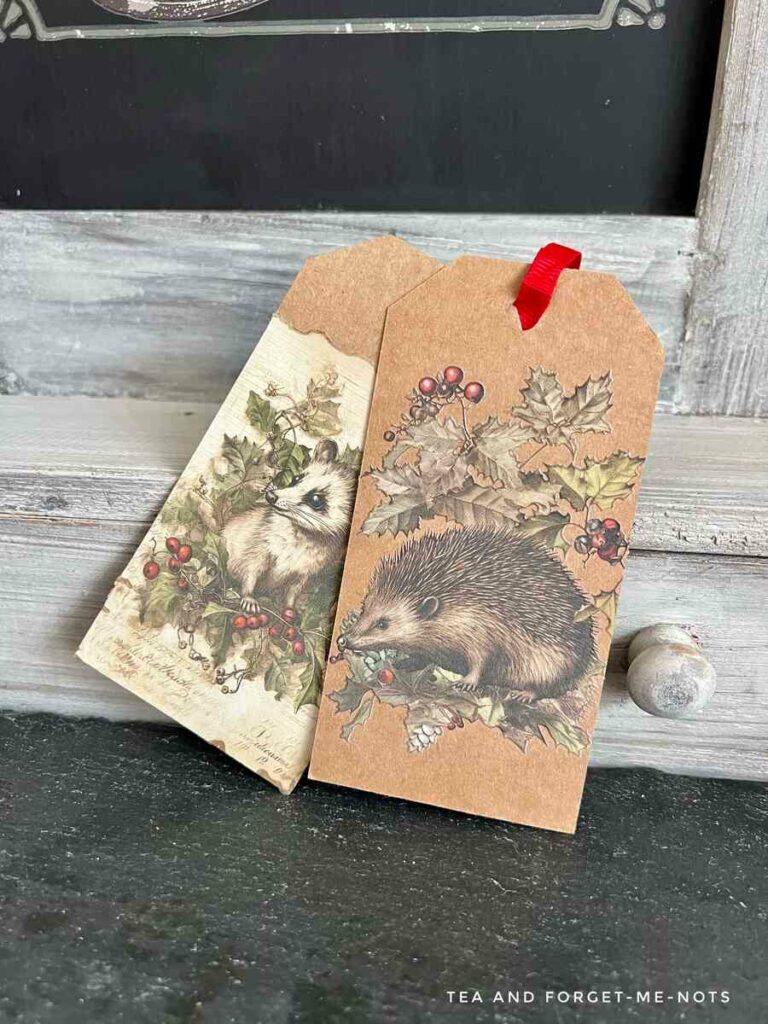
You can choose between designs with a solid edge and a free-form outline.
If the block image is smaller than the handmade gift tags then you could cut the gift tag smaller so that it fits exactly, for the best result.
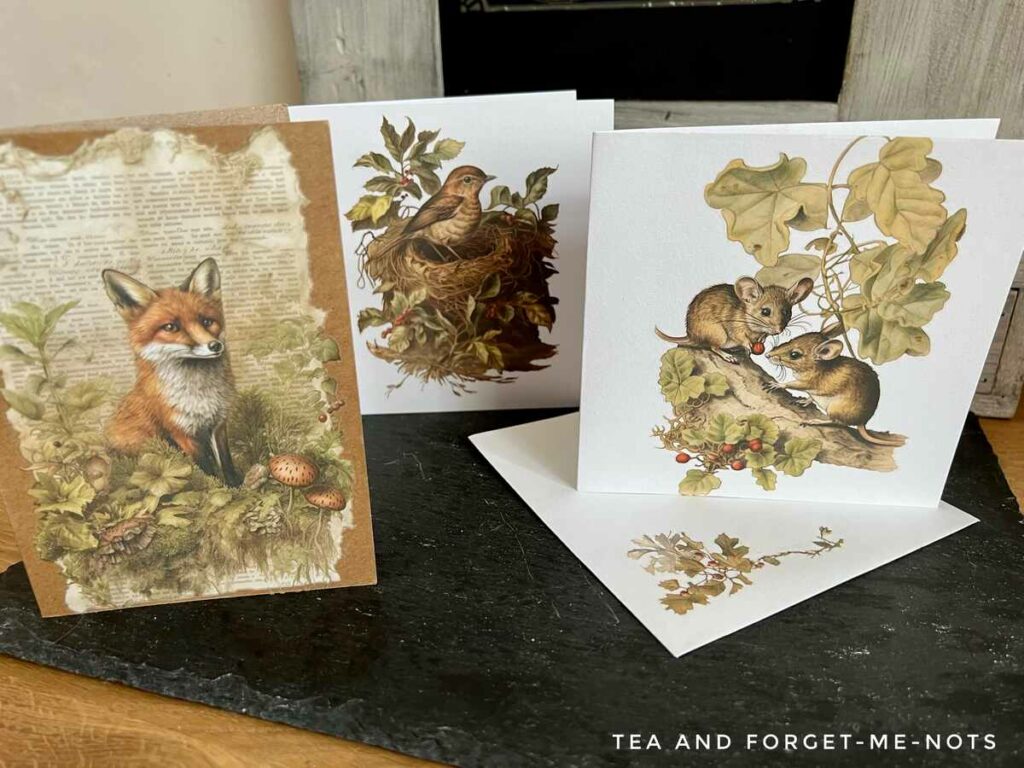
Easy Christmas Card DIY
You could create a whole set of greeting cards with these Christmas decor transfers. The mid-sized images are perfect for a square blank card.
I used both white and brown card stock to see the different ways it would show off the holiday season transfers.
Depending on the size of the card you use, you might have some parts of the transfer left over. These extra bits can also be used to add decorative elements to envelopes.
For the Christmas card with birds on it, the matching envelope had a leftover transfer in a leaf design.
The front of the cards is naturally the most important part of the greeting cards. But you can also add a transfer to the extra paper on the back of the card to make it extra special.
Making personalised gift wrap, tags and cards add an extra touch to a gift. These decor transfers are easy to do and look so original.
Imagine receiving Christmas packages with an ornament gift tag and cards decorated this way. Wouldn’t they feel so thoughtful?
I hope you found some of these wrapping ideas helpful. They make for extra special gifts.
If you don’t have access to decor transfers you could do the same with fabric scraps, scrapbook paper or the pictures from old Christmas cards.
Whichever you choose to make, I hope you have a very Merry Christmas!
How To Make Easy DIY Christmas Gift Wrap, Tags and Cards Instruction Video
You can find more video tutorials on my Youtube Channel
How to Apply a Decor Transfer
If you’re new to decor transfers, they’re really easy to use. Here’s the step-by-step process of how to use them:
- The first step is to choose the design you want to use.
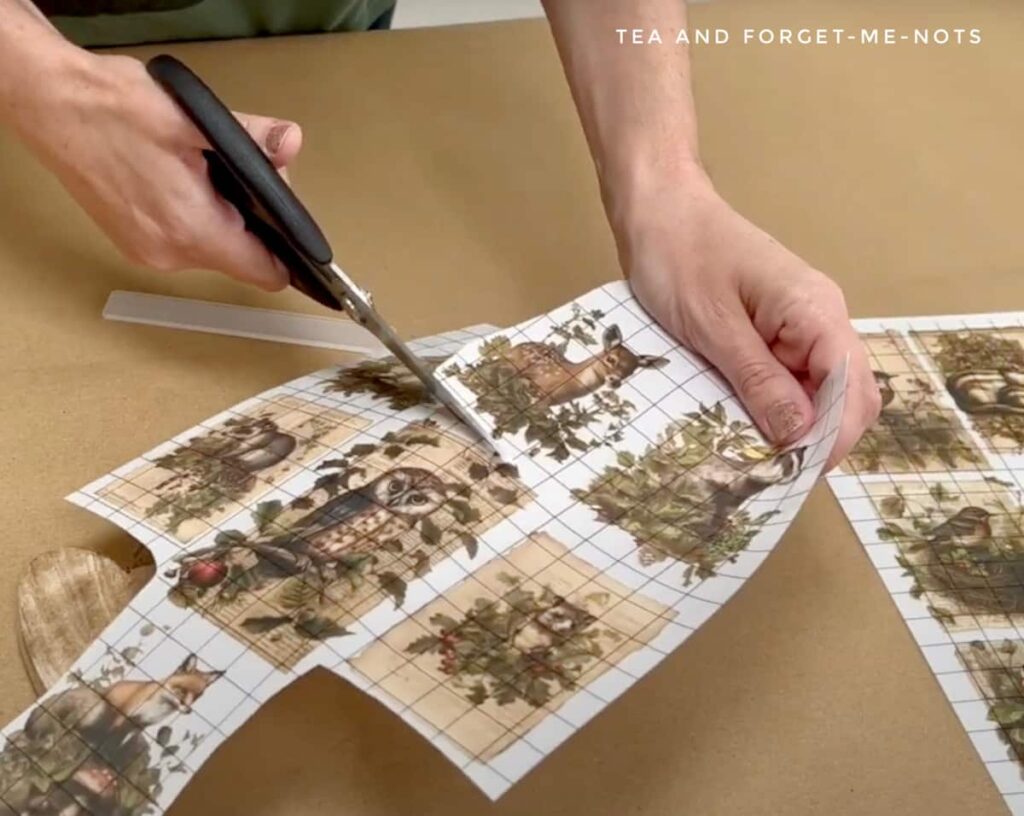
- The transfers come on white shiny paper with clear plastic on top. You cut out the design, being careful to leave the white paper and plastic film attached. Keep them attached until you’re ready to place it.
- When you’re ready to use the transfer, remove the white backing paper.
- Then place the transfer down and smooth out the plastic film from the middle. This is where you remove any bubbles and make sure that the transfer is flat so that it attaches properly.
- You might want to attach Frog Tape to the edges so that it stays in place.
- Then take the wooden stick that comes with the transfer and burnish the image. Burnishing means rubbing over the transfer. This is how it detaches from the plastic film and attaches to the surface that you’re applying it to.
- You should see when the transfer has detached because the colour dulls slightly.
- You can pull up the plastic film to check that the image has transferred. If there is any left on the plastic, place it back down and continue rubbing at that section.
- Once all of the image has transferred, you can remove the plastic.
- Finally, use a clean cloth or finger to gently rub over the image and ensure it has securely attached.
- You can seal the transfer with a Clear Coat, but not for something like a paper craft.
For more info, find an in-depth tutorial here.
If you loved this project, you’ll love these projects too:

Did you make these christmas crafts?
I love seeing what you do. Please mention @teaandforgetmenots and share your creations with me!
Pin it for later – Easy Christmas Gift Tags DIY Wrap and Cards

Hi there! I'm Rachel Bowyer, a passionate DIY enthusiast with a knack for transforming the old into something beautifully new. With a deep love for furniture painting, refinishing, and the art of crafting. I've been documenting my DIY projects and restoration journey since 2018. I specialise in techniques like decoupage, stencilling, and decor transfers. Join me as we explore the world of creativity and home improvement, one project at a time.