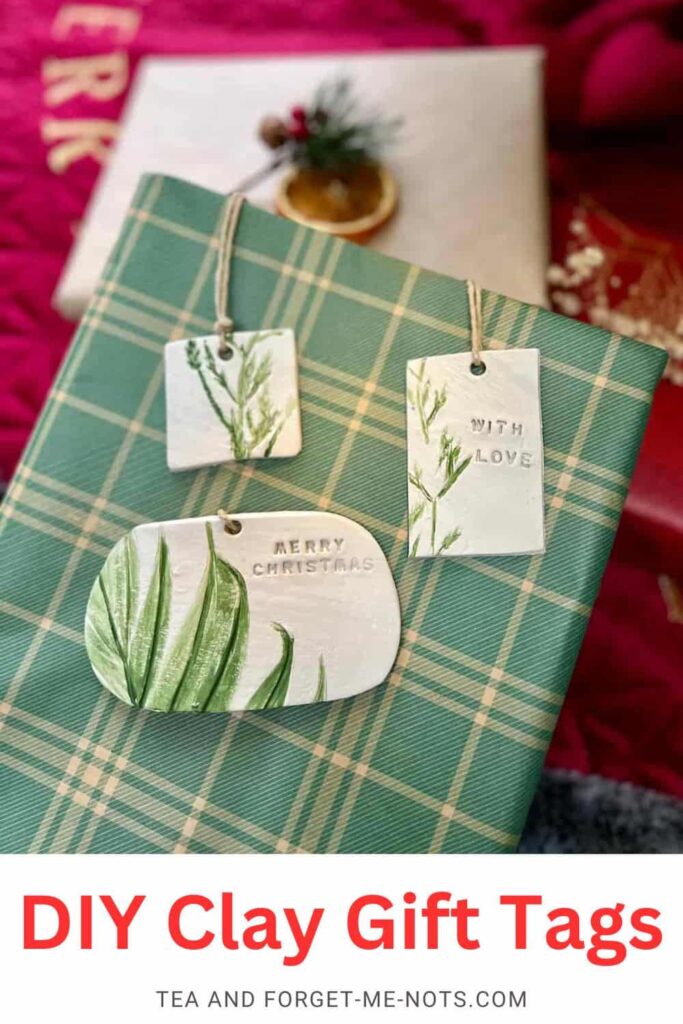
Personalise Gifts With Easy DIY Clay Gift Tags
Looking for an affordable way to make your presents stunning? Learn how to create elegant, personalised wrapping with easy DIY clay gift tags.
We know that it’s the thought that counts. But what if you could easily add extra thought to the gift wrapping too?
You’ll see how to easily create gift tags to add a personalised and unique way to your presents. Whether it’s for birthdays, holidays, or any other special occasion, these handmade tags will make your loved ones feel extra special.
With just a few simple materials, here’s how you can take your gift-wrapping to a new level.
This post includes gifted products and affiliate links so you can easily find the products I use myself and recommend to friends. If you purchase these products, I may earn a small commission at no extra cost to you.
How To Make DIY Clay Gift Tags Step by Step
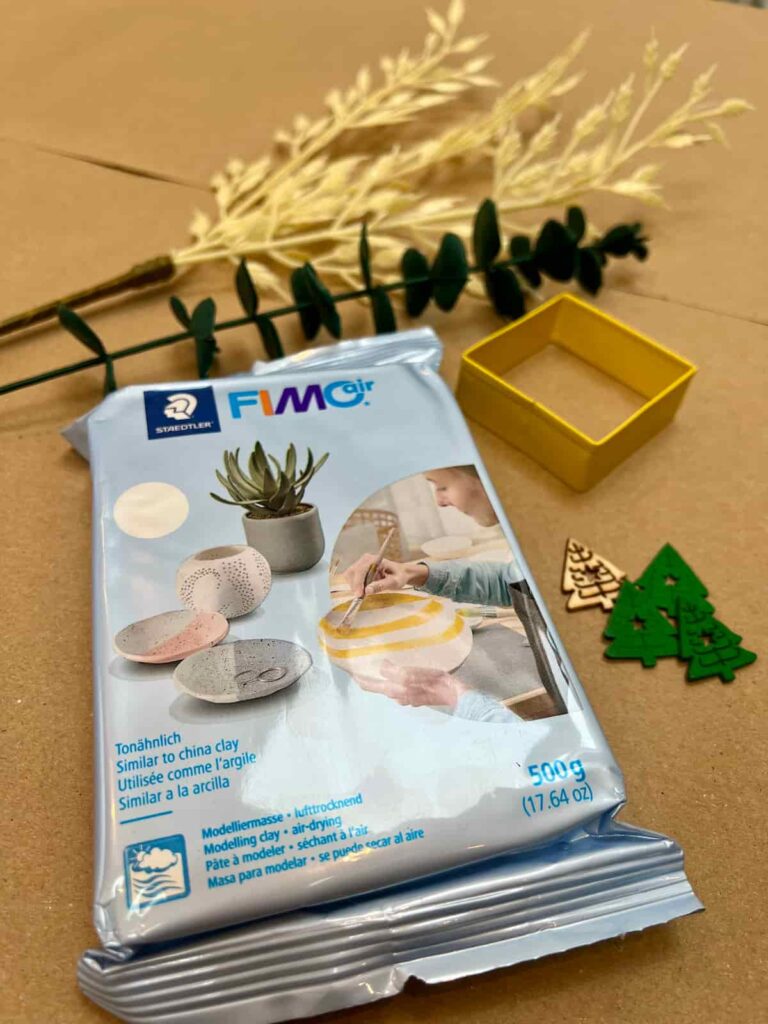
Personalised Gift Tags Supplies
Step by Step Instructions
Step 1: Roll Out Clay
Firstly, roll it into a ball of clay to make it less sticky. Then use a rolling pin to flatten and smooth the top of the clay out.
Doing this on a hard surface or a silicone mat will be the easiest way to stop the clay from sticking too much.
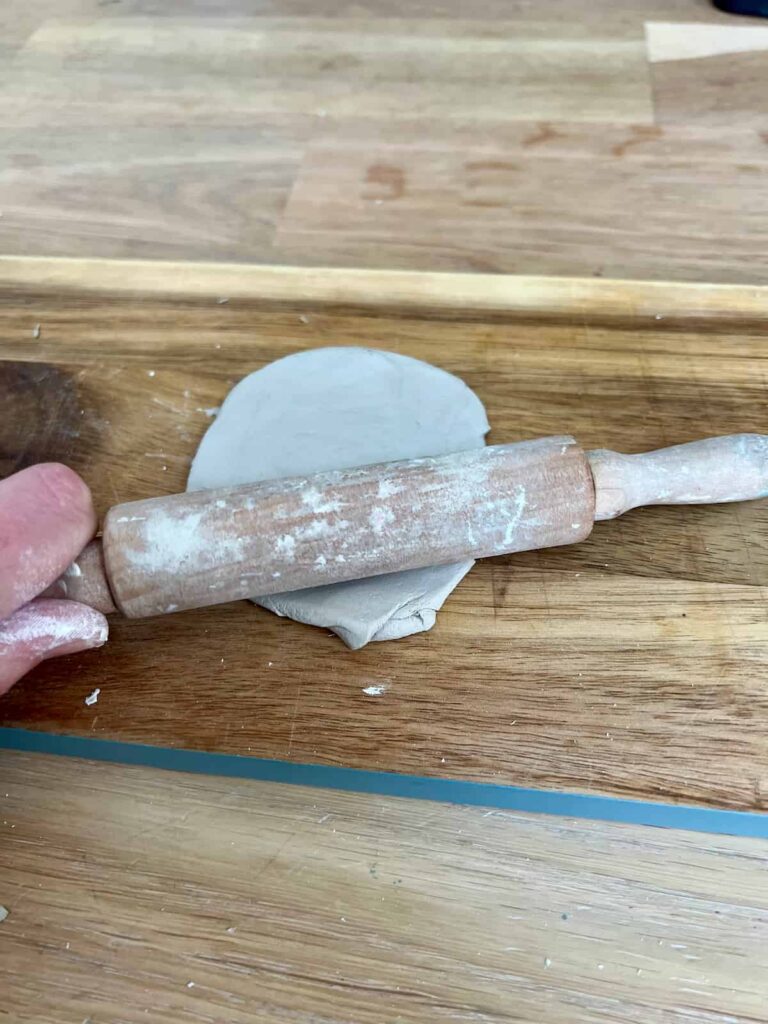
It should be about .5cm or .2in thick. The thicker it is, the longer it will take to dry. The thinner it is, the more fragile it will be.
Step 2: Stamp Clay
Next, it’s time to add personalised elements to the DIY gift tags.
For this, place a faux flower into the clay and use a regular rolling pin to gently imprint the shape.
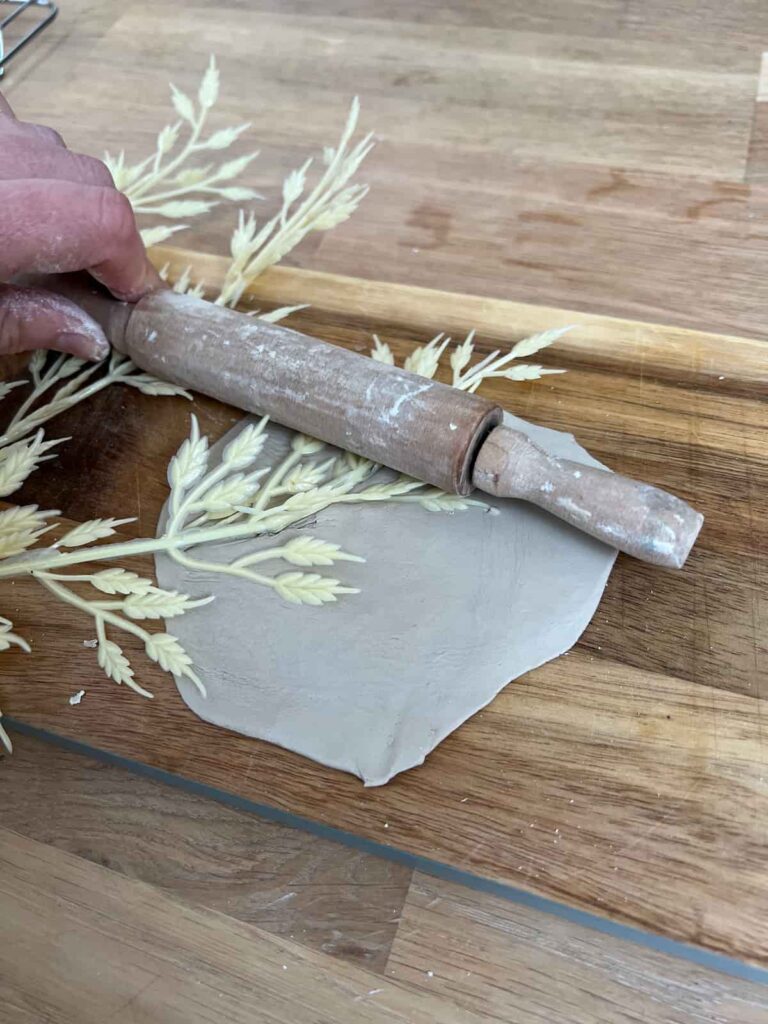
If you don’t like the impression it leaves on that section of the clay, simply re-roll it and try again.
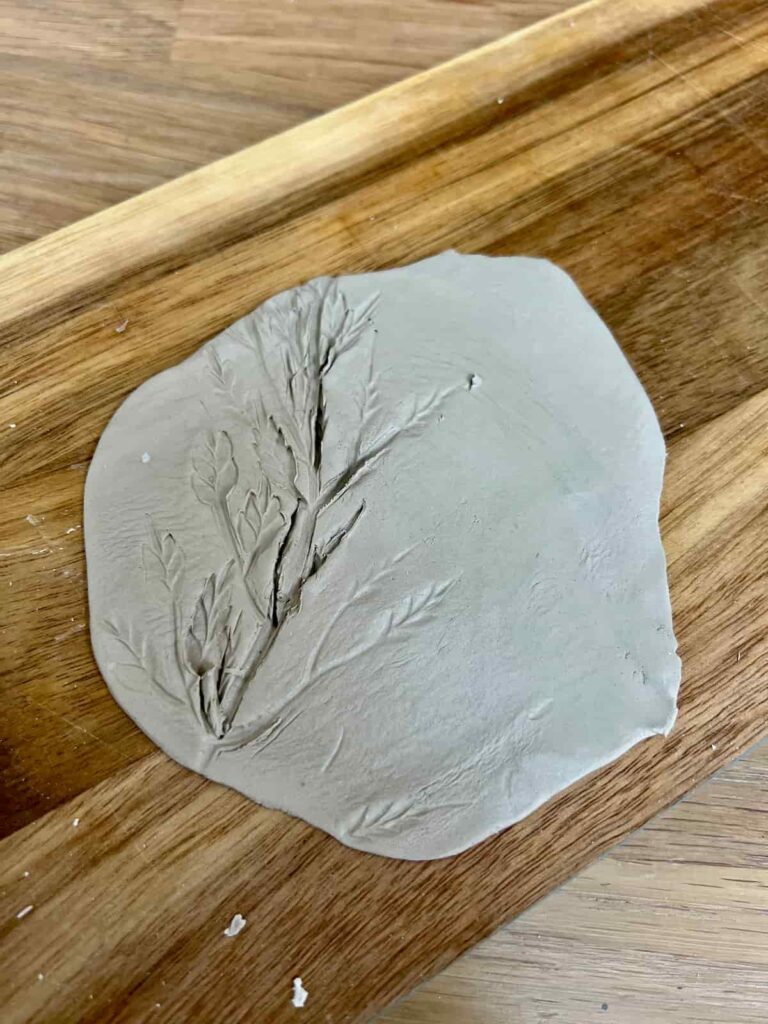
You might want to play around with different textures and patterns to see what you like the best.
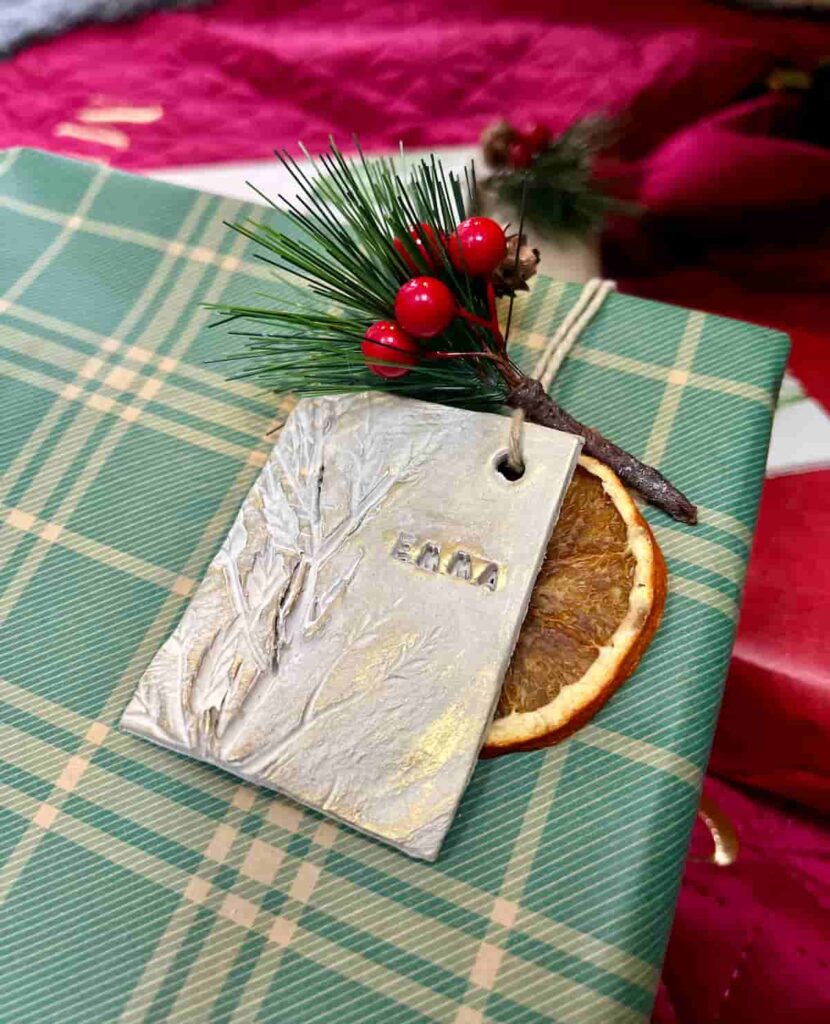
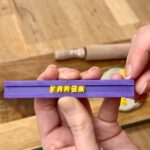
Step 4: Personalise With Cookie Letter Stamps
You don’t need any specific clay tools but cookie letter stamps help keep the letter sizes consistent. You can either stamp the words now or after cutting out the tag shape with a cookie cutter.
If you do the words first, it’s easier to get the words in the centre.
Remember to add your letters backwards to stamp the word correctly. For example, for ‘Merry Christmas’, Merry is placed in the order YRREM. The letter guide helps to keep them in a neat row.
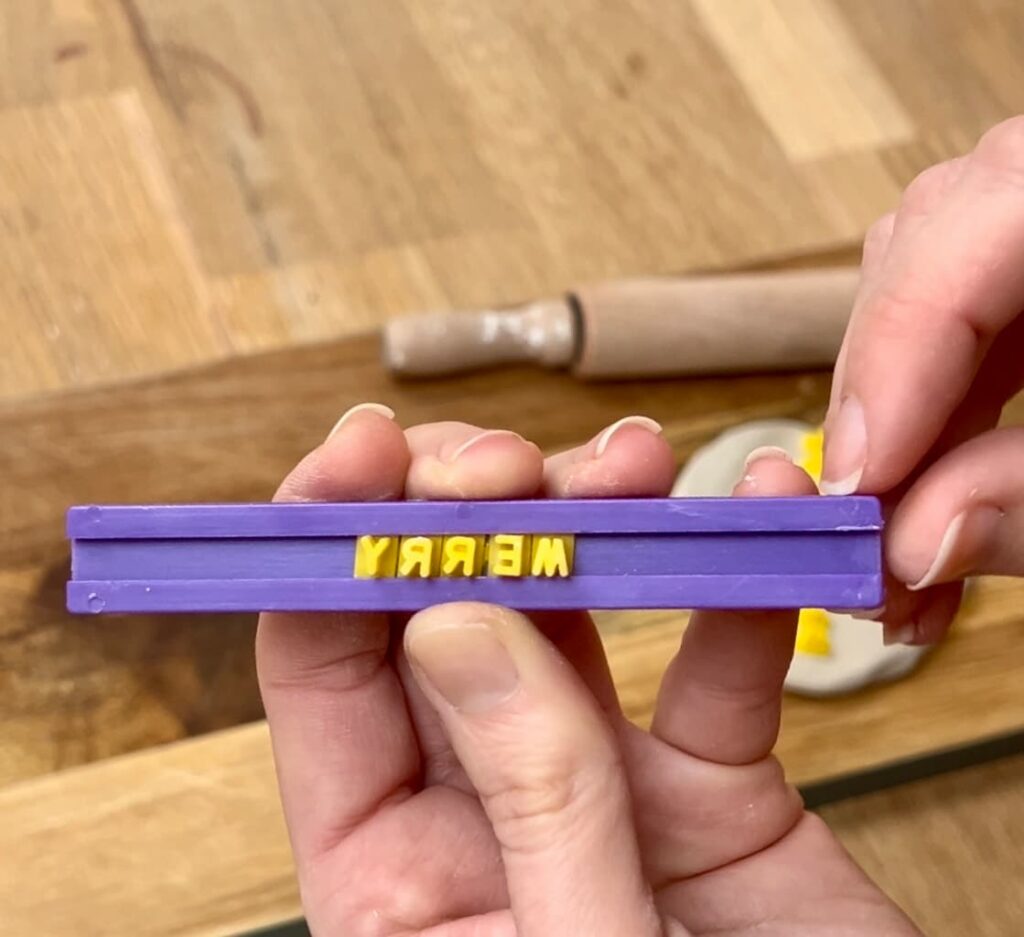
However, if you like the freehand look, then that adds an extra handmade feel. For me, the guide helps to avoid nail marks in the clay when stamping the individual letters.
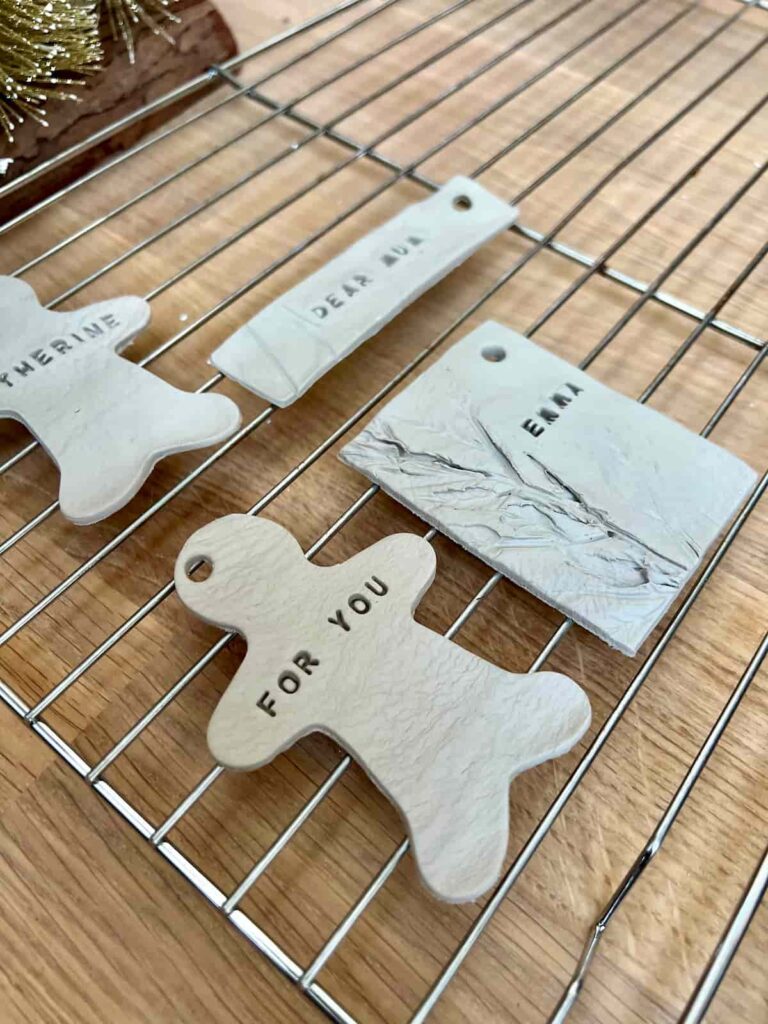
Then finally use the cookie cutter, or freehand cut the tag shape you would like the finished tag to be. You can use plain rectangles or circles which are suitable for gifts all year round. Or something like a gingerbread person biscuit cutter at Christmas.
You also want to add your hole for attaching the gift tag to the present at this point. You can use a straw to make a perfectly round, small hole at the top of the tag.
Step 5: How Long Does Air Dry Clay Take to Dry?
Air dry clay takes 24-48 hours to fully dry. It’s best to leave it on a wire rack or somewhere where the air can get to the bottom.
Here the clay is partially dried. The darker section is where there is still moisture in it.
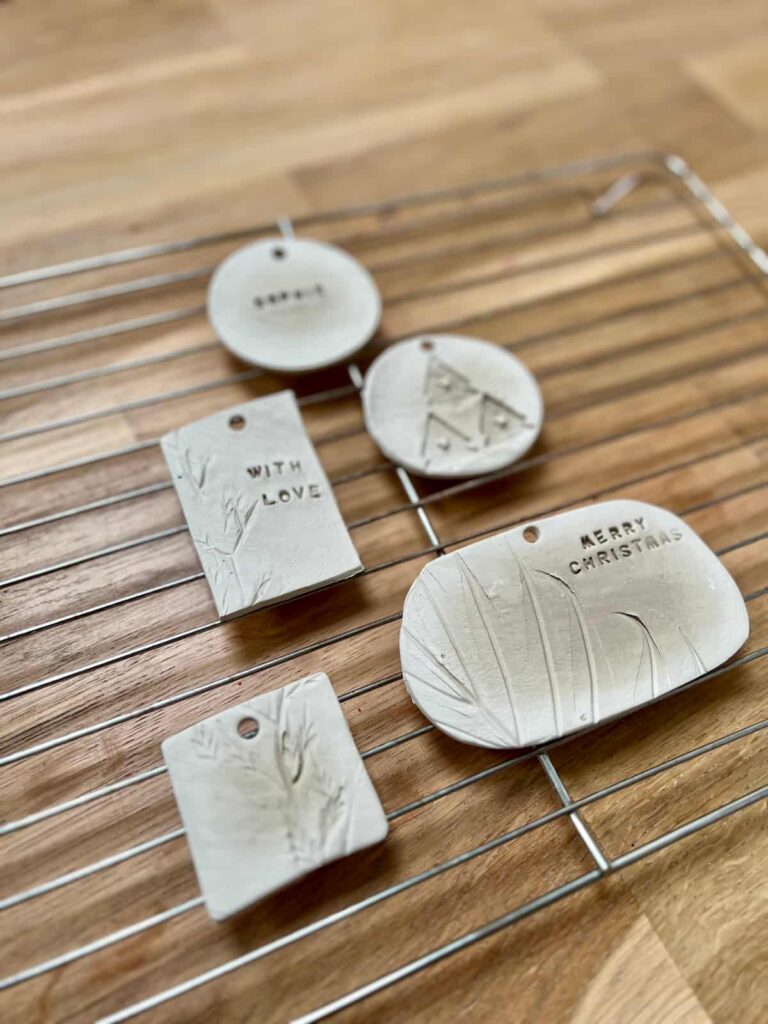
If the clay feels soft or cold, it isn’t dry yet.
The best part is that while the clay is drying, it is still slightly flexible. You can gently reposition it if the sides curl or bend.
Step 6: Can You Dry Clay in the Oven?
It is not recommended to put air dry clay in the oven. It can crack or burn as it dries faster.
But in a test for these air dry clay tags, this process worked:
Put the clay in the oven at 80°C / 175°F for 20 minutes. It can be on a baking sheet with parchment paper or a wire rack.
Top tips:
- Put the clay in a cold oven and let it warm up with the oven.
- Don’t put the clay in for longer than 20 minutes as it might burn. If it isn’t dry after 20 minutes, let the clay cool then do another session.
If you’re using oven-bake clay then check the package instructions.
Step 7: Paint DIY Air Dry Clay Gift Tags
You don’t need to paint this clay as it dries white. Which is a neutral and classic look.
However adding acrylic paints, or even a hint of colour with watercolours, is a great way to add something extra.

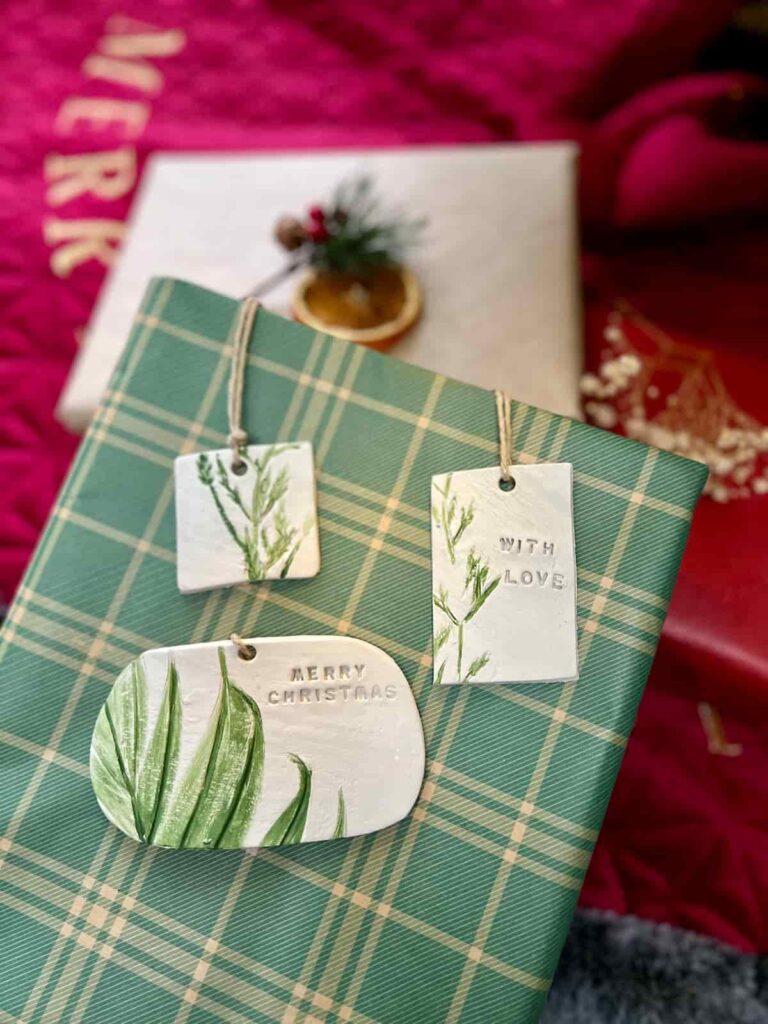
I left the white clay as it was. Then used a green called English Ivy for a little bit of a washed-out look on the imprinted leaves.
It’s not necessary to seal chalk paint. But if you’d prefer a glossy finish, then using a Gloss sealer will give that sheen.
Custom Gift Tags Using Air Dry Clay
To assemble the gift tags, simply add some ribbon or string and attach it to the wrapping paper. You can also embellish it further with dried orange slices.
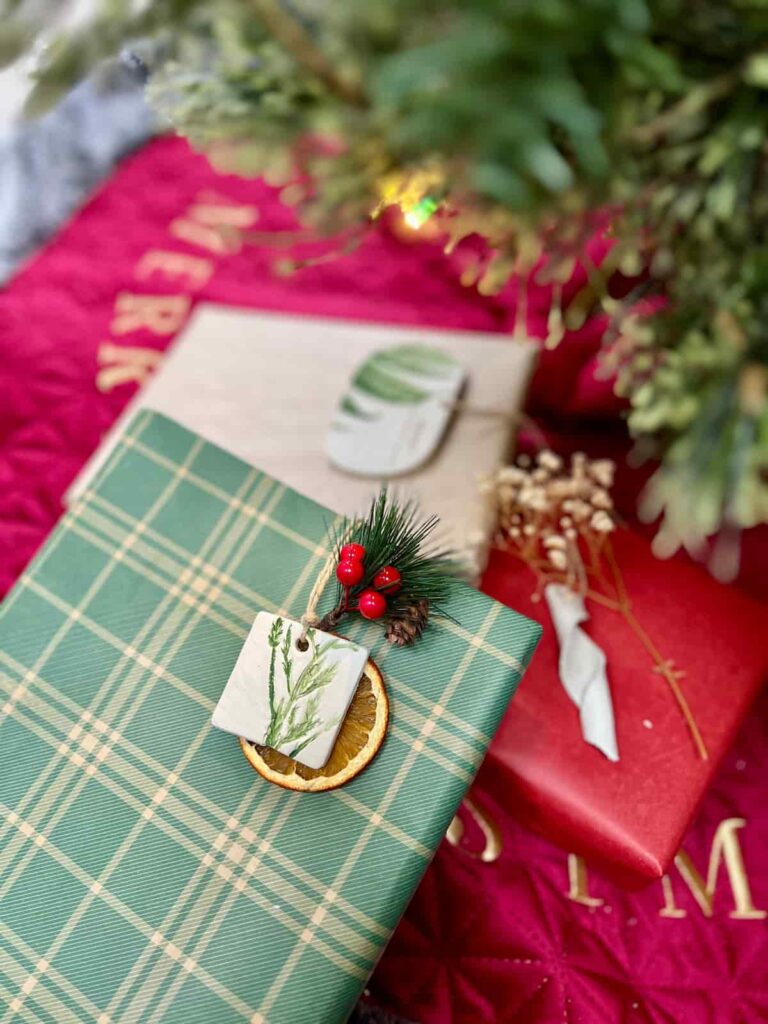
You can also decorate the clay with wax. Firstly add a coat of clear wax and then gold wax to highlight the stamped areas. This is particularly effective for a simplistic colour scheme.
Adding personalised clay gift tags to your gifts adds an extra touch of thoughtfulness and creativity.
Not only are these tags easy to make, but they also allow you to customise each gift with a name or a special message.
By using simple materials and following the step-by-step instructions provided, anyone can create beautiful and unique clay gift tags.
What an easy but special way to show the extra thought that went into wrapping a gift. It’s a fun and rewarding way to give a personal touch. And what better reason is there to create crafts and DIY projects than to do it for someone you care about?
How To Make DIY Gift Tags Instruction Video
You can find more video tutorials on our Youtube Channel
My Favourite Supplies
Here are some of the supplies that I used when making this project!
Air Dry Clay
An easy-to-use air dry clay for all kinds of crafts and projects.
Letter stamps
Personalise clay projects or cookies with these small letter stamps.
Answers To Your Questions About Making DIY Clay Gift Tags
A cookie stamp guide is the easiest way to stamp words onto air dry clay custom tags. Make sure the letters are in order backwards for it to spell out correctly when stamped.
Don’t need to make your own clay gift tags this year? How about making Christmas tree clay ornaments instead?
If you loved this project, you’ll love these projects too:

Did you make this craft?
I love seeing what you do. Please mention @teaandforgetmenots and share your creations with me!
Pin It For Later – DIY Air Dry Clay Gift Tags

Hi there! I'm Rachel Bowyer, a passionate DIY enthusiast with a knack for transforming the old into something beautifully new. With a deep love for furniture painting, refinishing, and the art of crafting. I've been documenting my DIY projects and restoration journey since 2018. I specialise in techniques like decoupage, stencilling, and decor transfers. Join me as we explore the world of creativity and home improvement, one project at a time.