Vintage Upcycled Office Desk Home Makeover Project
If you have a home office, then a desk is a must-have. But new desks can be very expensive, especially the quality ones. So here’s how you can transform an affordable, vintage upcycled office desk for your home office.
Vintage is something that is 20+ years old. So there’s a reasonable chance that DIY projects of that age will need some repairs. But that doesn’t mean that it can’t be a quick makeover.
Even though this work desk was bought to get refinished and stay in my home, it didn’t work out that way. As it is such a large desk, it immediately got put to use and became my office desk.
Which then posed a problem. When would be a good time to give the new desk a makeover?
It would be out of use for a few weeks. Which is why it was bought a few years ago and you’re only hearing about it now… But this home office desk finally got some new life breathed into it.
Would you rather opt for video tutorials instead of step-by-step instructions? Here’s a comprehensive video tutorial that guides you through the process of upcycling an office desk.
Thank you to Dixie Belle Paint for sponsoring this post.
This post includes gifted products and affiliate links so you can easily find the products I use myself and recommend to friends. If you purchase these products, I may earn a small commission at no extra cost to you.
How to Upcycle a Vintage Office Desk Step by Step
Materials Needed
Step by Step Instructions
Step 1: Find an Old Desk
You may have your own desk in need of a makeover or are looking to find one. Fortunately, they are usually quite easy to find.
This desk was from Facebook Marketplace and cost £40 a few years ago.
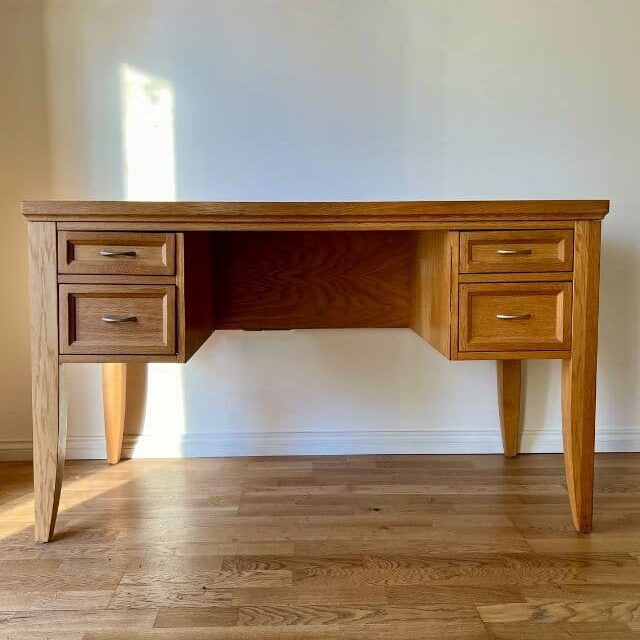
£40 is a little more than I would normally spend on a piece of furniture. But it’s large, feels substantial and has very deep desk drawers for lots of storage.
I’ve also found desks previously in charity shops and on Freecycle. Charity shops aren’t always the thrifty find that they used to be but they’re always a good place to start for a furniture makeover.
If you’re working in a small space like me? A great way to move the desk around is to put the desk legs on wheels. It’s more convenient to move the furniture rather than yourself!
Step 2: Repair Office Desk Damage
With an old piece of furniture such as a vintage desk, there’s a good chance that you’ll need to do some repairs. For deep scratches on the existing tops, you can use wood filler to help give them a perfectly smooth finish.
Fortunately, this work table didn’t need any significant changes or repairs.
But there was some veneer damage. It’s a good idea to repair issues with furniture before starting cleaning or prepping it. Because it’s likely to need cleaning again after the repairs are done anyway.
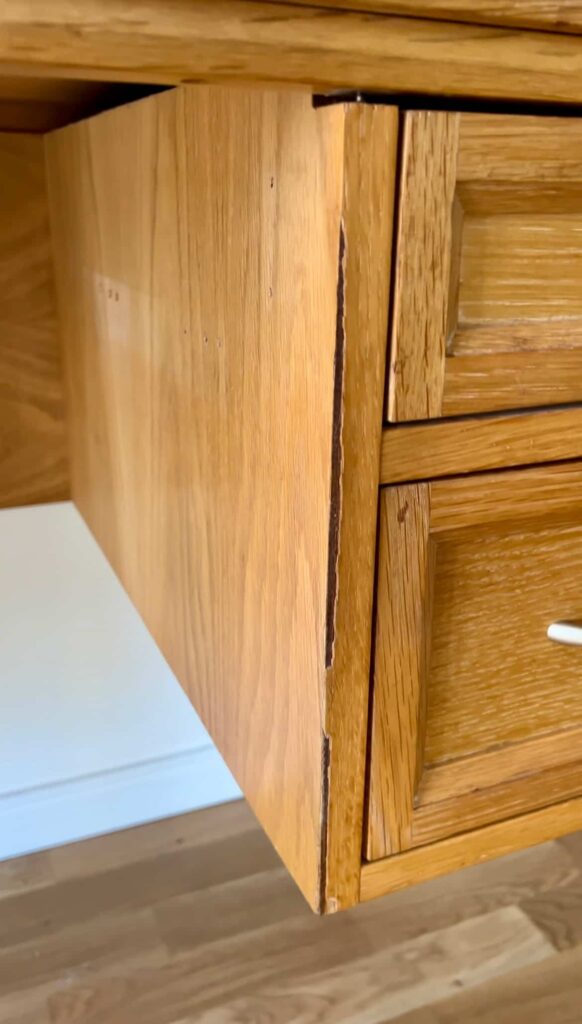
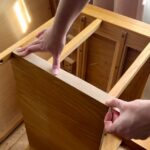
The veneer on the sides of the drawers had a little bit of damage on both sides. One was chipped and the other had bubbled up. It was just a thin strip in both areas, so an easy fix.
An excellent way to remove the broken veneer is to simply scrape it off with something sharp like a Stanley knife.
The glue will be visible underneath the veneer, so you can use 80-grit sandpaper to sand that smooth before applying the new piece of wood veneer.
Replacement veneer comes in strips of different wood types. It’s thin enough to cut with scissors after measuring the size you need. You then apply wood glue and let it dry.
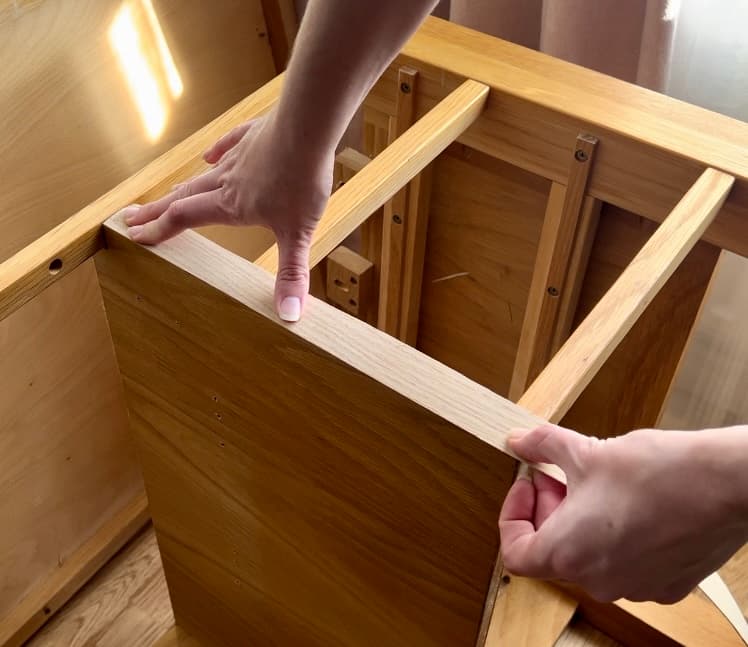
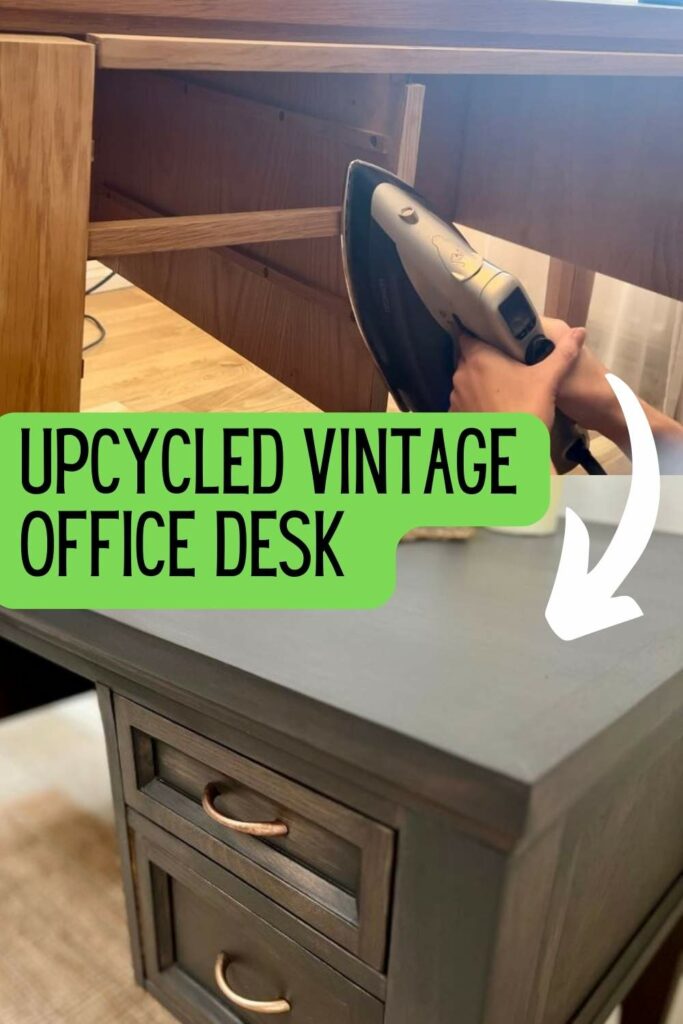
Finally, use an iron on medium heat to secure the veneer in place.
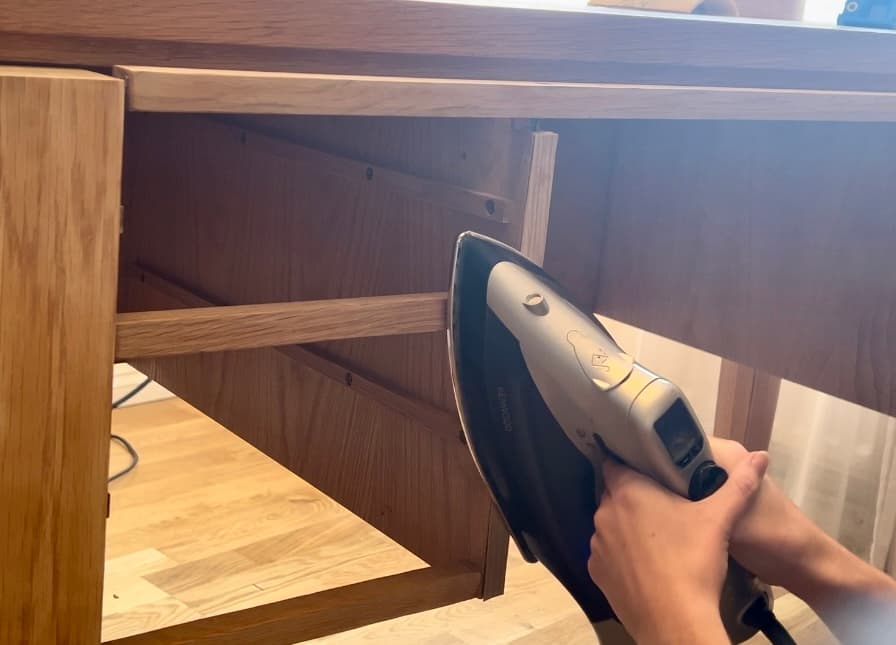
If you leave the strip slightly wider than you need, you can sand it flat against the edge with sandpaper. It’s better to have it slightly too big than too small and have a gap to fill.
Step 3: Prep Desk Before Refinishing
After repairs, the next step is to prep the furniture before refinishing. Whatever condition your furniture is in, you will always need to prep it. This is both sanding and cleaning.
Rarely, you don’t need to at least scuff sand a surface before painting. Exceptions would be when you are painting a laminate or metal surface. In this case, an easy way to paint them is with an adhesion primer like Slick Stick.
With a veneered surface, you need to be careful when sanding so that you don’t make a hole in the veneer. Veneer is very thin strips of wood so it’s easy to do.
Initially, I started sanding with 180-grit sandpaper, being cautious to not be too abrasive to help protect the surface.
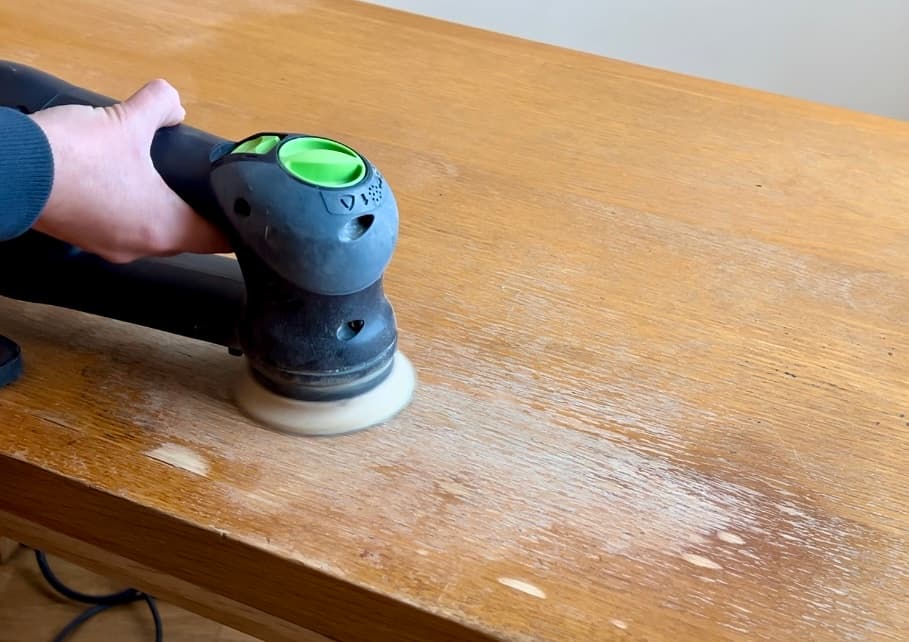
But the 180-grit barely made a dent in the finish. To make quicker progress, I moved on to an 80-grit sandpaper. Which worked much better.
You then need to work your way through the grits of sandpaper until you have a smooth finish. You can typically finish at 180 or 220-grit.
Different ways to remove old paint or varnish is with a chemical stripper. It depends on whether you prefer the speed of a stripper versus the mess it makes. There is always a balance.
Cleaning the old Desk
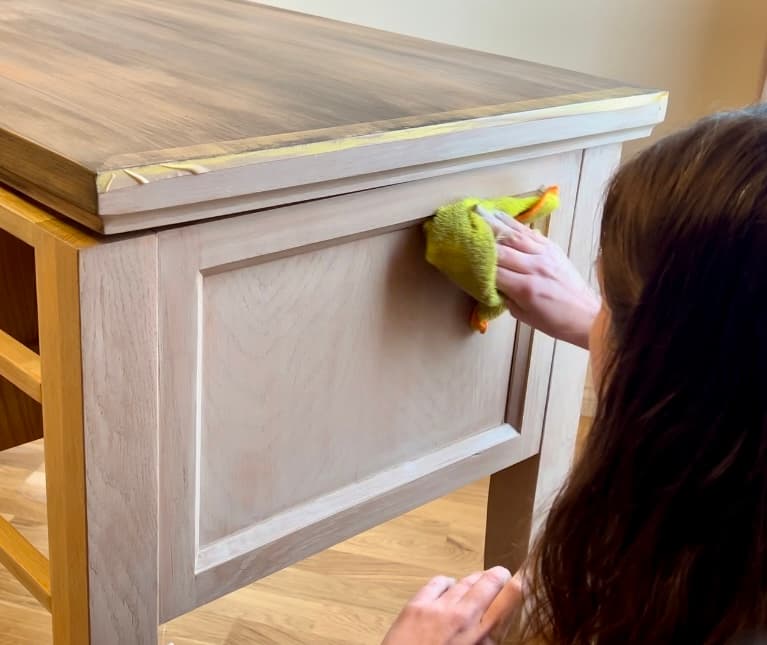
Lastly, to prep the desk, you need to clean it. If you do this after sanding then you also remove sanding dust as well as any grime.
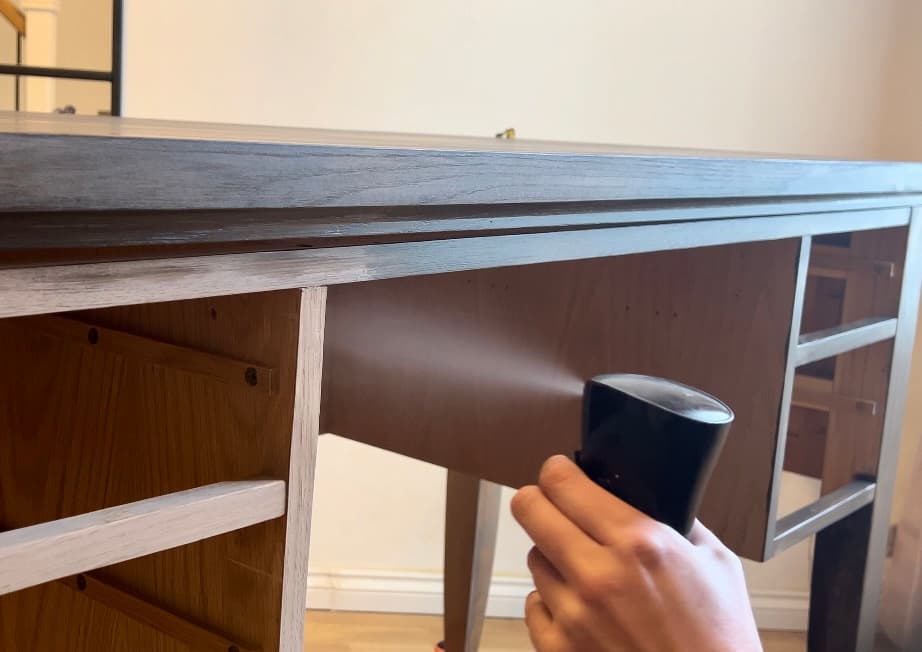
For this, I diluted a TSP cleaner with warm water. If you make a solution and leave it in a spray bottle then you don’t need to make a batch each time you need it.
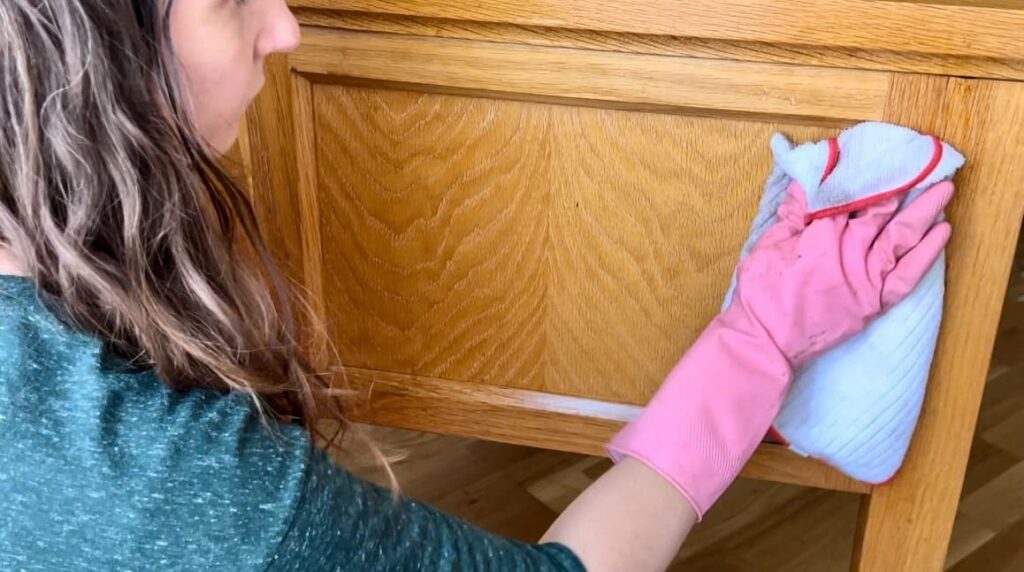
Finally, after wiping over the entire surface with the TSP cleaner, you need to remove any leftover residue from it. You can do this with water and a clean cloth.
Then leave to dry before moving on to painting or staining.
Step 4: What Type of Paint Do You Use on a Desk?
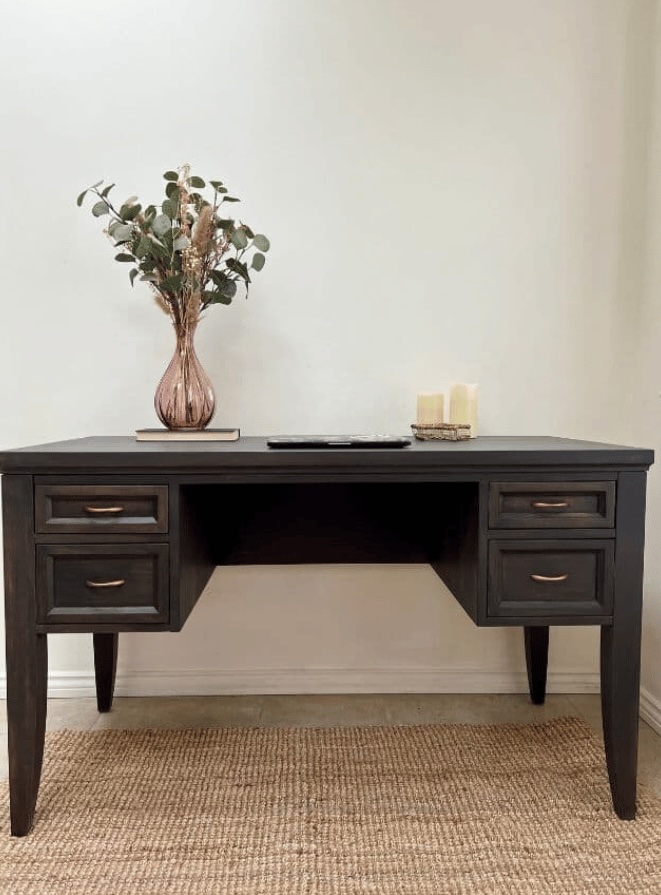
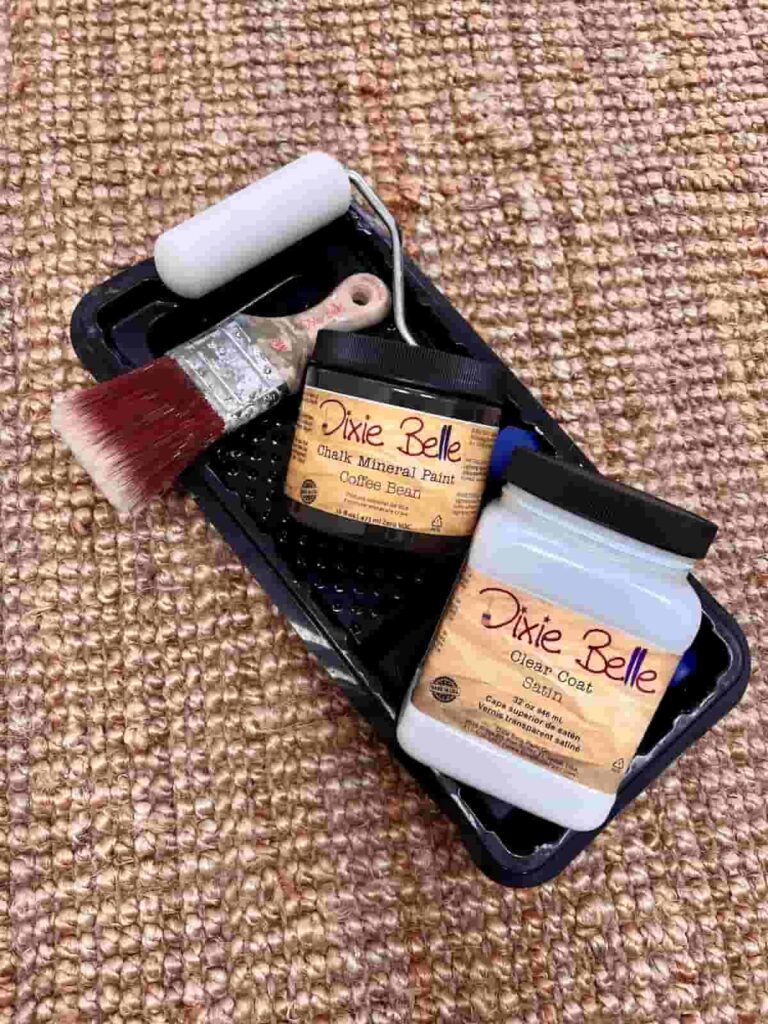
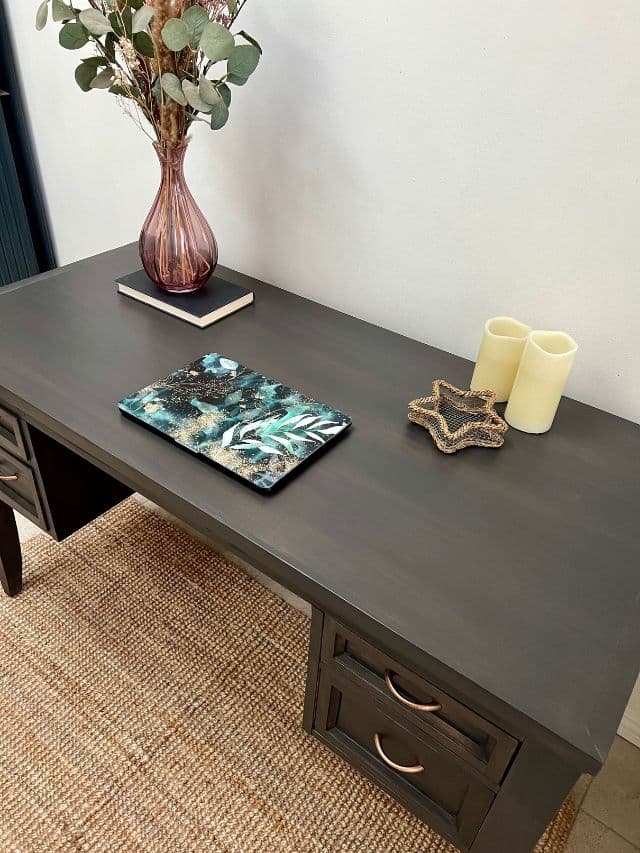
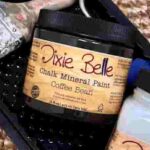
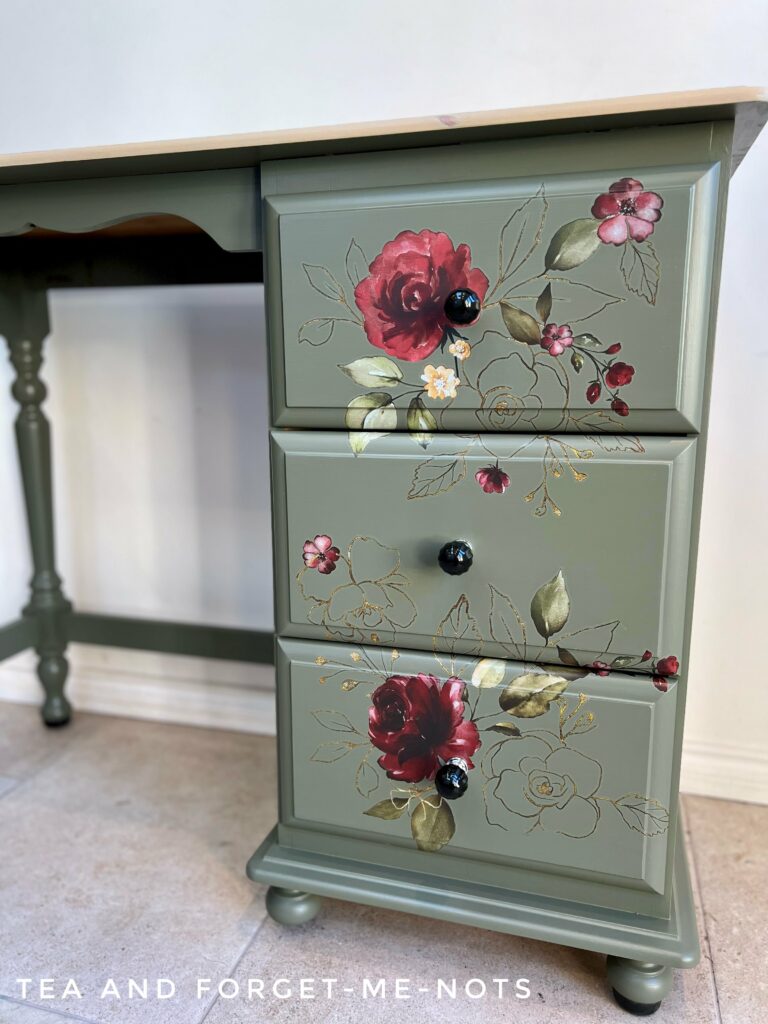
When painting furniture, using low-VOC paint is ideal for indoor use. This was a low-VOC brown chalk paint called Coffee Bean.
As for this desk, I wanted a warmer, chocolatey kind of look.
The desk had some interesting grain on the veneer that I didn’t want to completely cover. So I went with a paint wash. Which is when you dilute paint with water to create a more translucent look.
It might take more coats of paint, depending on the look that you’re going for. But you can build up the colour more slowly until you’re happy with the result.
To even out the colour of the desk, the first step was a coat of a warm beige called Cobblestone. This helps the later coats of Coffee Bean to look more uniform over the base coat of new paint.
If I hadn’t planned to do a dark colour for the desk makeover, Cobblestone would have been a lovely colour to refresh the desk with.
Step 5: Make a Paint Wash for a Desk
There is no one-size-fits-all for a paint wash.
You can do any ratio of paint to water depending on how see-through you want the result to be. If you want the paint to look more like a tint then you might mix 20% to 80% water.

For a much more opaque look, you can reduce the water to 20%. It’s best to test on a small area first to see the look you want.
If you want the grain to be visible still, you would have a higher amount of water in the paint wash.
And remember that you’ll likely need a couple of, or more, coats with a paint wash. So the first coat doesn’t need to look how you want the end result to be.
This desk needed two coats of Coffee Bean to get to the coverage that worked for me.
I love the dimension of the paint wash over the Cobblestone. Depending on the angle, and how it catches the light, it shows different colours and looks beautiful.
Step 6: Do You Need To Seal a Painted Desk?
You should seal any highly-used piece of furniture painted with chalk paint. And as this desk took several years to get a makeover, it needed a durable top coat.
Typically with darker colours it can be helpful to mix a splash of the paint colour with the sealer to help reduce streaks. But as this was a paint wash, it might change the look of the layers that had been built up.
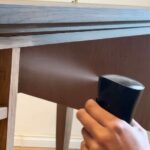
So, I applied a Satin Clear Coat with a roller. A roller is a good way to get an even application across large flat surfaces such as the top of the desk.
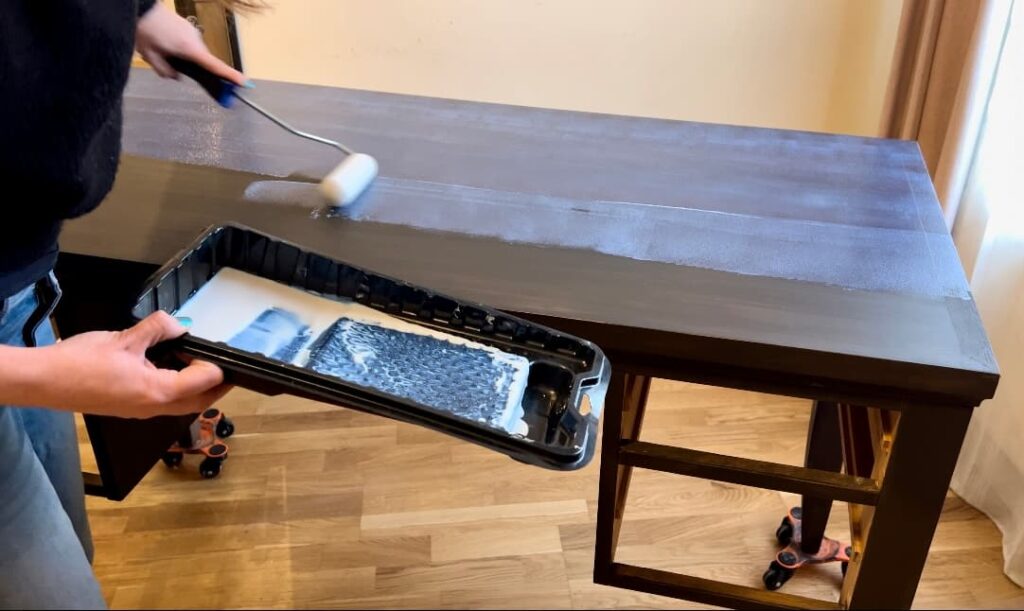
It always looks a bit worrying when applying the sealer. But as long as there are no blobs of sealer built up, then it will dry clear.
Satin has a good medium level of durability. This desk has two coats of sealer on the frame and a third coat on the desktop.
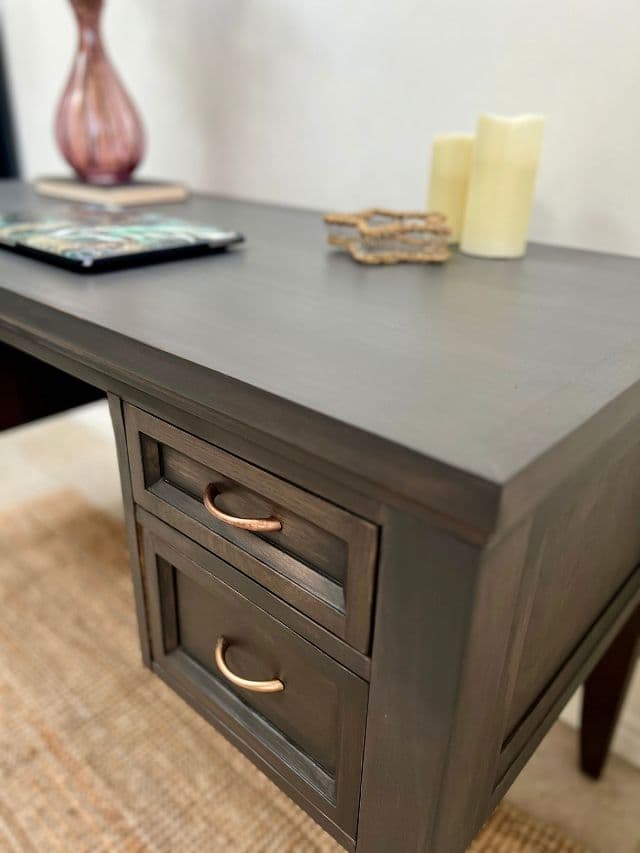
Step 7: Painting Metal Desk Handles
The last thing was to update the handles. The handles were naturally the perfect size but just not the look I wanted. So, instead of the additional cost of buying new drawer pulls, I simply painted them.
To paint the metal handles, firstly you need to prep them with two coats of Slick Stick.
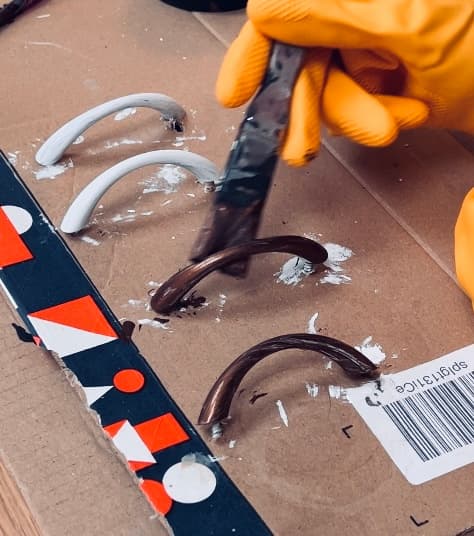
Then for the colour. I wanted a colour that went well with the dark brown desk. But also something with a bit of interest.
The best option was to go for a bronze. Which is essentially metallic brown. It tied in with the brown but also added some shine.
How To Make an Old Office Desk Look Better
When you have something that needs repairing or refreshing, it can be distracting. You always see the things that need to change.
If you work from home then your office furniture probably gets used a lot. It needs to be somewhere you feel comfortable. This updated desk is now a cleaner and cosier place to be.
Now I can relax at the refinished desk and enjoy concentrating just on what I’m doing. Refinishing parts of your home where you spend a lot of time is always a good way to feel better about the environment you’re in.
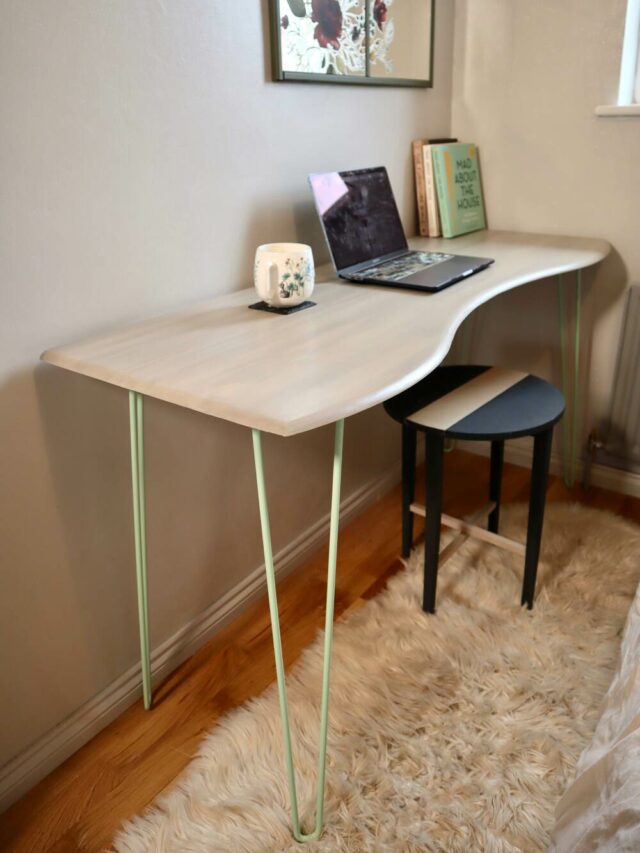
For more upcycled desk ideas, here’s how I created this repurposed office desk with hairpin legs, and how this classic pine desk got a new lease of life.
How To Upcycle Wooden Desk Instruction Video
You can find more video tutorials on our Youtube Channel
My Favourite Supplies
Here are some of the supplies that I used when making this project!
Coffee Bean Paint
A classic warm brown chalk paint, great for all kinds of furniture projects.
Spray Bottle
A must-have tool for keeping paint flowing while working.
Veneer
A simple way to replace broken veneer.
Answers to Your Questions About Painting a Vintage Office Desk
Do you need to sand a desk before painting?
Some paint brands state that you don’t need to sand before painting. However, sanding is always the best way to prep a wooden surface. This ensures that the paint adheres to the surface as well as possible.
Should I stain or paint my desk?
Stain and paint give different looks so it depends on the look you are going for on your desk. Stain is more often used on top of bare wood. Whereas you can paint on top of an already stained or painted surface.
How do you stop painted drawers from sticking?
Freshly painted drawers often stick. You can help them to move freely again by rubbing soap, a candle or wax on the areas that catch.
If you loved this project, you’ll love these projects too:

Did you paint an office desk?
I love seeing what you do. Please mention @teaandforgetmenots and share your creations with me!
Pin It For Later – Upcycled Office Desk

Hi there! I'm Rachel Bowyer, a passionate DIY enthusiast with a knack for transforming the old into something beautifully new. With a deep love for furniture painting, refinishing, and the art of crafting. I've been documenting my DIY projects and restoration journey since 2018. I specialise in techniques like decoupage, stencilling, and decor transfers. Join me as we explore the world of creativity and home improvement, one project at a time.
I love these older heavy desk. I used to have one I used for sewing and it was so sturdy. I couldn’t get it into my room in the apartment so I had to let it go.
Yes, it’s got a really nice feel to it. Thanks, Rosemary.