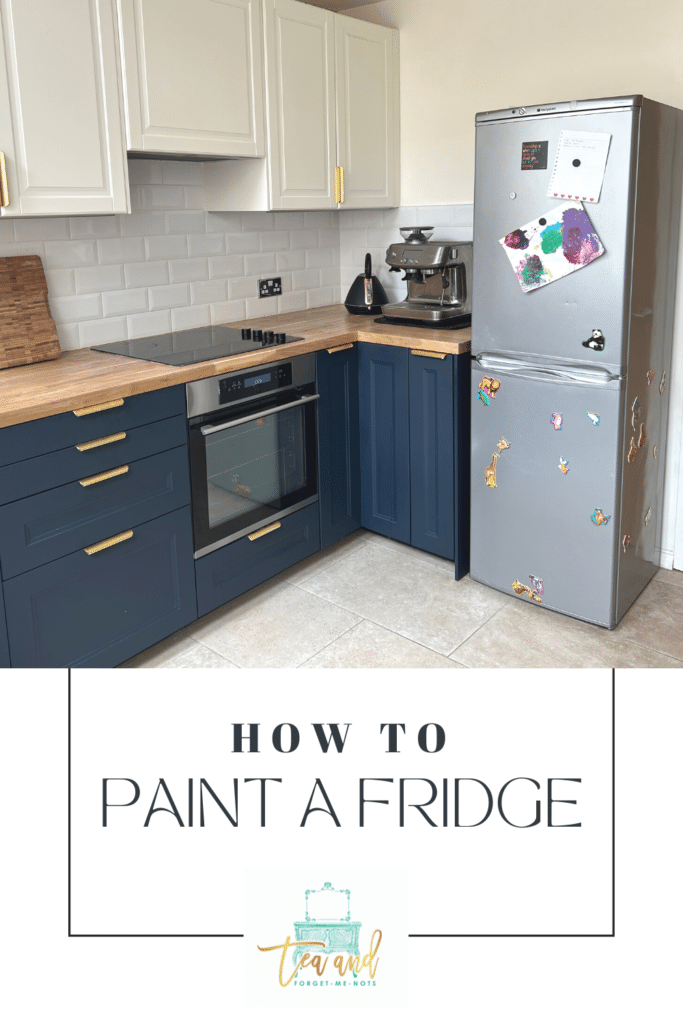
How to Successfully Paint a Fridge to Match IKEA Kitchen Cabinets
Have an IKEA kitchen and want to successfully paint a fridge to match? Here’s how I did it with one of their bestselling colours.
I had an IKEA kitchen but with a fridge that didn’t match. I’m sure it’s a common thing as IKEA kitchens must be some of the most popular in the world.
But large kitchen appliances come in limited colours, silver and white mostly. So if your kitchen colours aren’t those, what do you do?
Probably nothing. It’s just a fridge, after all.
But what if you could make it all match with a new look without having to buy a new fridge? This sounds like a DIY project to test out.
A fan of IKEA? Here’s one of my most-read posts on DIYing an IKEA mirror.
How to Successfully Paint a Fridge to Match IKEA Kitchen Cabinets
Last year I got new kitchen cabinets from IKEA. They’re a good option as they’re of decent quality and affordable.
The colours I chose for my cabinets were blue and white. I put white on the top cabinets to make them look brighter and open up the space.
They’re from the AXSTAD range if you’re interested.
How to Paint a Fridge Video
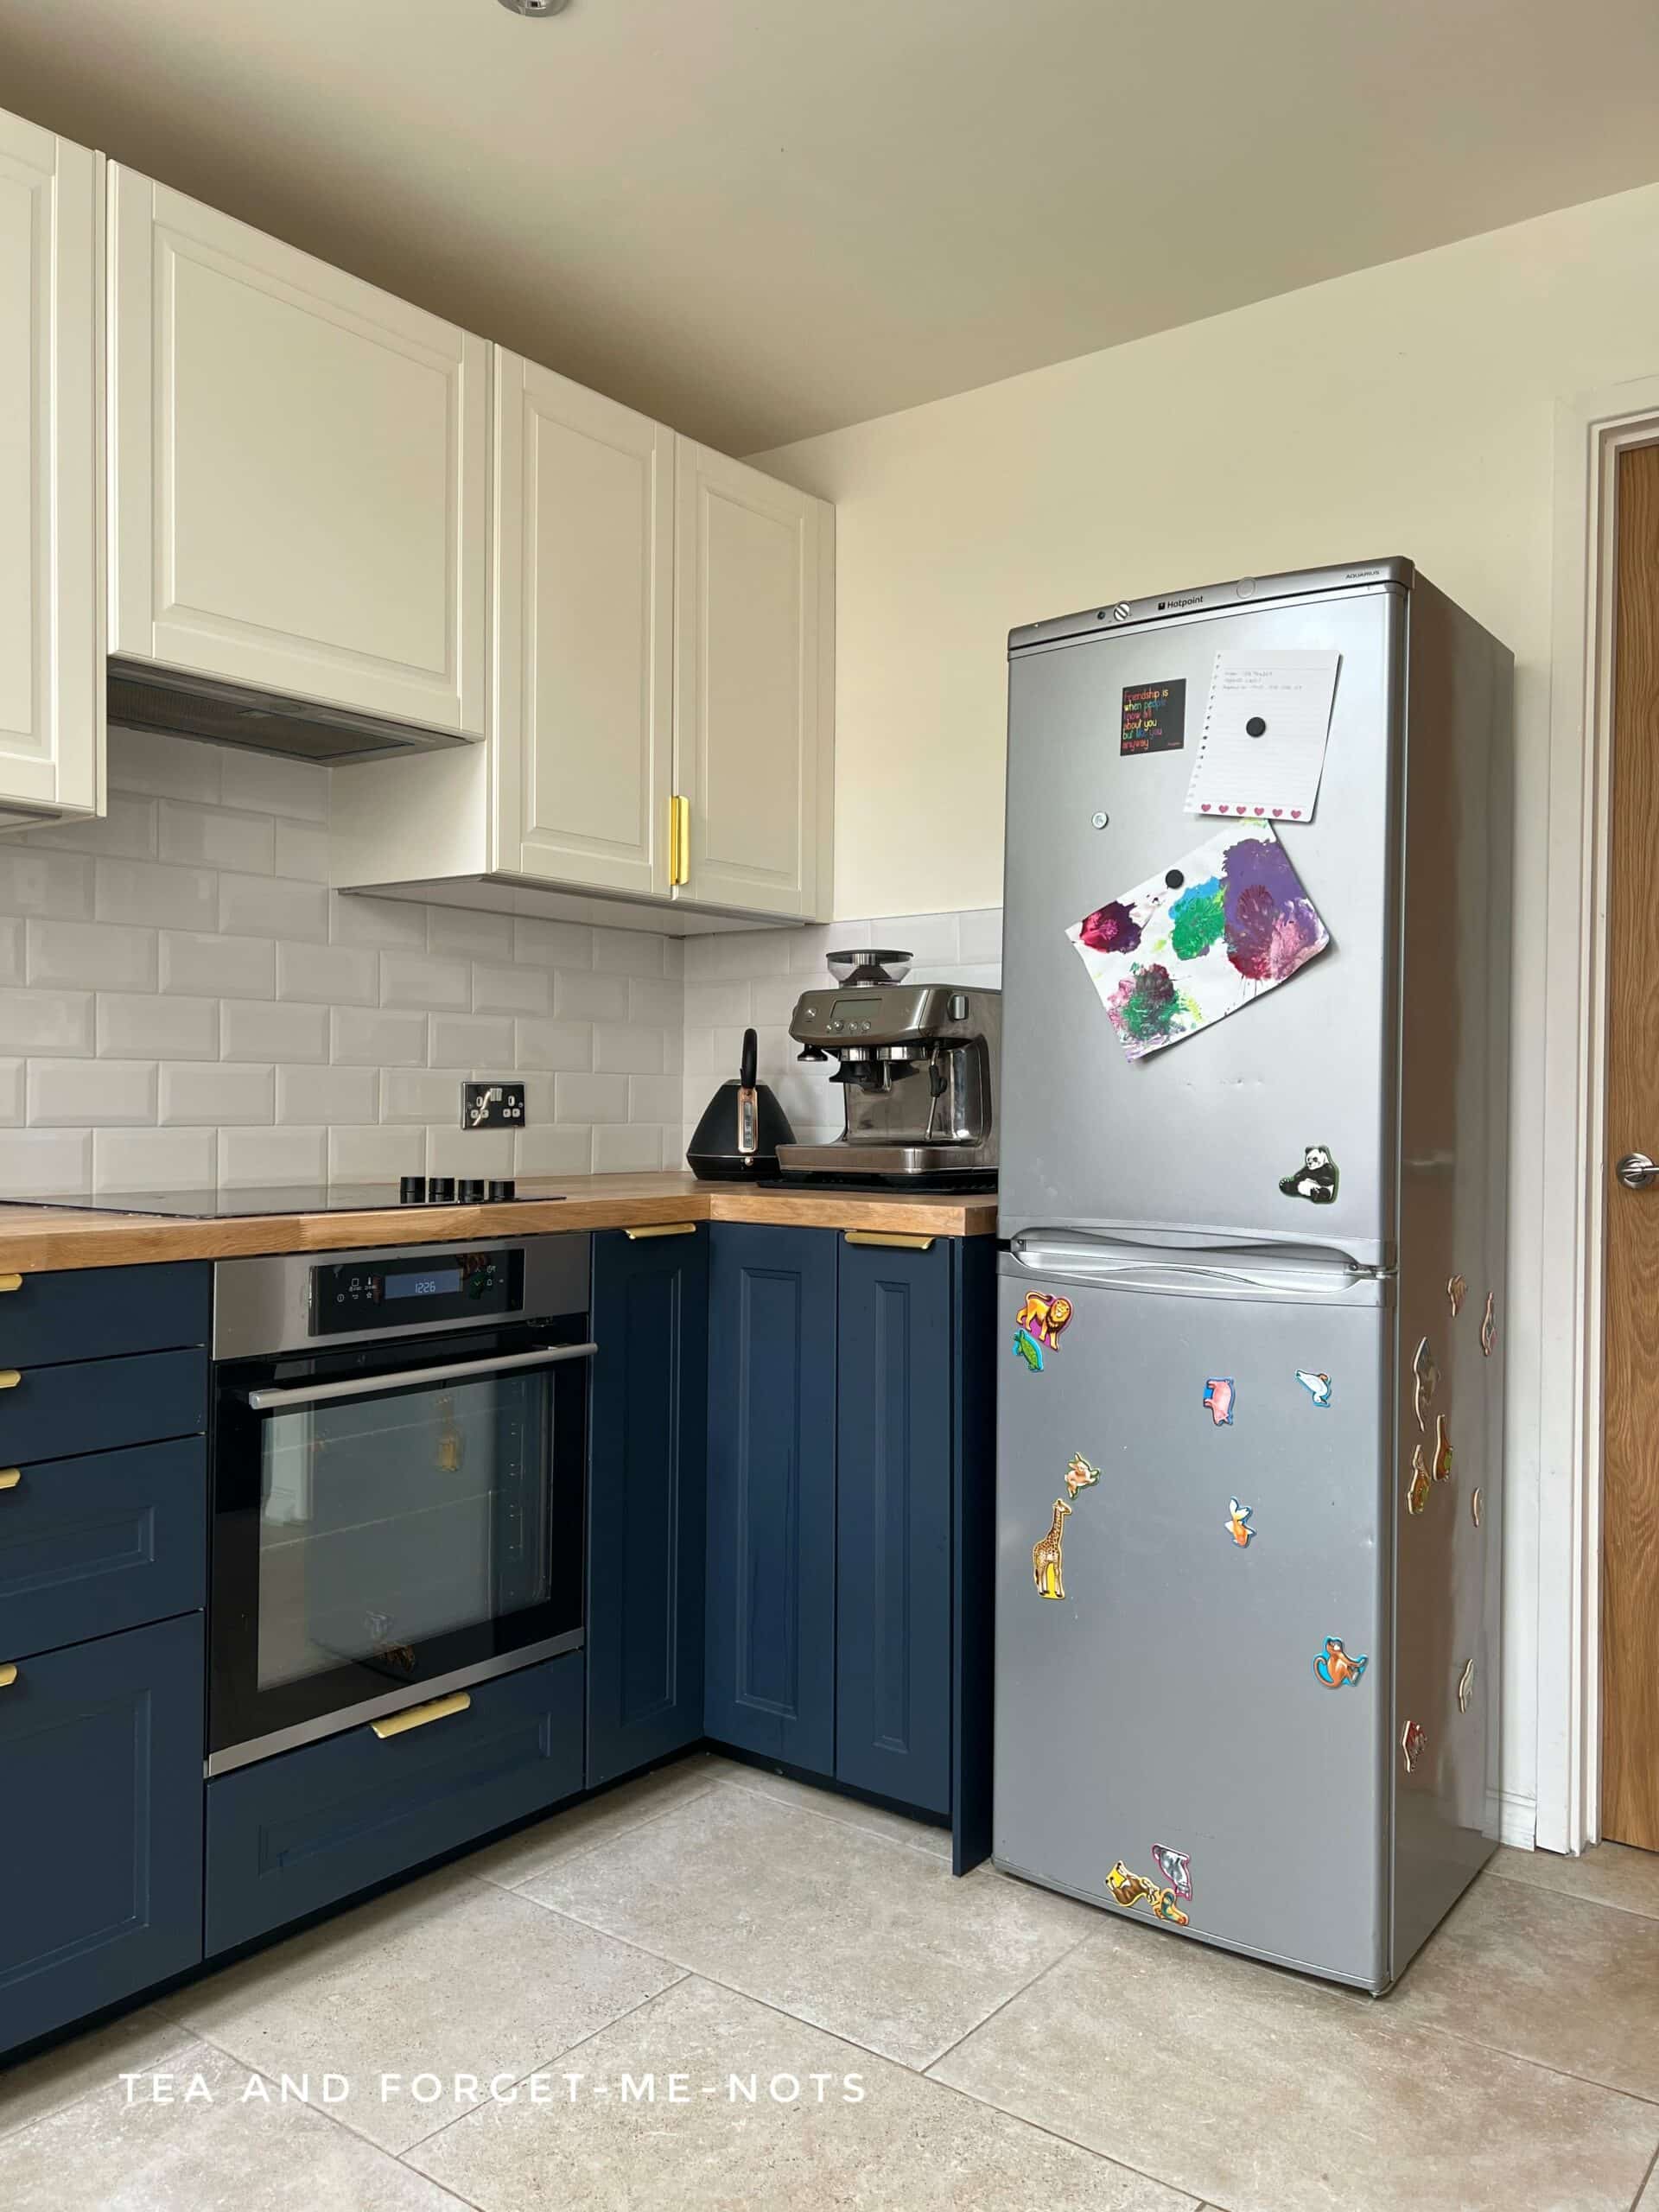
My kitchen originally had racing green cabinets and stainless steel finish appliances.
So when I chose blue cabinets, I also went with beautiful gold handles. And my old appliances no longer matched. Or, in fact, they clashed.
I wasn’t going to replace a working fridge with a new appliance, even if it wasn’t the perfect colour.
When I chose the blue cabinets, I was told that they had been out of stock since they had started selling them. Meaning that they were so popular that they were always on order and selling out with pre-orders.
It’s a really popular colour at the moment.
It’s certainly one of my bestselling colours too. This piece sold so quickly!
So, if you have these cabinets and a clashing fridge, this may help you find the right paint.
Painting a fridge is quite a quick project and can have a big impact.
How to Paint a Fridge for a Long-lasting Finish
The first stage of painting the fridge is the most important.
If you fail to prep properly, the finish won’t last.

Firstly, I cleaned the entire piece with White Lightning, which is a TSP Cleaner.
I decant my White Lightning into a spray bottle. It saves me time at the start of each new piece as I don’t have to mix up a new batch.
I diluted half a tablespoon of the White Lightning crystals in 1 litre of hot water.
I sprayed the entire piece, wiping off the White Lightning with a wet cloth. Then to remove any trace of the cleaner, I washed the fridge again with clean water. I paid particular attention to the fridge handles which naturally get the most use.
An easy thing to forget is to also change the lint-free cloth that you use to wipe the clean water off with.
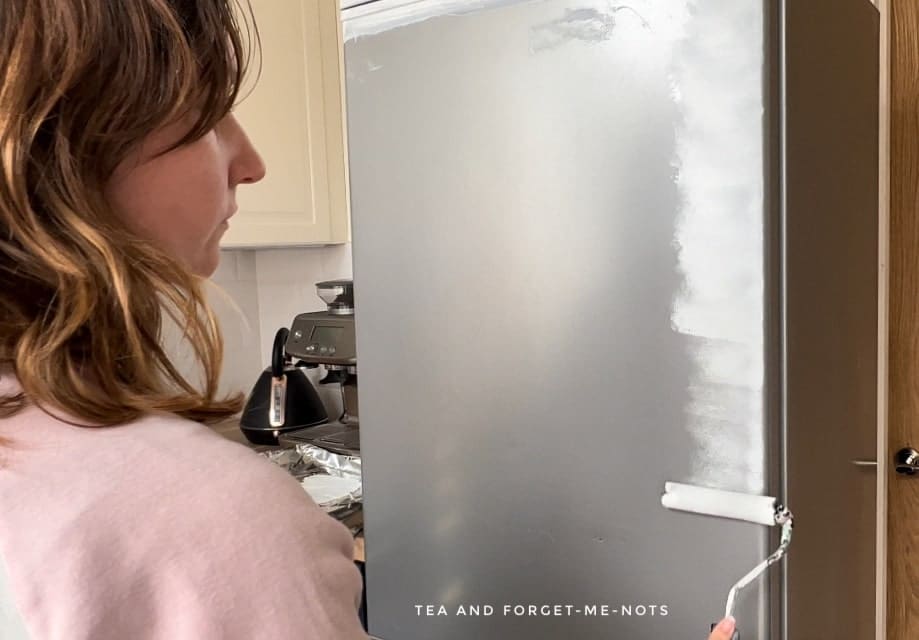
The next step is the product that is going to make or break the successful painting of the fridge.
Slick Stick. This is a product designed to mattify shiny or laminate surfaces.
Want to know what else you can paint with it? How about a front door?!
It’s an alternative to sanding when sanding isn’t possible. I don’t think sanding a fridge would be a good idea! But if you do happen to sand an old or new refrigerator, I’d use a tack cloth to remove any residue.
If you do need to sand though, here are some great tips!
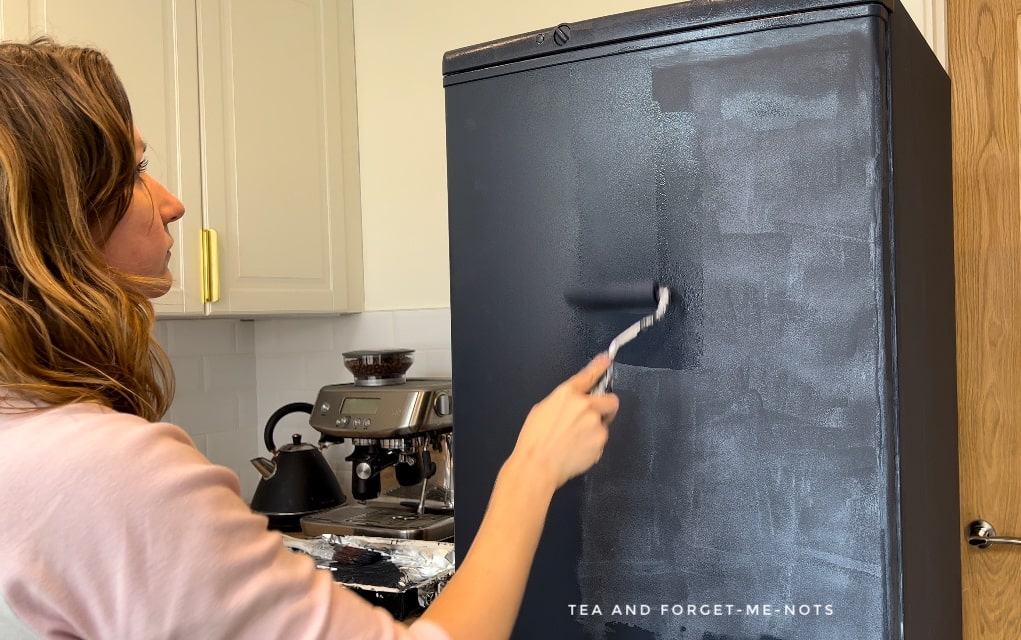
To apply the new paint, I used a combination of a flat synthetic brush, an artist brush, and a foam roller for a smooth finish.
I’ve only just started using artist brushes. They’re brushes for small areas and details. I’ve always just used cheap brushes for this as they didn’t seem that important to have quality ones for.
It’s one of those things though, when you try a quality version, you can’t go back. The firmness of the bristles and how well they stay together, rather than splayed apart after use, is night and day from what I used before.
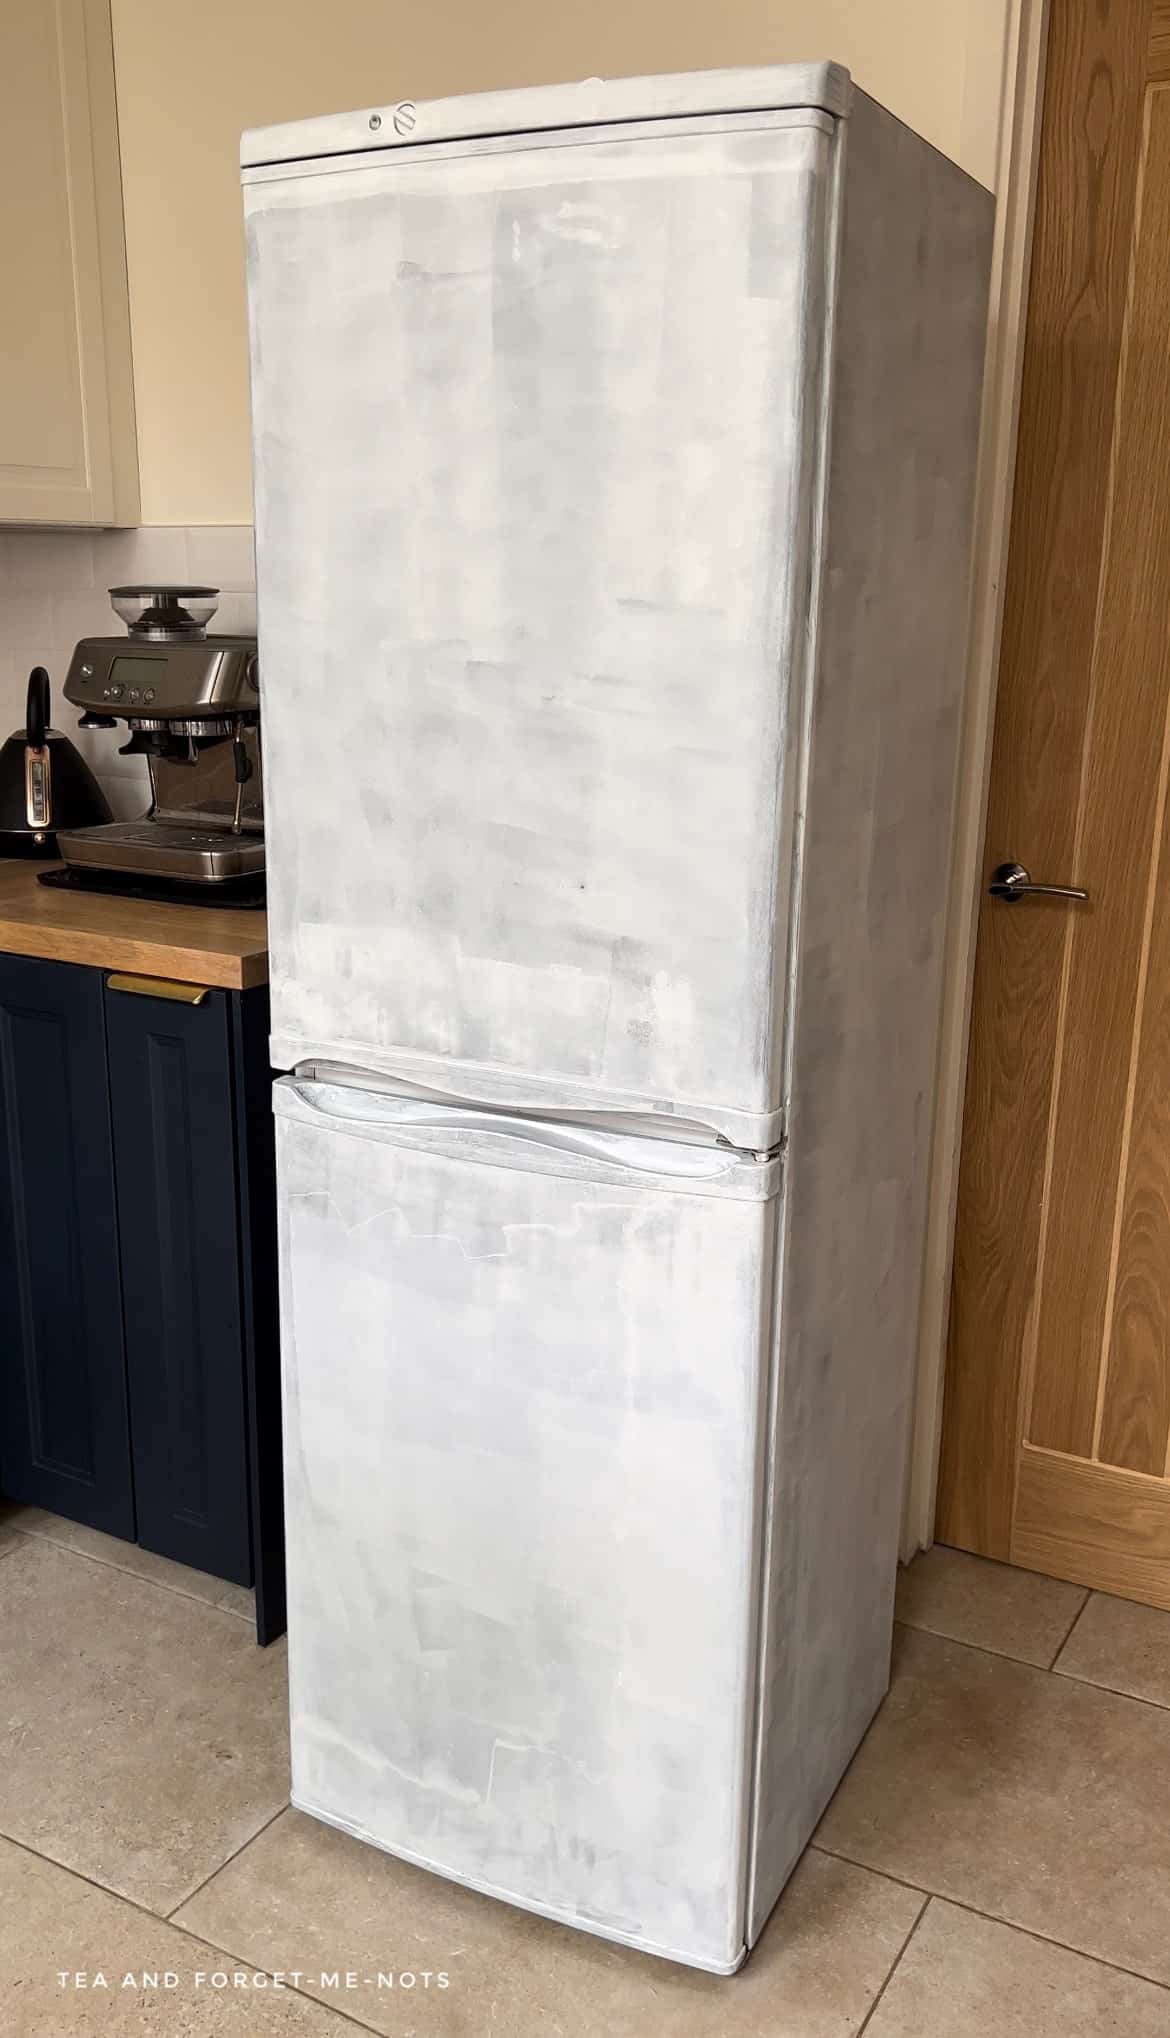
I did two light coats of Slick Stick to get solid coverage.
Like the idea of painting something unusual? Here’s what I did with a noticeboard!
On the second coat of paint, I tinted it with blue paint to make the contrast between the white and final blue less significant. And hopefully require fewer coats of paint. Mixing a little bit of black paint into poor coverage paint is great for improving its coverage.
Funnily enough, the tinted coat made the fridge door quite a similar colour to the original colour I started with. So, for two coats of paint, it looked like it was almost back to square one.
What paint do you use on a fridge?
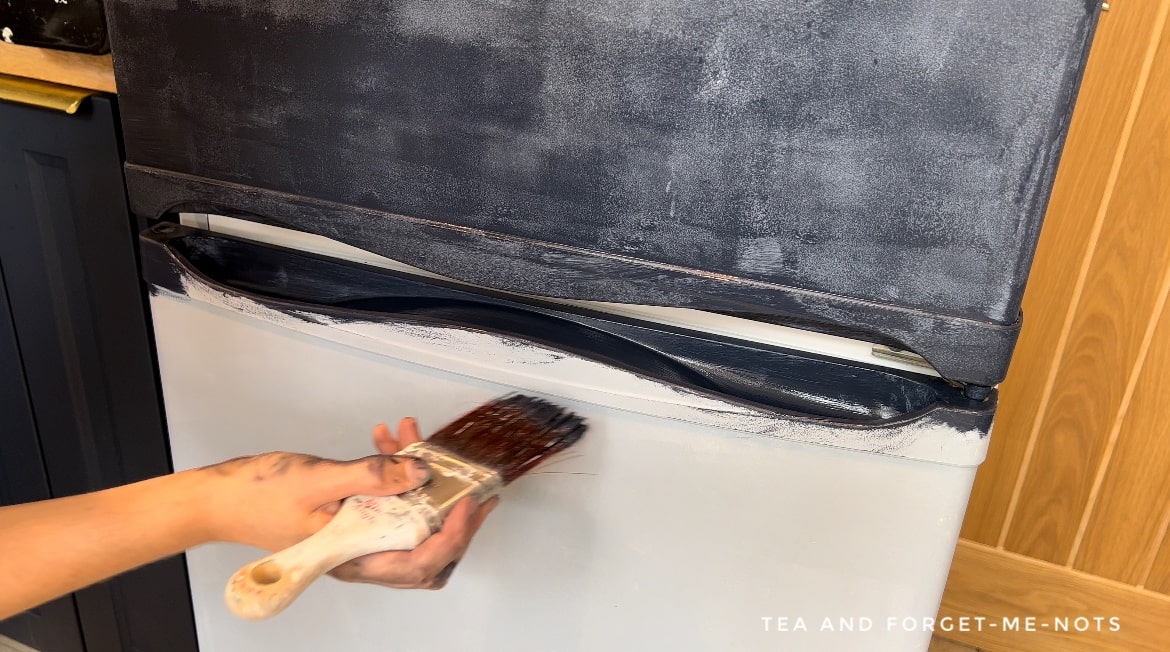
Onto the best part, the blue!
I knew that I had a similar paint in my stash to match the blue cabinets.
Here’s how I upcycled a clock to match a cream and blue kitchen. It’s a beauty!
My plan was to do the first coats with this colour. Then for the final coats mix a closer match.
I don’t love mixing paint. I always overestimate how much it needs so that I don’t run out. But that means that I waste paint and have to find a small project to finish it on.
This is one of the times that I failed and caused more work for myself!
So, the blue that I had in my supply was called Deep Sea.
And, good news, I couldn’t have found better!
It’s from the Silk range, so has the added benefits of a built-in primer and topcoat.
Based on other people’s experiences of painting fridges, I expected to need four or five coats of paint.
In fact, the entire project only took three coats. And if I had been really thorough in checking my coverage, might have only needed two.
The final coat is always my favourite when you can see just how crisp the finish is. The dry time between each coat is only an hour or two so it’s a quick process.
I could have applied masking tape to protect the rubber seal around the door from getting paint on it. But I went with the easy way. I decided to not worry about getting paint there. Instead, I removed any splashes with a damp cloth quickly before they dried.
Typically I seal the paint with a clear coat with a satin finish as it gives it a medium level of protection.
But I decided not to apply a topcoat. The paint was a lovely matte finish and was perfect against the cabinets. Also, Deep Sea has a top coat, so does have built-in protection.
The durability of the finished fridge is not based as much on the kind of paint used. But on the quality of the prep work before the painting process. If the paint didn’t adhere properly to the fridge, it doesn’t have a chance.
Be careful of doing a ‘scratch test’ though, to see if the paint has adhered properly. Until it has cured (which takes up to 4 weeks) the paint paint job is at risk of scratching anyway. But as it is a fridge, it’s not something I can avoid using for several weeks. I just had to be extra careful with the door handles.
I’m quietly confident. So far, it looks brilliant. It is so much more in keeping with the kitchen.
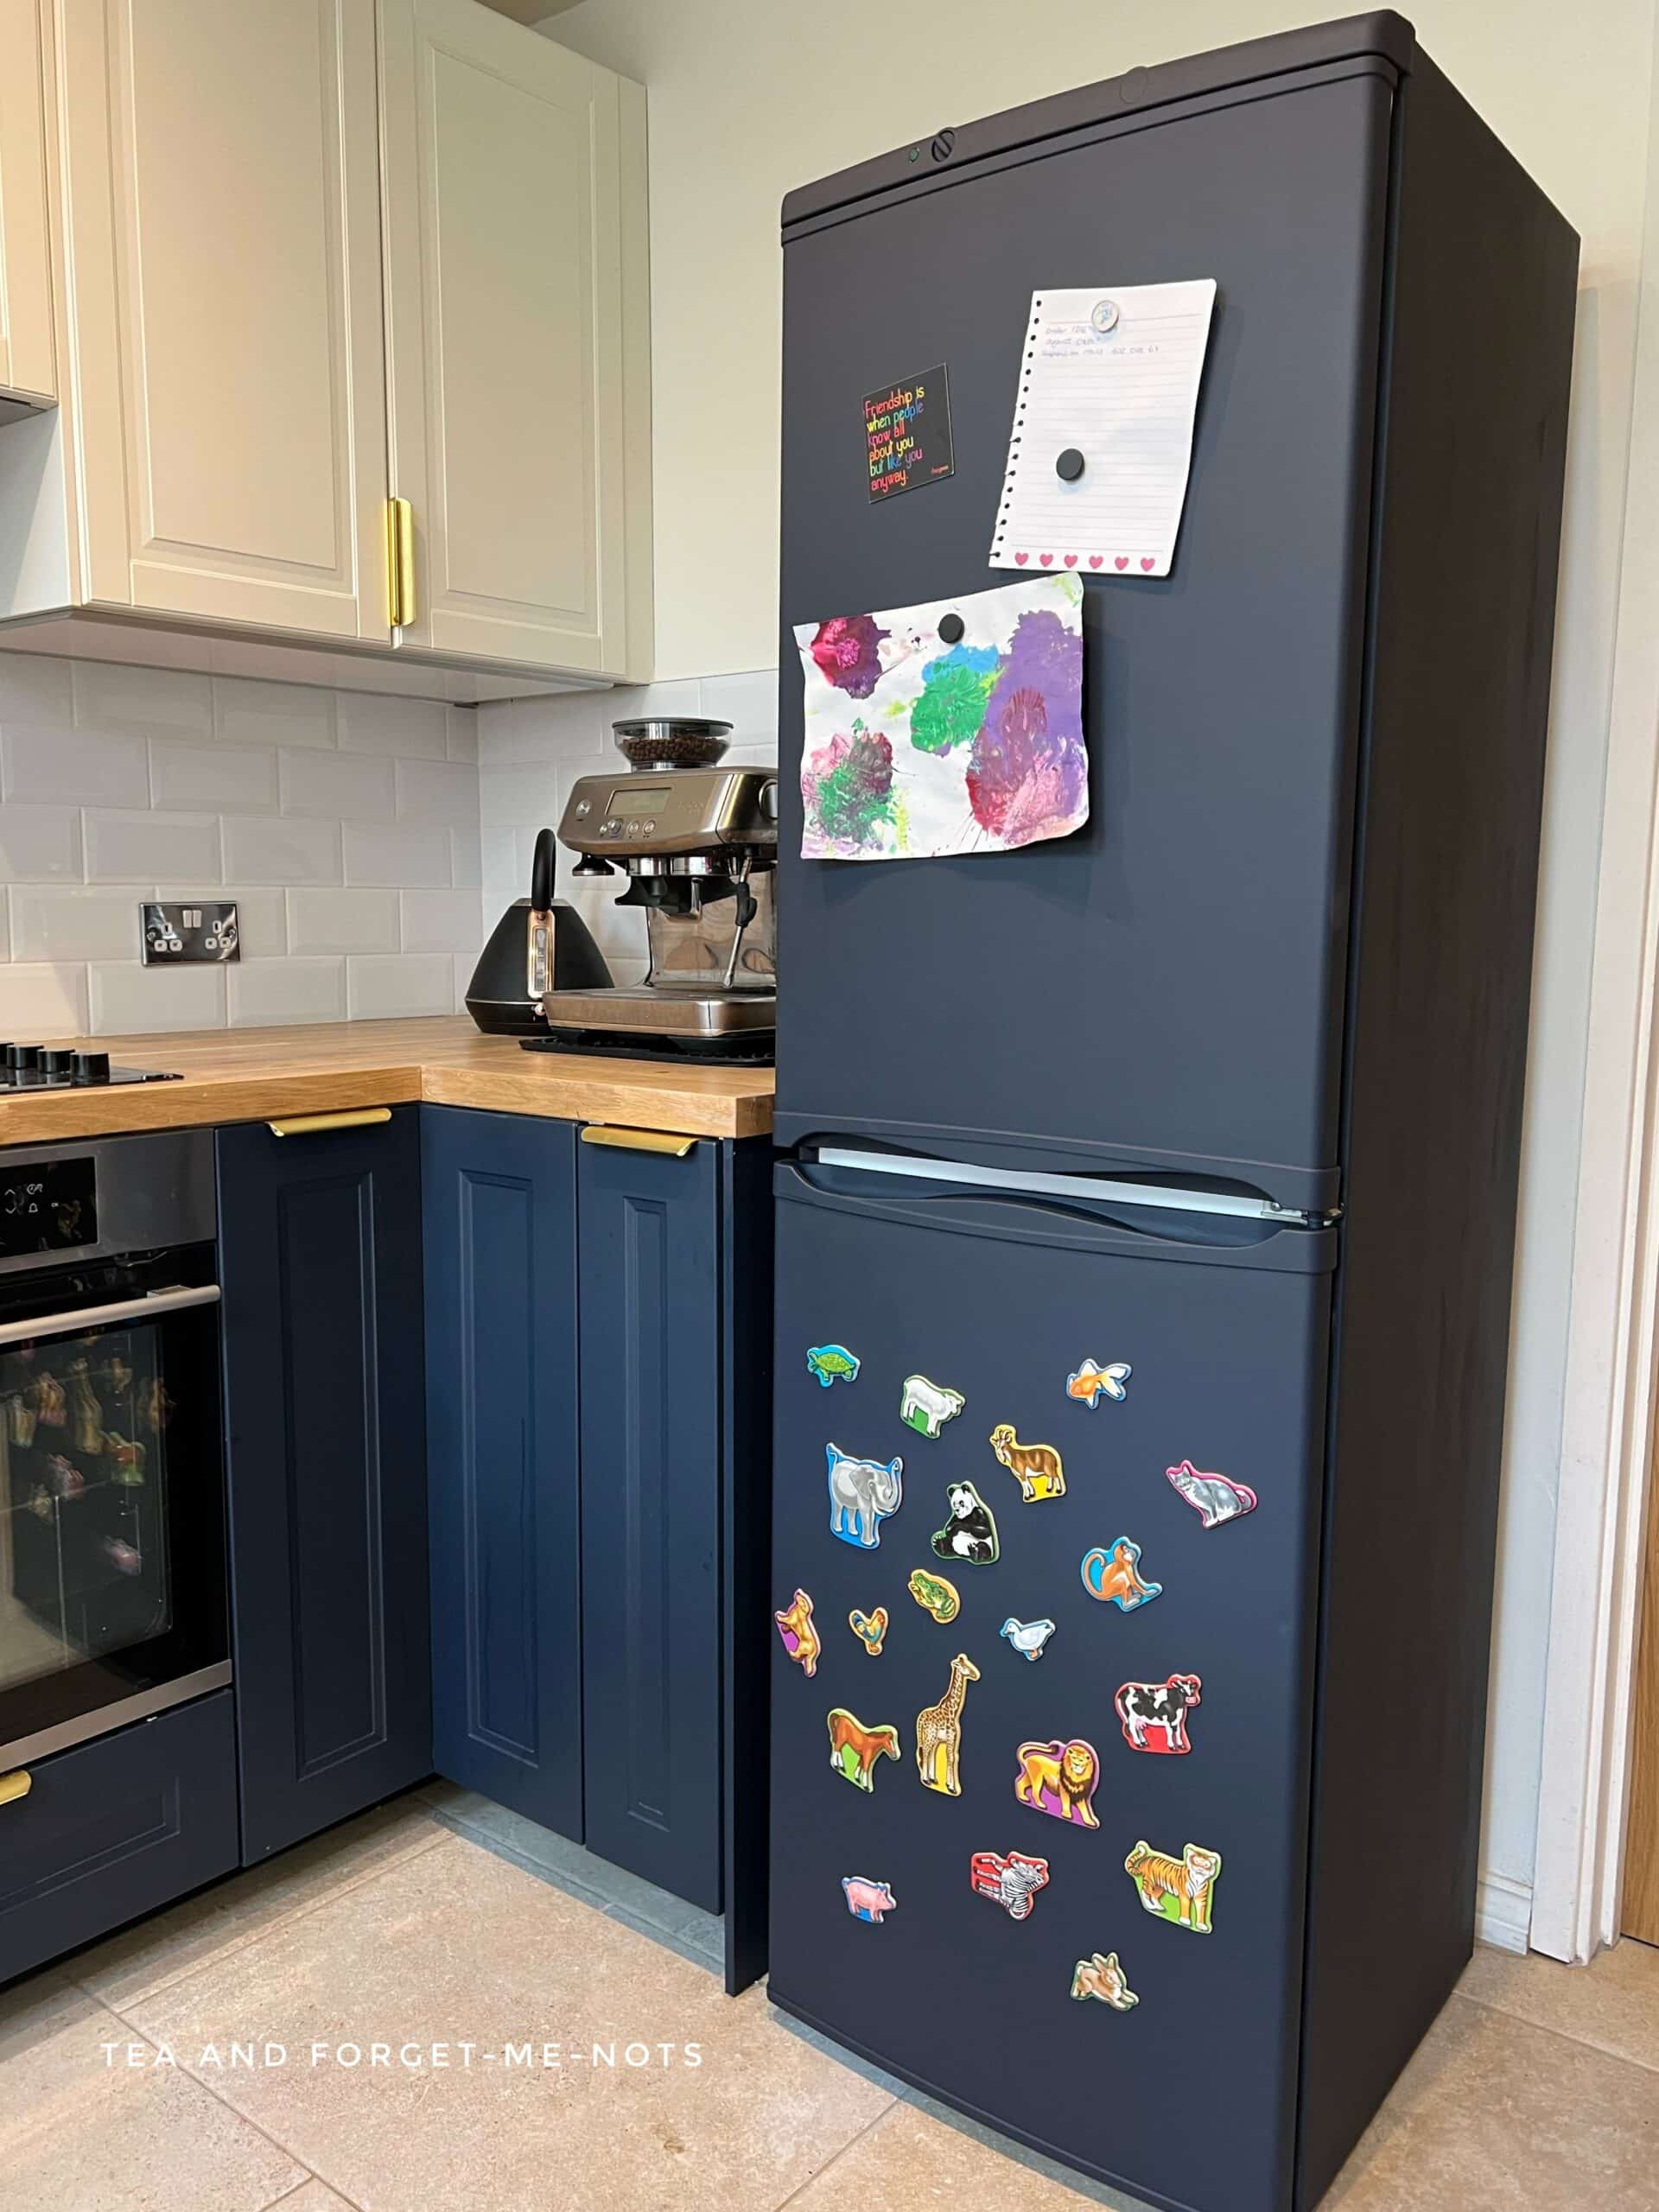
Update: here’s how it looks 6 months later!
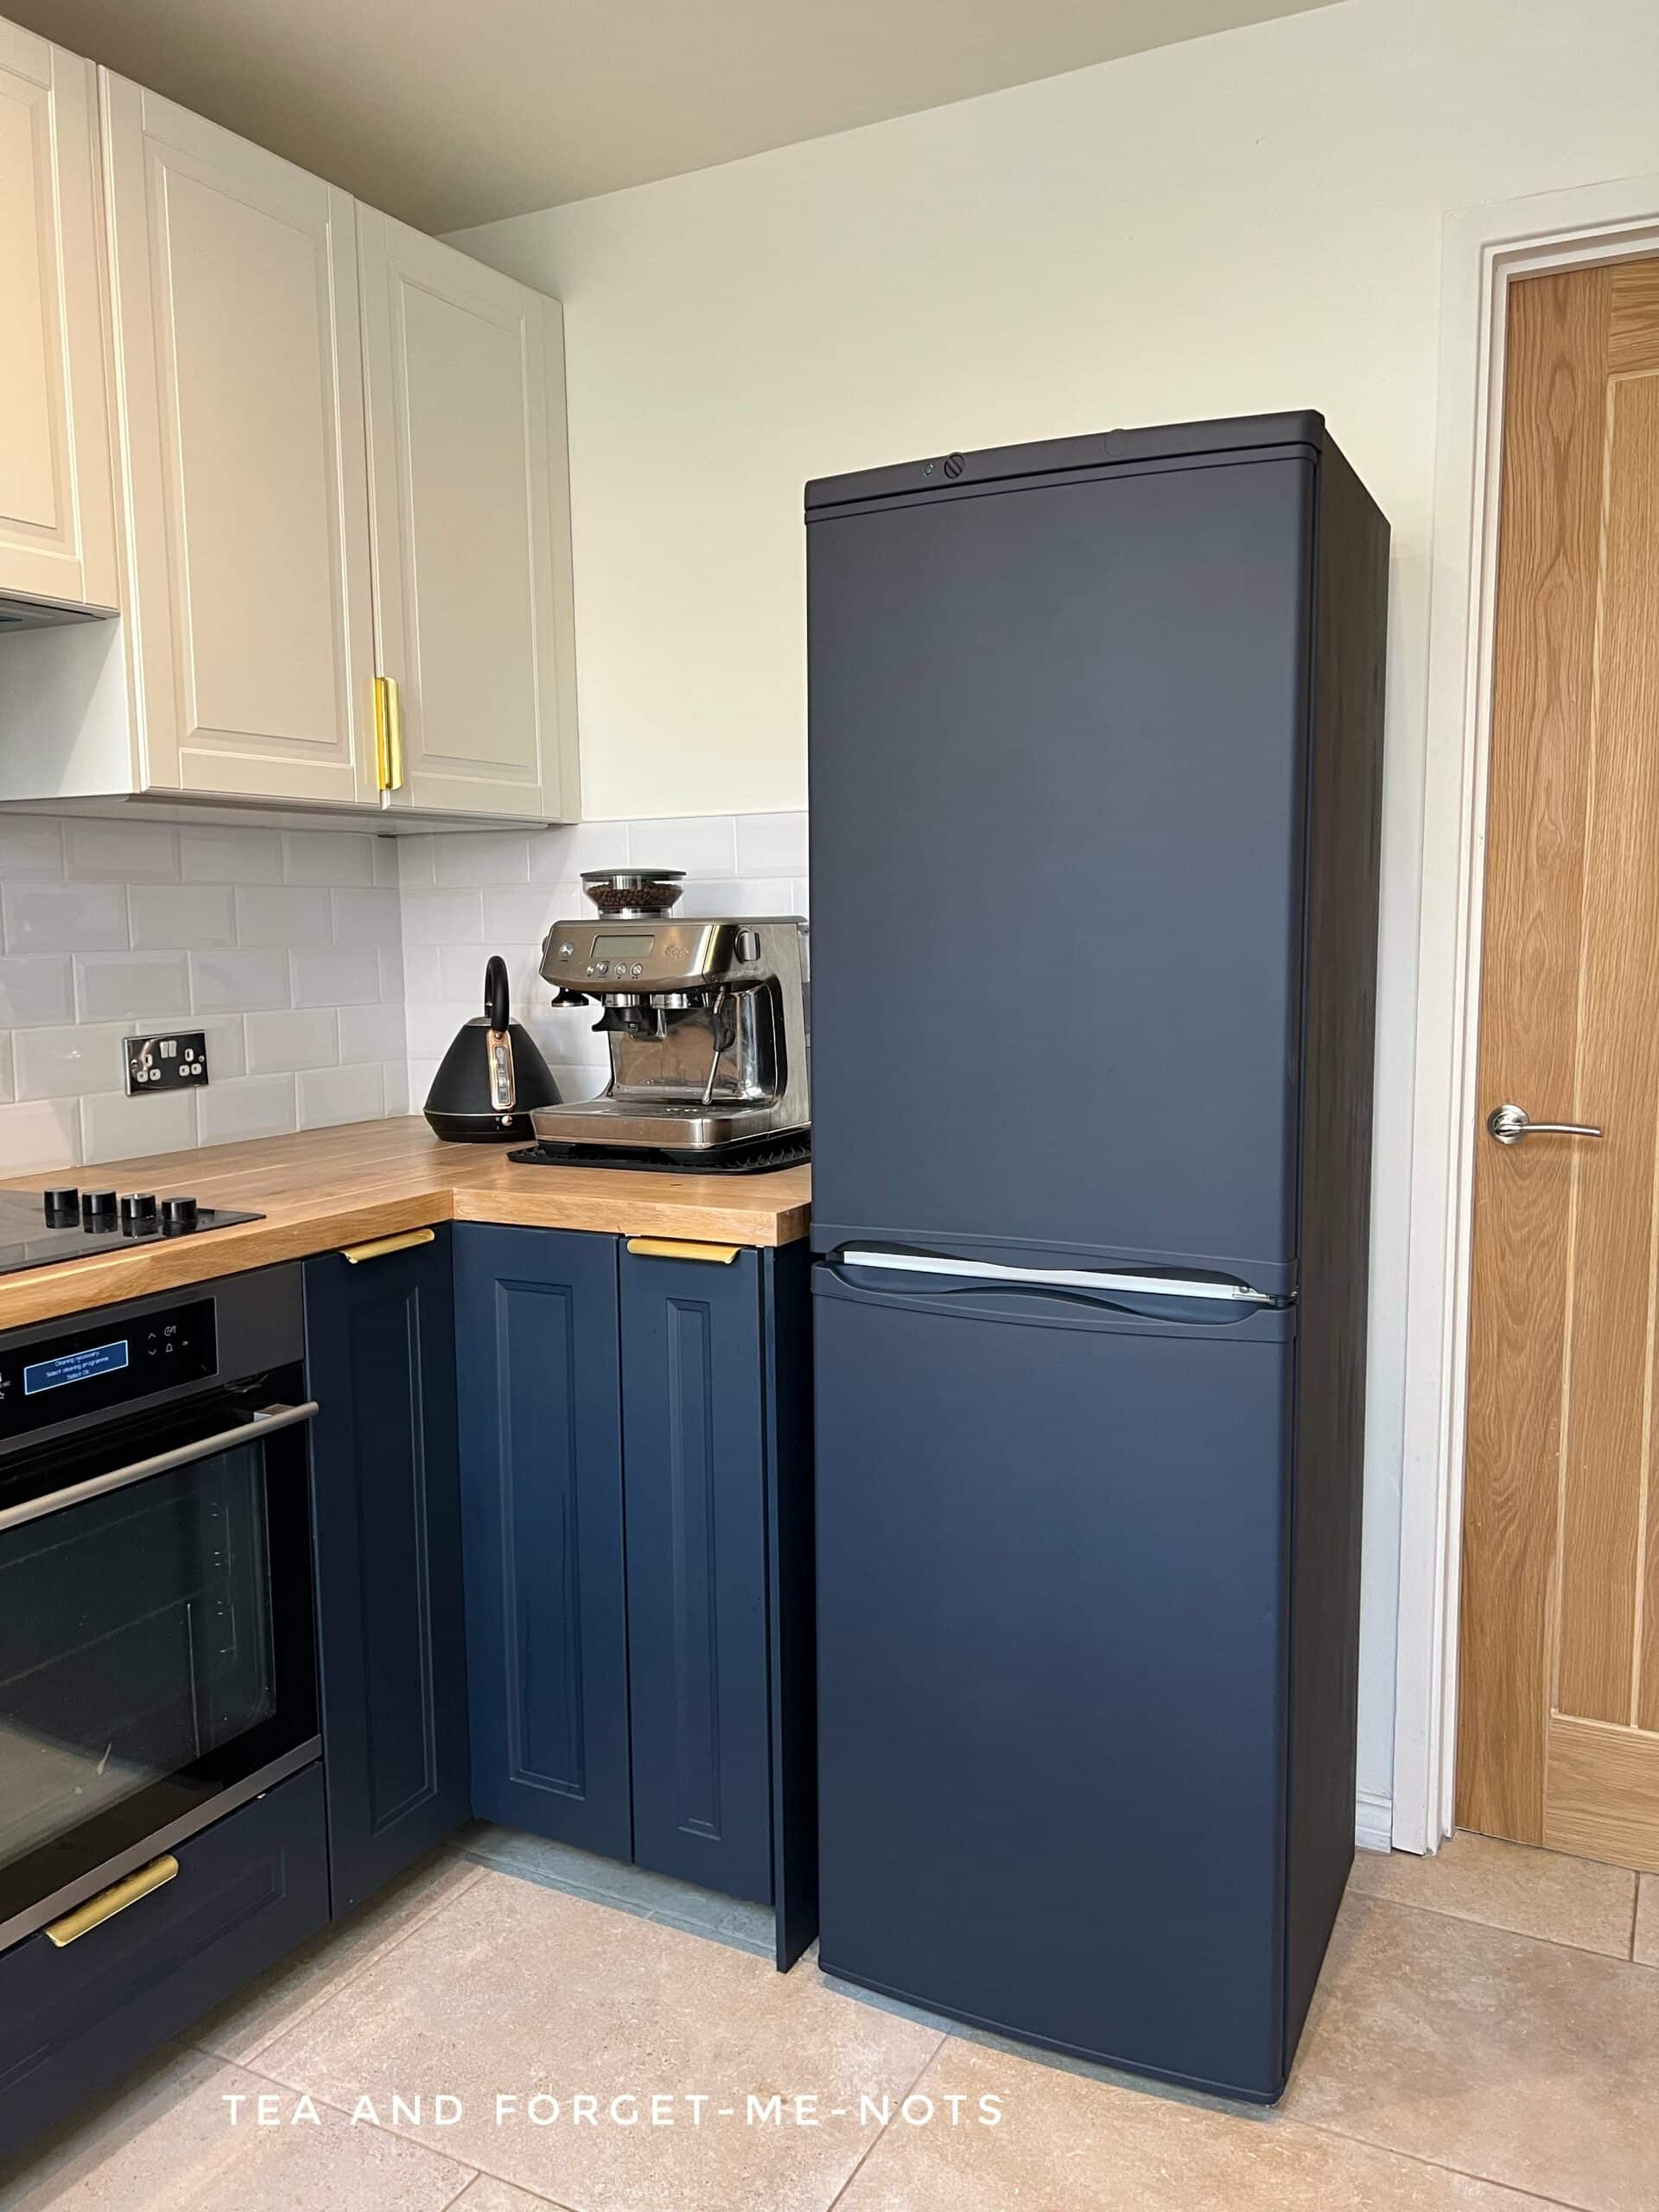
I couldn’t have asked for a better paint colour and finish to match the IKEA kitchen cabinets.
It was also a really quick project that has made a big difference.
It was simply cleaning, five coats of appropriate paint, and about 24 hours of time.
So, if you’re wondering whether you can successfully paint your fridge. Absolutely. The most important step is to properly prepare it first.
And if you buy appliances with previous owners, you don’t need to worry so much about the colour!
Now, I’m going to try and resist painting the toaster, kettle and microwave! We’ll see how that goes…
If you enjoyed this makeover, you might like to see Deep Sea used on an MDF chest. That also had gold on it. I clearly have a style.
Or watch the transformation on YouTube!
A fan of IKEA? Here’s how to create a beautiful DIY wood mirror frame with their mirror tiles.
Other ways to successfully paint a fridge…
What if you want to create a chalkboard fridge?
You can do that easily on a white fridge. Either across the entire surface or as a small section. That way you can use chalk or chalk pens to write a grocery list or to doodle.
The first coat or two should still be with a shiny surface primer such as Slick Stick. Then you can use chalkboard paint as your main paint to get the chalk board effect.
If doing a smaller section, you can use painter’s tape to make off the right shape. The key thing is to make sure you end up with smooth surfaces for the chalk to write evenly.
Top tip – Here’s how you prep a chalk board surface so it can wipe clean after use.
Will the fridge still be magnetic after painting?
The fridge is still magnetic but the strength of the magnetic pull is reduced. That’s simply because there are now several layers of paint separating them now.
Is a strong magnetic surface on the fridge important to you? You can use a magnetic primer on top of the Slick Stick to have a strongly magnetised surface.
Pin it for later – how to successfully paint a fridge

Hi there! I'm Rachel Bowyer, a passionate DIY enthusiast with a knack for transforming the old into something beautifully new. With a deep love for furniture painting, refinishing, and the art of crafting. I've been documenting my DIY projects and restoration journey since 2018. I specialise in techniques like decoupage, stencilling, and decor transfers. Join me as we explore the world of creativity and home improvement, one project at a time.
Great makeover! I guess you have to be really careful until it fully cures! Can’t wait to see how it holds up.
Yes, that’s the plan. No animal magnets until then, what will I play with?
Rachel, it looks great! I love the color of your cabinets and the fridge! Can’t wait to see how this holds up! Great job!
Thanks, Donna. So far, so good!
The whole kitchen just thanked you for painting that frig! It looks so good Aliya! I painted an ugly old mustard frig way back in the day. Loved it!
Mustard fridge? Wow, that would have been something!
Any chance you know the color code for the blue you used so I can go to Lowes to get the right color? I don’t have my cabinets yet so can’t color match
I don’t know a code but this is the paint I used https://dixiebellepaint.com/deep-sea-silk-all-in-one-mineral-paint/
How has it held up? Looking to do this in our RV, but don’t want it to chip/scratch.
It has held up well. I’ve retouched the handle once where my nails have scratched it (by constant use). I would recommend it.