Make money upcycling decor from charity shop finds
Want to make money upcycling decor from charity and thrift shop finds? From candlesticks to picture frames, here’s how to make them more valuable.
Let’s start with the obvious thing. You aren’t becoming a millionaire by upcycling candlesticks any time soon. But they can be fun little projects in their own right, either to sell or to give your own decor a new look.
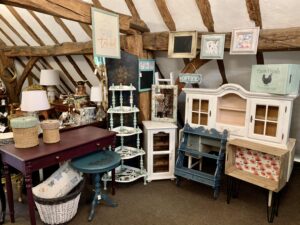
Decor items or ‘smalls’ are important in retail spaces like at Homemade at The Barn because it adds more interest to a booth.
It helps make the space feel cosier as well as having more affordable items to suit more customers.
If you’d like to see my booth space at The Barn, here’s the progress over 2021/22.
This post may include affiliate links so you can easily find the products I love and use myself. If you purchase these products, I may earn a small commission at no extra cost to you.
Make money upcycling decor from charity shop finds
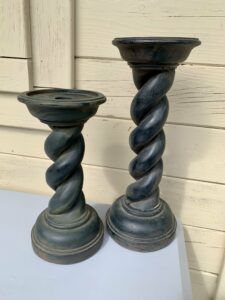
Candlesticks
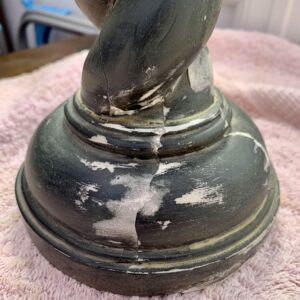
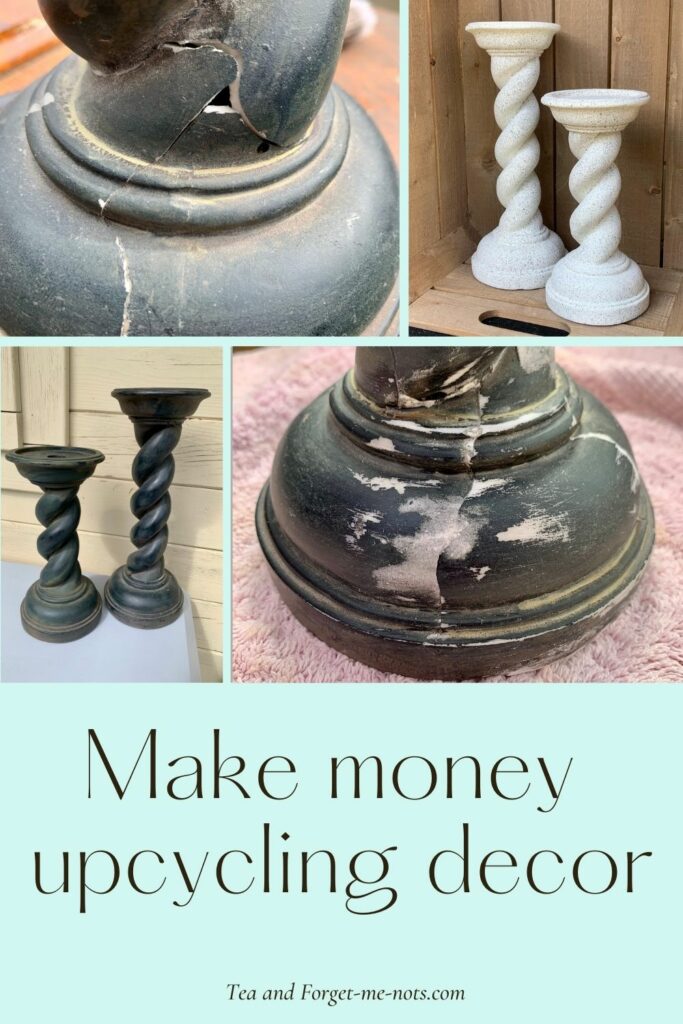
These candlesticks, probably once quite grand looking, were £1 each in a charity shop. I liked their shape although the taller one had a few cracks in it.
I filled the cracks and a couple of holes with Polyfilla. It didn’t need to be perfect because I was going to cover it up but it still needed to look solid.
I stopped taking progress photos after several coats of Autentico paint in Ivory. This photo was after two coats. There were a lot of coats!
Here’s a beautiful white cabinet makeover that also required LOTS of coats.
The paint would have covered better if I’d put a primer underneath but I didn’t think initially that it was worth the extra step. But it did take a lot of coats to get decent coverage over the dark base.
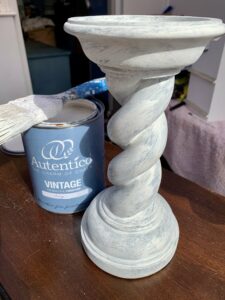
Once it was 90% well covered, I added a couple of layers of Ivory paint with baking powder. This trend has been going for a while in upcycling circles but I hadn’t had the chance to use it until now.
You can see that the baking powder has added texture to it but the overall look was still a bit bland.
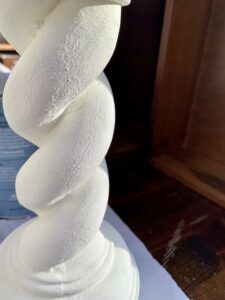
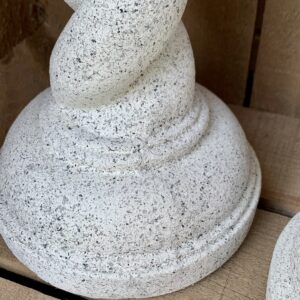
That’s when I remembered (or actually saw in my shed) that I had some stone-effect spray paint. As this was going to give the same look that I’d been manually attempting but also add some different colours, it seemed like the easy and sensible option.
I think that the spray paint has done a great job on these candlesticks. They’ve got much more character now.

If I owned candles, I could have demonstrated how they look with both the tall and round candles. But it’s best if there aren’t too many candles around with two cats and a dog to contend with.
You can see how involved they get with my projects in this IKEA mirror DIY.

Here’s the side with the biggest crack. It’s still visible but I think that adds to the charm. Not everyone would like the imperfections but as with all upcycling projects, you know there’s a story behind it.
Chalkboard
I can’t imagine that this picture was in this frame originally. They seemed like a very odd pair when I saw them in a charity shop for £2.50.
My original plan was to paint the frame white but it is quite pretty. For now, I’ve decided to leave it as is but might paint it if it doesn’t sell.
(Note from the future: I did paint it and it sold, see the final piece at the end).
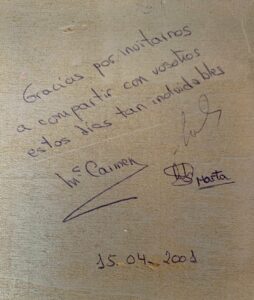
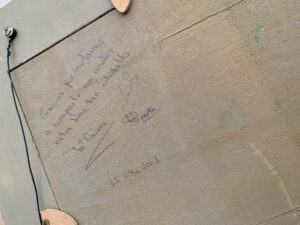
When taking the picture out, I discovered a sweet little note in the frame. With some help from Google translate, I found it said: “thank you for inviting us to share these unforgettable days with you”. It’s also dated on my birthday, so it was an extra special find.
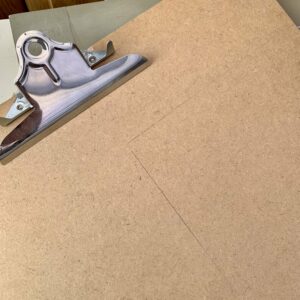
To make the chalkboard, I sacrificed an unused clipboard that was lying around the house.
This is the chalkboard paint I used. It’s a cool idea being able to paint a chalkboard onto any surface such as a door or bookshelf which would be great for children to play with.
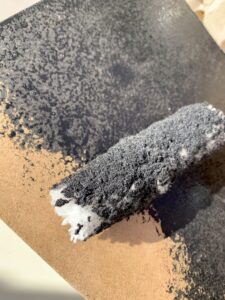
I rolled two layers of paint onto the clipboard. It’s better to use a roller rather than a brush with this paint because any brush marks or texture left will make it harder to write smoothly or clean the board well.
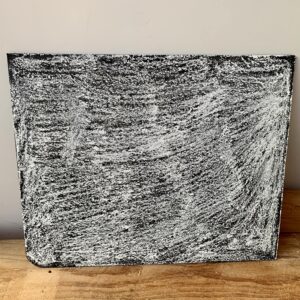
Once the paint has dried, it’s time to prep the board for chalk. To ‘season’ the board, cover it in chalk and leave it for 24 hours. You can rub it clean with vinegar.
This is where I’ve learned from experience. If you write on the board without doing this prep step, a hint of whatever you write will always be visible even after you’ve erased it.
Want to know 23 great DIY tools? Get the list!
I added the secret message back in so the next owner will be able to enjoy it too.
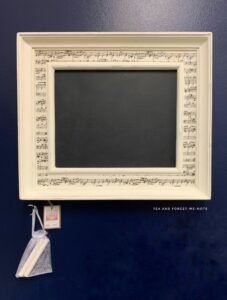
And the final reveal… is something I forgot to take a photo of! At least it’s not much of a visual change. It’s essentially the original frame with a black centre now.
Here’s a photo of it hanging on a beautiful beam at my booth at Homemade at The Barn.
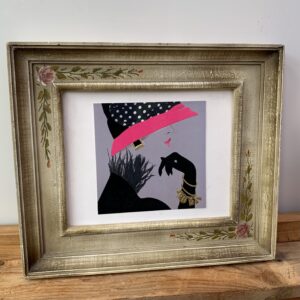
UPDATE: as the chalkboard didn’t sell for a few months, I gave the frame a makeover. My initial thought was to paint it and that was the right thing to do.
I painted the frame with Autentico’s Ivory and added music note decoupage paper. I also added a handy hook to hold the chalk in a little bag.
And it sold!
If you like decoupage, check out my how-to guide.
Which project did you like best? How would you make money upcycling decor? Let me know in the comments below.
If you liked this post, you might also enjoy this bestselling reupholstery project…
Pin it for later – make money upcycling decor

Hi there! I'm Rachel Bowyer, a passionate DIY enthusiast with a knack for transforming the old into something beautifully new. With a deep love for furniture painting, refinishing, and the art of crafting. I've been documenting my DIY projects and restoration journey since 2018. I specialise in techniques like decoupage, stencilling, and decor transfers. Join me as we explore the world of creativity and home improvement, one project at a time.