The best way to paint pine bookshelves
It can be so easy to give a new look to a bookshelf. This makeover explains the best way to paint pine bookshelves.
Bookshelves are great sellers for me. They’re also a good starting piece for a new upcycler as the shape is quite basic.
My recent decoupaged bookshelf sold within a week and another customer asked me to recreate it.
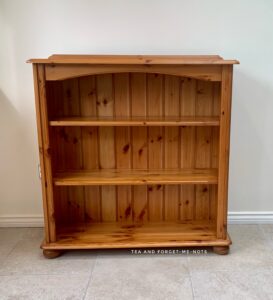
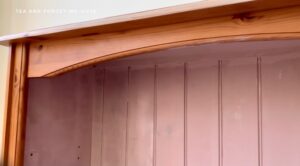
So that led me to this bookshelf on Facebook Marketplace for £15. It was in good condition other than a couple of dents on the sides and top.
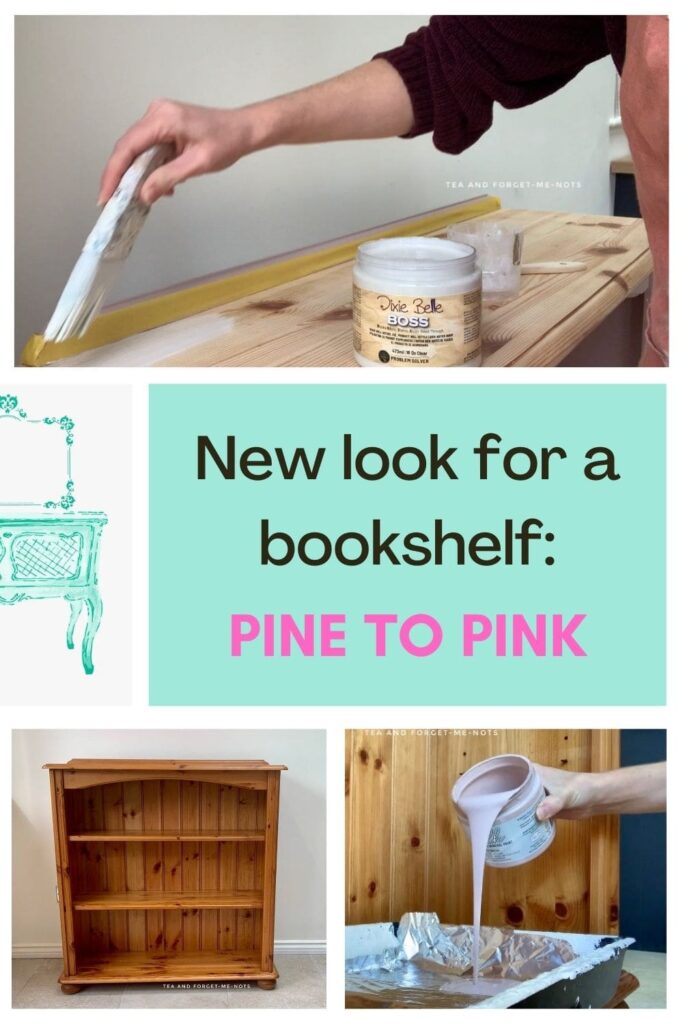
Thanks to Dixie Belle Paint for sponsoring this project.
This post includes gifted products and affiliate links so you can easily find the products I use myself and recommend to friends. If you purchase these products, I may earn a small commission at no extra cost to you.
The best way to paint pine bookshelves
The prep
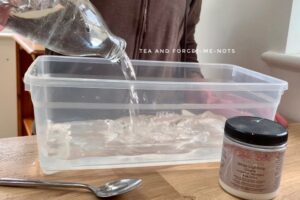
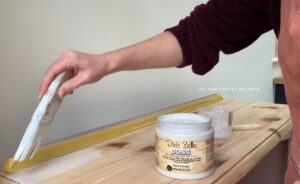
I began by cleaning the shelves with White Lightning which needs diluting with warm water.
The instructions say to dilute it in one gallon of water. In case you also need to work out the conversion, that’s about 4 litres or 7 pints. I used my 1-pint milk bottle to measure it.
Due to the ridges along the back, it was particularly important to get into all the grooves, otherwise, any paint won’t stick. Not once it’s dry, anyway.
Upcycle Pine Bookshelves Video
This is why you need to clean!
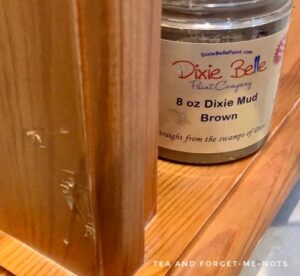
I also filled a couple of dings with Dixie Mud in brown. I filled the hole above the surface level and then sanded it back when it was dry.
Then I scuff-sanded the whole piece with 180 grit sandpaper and removed the dust with a tack cloth.
Finally on to the fun bits!
Starting with paint
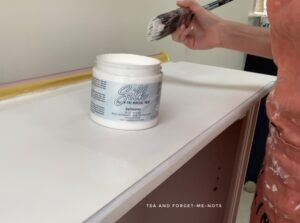
I chose the beautiful soft pink, Conch, for this bookshelf. I wanted to create something different to my navy blue and green bookshelves.
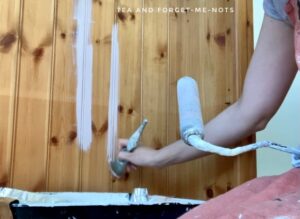
As usual, I wrapped the paint tray with foil for easy cleanup.

To get a smooth application, I brushed the paint into the ridges and then rolled the excess out, using my favourite roller. It’s important to do this as you go along otherwise if the excess dries, you’d have to sand it smooth.
After one coat of paint, you can still some of the knots in the pine. Priming first would avoid the risk of seeing them as you never know how many coats of new paint it will take to get solid coverage.
Some paints need more coats than others often because of the base colour. The base is the bulk of the paint before the tint of colour is added.
Some bases are clear and others are white. One reason for having a clear base is to not dilute the vibrancy of the colour but that means they’ll often need more coats to get good coverage.
As I mentioned in my blue mirror project, the coverage of the Silk line is excellent. I painted the frame of the mirror with just the paint that was in the lid after opening!
I used two coats of Conch on the bookshelf and that was without a primer.
Want to know 23 great DIY tools? Get the list!
The new-look top and shelves
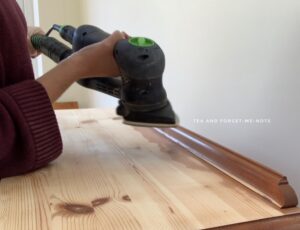
My original plan was to get a whitewashed look on the shelves so used my sander to take it back to the raw wood.
I used an orbital sander for the majority of the sanding and the triangular attachment to get to the edges.
After several coats of both liming wax and white wax, I didn’t like the result and admitted defeat. Time to cut my losses.
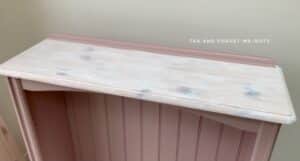
I used white spirits (mineral spirits) and a microfibre cloth to remove the wax which fortunately came away easily.
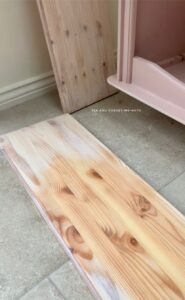
As I’d gone back to raw wood, it was important to use a primer to stop too much paint being absorbed into the wood and needing a lot of coats of paint.
I used Dixie Belle’s BOSS primer in clear and mixed it with some white paint to help cover the knots.
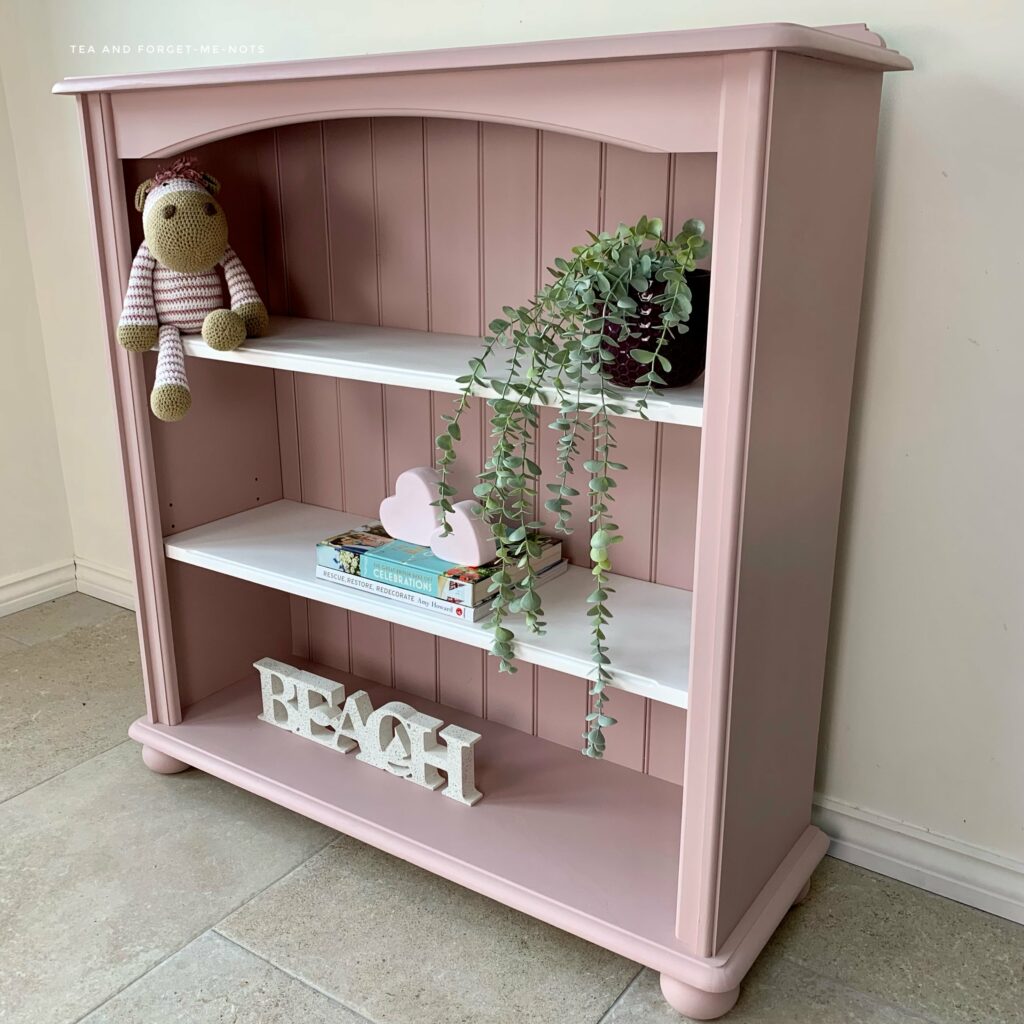
I decided to paint the top pink to match the rest of the unit. I then painted the shelves with two coats of Salt Water, which is white.
I was glad that I primed it first because it meant that I didn’t need as many coats of white to get it to cover evenly.
White typically takes a lot of coats to get it to look even, as was proven with my 5 or so coats in this white cabinet makeover.
To seal the piece I used a satin clear coat. I often use matte for a flat look so I like the difference of the slight shimmer as it catches the light.
New look for a bookshelf
While the top was a bit of a labour of love and didn’t take it easy on me, I think the final pink and white combination is really sweet.
I do have to wonder whether the colours were secretly inspired by the zebra cuddly toy. They’re certainly a good match for each other.
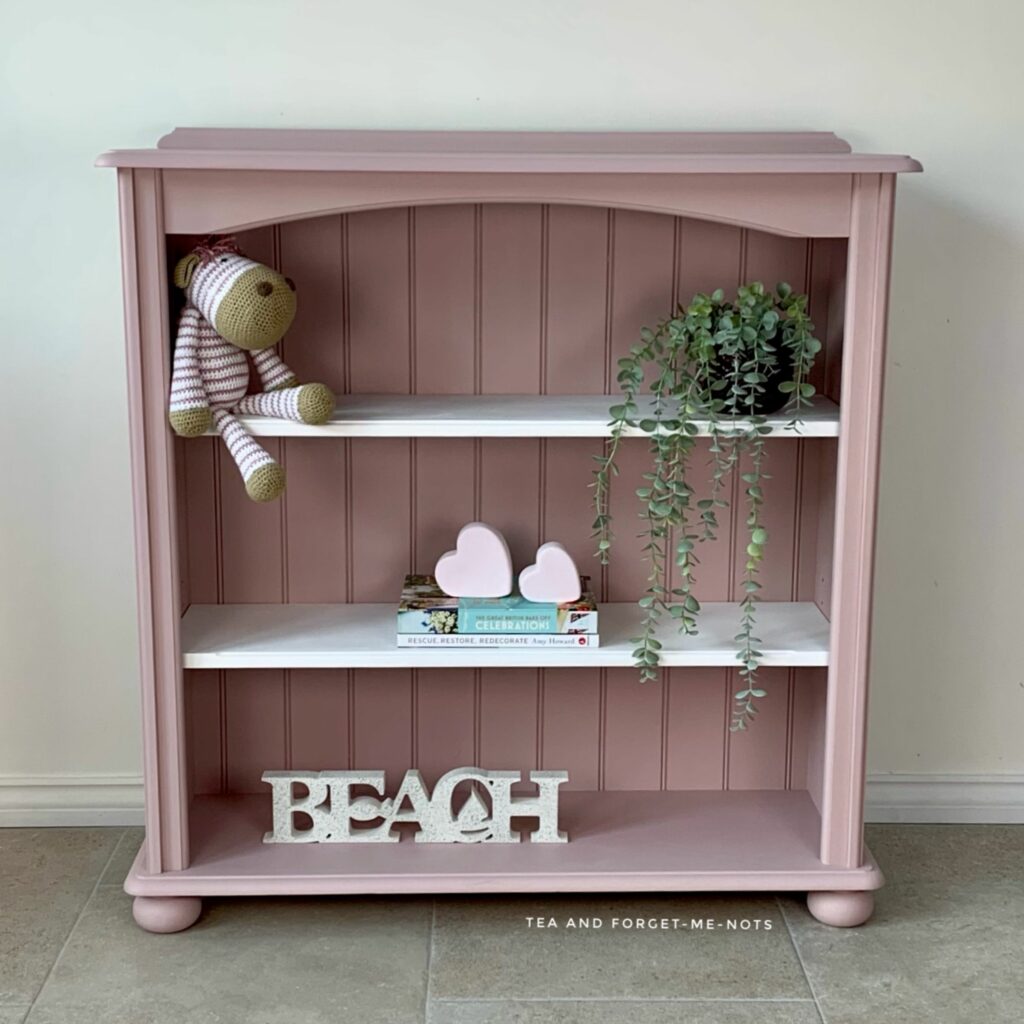
The white shelves particularly break up the solid colour and make it more interesting. It’s almost a candy cane!
It’s pretty easy to get a new look for a bookshelf. This is my first pink one but I don’t think it will be the last.
I had so many comments from customers on my last pink makeover that I can’t wait to hear the feedback on this piece when I take it to Homemade at The Barn.
Is this the best way to paint pine bookshelves or do you know another way?
If you have a pine chest of drawers on your to-do list, take a look at this stunning grey makeover.
Pin it for later – the best way to paint pine bookshelves

Hi there! I'm Rachel Bowyer, a passionate DIY enthusiast with a knack for transforming the old into something beautifully new. With a deep love for furniture painting, refinishing, and the art of crafting. I've been documenting my DIY projects and restoration journey since 2018. I specialise in techniques like decoupage, stencilling, and decor transfers. Join me as we explore the world of creativity and home improvement, one project at a time.
I love this so much!! Looks amazing!! Great job!!
Thank you, Christin
This is a gorgeous color! Well done!
Thanks Dara
This turned out so pretty. Love the pink!
Thanks Libbie, me too!
This looks so pretty! I love the shade of pink. You did a terrific job!
It seems to be a popular colour choice, glad it worked as well I hoped. Thanks for commenting, Kim.
This turned out beautifully! Love the pink!
Thank you!
What a pretty color! The size is so versatile too. Thanks for sharing your process.
Thank you, Marie
You did an amazing job on this makeover. I love the pink color that you used.
Thank you. Conch is lovely, sweet without being sickly.
This is so cute! The pink is perfect for any little girl’s room!
Thank you, I think so too.
Beautiful! I love the contrast with the white shelves. SO pretty!
Thanks, I was glad I went with the contrast in the end after all the decision changes!
This looks beautiful! Love the shade of pink.
Pinned
So adorable! Great job!
Love the pink and white!