How To Paint Wood To Look Like Metal On Furniture
Want to know how to paint wood to look like metal? Here’s how with a simple tool and paint with a metallic finish.
This piece goes through quite the transformation. From an outdated, brown media unit to an industrial cubby.
There is a whole process of changing the style of the TV unit. From structural changes, the prep and then how to create the metal effect on this wood project.
Want to know just how to get the metal look? Skip to here!
Thanks to Dixie Belle Paint for sponsoring this post.
Supplies for how to paint wood to look like metal:
- Marxman Hole Marker
- Hole Locator Tool
- Graining Tool
- Steel Magnolia Metallic Paint
- Silver Bullet Metallic Paint
- Dixie Mud Black
- Gravel Road
- Stormy Seas
- Slick Stick
- BOSS Primer
- Satin Clear Coat
This post includes gifted products and affiliate links so you can easily find the products I use myself and recommend to friends. If you purchase these products, I may earn a small commission at no extra cost to you.
Upcycling Old Furniture Pieces
This piece was free from Freecycle.
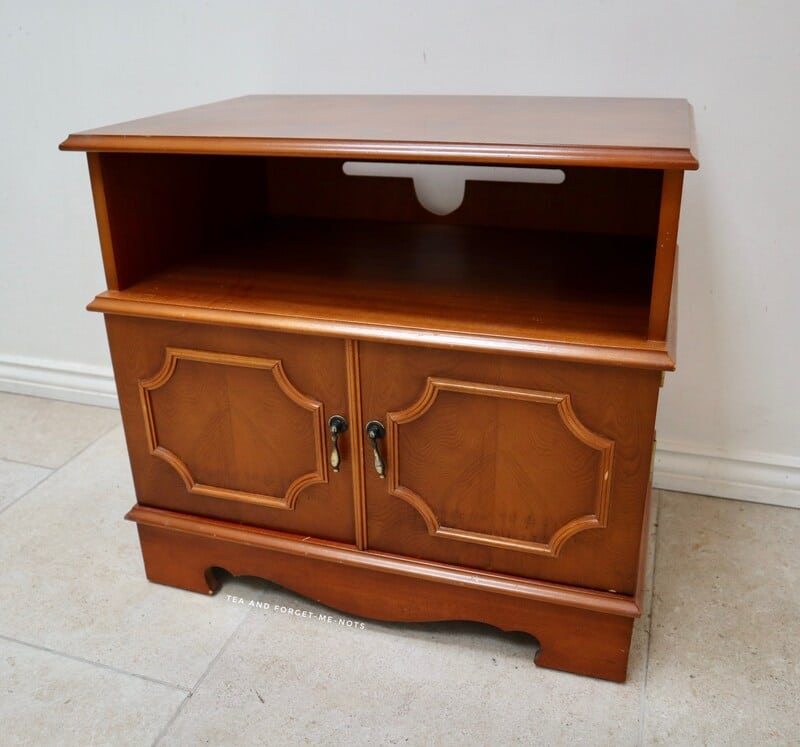
It is a classic media unit with swing out doors. Which is probably the most interesting thing about it.
Some pieces are free because they’re in poor condition. Or because they’re low quality. Or they’re old fashioned and no-one will pay for them.
This TV cabinet was at least partially particleboard and veneer. But most importantly, it was in good condition.
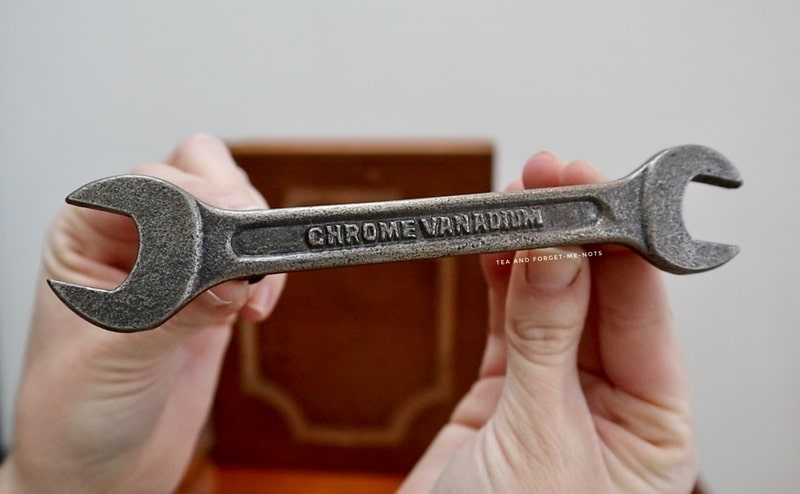
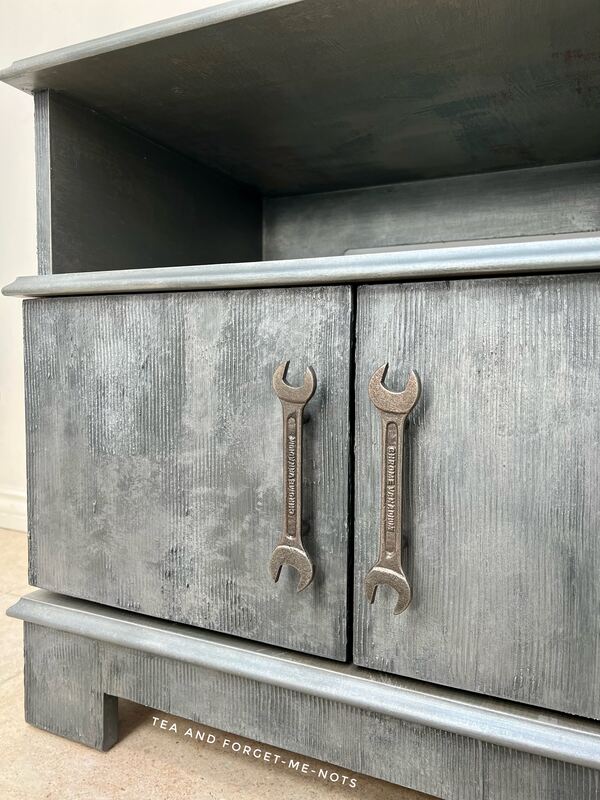
The muse I had for this piece was this new hardware. In a spanner, or wrench, design. I bought a set of two in Hobby Lobby.
How to Install New Hardware on Furniture
It’s best to drill new hardware holes at the start of a DIY project. Because you don’t want to get scratches or chips on new paint. Or potentially find the new hole is in the wrong place. Then you would need to fix the new finish and the hole.
I want to share two tools I recommend for fitting new hardware. These are both a good idea to make the job simpler.
Firstly, this hardware hole locator tool. I’ve created both a post and video outlining how to use this tool in the past.
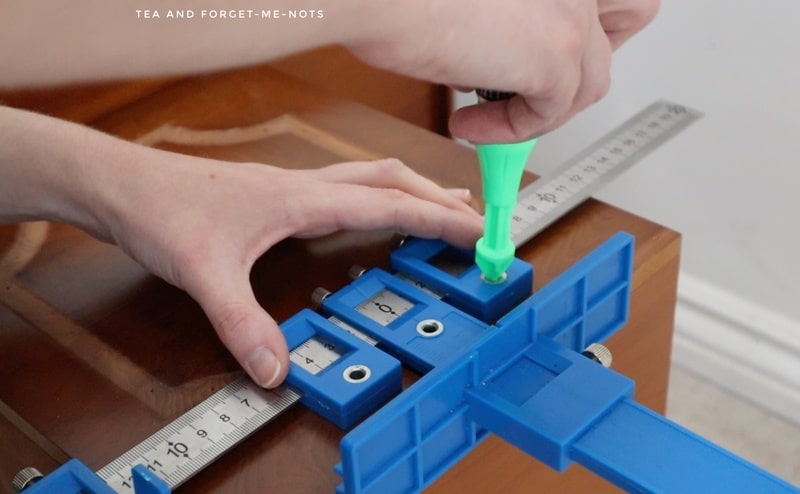
Essentially you measure the two holes on the hardware. Then adjust the guides against the furniture so that it’s perfectly centred and straight.
You then mark where the holes you need to drill. You can drill straight through the guide if your drill bit is thin enough.
But I use a great tool called a Marxman. This tool shoots a dot of chalk through the hole so you know where to drill. And as it’s chalk it’s easily wiped off, if need be.
I also used it for accurately placing the holes when installing this DIY pallet shelf.
How to Paint Wood Like Metal Video
Make Furniture Look More Modern
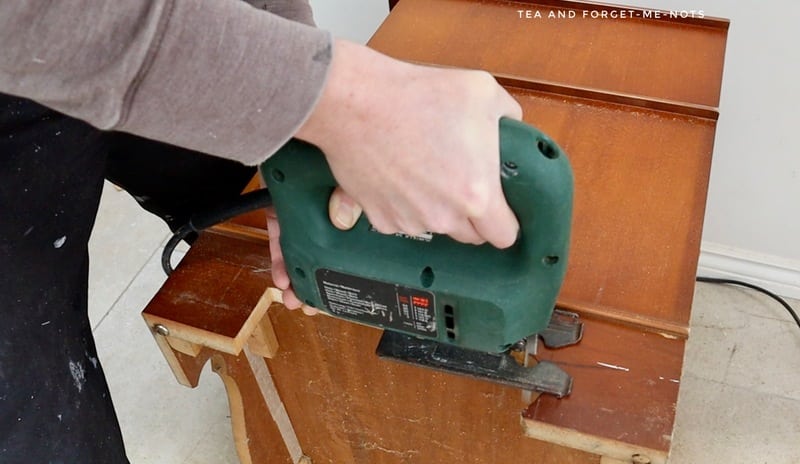
After the new hardware holes, it was time to give the TV cabinet a new silhouette.
The wood mouldings on the front of the door were a bit outdated. So I removed them. They were secured with lots of small nails. Which also meant a lot of little holes cover with wood filler.
I also removed the decorative edge on one of the doors. Unfortunately, it also chipped off the veneer with it. Which meant that I needed two layers of wood filler to even out of the surface.
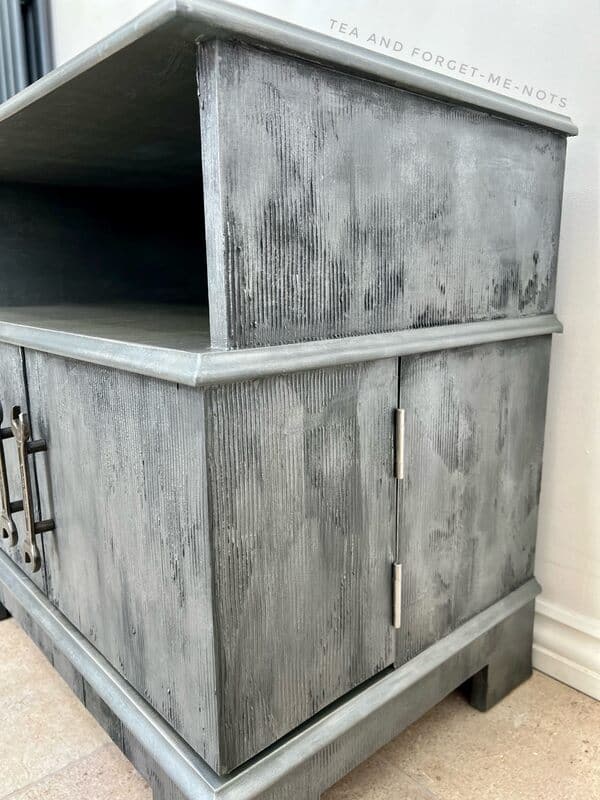
In keeping with giving this an industrial look, I changed the shape of the base. It had a curvy design but I wanted the flat surfaces to look more solid and boxlike.
I drew straight lines around the base and cut it out with a jigsaw. Then sanded the edges to get a smooth surface.
With the structural changes complete, it was the first time to prep.
I cleaned it thoroughly with White Lightning, which is a TSP Cleaner. Fortunately the TV cabinet was pretty clean already. I then removed the White Lightning by rinsing with some fresh water and a soft cloth.
Do You Have to Sand Before Painting?
If a piece is veneer, rather than solid wood, Slick Stick is a good choice. Which is used for shiny or laminate surfaces rather than sanding.
You can sand veneer but as it’s thin wood, there’s always a risk of making a hole which will need to be fixed. Slick Stick is also helpful when there are hard to reach places where sanding would be difficult. Such as the compartment at the top of this unit.
I did two light coats of Slick Stick and let it dry for 24 hours before the next step.
What To Do When Doors Rub
Before the second coat of Slick Stick, I noticed a small indentation under a wooden door. Where it had been rubbing the surface.
Which was a problem. Because any additional layers of paint were going to get scratched in the same place.
So, I had a few options. I tried the easy one which was adjusting the hinges, but it didn’t make enough difference.
I could either remove the doors so that it was just an open cabinet. Although that would make the unit a bit boring. And also look top heavy.
Or I could sand the bottom of the doors to give it more clearance. I went with that choice. Because if it didn’t work well then I could still remove the doors if need be.
It was a bit of a process of removing the base of the doors as they were nailed in. But I eventually got them detached.
I marked out how much of the door I was going to take off on each side. Then clamped the doors in place. And sanded with 100 grit sandpaper.
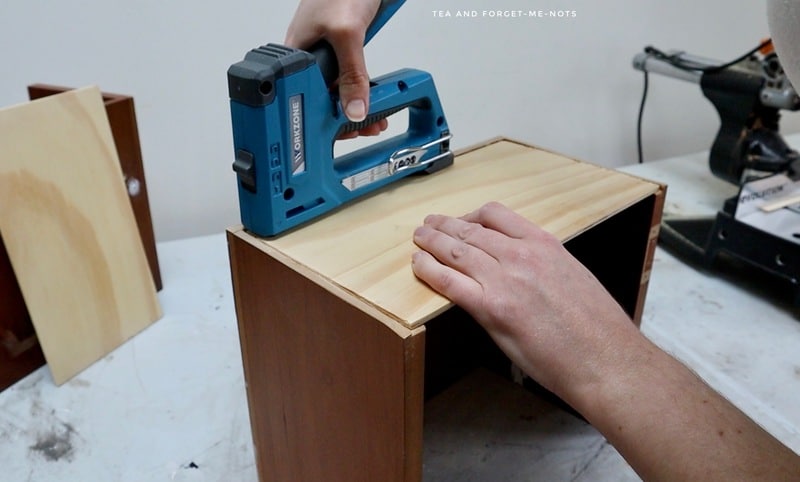
I firstly did a test run to check that the doors fit smoothly. Then I needed to add new bottoms to them.
I had some spare wood, which was thinner than the original base. I cut them with a mitre saw and stapled the new bases into place.
A first coat of paint is often a good time to spot flaws than you didn’t see originally. The Slick Stick had shown a few more dings, so I did another round of wood filler.
Priming Veneer Before Paint
With the different surfaces, some paint, some wood filler etc, the right paint primer was essential. Different primers have different strengths. Some for hiding odours and others for blocking bleed-through from wood.
I used BOSS primer to even out the surface between the Slick Stick and the places with additional wood filler. This gives it a neutral base for paint to apply evenly to.
As this cabinet is getting a faux metal look, I used a grey primer. A great way to give it a head start on the metal coloured look.
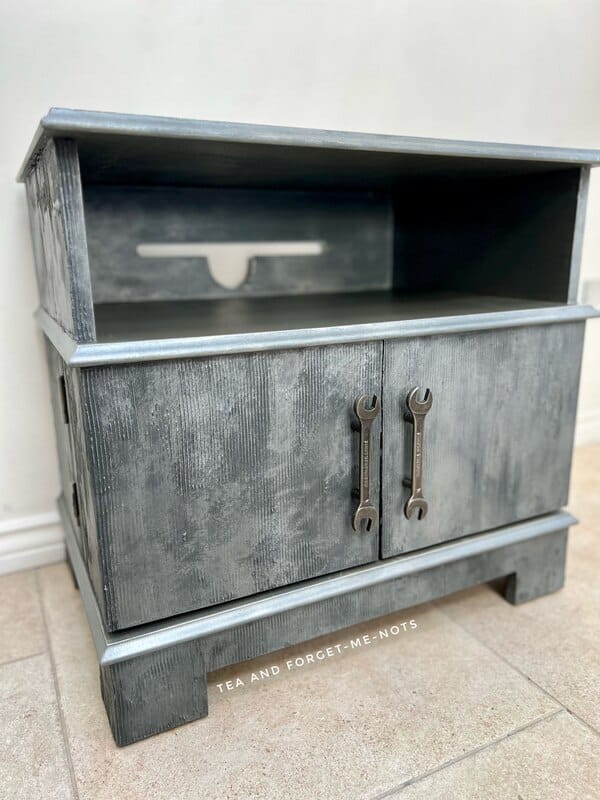
The Best Way to Paint Wood to Look Like Metal
My goal was to create a layered look with several different metallic colours.
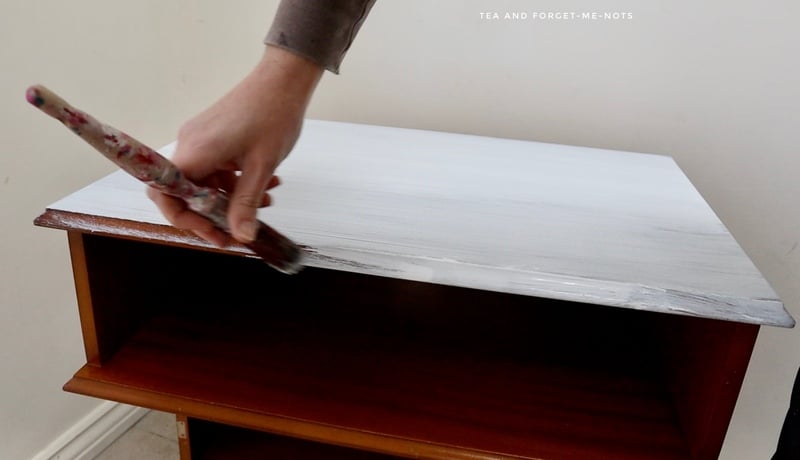
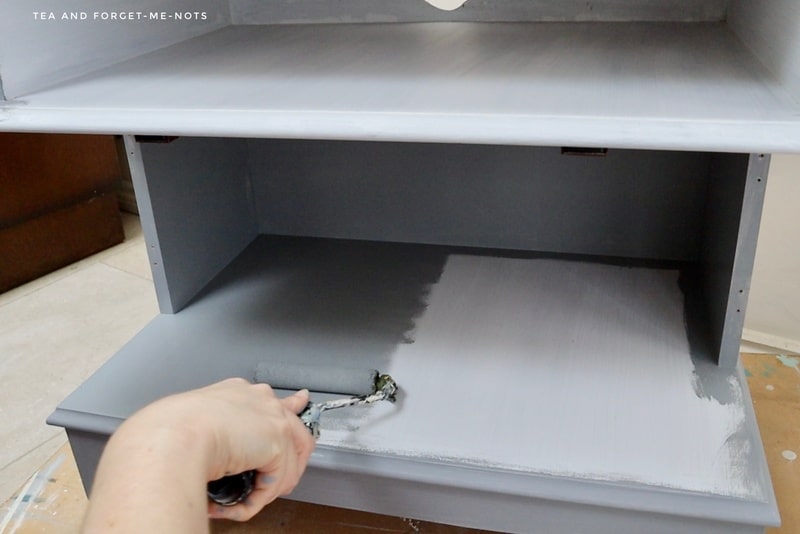
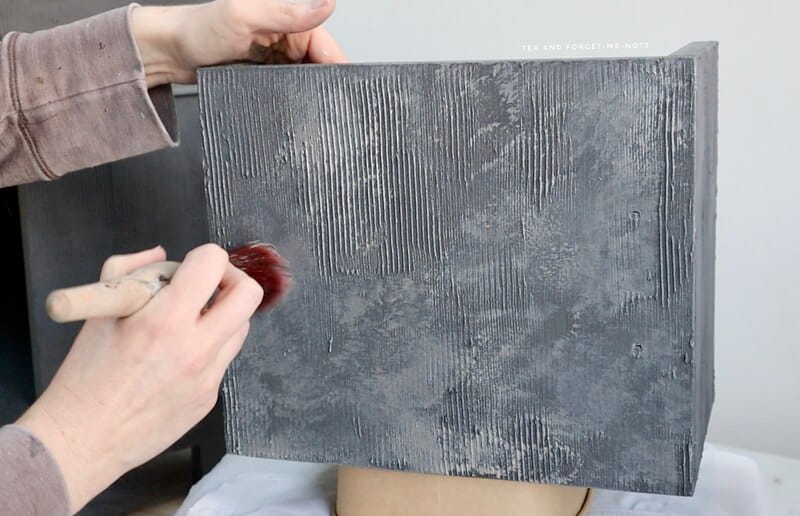
For the first step, I did a base coat of paint in the dark grey, Stormy Seas. I painted vertically and with a dry brush added brush strokes in the opposite direction. Leaving some of the underneath grey exposed for more depth.
Then I mixed a combination of paint. Stormy Seas with the brown of Gravel Road. And I added a touch of Sea Spray. Which is an additive, to create texture.
After applying the paint, I used a wood grain tool to make straight lines. I dragged the tool straight down which left ridges in the paint. This was for the ridges to create a corrugated iron look.
I made sure to stand straight on to the piece while doing this. If the tool weaved in different directions, it wouldn’t have created a solid metal look.
But the ridges weren’t as dramatic as I wanted.
So I then did a coat of Dixie Mud and repeated the process. I used the white Dixie Mud before as a wood filler for the holes. But for this layer, I used the black version.
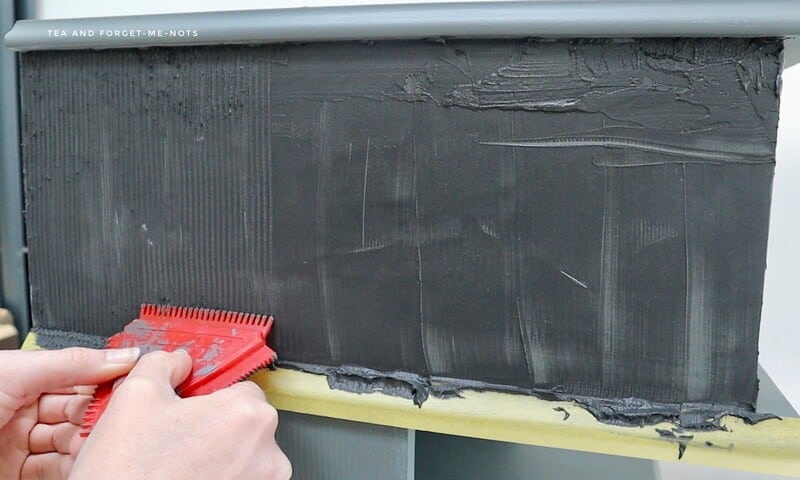
The extra thickness of the Dixie Mud left deep, dramatic ridges after using the grain tool. The black colour also created a strong base colour.
This was exactly what I had in mind.
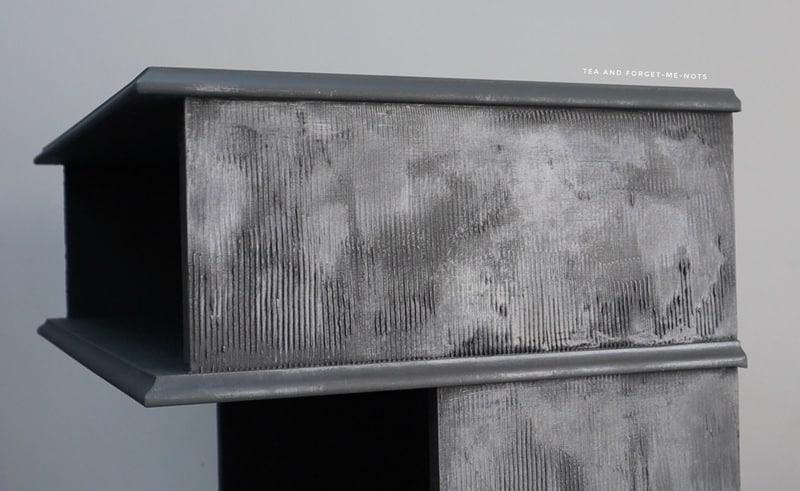
The final step to create the look of metal surfaces, was the metallic paint.
I used two colours of metallic furniture paint. Firstly, I did a coat of Steel Magnolia. Which is more of which is more of a deep silvery brown.
I created a stippled look with the Steel Magnolia. To give it the aged look of a tarnished metal door.
Then I used Silver Bullet, which is a bright silver. I placed this for highlights. This new coat of paint created added depth.
This combination was the best metallic paint I could have hoped for.
Metallic spray paint would also work. But it could be less easy to control the effect than with a paint brush.
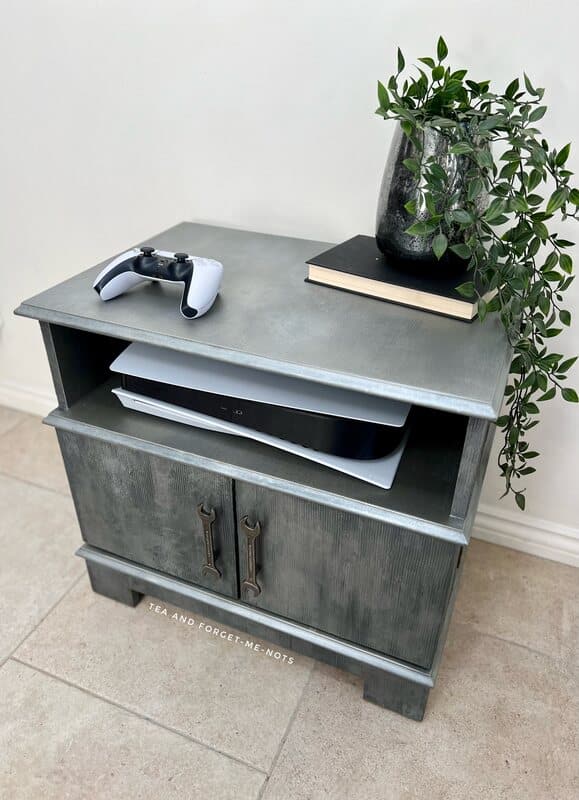
I didn’t add the texture to the surrounding area of the top of the TV cabinet. That would’t be very convenient for placing drinks on a ridges surface.
Sealing The Painted Faux Metal Finish
Finally, I sealed the entire piece of furniture with two coats of top coat. I chose a Satin finish. Perfect to enhance the sheen of the metal paint look.
Then it was time to attach the handles that inspired the hole piece. The spanner hardware fortunately reattached easily. Even with all the additional coats of paint and Dixie Mud.
After reattaching the doors, the orginal brass hinges stood out. They no longer matched the silvery grey of the TV cabinet. So I also painted them with Silver Bullet, to blend in.
I could have used black paint or wax for lowlights, but there was enough variation already.
How To Paint Wood To Look Like Metal
And there it is, a faux finish metallic look on wood furniture.
What a difference paint makes.
Not everyone will want this in their living room. But isn’t it fun and quirky?
And so much more interesting than the original brown.
With several simple steps, the whole piece is completely transformed.
It’s like new furniture again. You don’t need solid wood pieces to create something special.
It feels like a gaming cabinet to me. And someone will love an industrial faux metallic cabinet like this in their room.
For the full tutorial in person, check out the YouTube video.
Like the industrial look? Here’s similar effect on a pirate’s chest!
Pin it for later – How to Paint Wood to Look Like Metal


Hi there! I'm Rachel Bowyer, a passionate DIY enthusiast with a knack for transforming the old into something beautifully new. With a deep love for furniture painting, refinishing, and the art of crafting. I've been documenting my DIY projects and restoration journey since 2018. I specialise in techniques like decoupage, stencilling, and decor transfers. Join me as we explore the world of creativity and home improvement, one project at a time.
Great makeover Rachel! The squaring of the legs and metallic finish really transform it.
Thanks, Sara. Yes I think squaring the base worked well.
I love this transformation! I can’t believe how much it looks like metal now! The hardware gives it such an industrial look! Paint is amazing!! Great job!
Thanks, Donna!
This is so clever and creative Rachel. I like how you modernized the piece by changing the slope of the base.
Thanks, Maria, yes I think that was a small change to make a big difference.
I like the look a lot! I’ve not seen this technique before- very original. Have you thought about adding a rust effect or a weathered patina? How would you go about it?
You could add a weathered look with patina paint. That would create an interesting result. You can see how here https://www.teaandforgetmenots.com/ultimate-guide-to-dixie-belle-patina-paint-collection/