How to decoupage wood furniture – the easiest ways
Want to know how to decoupage wood furniture? Here are two decoupage techniques with tips on the process and products.
Decoupage, or adding paper to furniture, opens up a whole new world to furniture refinishing. Imagine all of the beautiful wallpaper, posters and napkins out there for you to use to create jaw-dropping, unique pieces.
Once you’ve found your amazing paper, there are a few steps to not end up with a wrinkly mess destined to go in the bin.
Fan of decoupage? You might also like to learn the 3 steps to using furniture transfers.
This post may include affiliate links so you can easily find the products I love and use myself. If you purchase these products, I may earn a small commission at no extra cost to you.
How to decoupage wood furniture – the easiest ways
You can decoupage almost any surface – wood, slate, glass – but you need the proper materials to make sure it sticks well and lasts.
I’m sharing two projects using different techniques.
One is very quick and simple and not for a perfectionist. The other is slightly more involved and more likely to create a crisp, clean finish.
Materials for the easiest way
- Paper. This can be wallpaper, napkins, wrapping paper, posters…
- PVA glue (AKA white glue or Elmer’s glue)
- White paint
- Cling film
Both methods here are actually easy. But this one is really easy.
Preparing the wood furniture
Paper goes see-through when wet (or glued) and will show the colour of the object beneath it. So, if you don’t paint the surface white then the napkin will only be as vibrant as the colour of the object it’s on.
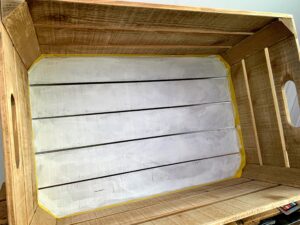
To start I cleaned and sanded the apple crate and taped the edges with Frog Tape to get a straight line.
I then painted the back where the decoupage would go with GraceMary’s chalk paint in Portland Stone.
Curious about what brushes I recommend? Here are the best brushes for each job.
Decoupage paper
Napkins have two or three layers of paper. So I carefully removed all of the layers other than the one with the pattern on it.
It’s best to gently tear around the edge of the pattern. If you leave the napkin with solid edges, it doesn’t blend as nicely and is more noticeable that it’s an image rather than painted on.
The napkins I used were from Tesco but they’re no longer available. These napkins are the closest match I could find.
I tore the napkins into the rough layout where I wanted poppies so that they would cover the back of the crate.
Then I removed them but kept them in the same layout on the floor, so I could recreate it later.
I covered the back in one layer of PVA glue and added the napkins.
It’s helpful to use cling film on top of the napkin when smoothing it out, as it’s easier to control the paper from sticking to you.
After the napkins had dried, I added another layer of PVA glue as a sealer.
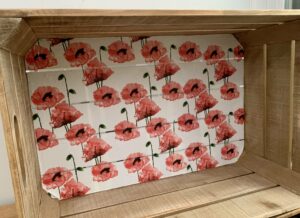
Easy enough? Paper, glue, wood furniture and voila, decoupage done.
I’m really happy with this rustic-edged look to the piece because it suits the apple crate.
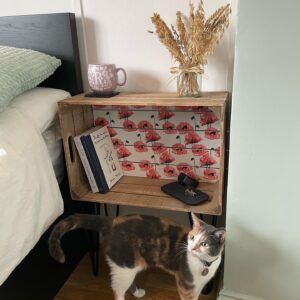
I added four hairpin legs and turned it into a bedside table.
One of my favourite decoupage projects ever is this black cabinet with Japanese-inspired paper.
Materials for the crisp and clean way
In addition to the decoupage paper and glue needed above. You also need:
- an iron
- greaseproof/parchment paper
- spray lacquer
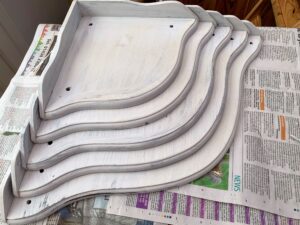
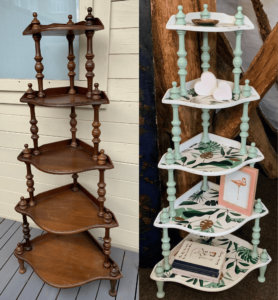
I began by painting the shelves of the wotnot with GraceMary’s Portland Stone.
Then I added two layers of Mod Podge glue, and let it dry in between coats.
I chose leaf wrapping paper from HEMA, which is a shop no longer in the UK. This paper is similar.
Another amazing wallpaper I used was this Star Wars paper makeover!
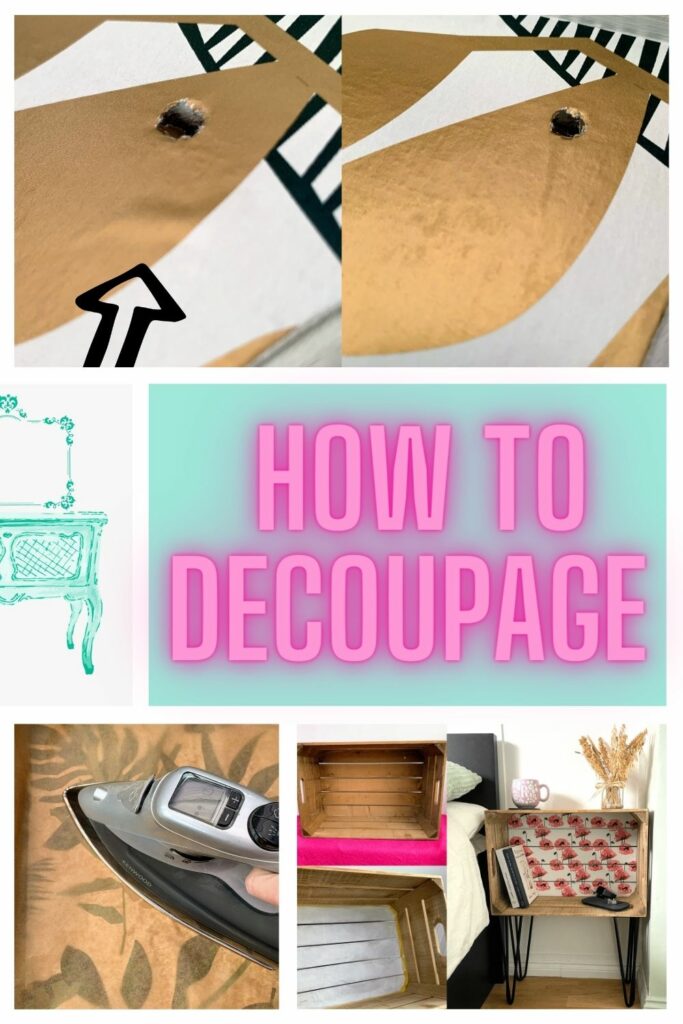
Once the second layer of glue was dry, I placed the decoupage paper where I wanted it. I then added a piece of greaseproof paper on top of that.
Want to know 23 great DIY tools? Get the list!
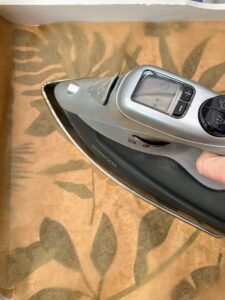
Ironing
Next, the iron. Not just for ironing boards and Monopoly boards, also for decoupage.
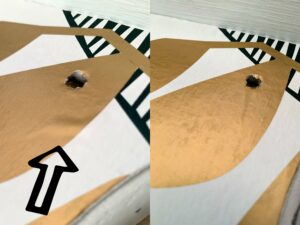
With the iron on medium-high heat, I ironed over the paper from the middle outwards. The reason for ironing from the middle is that if there are bubbles, the iron will push them towards the edge and they should disappear.
If there are bubbles like in this example, iron the area again.
As the paper was hot after ironing, I used a cloth for protection and rubbed across the paper to make sure it was attached well.
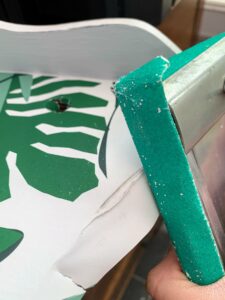
Because I had a curvy piece of wood furniture, I only loosely cut the paper to the right shape. So, once the paper was dry, I used sandpaper to sand straight down to get a clean edge.
Sealing for protection
Spray lacquer is a sealant to protect the paper. As PVA glue is water-based, it will bubble if you spill something on the paper without sealing it.
PVA glue was fine for the apple crate because it’s unlikely that water will spill in the decoupaged area. But for these shelves, spray lacquer gives better protection.
I used Rust-oleum Crystal Clear spray lacquer for this step. This sealer doesn’t turn the paper yellow, which can happen with some products.
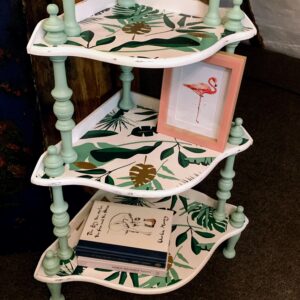
The spindles of the wotnot are painted with Fusion Mineral paint’s French Eggshell and then sealed with Polyvine’s Wax Finish Varnish.
And there you have it. Two easy methods on how to decoupage wood furniture.
Which is your favourite look? Do let me know if you try either of them out.
If you liked this post, you might also enjoy the decoupage project which was my number 1 blog post of 2021!
Pin it for later – how to decoupage wood furniture

Hi there! I'm Rachel Bowyer, a passionate DIY enthusiast with a knack for transforming the old into something beautifully new. With a deep love for furniture painting, refinishing, and the art of crafting. I've been documenting my DIY projects and restoration journey since 2018. I specialise in techniques like decoupage, stencilling, and decor transfers. Join me as we explore the world of creativity and home improvement, one project at a time.